JANETS_INM.pdf - 第71页
JaNets Instr ucti on Man ual 2. Install ation 2- 43 2.5.3 Procedure for se tting up an RP - 1 or an R V serie s mach ine A se rvice en gineer is supp osed to make t he sett ings of each mach ine acc ording to the “Pr oce…

JaNets Instruction Manual 2. Installation
2-42
In order to perform on-line production, create the following setup.
Click the "Environment" button and set up the item of a file/folder management as follows.
Figure 2.5-19 Environment setting screen (File/Folder management)
Moreover, set up the item of host communication as follows.
Figure 2.5-20 Environment setting screen (Host communication)
Click the "Update" button when you compete the above-mentioned setup.
You have finished setting up communication of the RX-7 series at this point.
JaNets Instruction Manual 2. Installation
2-43
2.5.3 Procedure for setting up an RP-1 or an RV series machine
A service engineer is supposed to make the settings of each machine according to the “Procedure for
setting up an RP-1 or an RV series machine.”
2.5.3.1 Creating a user account
To communicate with a PC, create a user account for the machine.
The name of the account to be created is “isuser,” and the corresponding password is
“is_user_2008.”
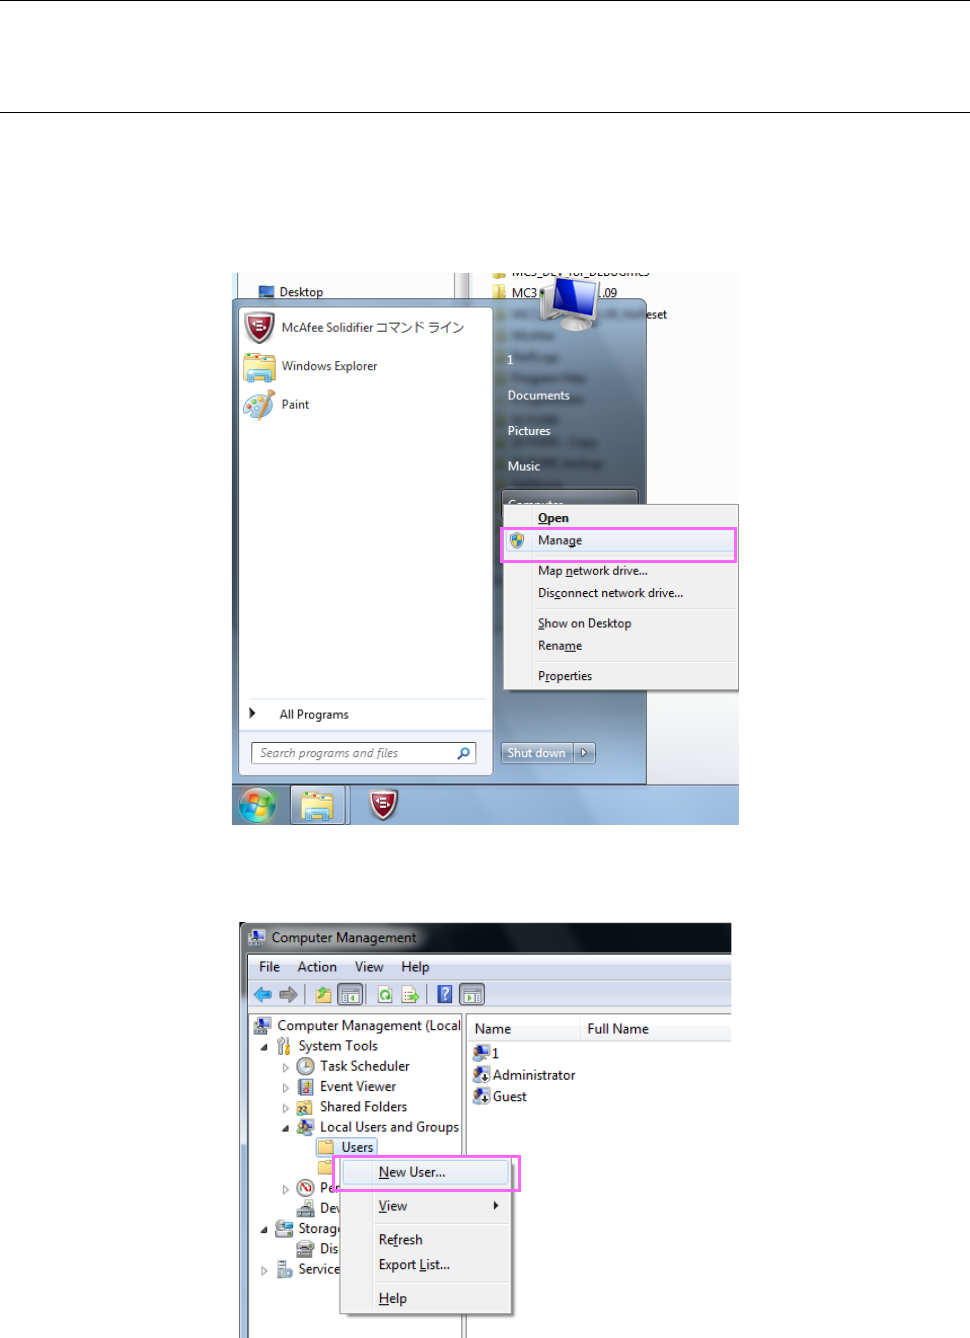
(1) Click the “Computer” on the Start menu of the Windows running on the machine main unit with
the right button. When the menu appears on the screen, click [Manage].
Figure 2.5-21 Start menu of the RP/RV series machine
(2) Click with the right button the “Users” on the “Local Users and Groups” tree displayed on the left
side of the screen. When the menu shown below appears on the screen, click [New User].
Figure 2.5-22 “Computer Management” screen
JaNets Instruction Manual 2. Installation
2-44
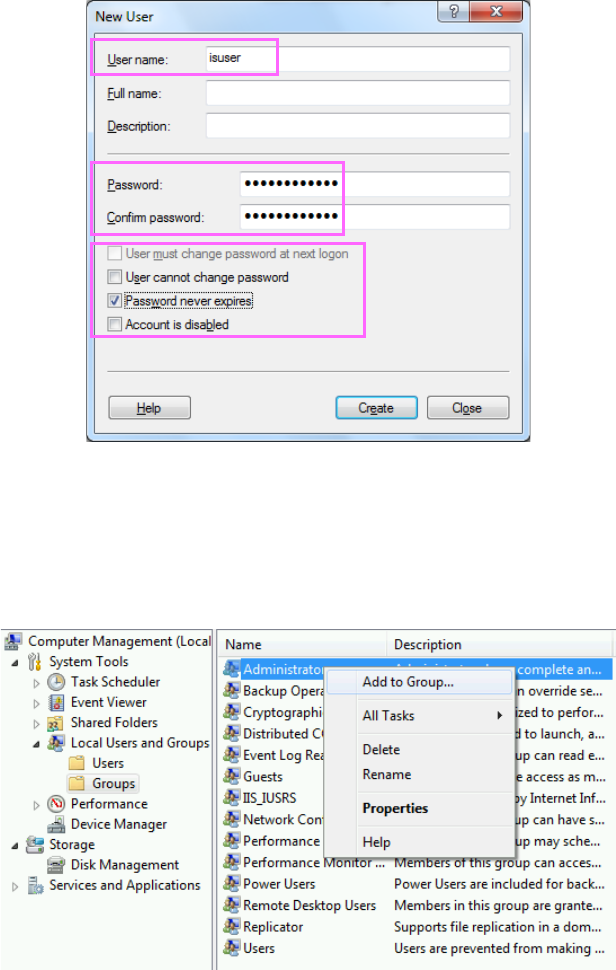
(3) When the “New User” screen appears, enter the user name and the password. Check the
“Password never expires” check box only. When you finish these operations, click the <Create>
button.
Figure 2.5-23 “New User” screen
(4) Click the <Close> button to close the “New User” screen.
(5) Click “Groups” on the “Local Users and Groups” tree displayed on the left side of the screen.
When the list of groups appears on the screen, click “Administrator” with the right button. When
the menu shown below appears on the screen, click [Add To Group…].
Figure 2.5-24 Adding a user to a group