JANETS_INM.pdf - 第79页
JaNets Instr ucti on Man ual 2. Install ation 2- 51 2.5.4 Procedure for se tting up other machines T his section de scribes h ow t o set up the fol lowing machines: FX -3 series , KE - 3010 ser ies/302 0 ser ies , KE - 2…
JaNets Instruction Manual 2. Installation
2-50
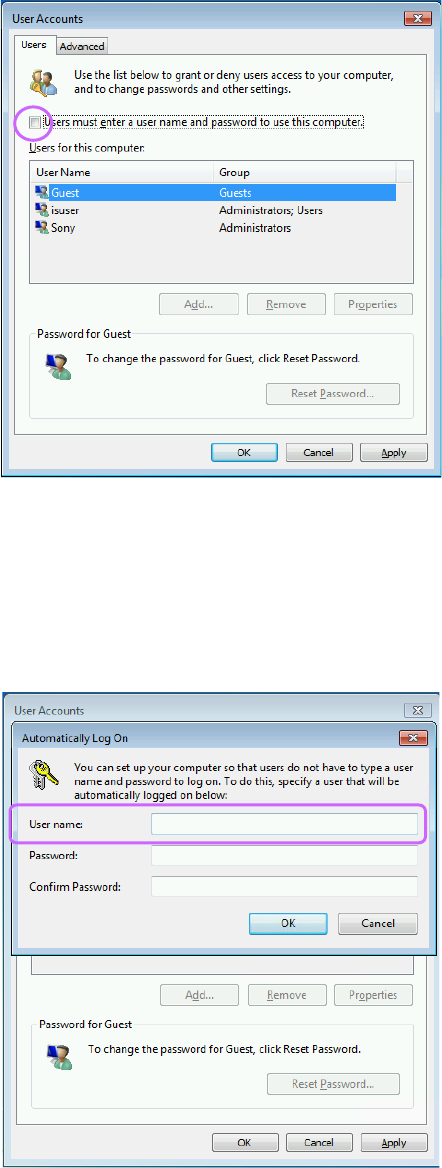
(3) Uncheck the “Users must enter a user name and password to use this computer.” check box on
the displayed screen.
Figure 2.5-33 When the check box is unchecked on the screen
(4) Click the <Apply> button. You are prompted to enter information on the account of a user who
will automatically long on the machine.
Enter “RV” in the “User name” field for the RV series machine or “1” for the RP-1.
You do not have to enter any data in the “Password” and “Confirm Password” fields for both the
RV series machine and the RP-1.
When you finish entering the user name, click the <OK> button.
Figure 2.5-34 Setting for automatic log-on
(5) The screen is switched back to the screen for setting a user account. Click the <OK> button
to close the screen.
You have finished making setting for hiding the log-on user selection screen here.
JaNets Instruction Manual 2. Installation
2-51
2.5.4 Procedure for setting up other machines
This section describes how to set up the following machines: FX-3 series, KE-3010 series/3020
series, KE-2050 series/2060 series/2070 series/2080 series, KD-2077 and JM-10.
2.5.4.1 Creating a user account
To communicate with a PC, create a user account.
The name of the account to be created is “isuser,” and the corresponding password is
“is_user_2008.”
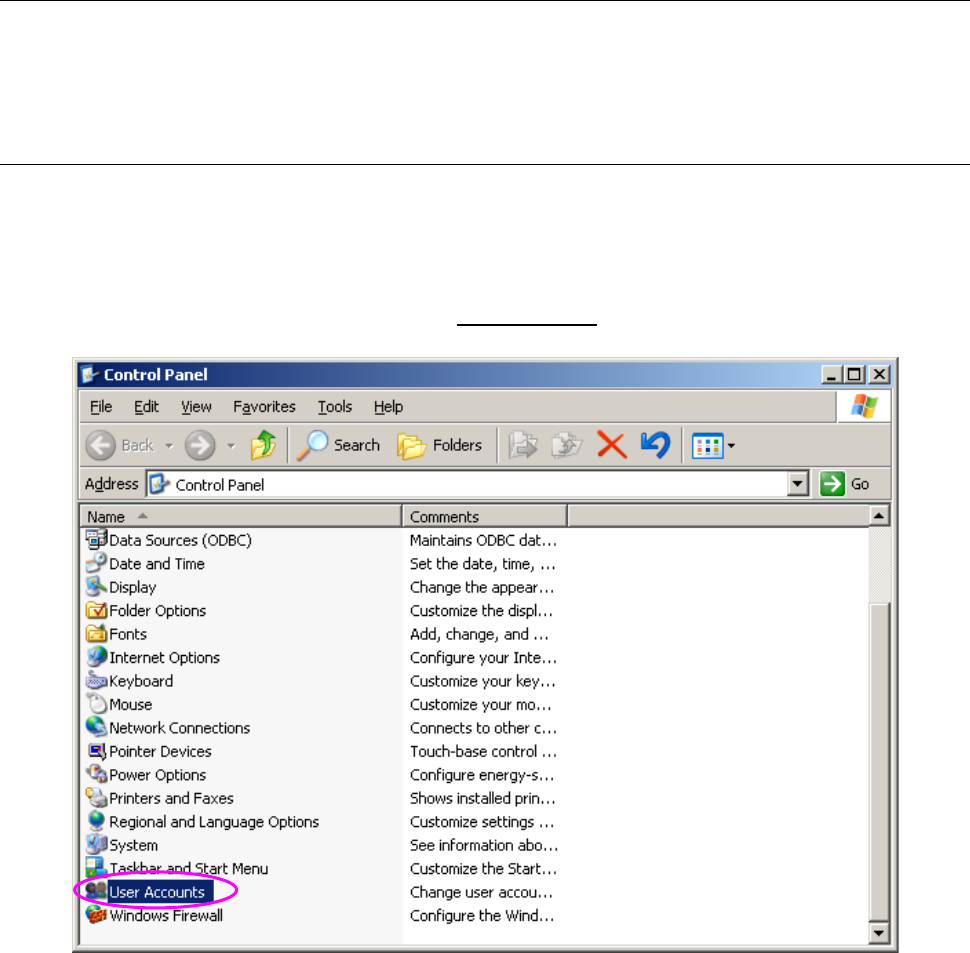
(1) Display the “Control Panel” shown in “Figure 2.5-35” from the “Start” menu, and then select
“User Accounts.”
Figure 2.5-35 Control Panel (displayed on the mounter)
JaNets Instruction Manual 2. Installation
2-52
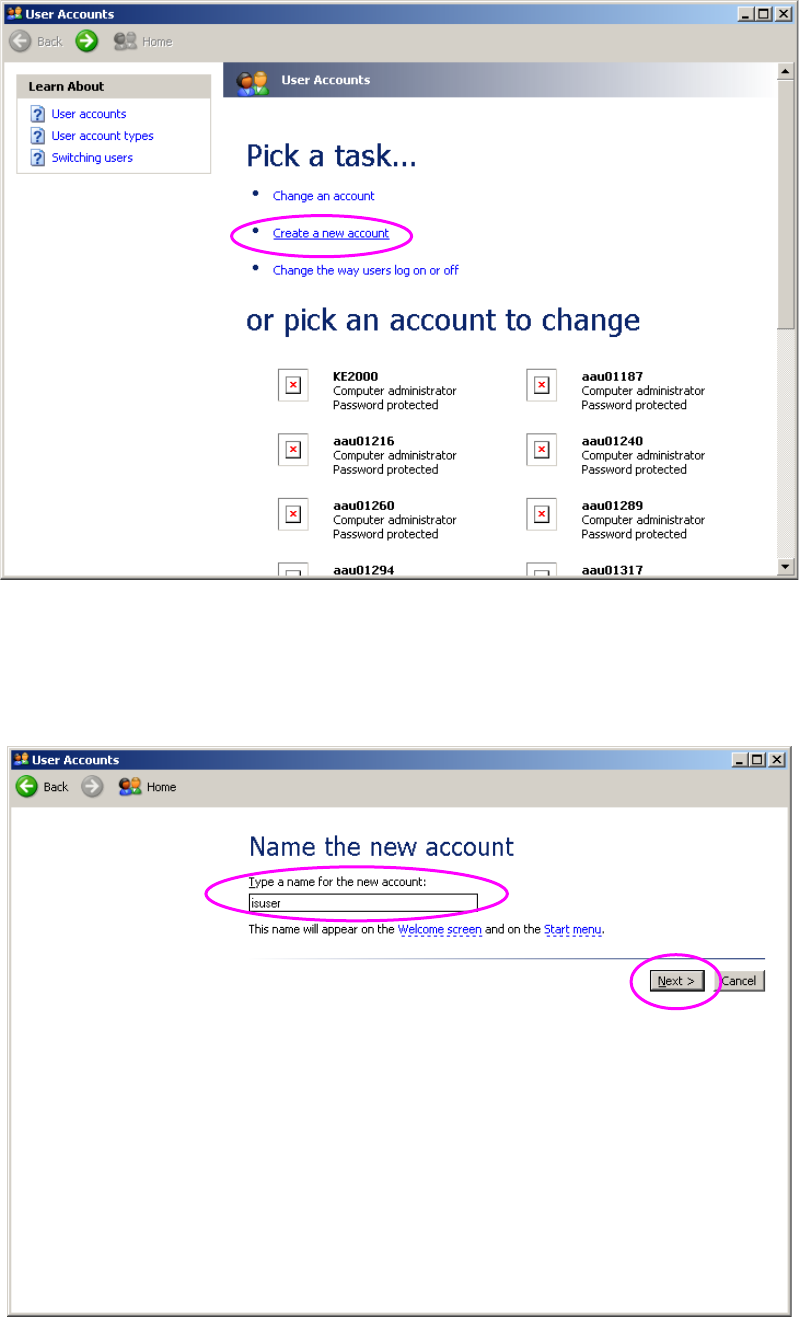
(2) Click the menu item “Create a new account” on the “User Accounts” screen.
Figure 2.5-36 “User Accounts” screen (displayed on the mounter).
(3) Name the account you are to create. The name of the account to be created is “isuser.”
The system does not distinguish between uppercase letters and lowercase letters. When
you enter this account name, click the <Next> button.
Figure 2.5-37 Screen for creating an account 1 (displayed on the mounter)