JANETS_INM.pdf - 第88页
JaNets Instr ucti on Man ual 2. Install ation 2- 60 2.5.5 The procedur e for changing the setting of local secu rit y When OS for the IS client (including a c lient plus a s erver) is Window s Vist a/W indows 7, a line c…
JaNets Instruction Manual 2. Installation
2-59
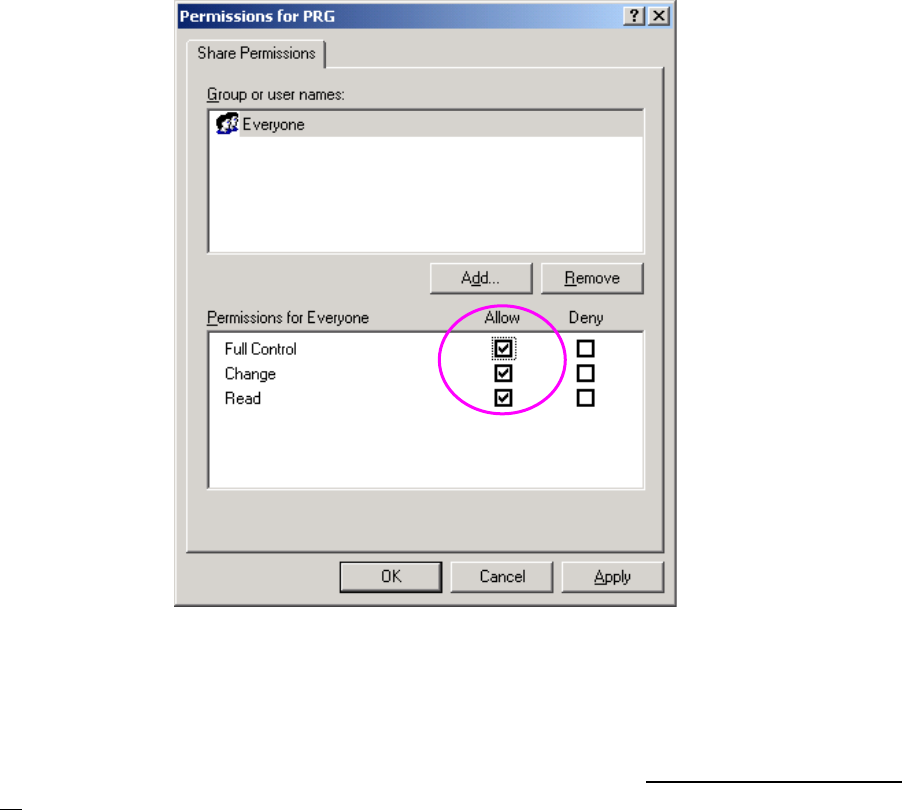
(3) When the “Permissions for PRG” dialog box (for access permission) appears on the screen,
make the following settings.
Put a checkmark in the “Allow” check box for the item “Full Control” of the “Permissions for
Everyone” column. Any checkmark is not put in this check box for the item “Full Control” by
default. Be sure to put a checkmark in the “Allow” check box for the item “Full Control.”
Figure 2.5-48 Access permission to a shared folder
The following machine models: FX-3/3R/3RA, KE-3010A/3020VA/3020VRA, KE-3010/20V/20VR,
KE-3020/20R, KE-2070/80, KD-2077 and JM-10 use the Enhanced Write Filter (EWF) to protect
the Operating System (OS) and handle the drive C as a ROM. Since data written on the drive C is
erased when you restart the system, follow the description of Section 2.5.1.4 “Updating the Drive
C” to update the drive C in order to change the information of the OS.
JaNets Instruction Manual 2. Installation
2-60
2.5.5 The procedure for changing the setting of local security
When OS for the IS client (including a client plus a server) is Windows Vista/Windows 7, a line
consisting of KE-2010-40/KE-2050-60 (OS for the main unit of a machine is Windows NT) is
communicated with IS, change a local security setup. A procedure is shown below:
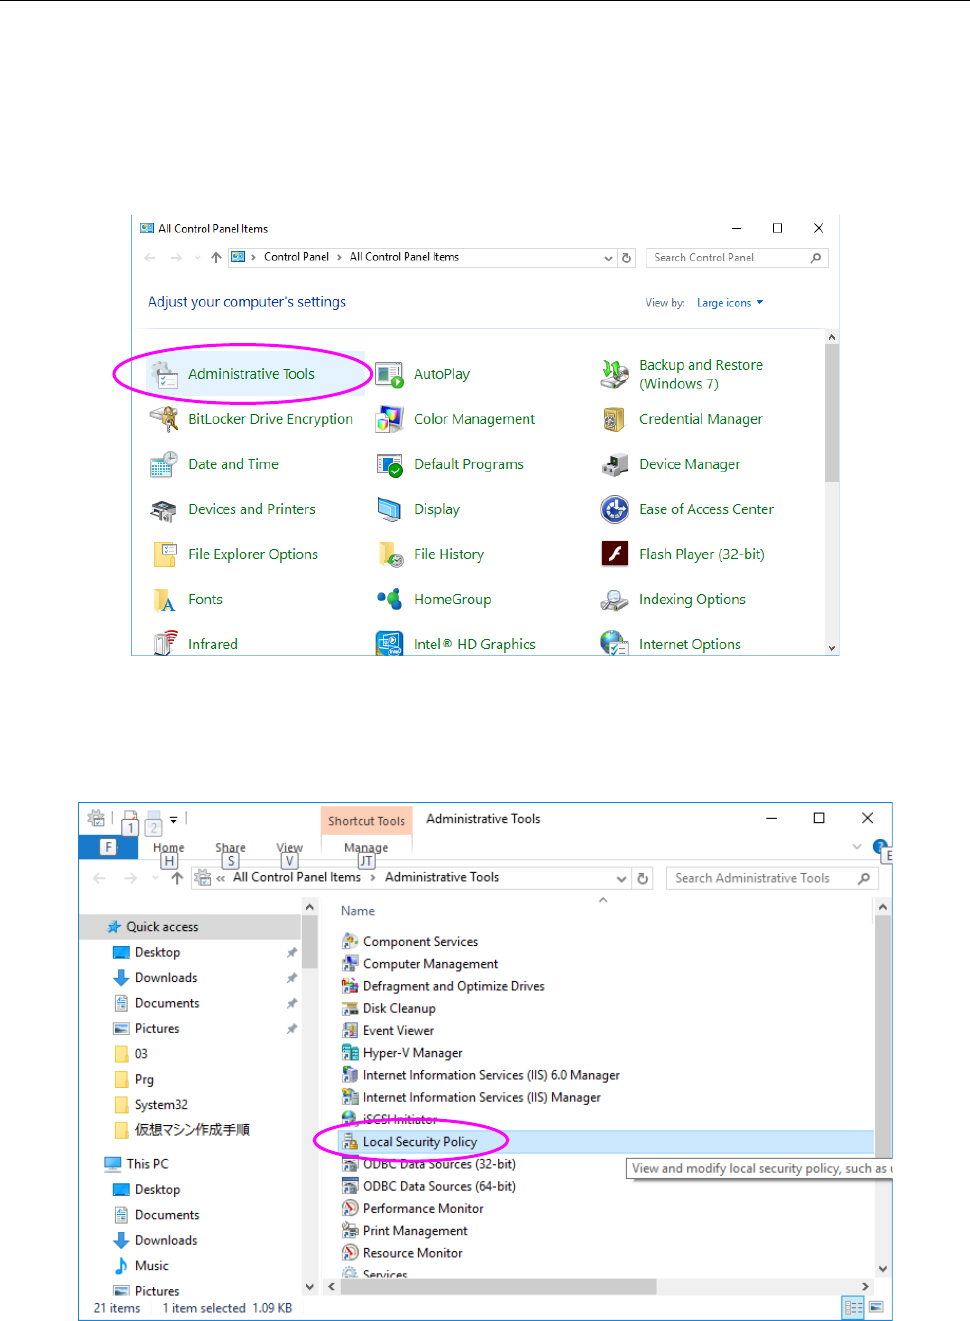
(1) When you select "Start menu", "Windows System Tools" and "Control panel" in sequence,
and set display method to a large icon, "Figure 2.5-49 "Control Panel" screen" appears. And
then click "Administrative Tools."
Figure 2.5-49 "Control Panel" screen
(2) When "Figure 2.5-50 "Administrative Tools" screen" screen appears, double-click "Local
security policy."
Figure 2.5-50 "Administrative Tools" screen
JaNets Instruction Manual 2. Installation
2-61
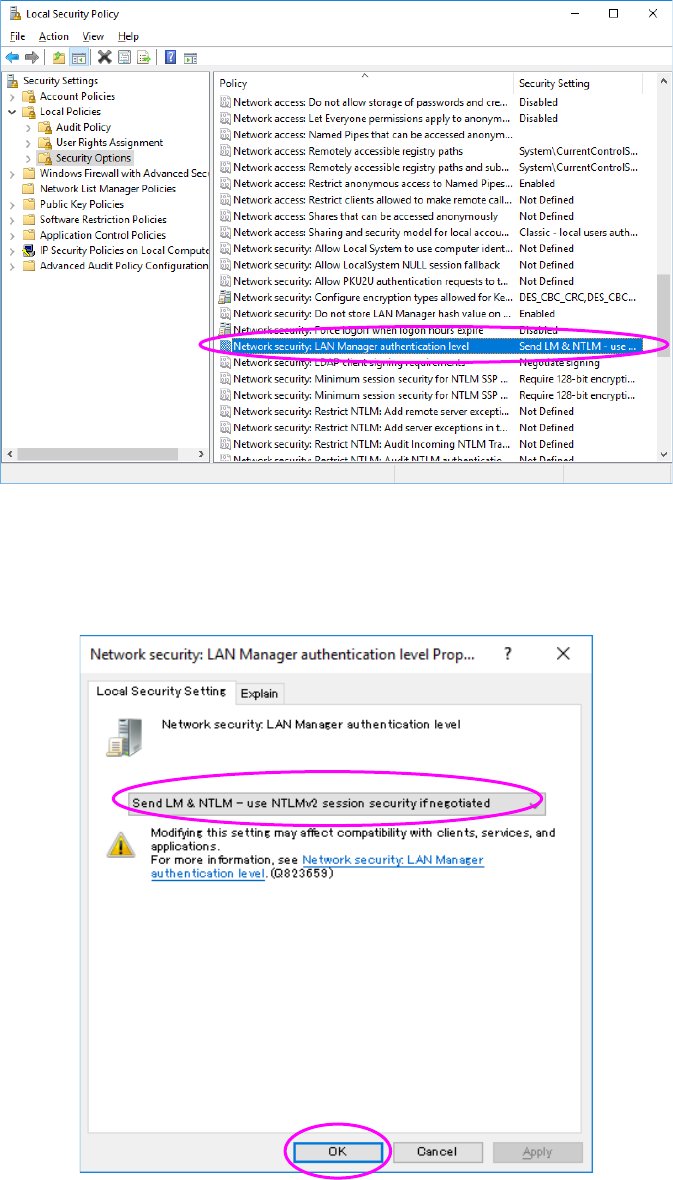
(3) When "Figure 2.5-51 "Local Security Policy" screen" appears, select Local Policy and
Security Option in sequence from "Setting of security", double-click "Network security: LAN
Manager authentication level" from the policy.
Figure 2.5-51 "Local Security Policy" screen
(4) When "Figure 2.5-52 "Network Security" screen" appears, select "Send LM & NTLM (use
NTLMv2 session security if negotiated) from "Local Security Setting," and then press the OK
button.
Figure 2.5-52 "Network Security" screen
The change in the setting of local security ends above.