CP40 service manual.pdf - 第184页
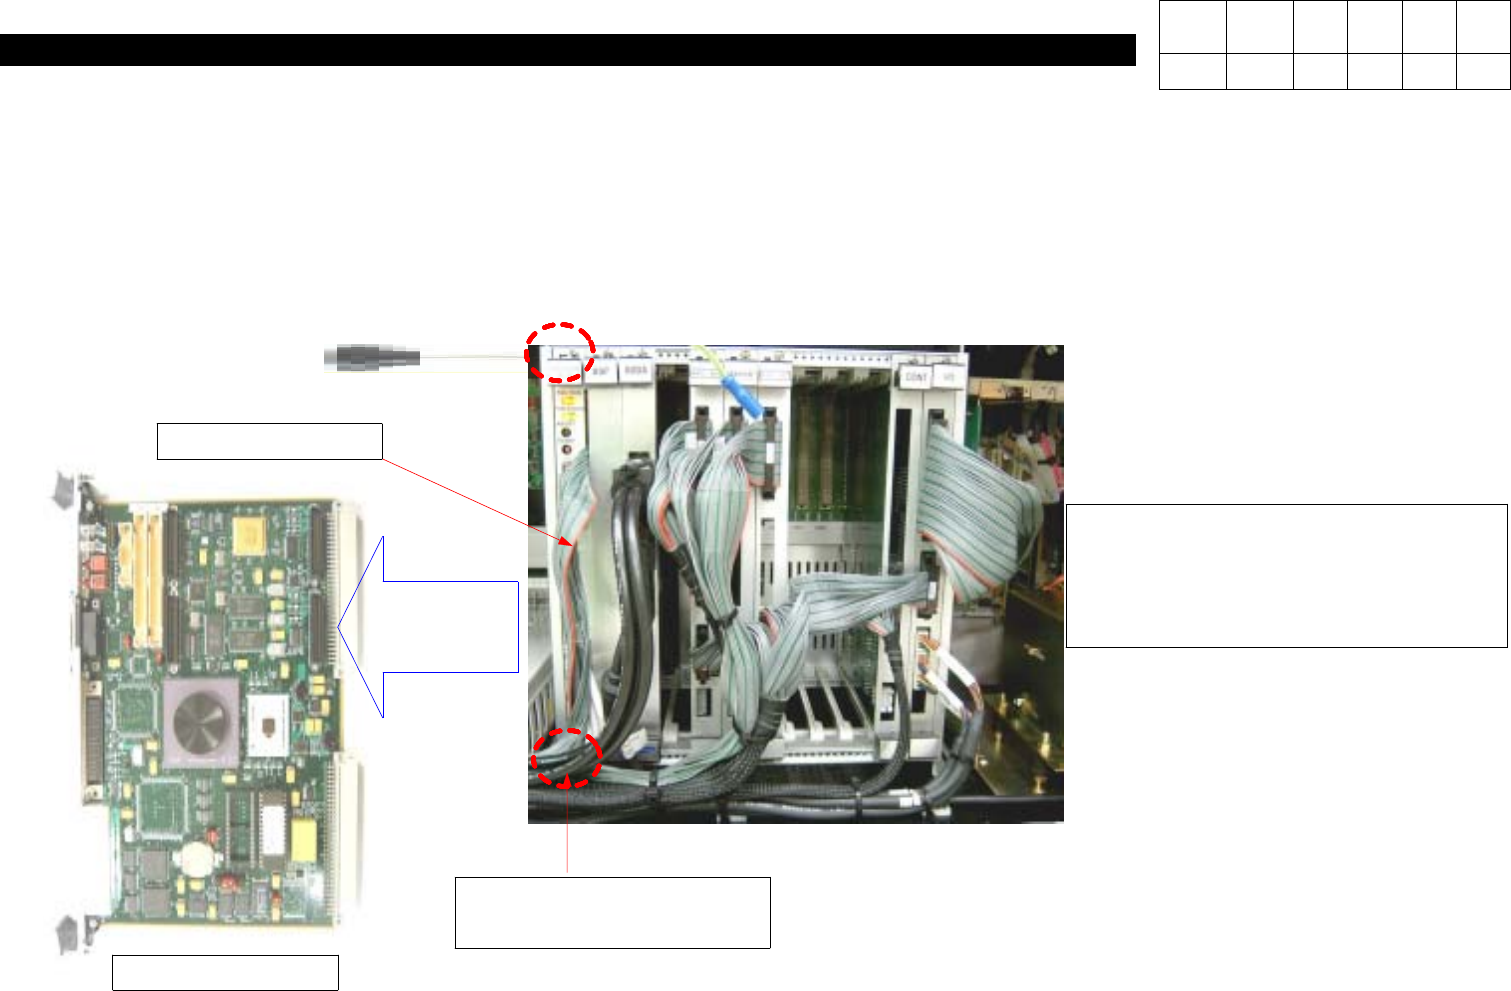
7. Rack Ass'y (CP-40) 3. Using Cross-head Screwdriver, Loosen Two Bolts(for Se curing VME) to Disconnect VME Board from Rack Ass'y. Note) I f Disconnecting VME Board Immediately, Replacement may be Difficult du…
7. Rack Ass'y
(CP-40)
7-3-1. VME Board Replacement and Dip S/W Setting
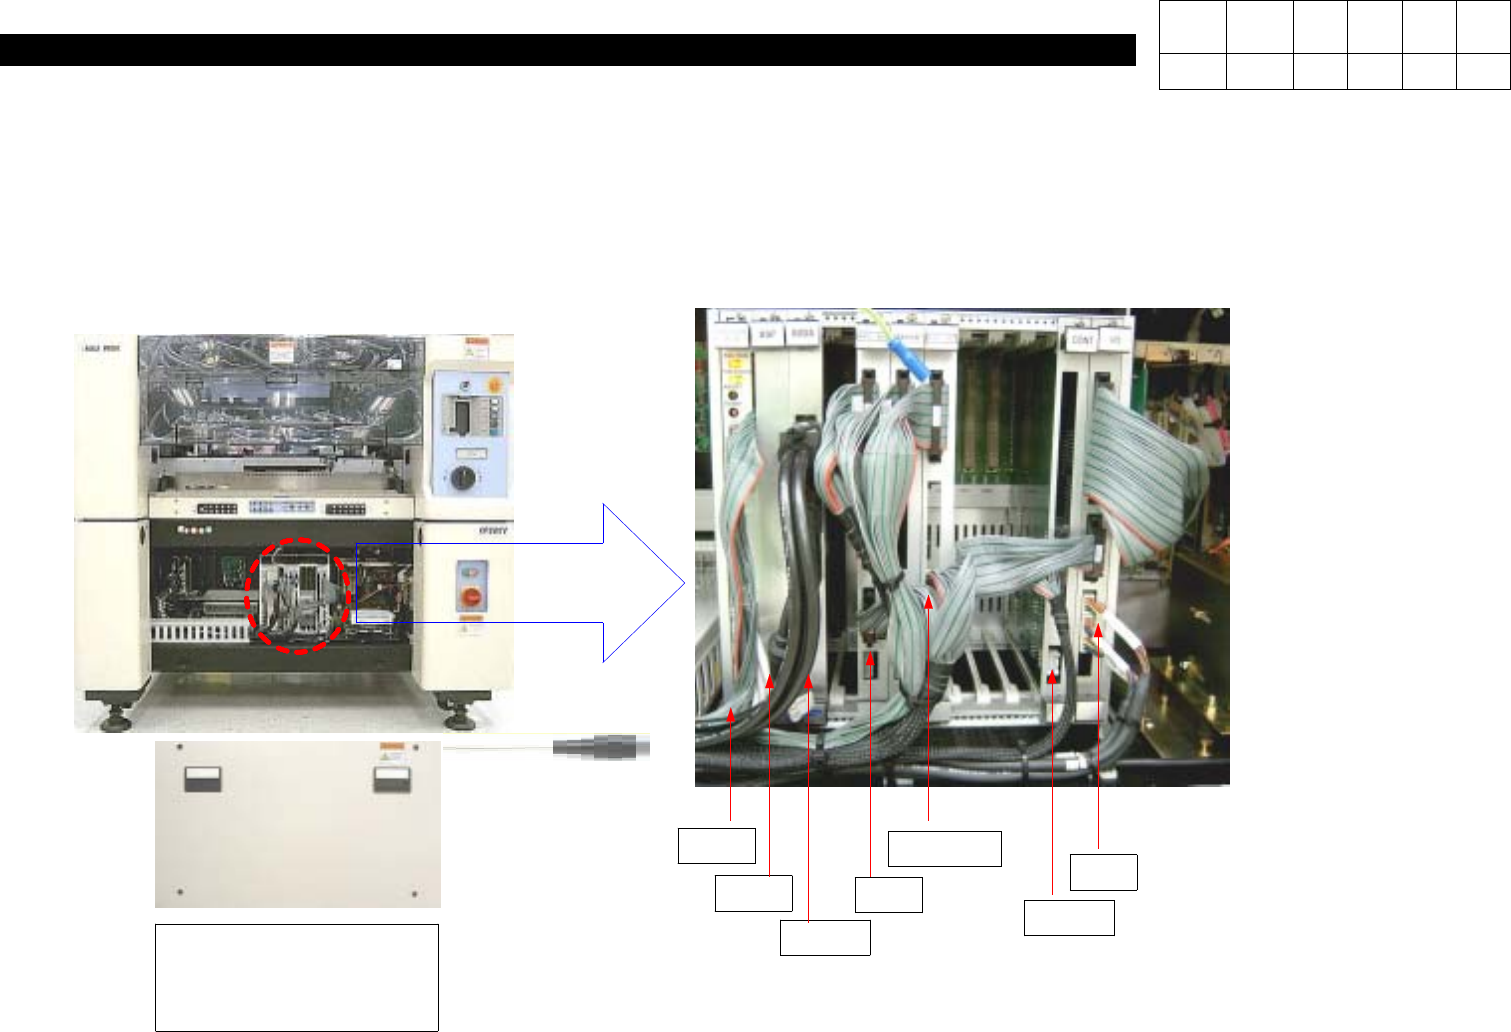
1. Using Cross-head Screwdriver, Loosen Four Spherical Bolts to Open Front Cover.
2.
Determine the Area to be Repaired and Checked.
Spherical Bolt(for
Securing Front Cover)
4ea
VME
DSP
ADDA
X-Y
H1~H3
CONT
I/O
<Board Configuration>
Version Date WA QA CA Note
00 Nov04 O O O
7. Rack Ass'y
(CP-40)
3. Using Cross-head Screwdriver, Loosen Two Bolts(for Securing VME) to Disconnect VME Board from Rack Ass'y.
Note) If Disconnecting VME Board Immediately, Replacement may be Difficult due to Interference of Cable. So, it is
Recommended that Vision Cable should be Disconnected First.
4. Disconnect Ribbon Cable from VME Board.
VME Board
Ribbon Cable
Bolt(for Securing VME)
2ea
Description: System Down During
Operating Equipment
Action: Replace XY Axis Board.
Version Date WA QA CA Note
00 Nov04 O O O
7. Rack Ass'y
(CP-40)
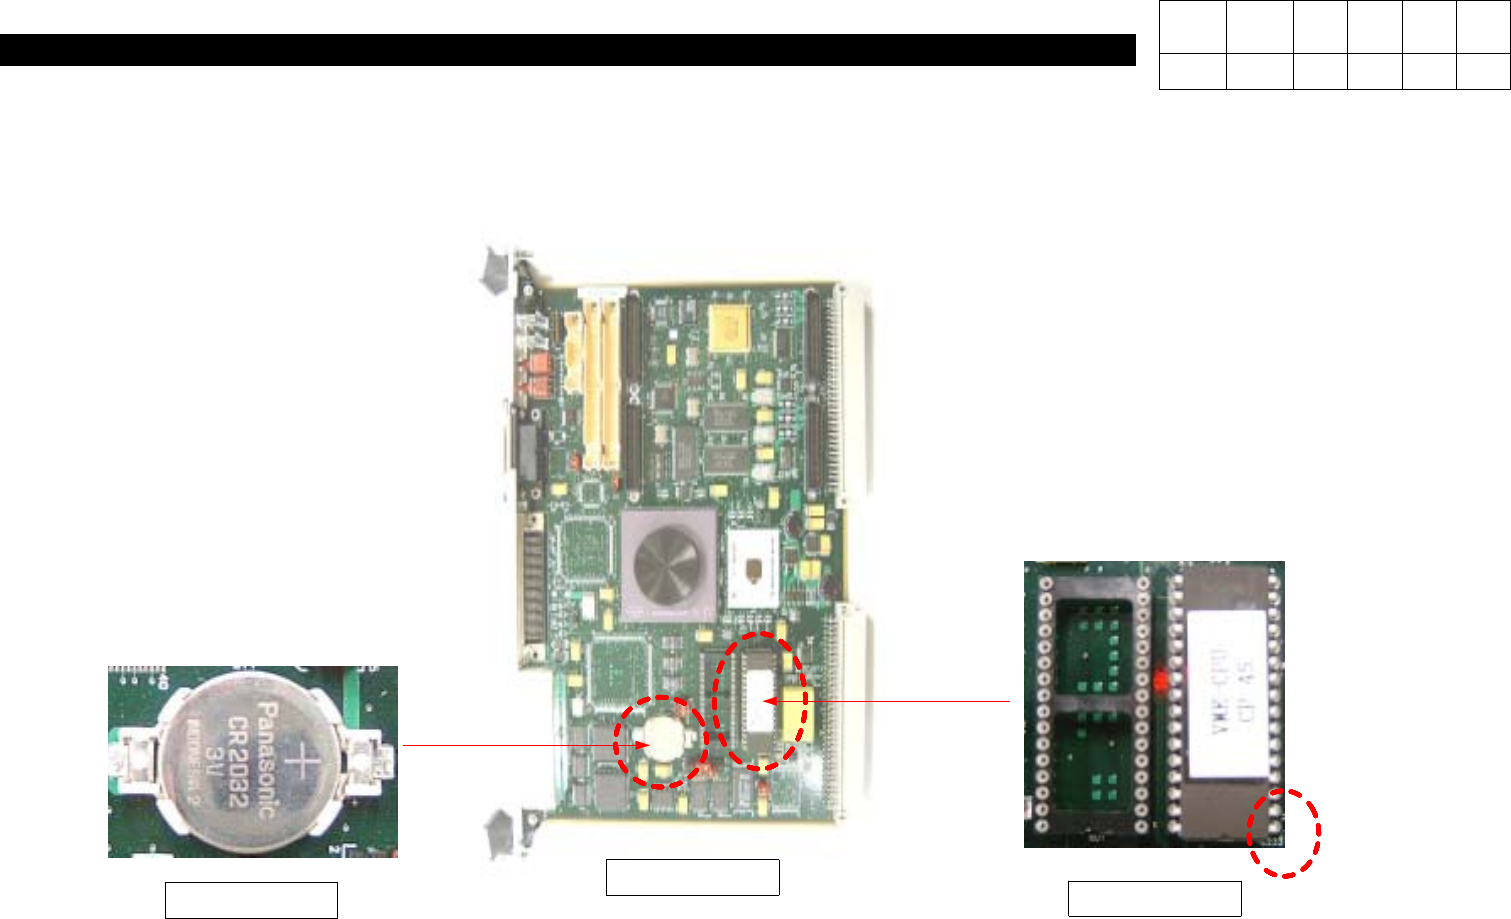
=> Before Replacing Battery, be
Sure to Verify Specification and
Voltage.
Specification : CR2032
Voltage : 3V
=>Before Replacing ROM, be Sure
to Location and Pin No.
PinNo#1
EP-ROM
Battery
VME Board
5. Check Battery, ROM and Dip SW from VME Board.
Version Date WA QA CA Note
00 Nov04 O O O