TS566R-UserGuide - 第10页
10 5.2 SPRAYING 5.2.1 Pressure Adjustment Note: Pressure in Port A (I) is not regulated. It delivers the same pressure as the supplied inlet pressure. This pressure is to activate the valv e. Make sure the supplied press…
9
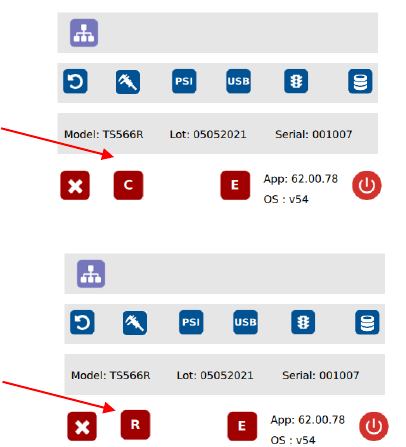
5.1.3 Controlling Mode
The TS560R can be used as stand-alone controller or integrated to any
robot/automation system.
A. To use as stand-alone controller:
Go to setup screen to check for controlling mode. If the icon “C” is
showing, then it is already set as stand-alone controlling mode. If the
icon “R” is showing, press this icon to change to “C”
B. To use as integrated controller to robot/automation
Press icon “C” to change to “R”
Note: Users will experience inconsistent dispensing and intermittent
behaviors with their dispensing valves if attempting to run the TS550R
in controller mode when interfacing with the robot.
Stand alone controlling
mode
Robot mode (integrate
to robotic system)
10
5.2 SPRAYING
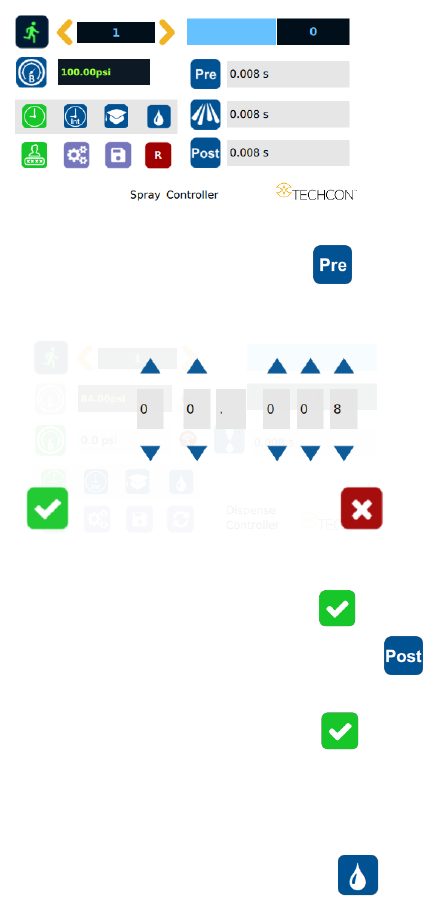
5.2.1 Pressure Adjustment
Note: Pressure in Port A (I) is not regulated. It delivers the same pressure
as the supplied inlet pressure. This pressure is to activate the valve. Make
sure the supplied pressure is at least 70 psi (4.8 bar)
Pressure in Port B is regulated. This pressure is to control the atomized air
spray. Adjust the pressure accordingly to achieve desired spray results.
1. Touch the “Pressure B” icon to enter the pressure setup screen
2. Touch the Up and Down arrows to set the desired atomized pressure
3. Touch the Check Mark icon to save and exit
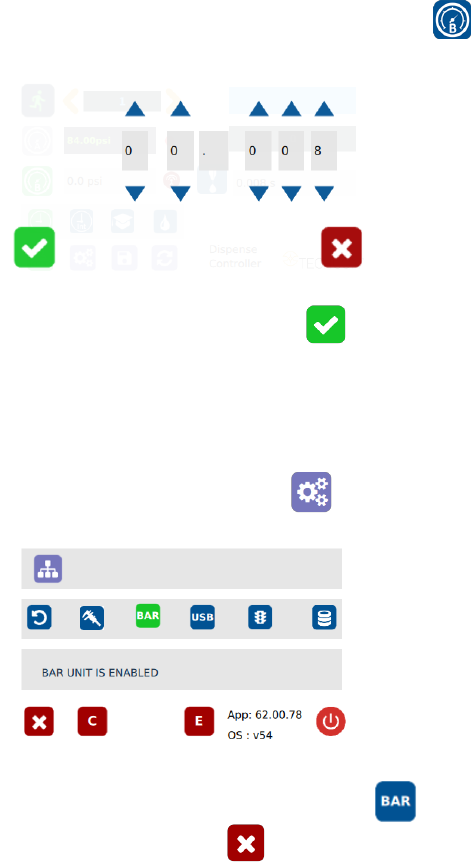
5.2.2 To Change Pressure Unit Display
Note: The default pressure unit is PSI. To change pressure unit to BAR,
follow below instructions.
1. Touch the Setup icon to enter setup screen
2. Press the “BAR” icon to change pressure unit to BAR
3. Touch the X icon to save and exit
11
5.2.3 Spray Time setting
Note: A complete cycle consists of Pre-Spray, Spray and Post-Spray.
Pre-spray: Atomized air turned on before the valve is opened.
Post-spray: Atomized air stayed on after the valve is closed.
1. Touch the “Pre” icon to setup pre-spray time
2. Touch Up and Down arrows to set the desired pre-spray time
3. Touch the Check Mark icon to save and exit
4. Touch the “Post” icon to setup post-spray time
5. Touch Up and Down arrows to set the desired post-spray time
6. Touch the Check Mark icon to save and exit
5.2.4 Manual/Purge Cycle Setting
1. Touch the Purge icon to select the purge cycle.
The Purge icon will turn to green color.
2. Press and hold down the foot switch to activate the purge cycle.