TS566R-UserGuide - 第9页
9 5.1.3 Controlling Mode The TS560R can be used as stand-alone controller or integrated to any robot/automation system. A. To use as stand-alone controller: Go to setup screen to check for controlling mode. If the icon “…

8
Please keep in mind that the exact pressure being fed must be indicated
correctly in this menu prior to calibrating the pressure. Not doing so may
cause the pressure display to show the incorrect pressure.
3. Turn pressure adjustment knob counterclockwise until the wheel can no
longer be turned.
4. Touch the 0 icon to set the pressure to 0
5. Turn pressure adjustment knob clockwise until display output pressure is
100 psi
6. Touch the 100 icon to set the pressure to 100
Warning: Do not turn knob all the way clockwise. 100 psi upper bound
should be set as soon as display output pressure goes from 99 to 100 psi.
Continuing to turn knob clockwise despite pressure on display already
being set at 100psi will result in incorrect output pressure readings if the
100 icon were to be pressed at that time
Note: The digital values shown at “0” and “100” icons are for reference
only. The actual calibrated values will be different
7. Touch the Reboot icon to save the settings and reboot the system
8. Wait until the system completes the rebooting sequence and the home
screen is displayed
The unit is now calibrated and ready to operate
9
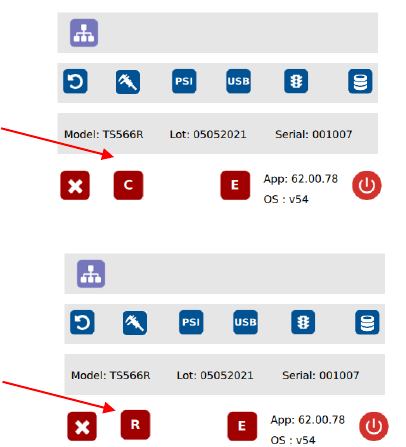
5.1.3 Controlling Mode
The TS560R can be used as stand-alone controller or integrated to any
robot/automation system.
A. To use as stand-alone controller:
Go to setup screen to check for controlling mode. If the icon “C” is
showing, then it is already set as stand-alone controlling mode. If the
icon “R” is showing, press this icon to change to “C”
B. To use as integrated controller to robot/automation
Press icon “C” to change to “R”
Note: Users will experience inconsistent dispensing and intermittent
behaviors with their dispensing valves if attempting to run the TS550R
in controller mode when interfacing with the robot.
Stand alone controlling
mode
Robot mode (integrate
to robotic system)
10
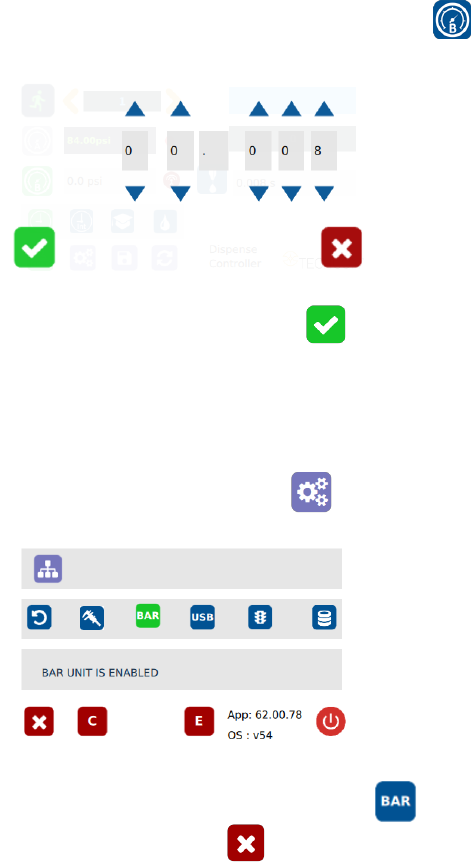
5.2 SPRAYING
5.2.1 Pressure Adjustment
Note: Pressure in Port A (I) is not regulated. It delivers the same pressure
as the supplied inlet pressure. This pressure is to activate the valve. Make
sure the supplied pressure is at least 70 psi (4.8 bar)
Pressure in Port B is regulated. This pressure is to control the atomized air
spray. Adjust the pressure accordingly to achieve desired spray results.
1. Touch the “Pressure B” icon to enter the pressure setup screen
2. Touch the Up and Down arrows to set the desired atomized pressure
3. Touch the Check Mark icon to save and exit
5.2.2 To Change Pressure Unit Display
Note: The default pressure unit is PSI. To change pressure unit to BAR,
follow below instructions.
1. Touch the Setup icon to enter setup screen
2. Press the “BAR” icon to change pressure unit to BAR
3. Touch the X icon to save and exit