00198268-02_GS_SIPLACE-Pro-14.1-R17-1_EN - 第10页
2 Program Overview Getting S tarted SIPLACE Pro 14.1 (R17-1) 2.2 The User Interface 05/2017 Edition 10 2.2 The User Interface This chapter will help you to fam iliarize yourself w ith the SIPLACE Pro user interface. The …
Getting Started SIPLACE Pro 14.1 (R17-1) 2 Program Overview
05/2017 Edition 2.1 Starting SIPLACE Pro
9
2 Program Overview
2.1 Starting SIPLACE Pro
After successfully installing SIPLACE Pro, the Windows Start menu Start => Programs => will
show the entry SIPLACE Pro => Desk 14.1 and a
Desk 14.1 icon will be added to the Desktop. 2
Start SIPLACE Pro from the menu or with the
icon on the desktop.
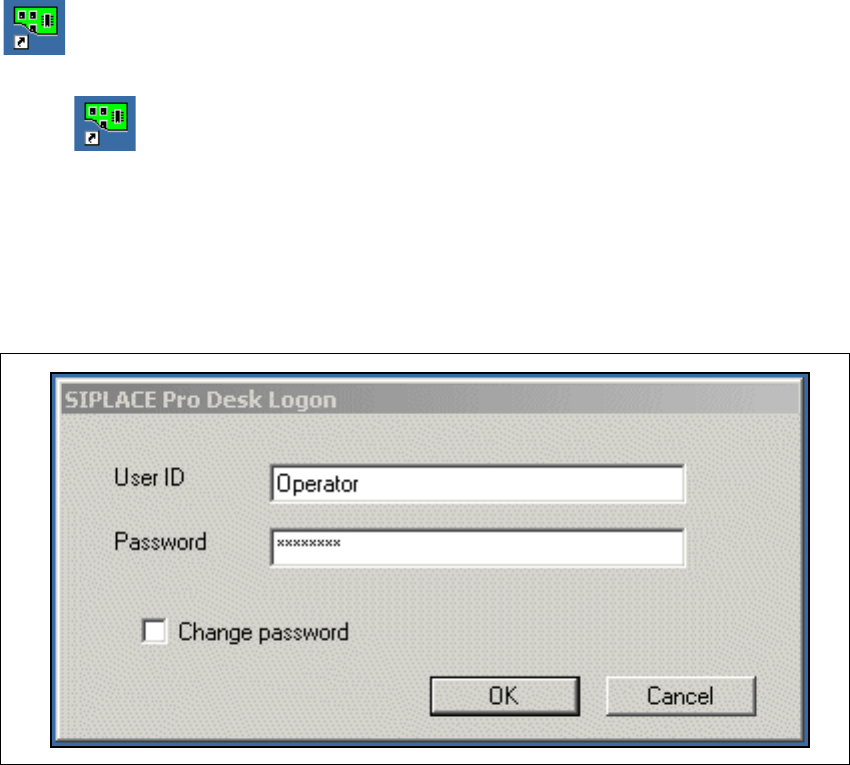
– If security is turned on, the system will open the Logon dialog box.
– If security ist turned off, select Global Options, tab Settings and select the option Security
on.
Enter your User data. Contact your system administrator if you have questions about user
name or password.
2
Fig. 2 - 1 SIPLACE Pro - Logon user
– After successfully logging on, the system will connect to the SIPLACE Pro server and open the
SIPLACE Pro user interface. Please refer to your installation guide, if installation was not suc-
cessful.
2 Program Overview Getting Started SIPLACE Pro 14.1 (R17-1)
2.2 The User Interface 05/2017 Edition
10
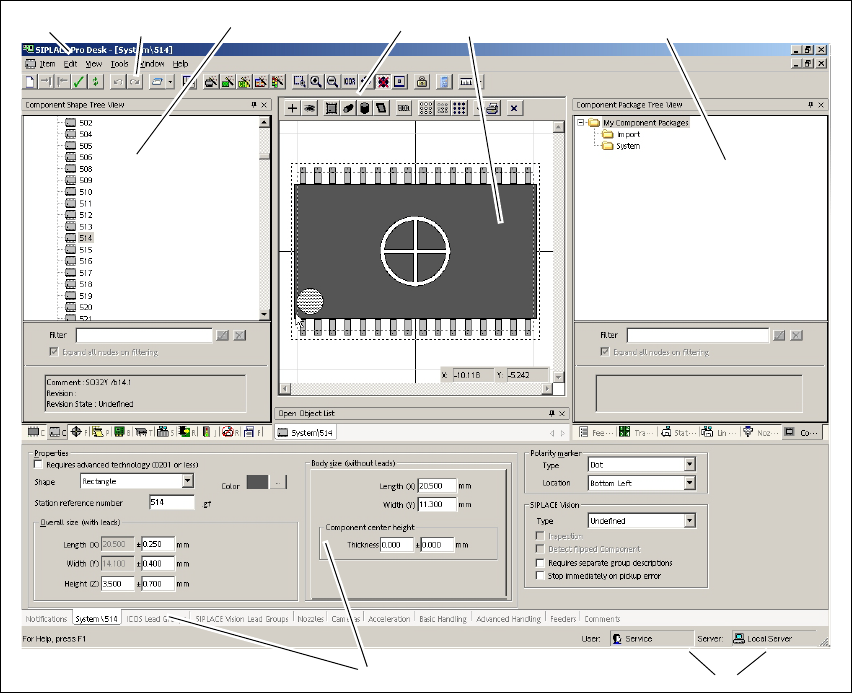
2.2 The User Interface
This chapter will help you to familiarize yourself with the SIPLACE Pro user interface. The user
interface is divided into the following areas. These contain all the functions and editors needed to
create a placement program with SIPLACE Pro. This example shows the user interface with the
opened Component Shape Editor. 2
2
Fig. 2 - 2 The user interface
Key
(1) Menu bar (2) Toolbar
(3) Tree view - product objects (4) Editor toolbar in window (may vary
between editors)
(5) View area/window (6) Tree view - Equipment objects
(7) Editor editing areas as tabs (may vary
between editors)
(8) Shows the current user name and the
server to which this desk is connected
123 45
7
6
8
Getting Started SIPLACE Pro 14.1 (R17-1) 2 Program Overview
05/2017 Edition 2.2 The User Interface
11
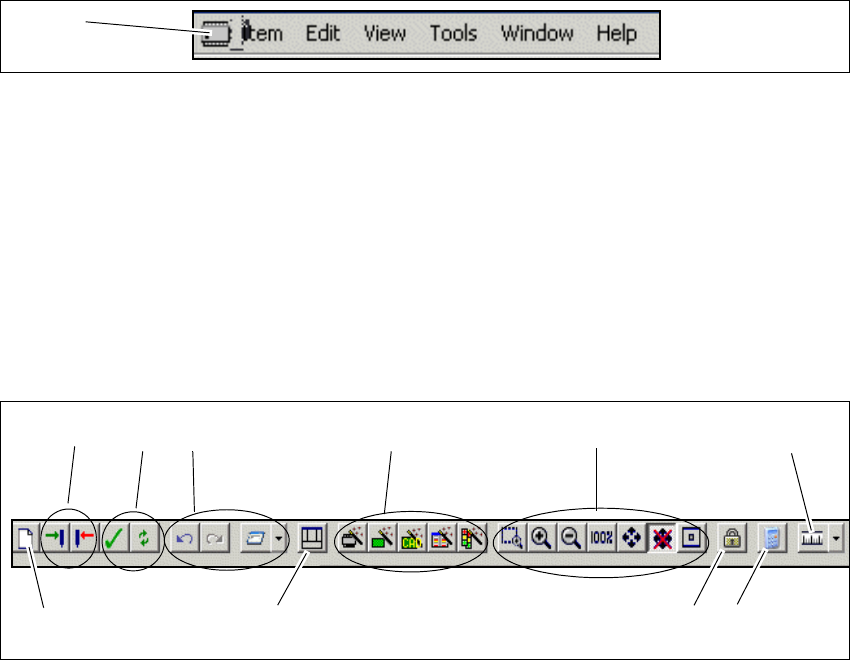
2.2.1 Menu Bar
The menu bar contains the functions. Select the required menu item to display the corresponding
functions. Frequently used functions can also be accessed from the toolbar or with key combina-
tions (shortcuts). 2
2
Fig. 2 - 3 Menu bar
Key
2.2.2 Toolbar
The toolbar contains the functions most frequently used. 2
These functions can be directly accessed with the individual icons. 2
2
Fig. 2 - 4 Toolbar
Key
(1) Icon for the active editor (e.g. component shape)
1
(1) Create new object (2) Save state, reset state
(3) Perform integrity check, refresh all editors (4) General functions (undo/redo, Report
Manager)
(5) Reset default layout for user interface (6) Wizards
(7) Zoom functions (8) Lock workplace
(9) Calculator (10) Set measurement unit
1
24
5
6
73
9
8
10