00198268-02_GS_SIPLACE-Pro-14.1-R17-1_EN - 第47页
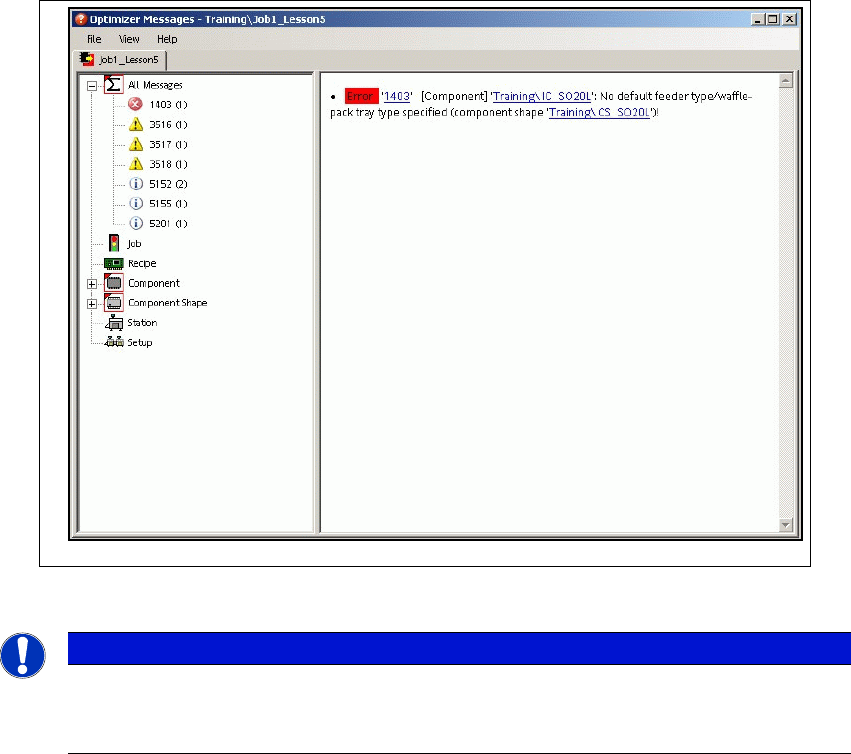
Getting S tarted SIPLACE Pro 14.1 (R17-1) 3 T utorial 05/2017 Edition 3.7 Exercise 6: Optimizing the Job 47 3 Fig. 3 - 13 Result: "Error Dialog" screen 3 How to remedy the error 3 Open the SO20L component sha…

3 Tutorial Getting Started SIPLACE Pro 14.1 (R17-1)
3.7 Exercise 6: Optimizing the Job 05/2017 Edition
46
. 3
Fig. 3 - 12 Result: "Optimization Parameters" screen
Confirm with OK.
3.7.2 Performing Optimization
Aim of exercise 3
The job will be optimized and an optimized setup (result setup) generated. Notification messages
will be issued to inform you whether the optimization was successful. You will learn to localize and
remedy errors. The result setups can be viewed and printed out as reports. 3
How to optimize a job and display the errors 3
Switch to the Job tab and select the Optimize... button in the Optimization edit field.
The Optimization Status dialog box will open and optimization will start.
Follow the instructions in this dialog box. Optimization was not successful as errors occurred.
Select the Errors button in the Optimization edit field.
The Error Dialog will open. Localize and remedy the problem.
Getting Started SIPLACE Pro 14.1 (R17-1) 3 Tutorial
05/2017 Edition 3.7 Exercise 6: Optimizing the Job
47
3
Fig. 3 - 13 Result: "Error Dialog" screen
3
How to remedy the error 3
Open the SO20L component shape at My Component Shapes\Getting Started .
Switch to the Feeders tab and assign the most suitable feeder as default feeder
(e.g. 24mm S).
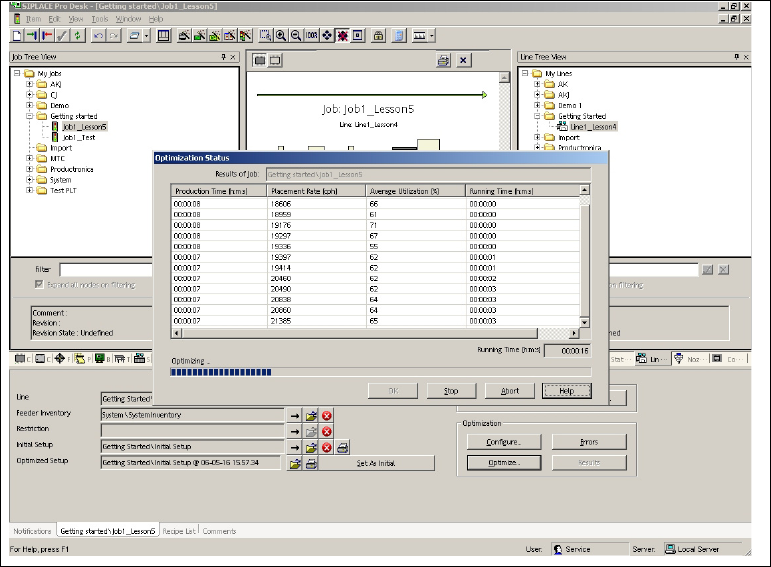
Switch to the Job tab and select the Optimize... button in the Optimization edit field.
–The Optimization Status dialog box will open and optimization will begin. Optimization
should now run successfully.
Note
A default feeder was not assigned when the missing component shape was created in
Exercise 2.
3 Tutorial Getting Started SIPLACE Pro 14.1 (R17-1)
3.7 Exercise 6: Optimizing the Job 05/2017 Edition
48
3
Fig. 3 - 14 Result: "Optimization Status" screen
Confirm with OK.
Save this optimized setup under the suggested name.
Open the result setup and set alll feeders, components and nozzles to "Fixed". Save the setup.
Set the result setup as initial setup in the Job Editor.
This setup is now the basis for subsequent optimizations. 3
3.7.3 Result Setups Reports and Brief Overview
Aim of exercise 3
The job is optimized and an optimized setup (result setup) is generated. The result setups can be
viewed in a brief overview or printed out as reports. 3
3
How to start the report 3
Switch to the Job tab and select the Results... button in the Optimization edit field.
The brief overview of optimization results will be opened for this job.