00197042-04_SM_X-Serie-S_Customer_EN.pdf - 第188页
6 Gantries 6.5 GCU and MGCU 188 Service Manual SIPLACE X-Serie S 06/2019 6.5.6 Overview of MGCUs Fig.237: Overview of MGCUs on X2 S
6 Gantries
6.5 GCU and MGCU
Service Manual SIPLACE X-Serie S 06/2019 187
Removal
► Switch off the machine, disconnect it from the power supply and secure it to prevent
unauthorized reactivation.
1.2 "Preparatory work..." [}16]
► Unplug all connections from the MGCU. If necessary, mark their positions to make clear as-
signment easier later on.
► Remove the screws fastening the mount and then remove the mount.
► Remove the MGCU from the machine.
Installation
► Follow the removal instructions in reverse order for installation. Also observe the following
instructions:
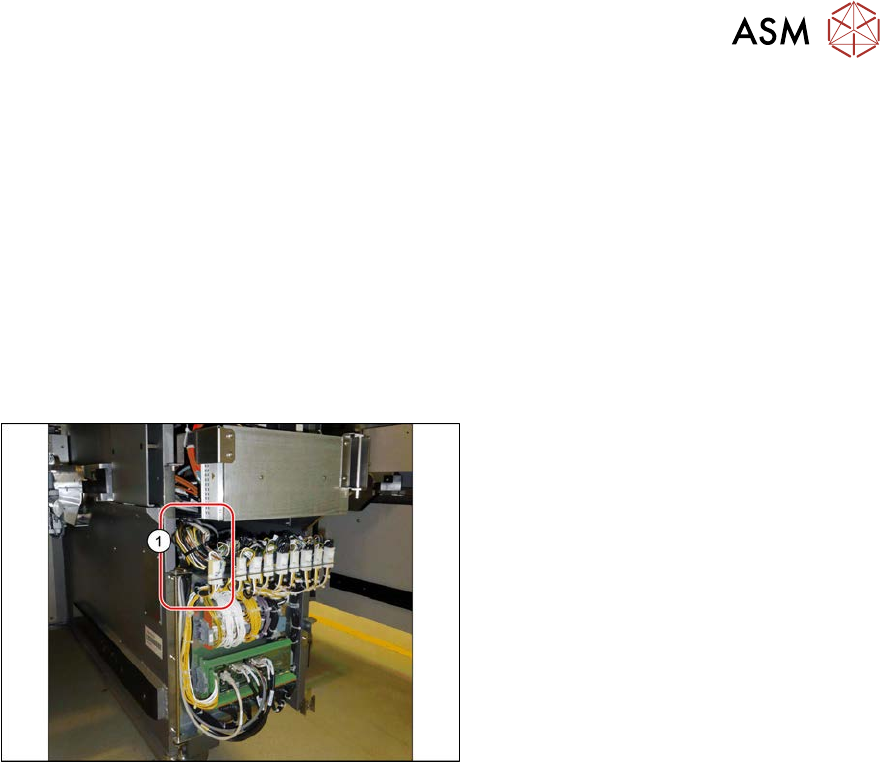
Fig.236: Cables
► Use the DIP switch to set the gantry ID
on the MGCU (see 6.5.6 "Overview of
MGCUs" [}188]).
► Always make sure that the cables do
not rub against any parts or are folded.
Pay particular attention to the
cables(1) at the top end of the flap.
► Check the firmware and perform a
download, if needed. (see 6.9 "eSW
Download (SW 70x)" [}202]).
See also
2 6.5.3 "Overview of GCUs" [}185]
6.5.5 Replacing the MGCU fan
Parts, Equipment and Tools
●
Fan for MGCU [03104136-xx]
Removal/Installation
► Removal and installation of the fan on the MGCU is the same as that for the GCU.
Screws are fitted in place of the expanding rivets.
Read also section 6.5.2 "Replacing the GCU fan" [}184].
6 Gantries
6.5 GCU and MGCU
188 Service Manual SIPLACE X-Serie S 06/2019
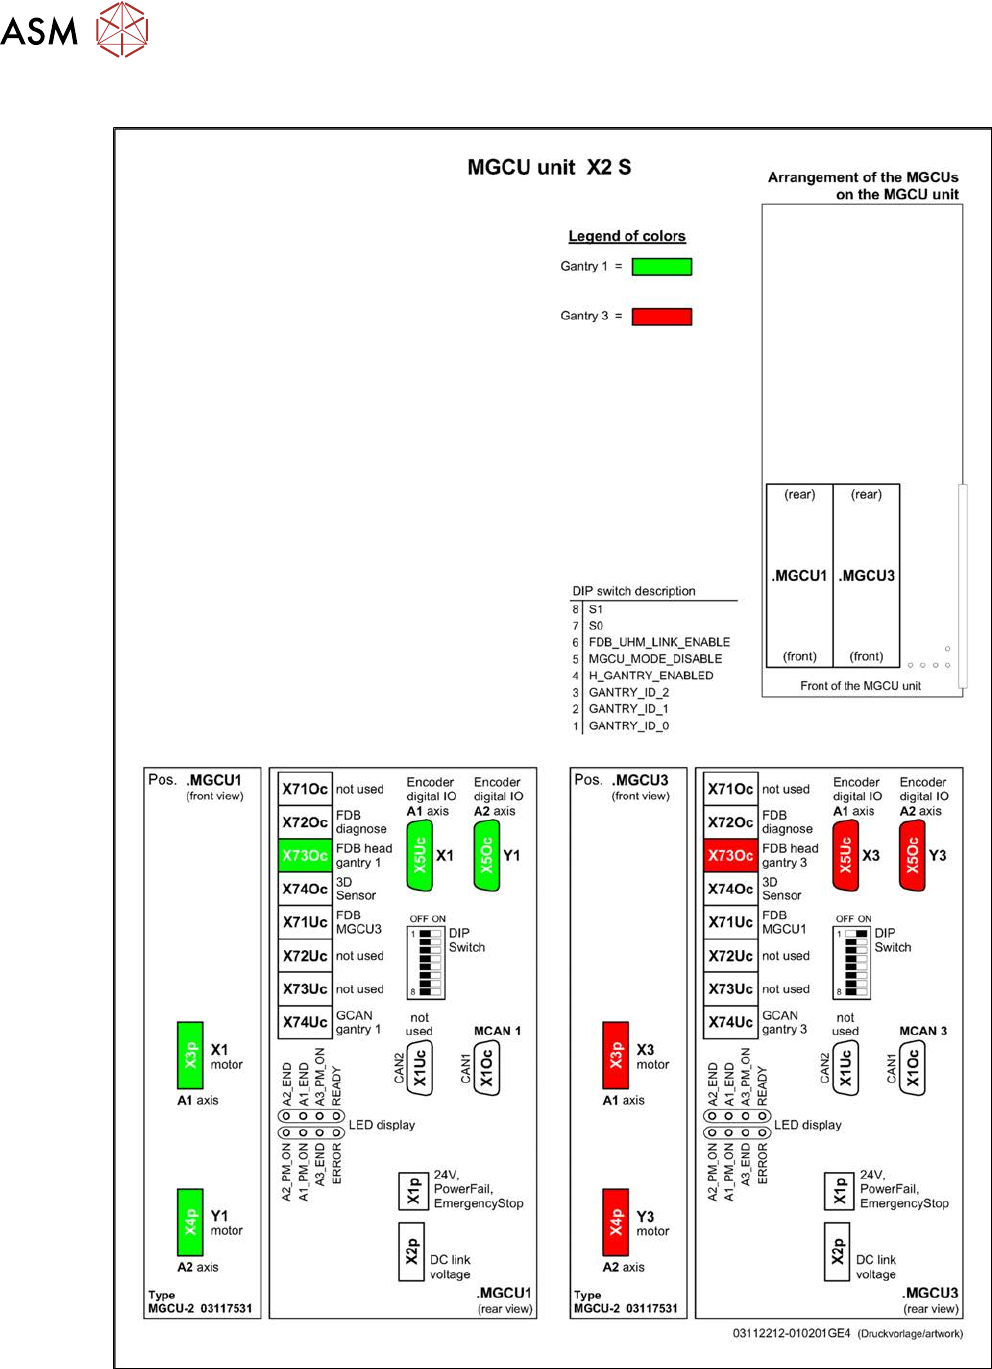
6.5.6 Overview of MGCUs
Fig.237: Overview of MGCUs on X2 S
6 Gantries
6.5 GCU and MGCU
Service Manual SIPLACE X-Serie S 06/2019 189
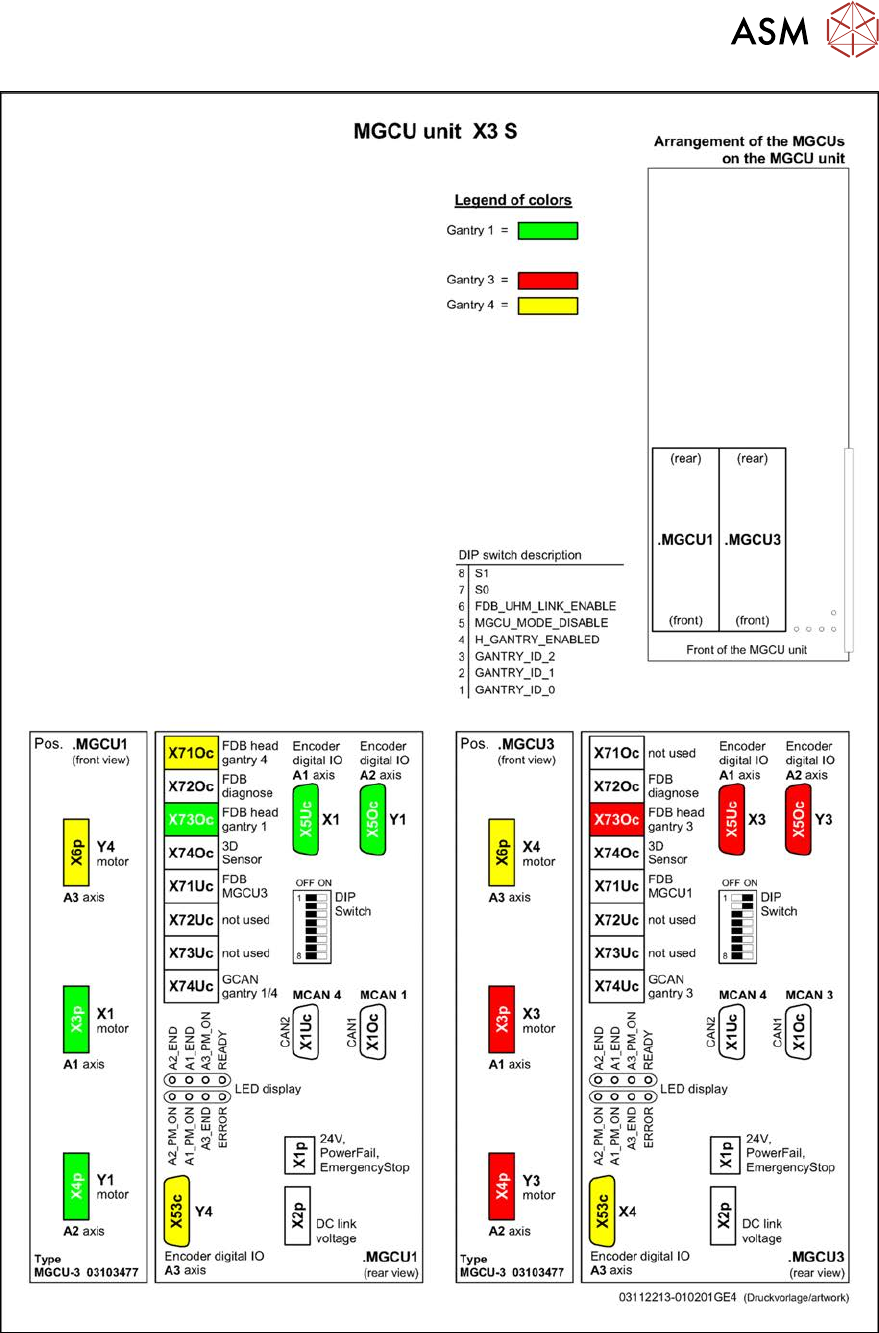
Fig.238: Overview of MGCUs on X3 S