YRM20_Mainte_E.pdf - 第102页
3. 3-month maintenance items 3-35 Chapter 3 Periodic maintenance items 3.4.3 Cleaning the air intake filter at machine rear side T he air intake filter is located at the right side of machine rear , protecting the contro…
3. 3-month maintenance items
3-34
Chapter 3 Periodic maintenance items
3.4.2 Cleaning the air intake filter
Usually, the air intake filters at the front and rear
side of machine can be cleaned by suctioning out
dust and dirt through the filter cover using a
vacuum assembly or a vacuum cleaner, shown in
the figure right.
If the dust cannot be removed completely, replace
the filter with a new one.
c
CAUTION
Do not clean the filter during automatic operation.
n
NOTE
When the filter is cleaned by vacuum assembly, the feeder
exchange carriage is required to set to machine, as the
air joint of feeder exchange carriage is used for cleaning.
█
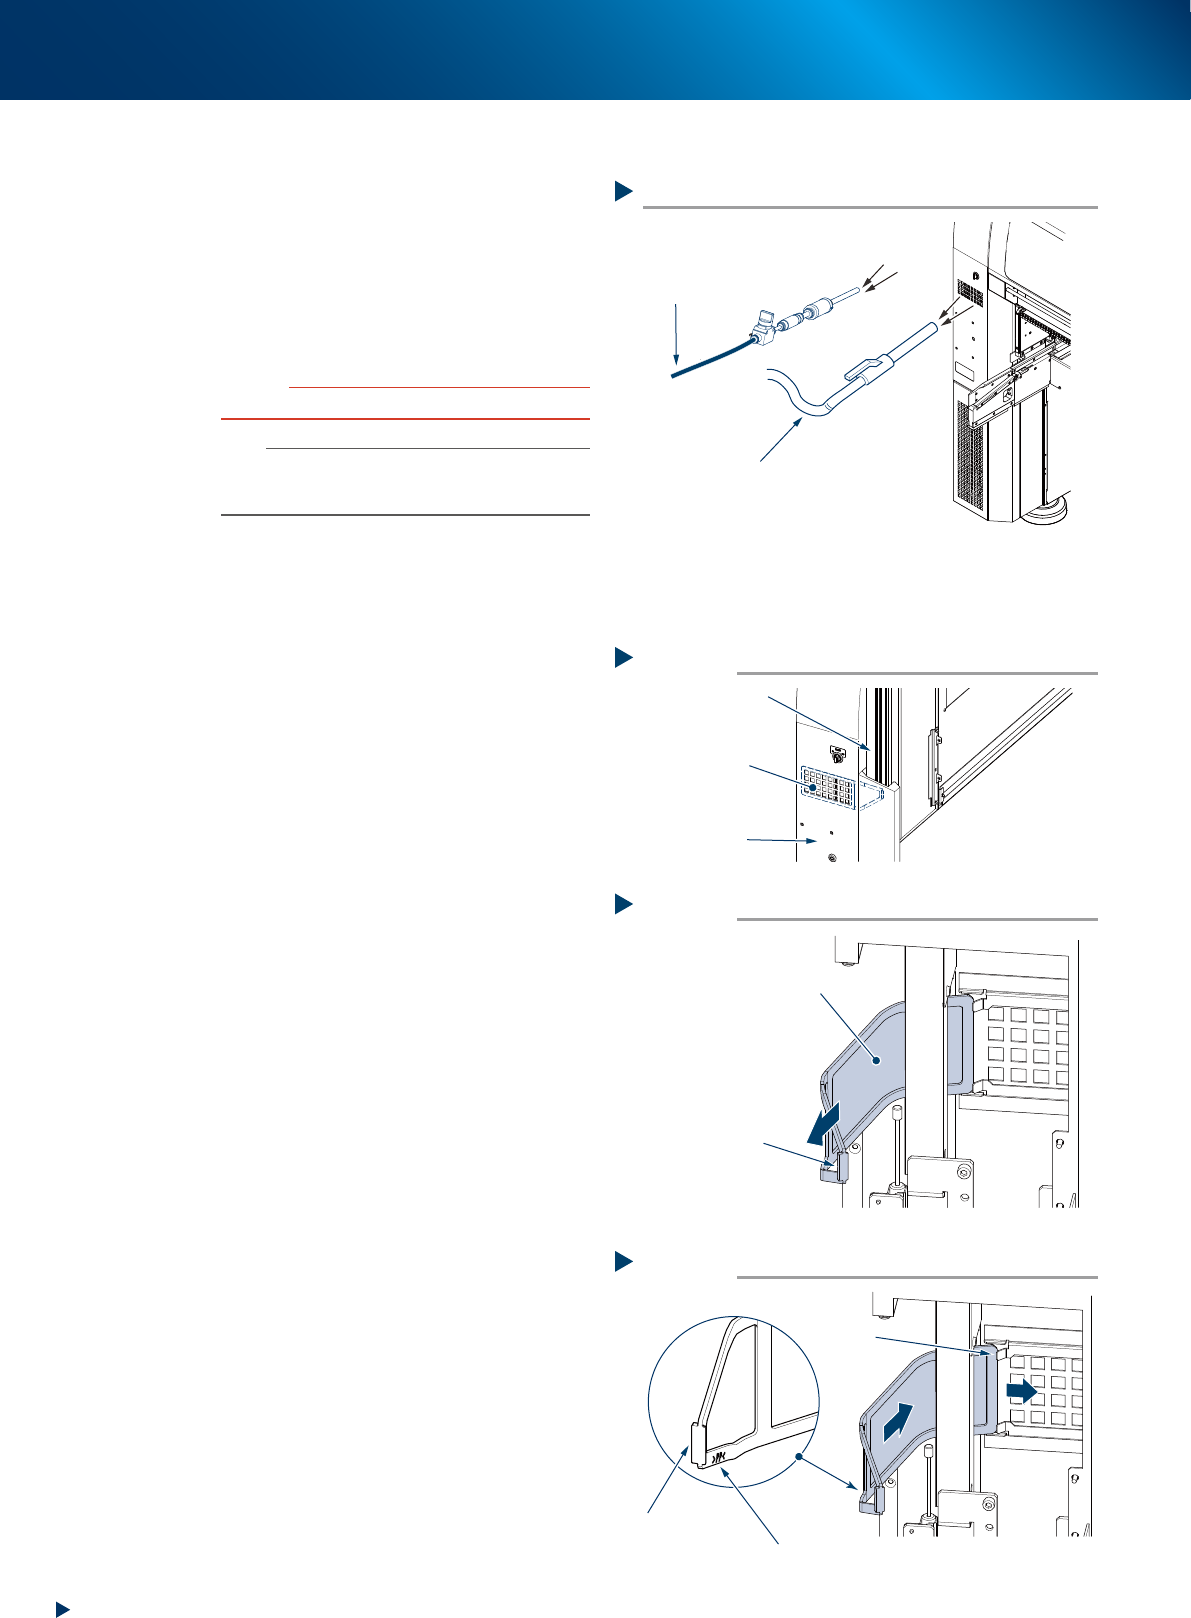
Replacement of the air intake filter
The air intake filter can be replaced without tools.
1
Open the machine safety cover.
The air intake filter is retracted in the gap
between the frame and cover as shown in the
figure right.
2
Pull out the air intake filter to the arrow
direction by holding the knob of the
filter.
3
Attach a new air intake filter.
Insert a new filter as shown in the figure right,
passing along the beneath of guide, be aware
the direction of it.
On the front and rear cover
Vacuum cleaner
Connected to the air joint of
feeder exchange carriage
Vacuum assembly (option)
53358-KMX-00
Attaching air intake filter
Step 3
Guide
Direction of filter
Inside:
side with “PP” stamp
Outside:
side with larger knob
53361-KMX-00
Pulling out the air intake filter
Step 2
Air intake filter
Pull out by holding
this knob
53360-KMX-00
Air intake filter
Step 1
Air intake filter
Frame
Cover
53359-KMX-00
3. 3-month maintenance items
3-35
Chapter 3 Periodic maintenance items
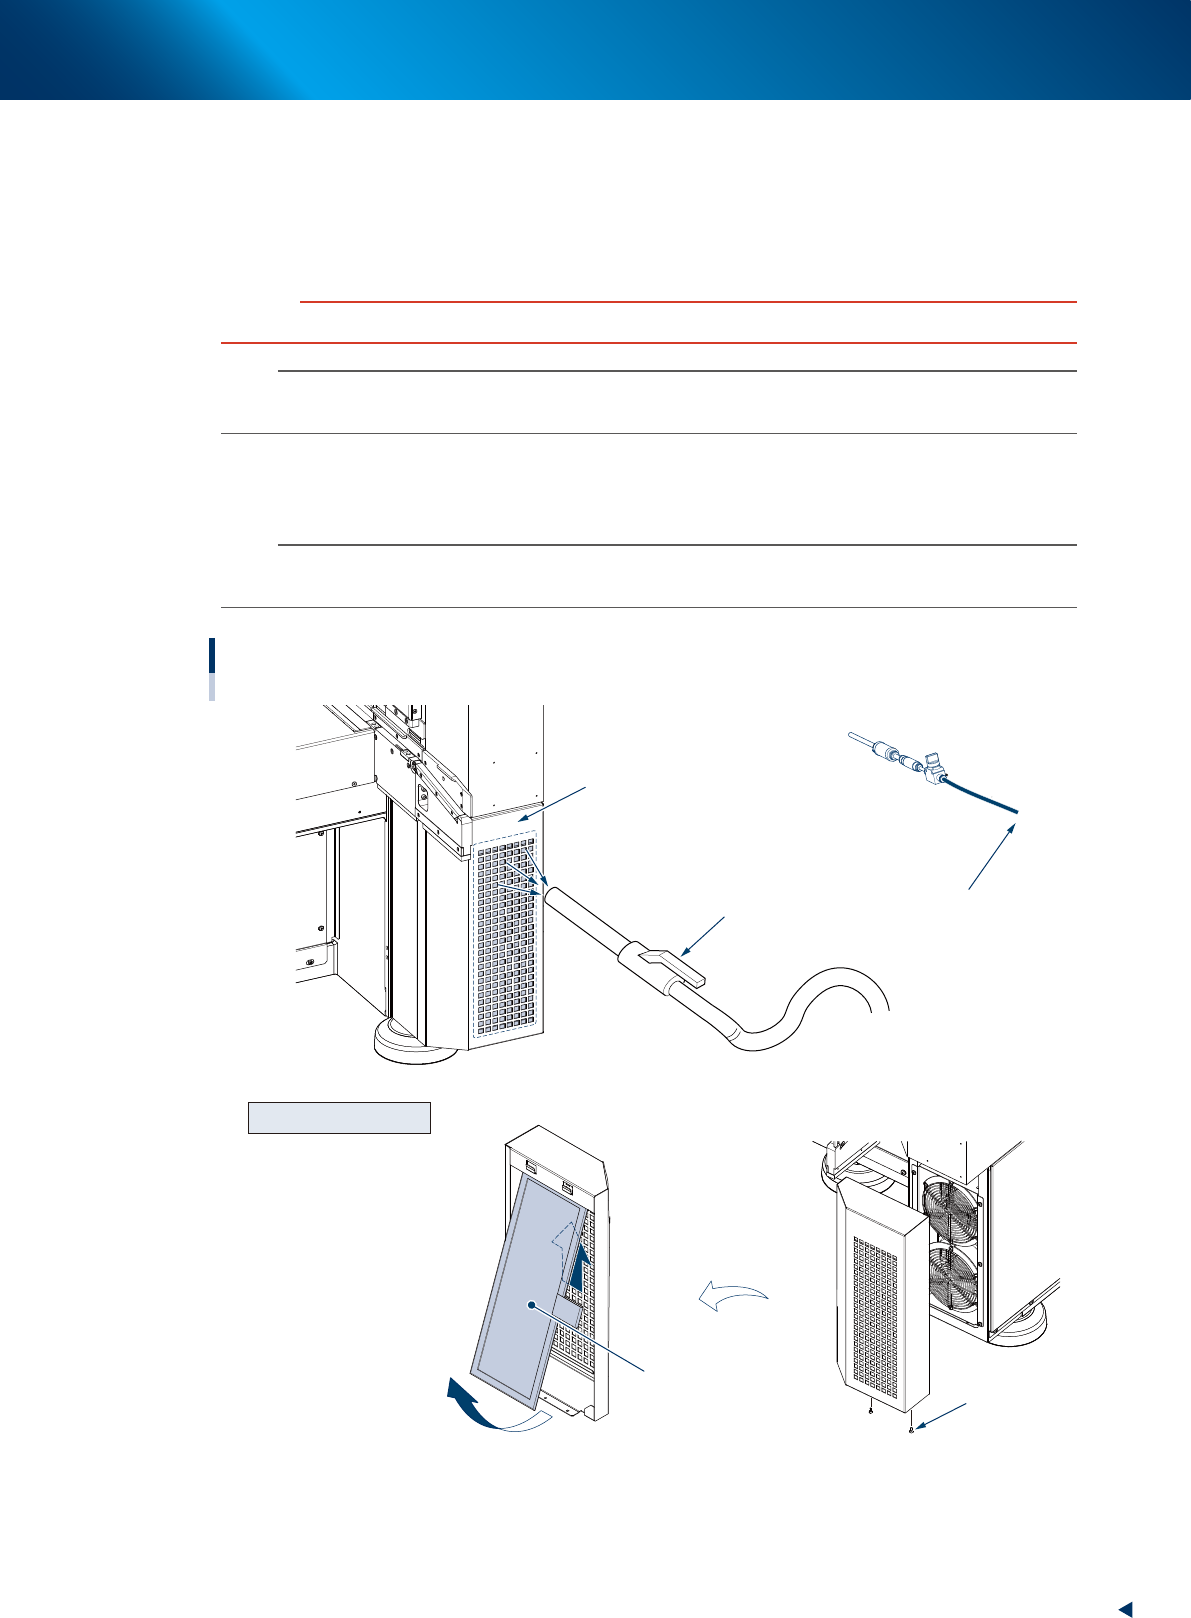
3.4.3 Cleaning the air intake filter at machine rear side
The air intake filter is located at the right side of machine rear, protecting the control section. This filter
should be cleaned every 3 months, though it depends on the machine operating condition.
1
Close the applications and turn OFF the machine power.
c
CAUTION
Be sure to turn off the power for this work. DO NOT clean during the automatic operation.
n
NOTE
When the vacuum assembly is used for cleaning, the feeder exchange carriage is required to be attached as the air
source.
2
From outside of the cover, clean with a household vacuum cleaner or a vacuum
assembly (option) by removing the dust on the filter.
n
NOTE
When the dust or dirt cannot be removed from outside of the cover, or the filter itself is deteriorated, it requires the filter
replacement detaching the cover.
Cleaning the air intake filter
At lower right of machine rear
Vacuum cleaner
Air intake filter (inside the cover)
To the air joint of
feeder exchange carriage
Vacuum assembly (option)
Mounting bolt
Detach and reverse
Lift up
Pull out to front
Fan filter
Detaching for replacement
53379-KMX-00
3. 3-month maintenance items
3-36
Chapter 3 Periodic maintenance items
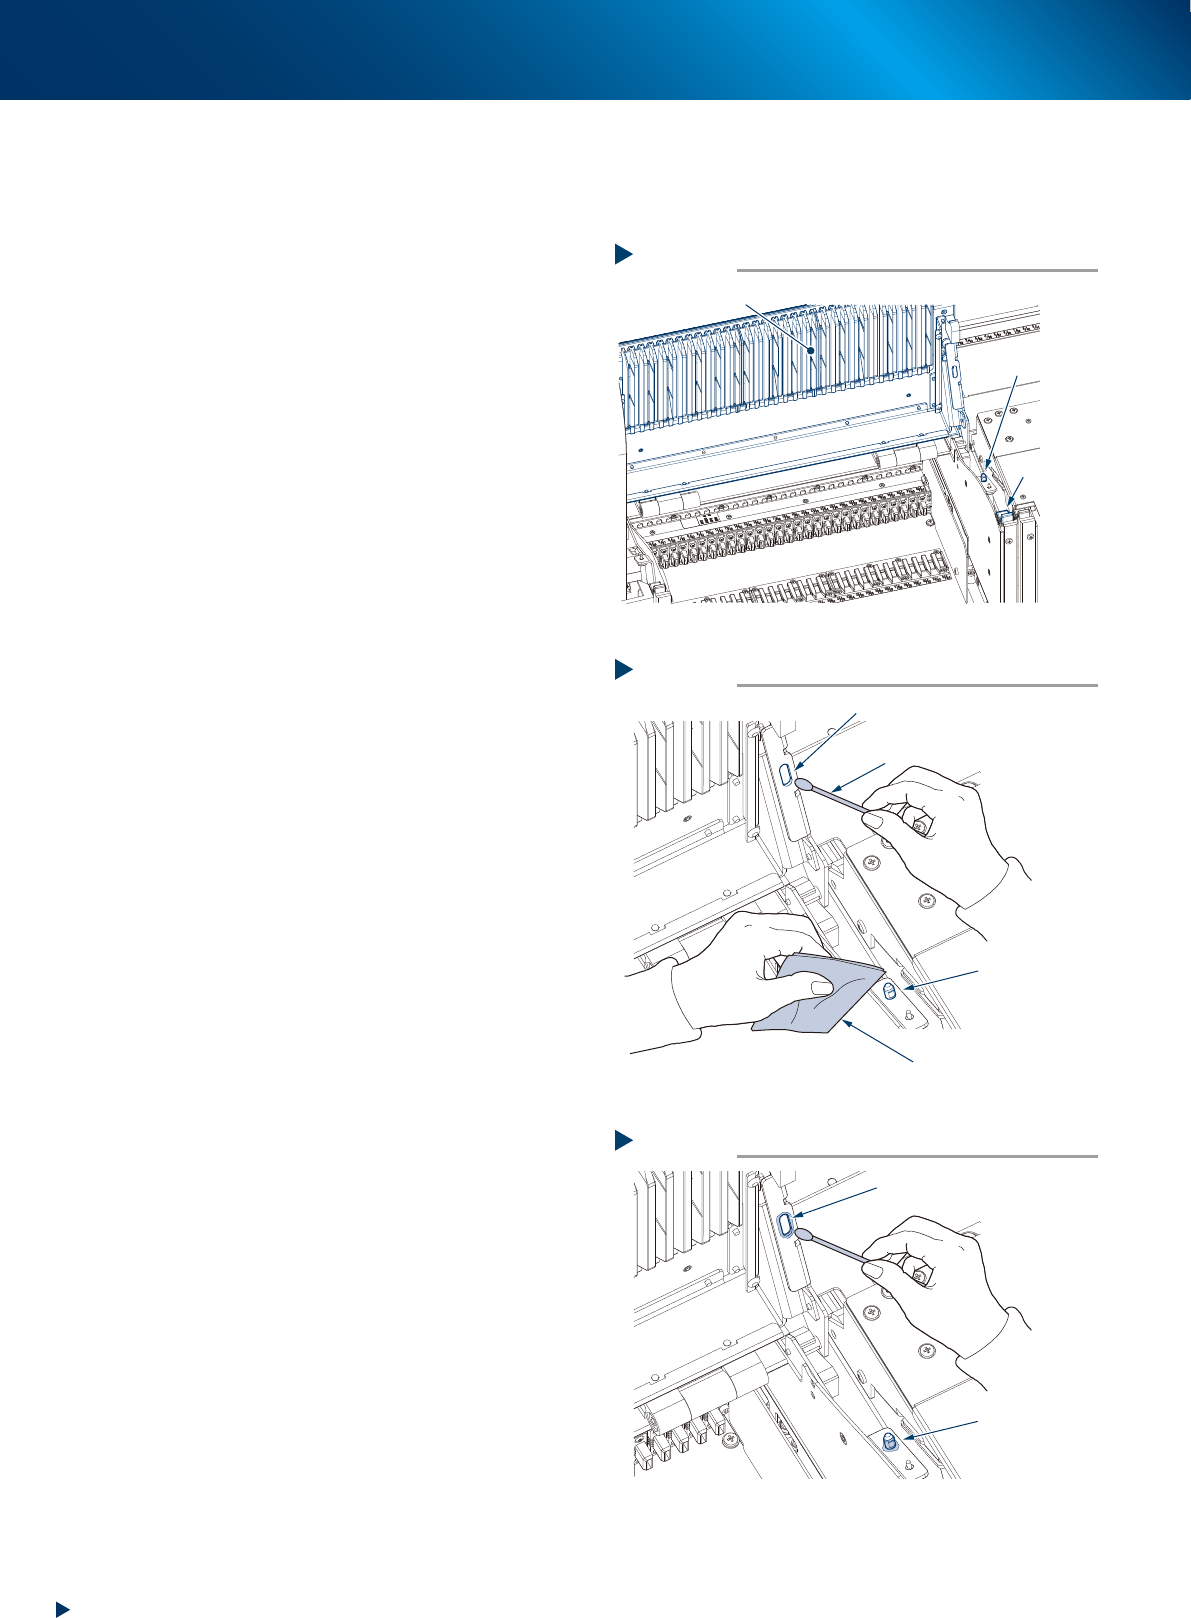
3.4.3 Cleaning/lubricating for the positioning unit of upper cover
The positioning pin of upper cover section requires to be cleaned/lubricated every 3 months.
Perform the following procedures.
e
1
Press the emergency stop button.
2
Open the upper cover by unlocking the
cover locks on both sides.
3
Clean the grease applied points, such as
the inside of positioning hole on the
upper cover and the positioning pin,
located each 1 on each cover, by wiping
away old grease or dirt using a cotton
swab or a lint-free cloth.
4
Apply the specified grease (NSL) using a
cotton swab or similar as shown in the
figure right.
Opening the upper cover
Step 2
Cover lock
Position pin
Upper cover
533H1-KMX-00
Cleaning the grease applying positions
Step 3
Wipe around
the positioning pin
Wipe the inside of positioning hole
Cotton swab
Lint-free cloth
533H2-KMX-00
Applying grease
Step 4
Apply around
the positioning pin
Apply inside of positioning hole
533H3-KMX-00