YRM20_Mainte_E.pdf - 第155页
4. Conveyor unit 5-6 Chapter 5 How to replace consumable parts 4. Conveyor unit 4.1 Replacing the conveyor belt T he convey or belt should be replaced if excessive slac k, grime or fra ying is found after checking it as …
3. Head unit
5-5
Chapter 5 How to replace consumable parts
3. Head unit
When a motion trouble is found at the operation valve, blow valve or blow valve for cleaning, replace
them by following procedures.
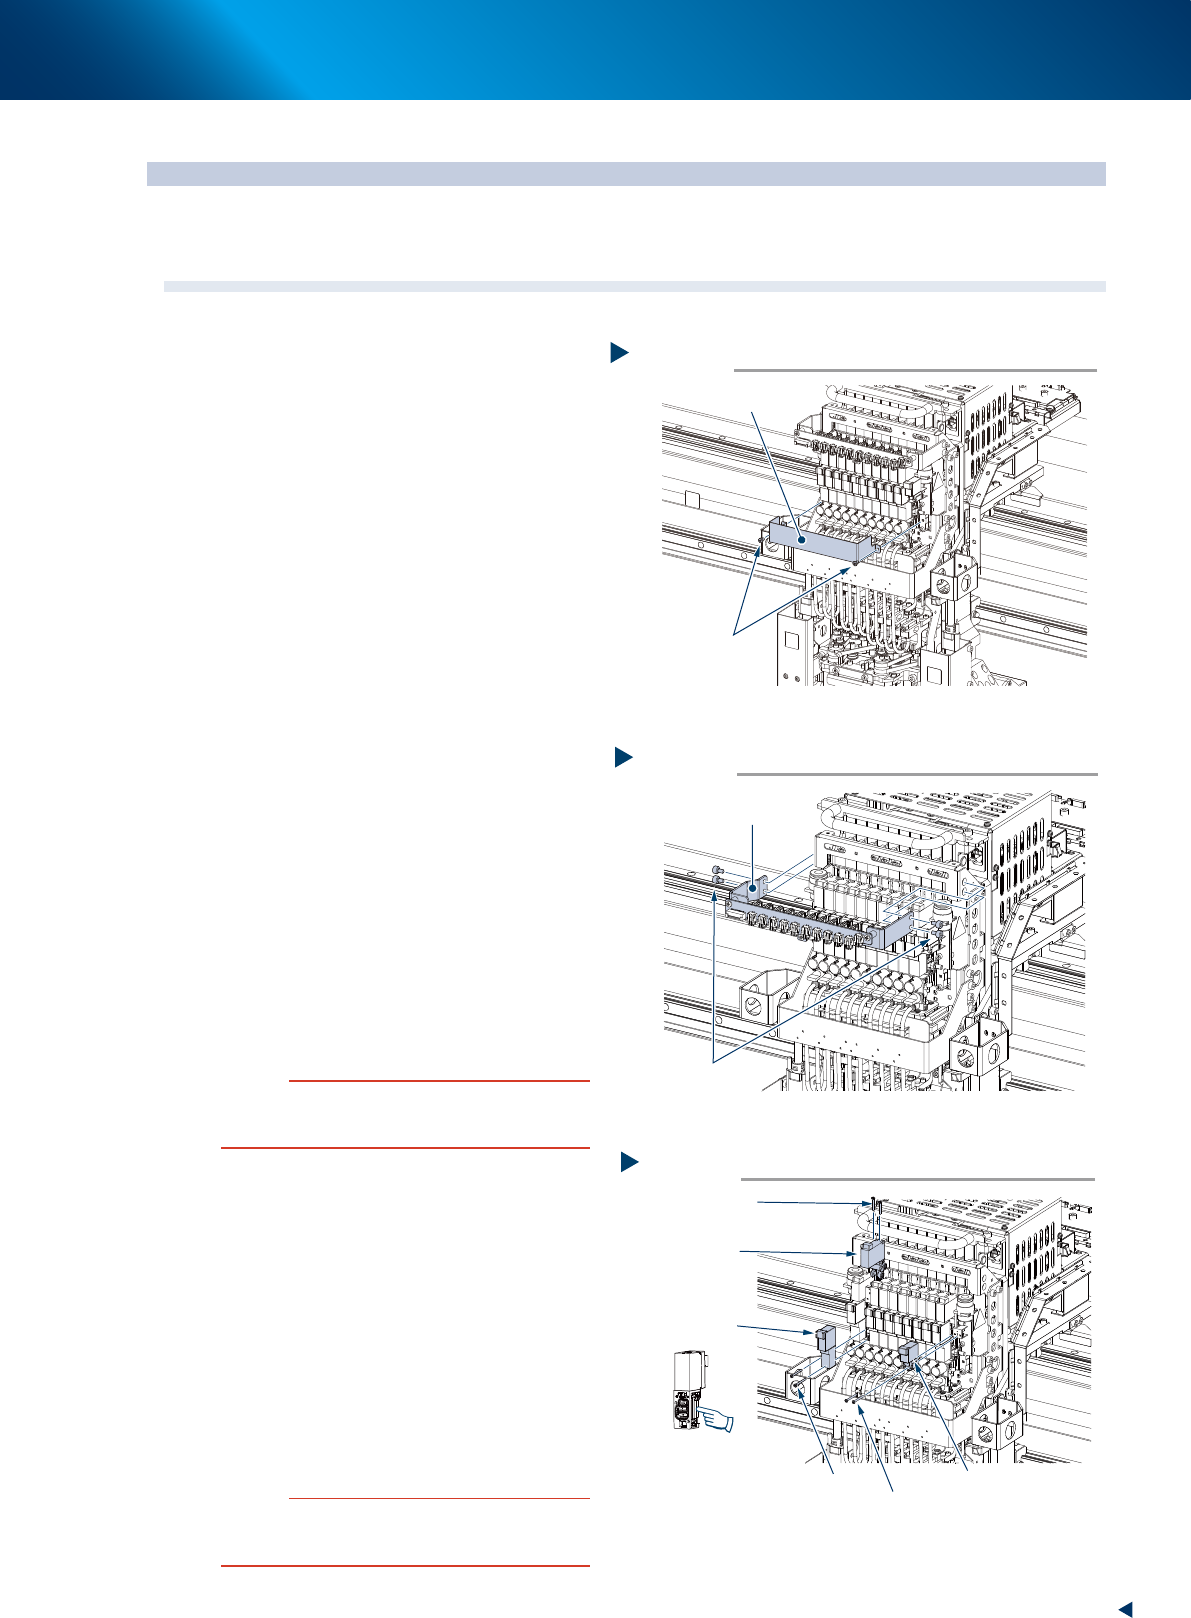
3.1 HM head: Replacing the valves
1
Prepare for work.
1. Press the emergency stop button and detach
the feeder exchange carriage.
2. Close the applications and power OFF the
machine.
3. Rotate the air supply/exhaust switch on the
lower left of the machine clockwise (EXH) to
turn OFF the main air.
4. Open the machine safety cover and move
the head unit to the position where facilitates
your work.
5. Place a square cloth beneath head unit.
2
Detach the baffle plate. (Only when
replacing the operation valve)
Remove the baffle plate mounting screws (2pcs.)
with a Phillips screwdriver.
3
Detach the head plate. (Only when
replacing the blow valve)
Remove the head plate mounting bolts (4pcs.)
with a hex wrench (3). The cables are
connected to the head plate. However, these
cables do not need to be disconnected.
4
Disconnect the connector.
Disconnect the connector of the valve you want
to replace.
5
Replace the valve.
Remove 2 mounting screws of the valve to be
replaced with a precision Phillips screwdriver,
and then replace the valve.
c
CAUTION
The packing is attached to the back of the valve. Replace
the valve with a new one while carefully checking the
packing for dropping or catching.
6
Return the parts to their original
positions.
1. Return the connector, head plate, and baffle
plate to their original positions.
2. Remove the square cloth and close the
machine safety cover.
7
Check the valve operation.
1. Turn on the supply air and power on the
machine and set the feeder exchange
carriage.
2. Then check the operation of each valve on
the [Unit] - [Head] screen or [I/O] screen.
c
CAUTION
When the operation check for the blow valve for cleaning
is performed at the [I/O] screen, perform it in condition
that the nozzles are detached from all the heads.
Removing the head plate from HM head
Step3
Head plate
4 mounting bolts
53512-KMX-00
Removing the current plate from HM head
Step3
Current plate
Mounting screws
53511-KMX-00
Replacing the HM head valve
Step5
Blow valve
Mounting screw
Blow valve for cleaning
Mounting screw
Operation valve
Mounting bolt
[Caution for dropping off]
A packing is attached to
the back of the valve.
53513-KMX-00
4. Conveyor unit
5-6
Chapter 5 How to replace consumable parts
4. Conveyor unit
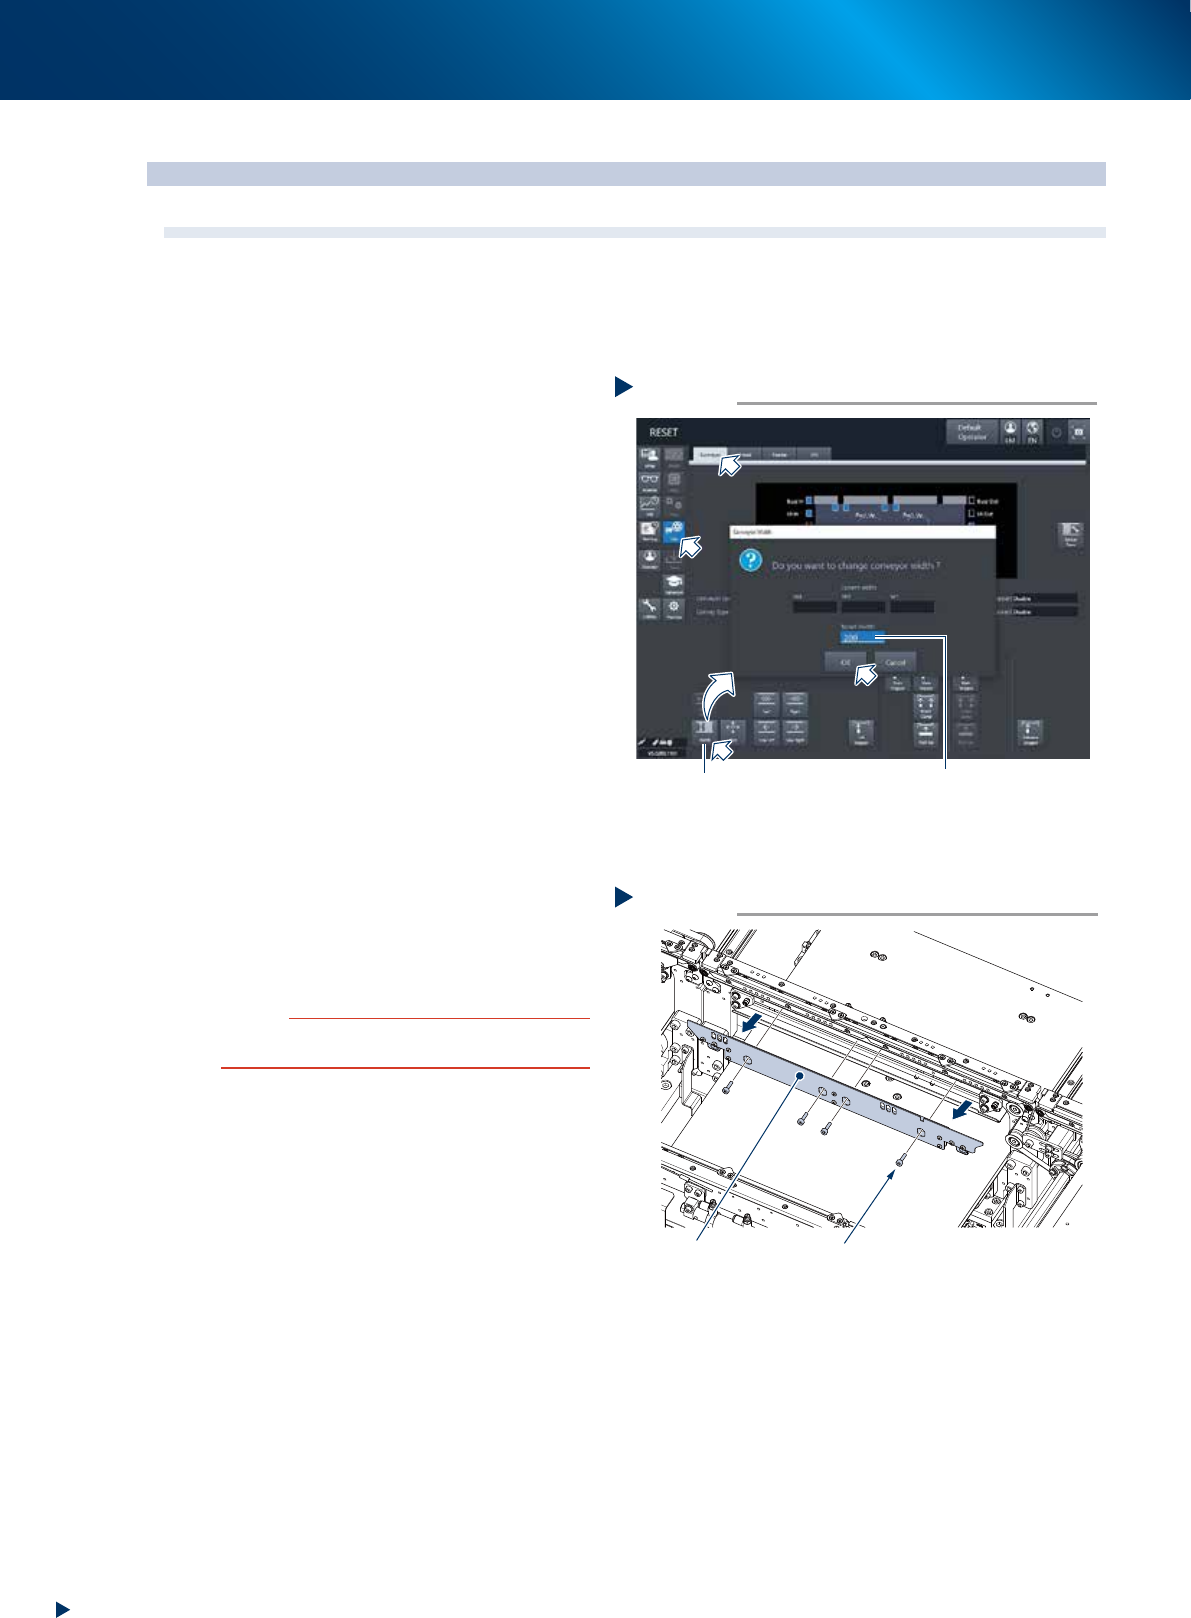
4.1 Replacing the conveyor belt
The conveyor belt should be replaced if excessive slack, grime or fraying is found after checking it as
described in Chapter 3, "5.2 Inspecting conveyor belt and cleaning guide".
Use the following procedure to replace the belt. Moreover, as the replacement procedure varies for CV1, 2,
4, and CV3 by Step 5 and later, they are described separately.
1
Change the conveyor width to
convenient for maintenance work.
1. Press the [Conveyor width] button on the
[Unit] - [Conveyor] scree and open the
conveyor width changing screen.
2. Input the value (approx. 200mm) which a
hexagon wrench can be inserted into the
"Changed conveyor width" and press the
[OK] button. Then the conveyor width is
changed to specified width.
2
Prepare for work.
e
1. Remove all items sensitive to magnetic fields
such as wristwatches and magnetic ID cards.
2. Press the emergency stop button and detach
the feeder exchange carriage.
3. Open the machine safety cover and detach
the upper cover.
4. Place a square cloth on the push-up plate.
3
Remove the board clamp board by
loosening the mounting bolts for PCB
clamp board (4 bolts, shown in the
figure at right) with a hexagon wrench
(3).
c
CAUTION
Do not remove any bolts other than 4 bolts shown in the
figure at right.
Changing the conveyor width
Step 1
[Width] button
Enter the value
which allows to insert a tool
(Approx. 200mm)
54501-KMX-00
Removing the board clamp board
Step 3
Board clamp board 4 mounting bolts
53517-KMX-00
4. Conveyor unit
5-7
Chapter 5 How to replace consumable parts
4
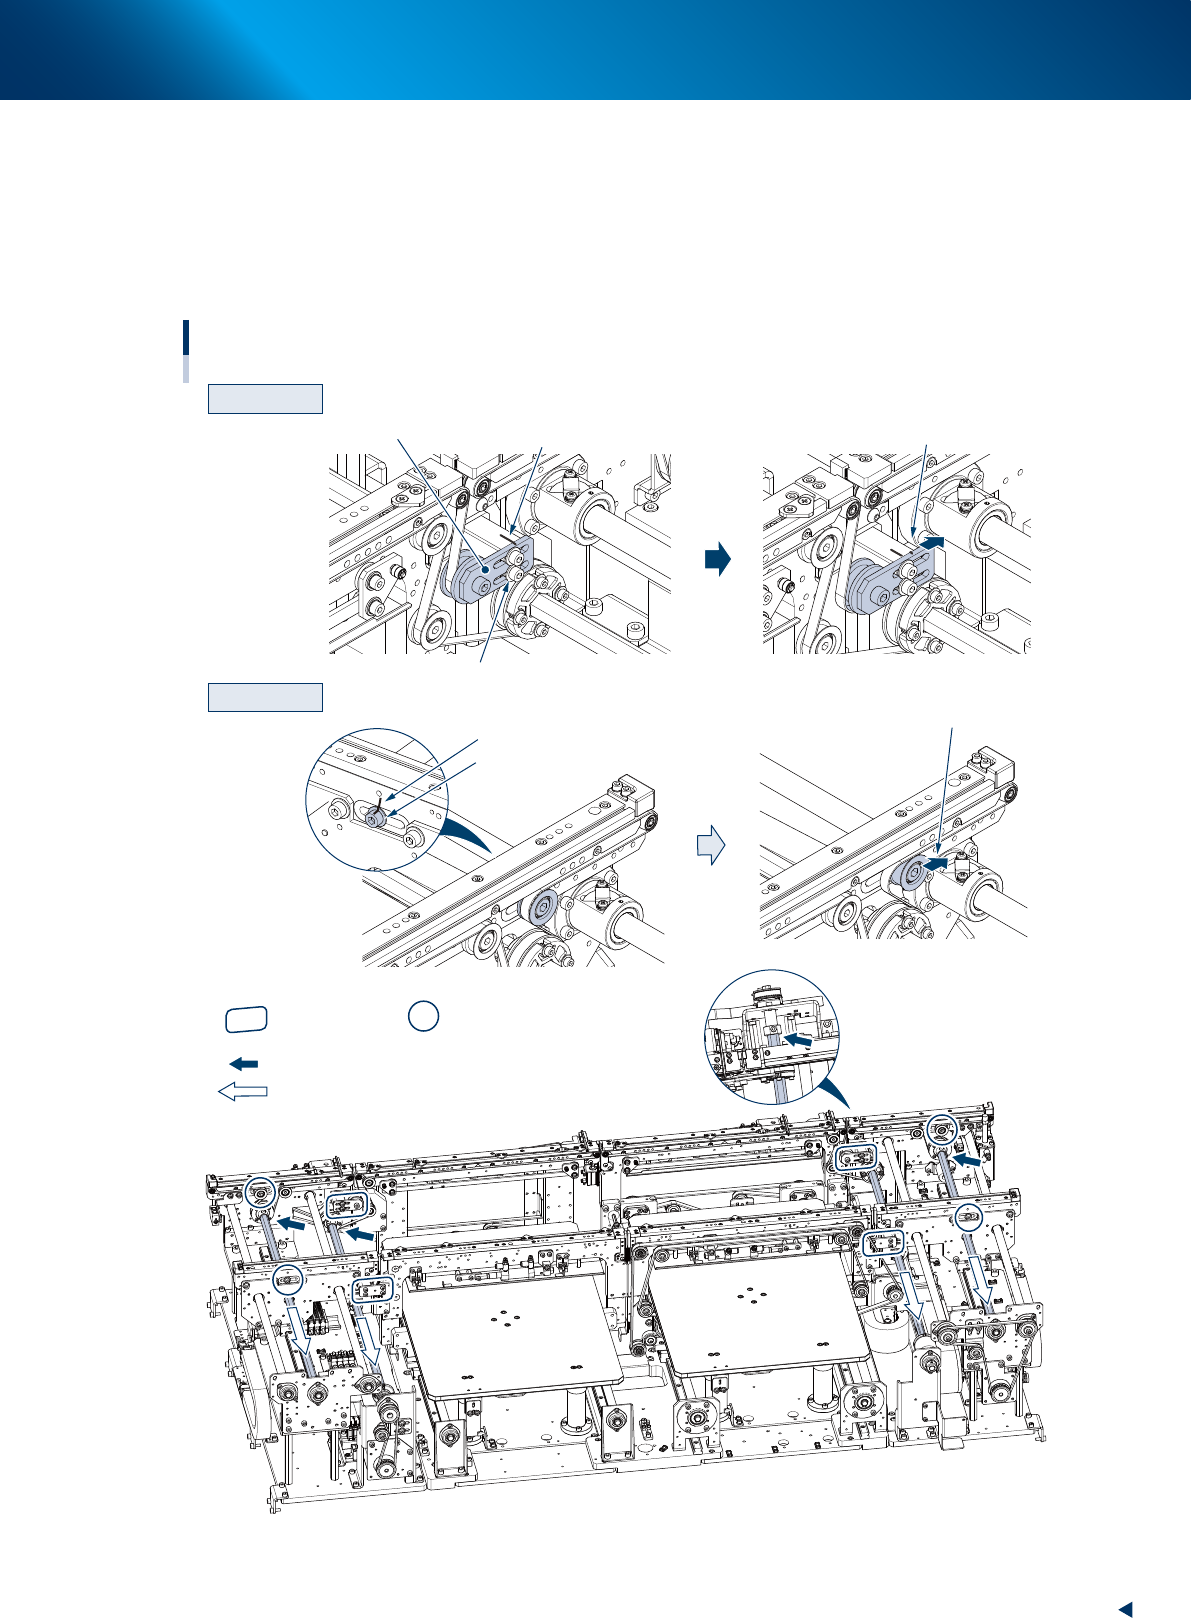
Loosen the conveyor belt.
1. Mark the current position of pulley bracket (CV2 and CV3) and pulley mounting bolt (CV1 and CV4) using a
permanent marker before loosening the conveyor belt.
2. Loosen the mounting bolt of pulley bracket (hereinafter referred to as bracket) using a hexagon wrench (3),
referring the figure below, then move the bracket to the end of its long hole (loosening direction).
For CV1 and CV4, loosen the mounting bolts of pulley using a hexagon wrench (5) and (4), then move the
pulley.
Machine rear
CV2 and CV3
CV1 and CV4
CV4
CV1
CV3
CV2
: Place where the shaft is separated from the pulley.
: Shaft pull-out direction
Loosening the conveyor belt
Slide the bracket
Loosen the mounting bolt
Mark with a permanent marker
Bracket
Loosen the mounting bolt
Mark with a permanent marker
Slide the pulley
Entrance
Exit
: Bracket position : Pulley position
53518-KMK-10