YRM20_Mainte_E.pdf - 第158页
4. Conveyor unit 5-9 Chapter 5 How to replace consumable parts 8 Detach the conv eyor belt from t he con ve yor b y pass ing it through the gap between the s haft and pulley . 9 Clean the belt guid e section and pulleys.…
4. Conveyor unit
5-8
Chapter 5 How to replace consumable parts
█
Replacing the CV3 conveyor belt
The replacement procedure of CV3 conveyor belt differs to other conveyor belts. Here describes the
procedure from Step 5 and later. When the conveyor belt other than CV3 is to be replaced, see
"Replacing the CV1/CV2/CV4 conveyor belt" described below.
5
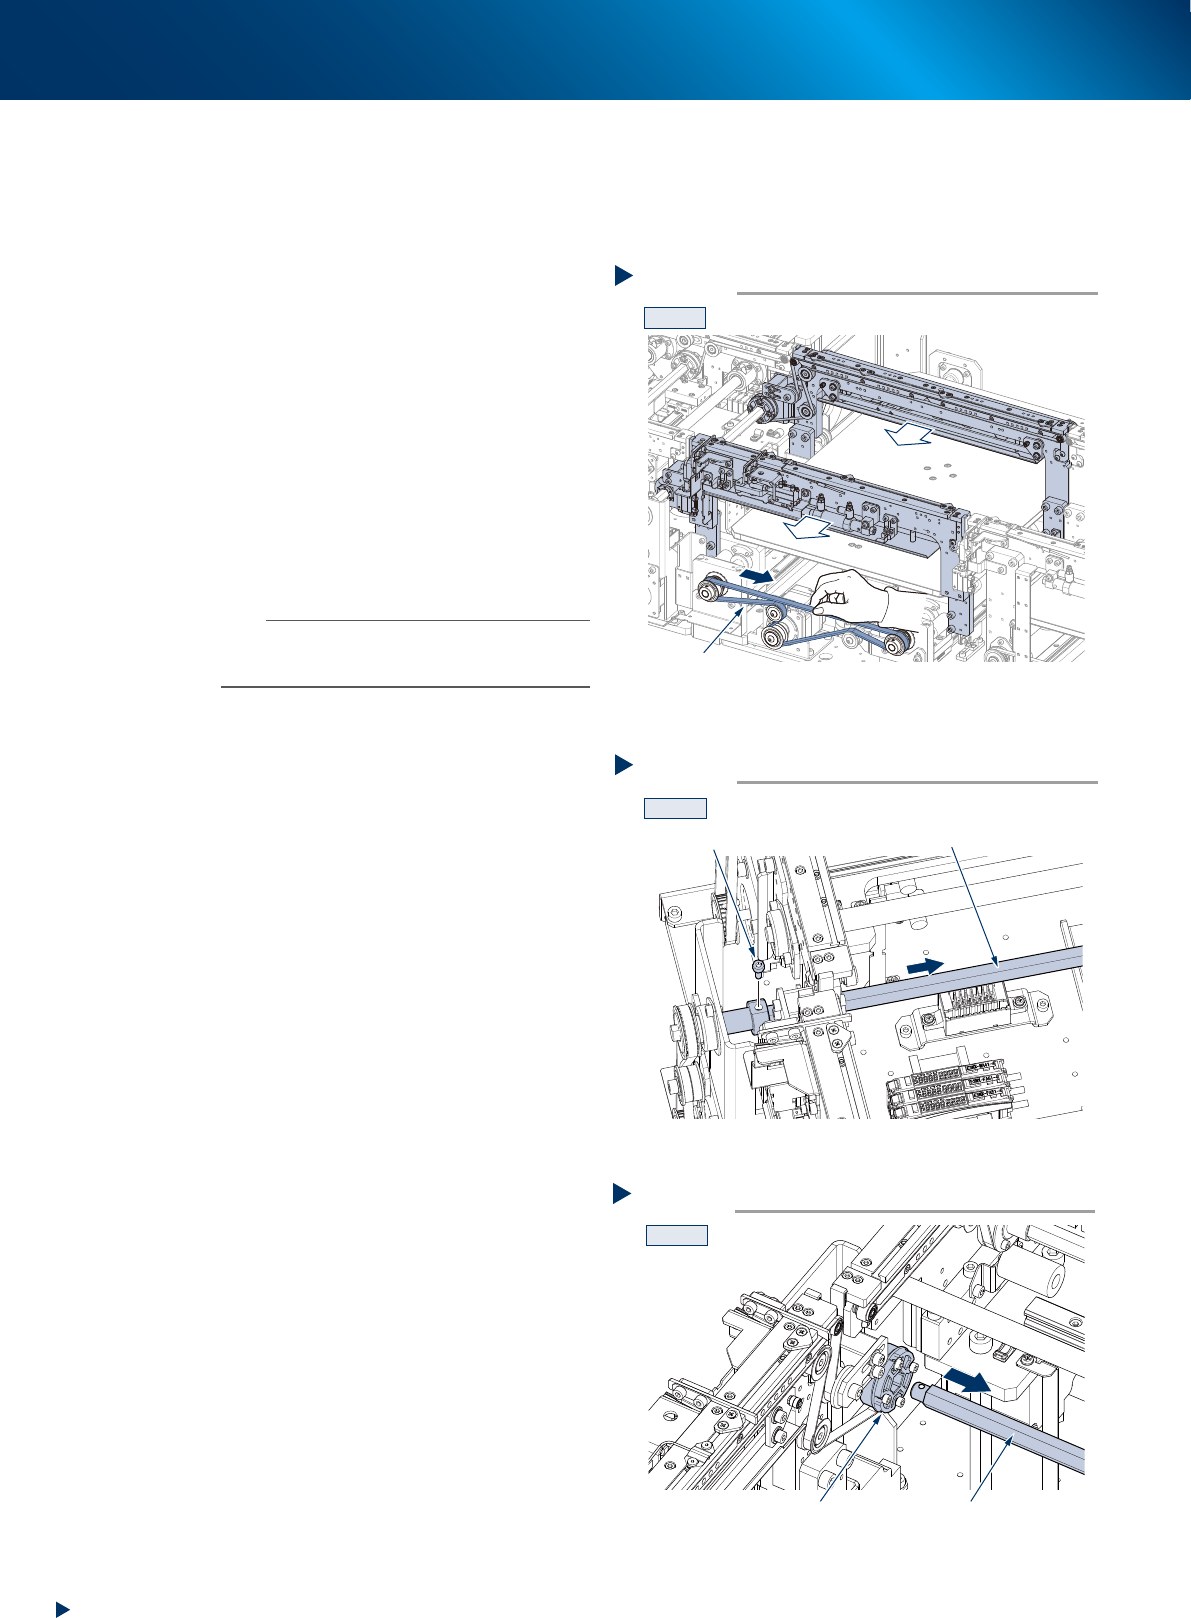
Move the conveyor U-axis.
Whole the CV3 conveyor can be moved by
running the U-axis belt manually. Run the U-axis
belt to the arrow direction shown at right to
move the CV3 conveyor to frontmost.
6
Detach the shaft by removing the shaft
mounting bolt (see the figure of Step 4
for its position) using a hexagon wrench
(3).
7
Pull out the shaft from the belt drive
pulley until they are completely pulled
out.
n
NOTE
The belt drive pulley may come off upon pulling out the
shaft, so that hold the pulley by hand while pulling out the
shaft.
Step 5
U-axis
CV3
Moving the coneyor U-axis
53520-KMX-10
Step 6
CV3
Detaching the shaft
Shaft
Bolt
53521-KMX-10
Step 7
CV3
Belt drive pulley Shaft
Pulling out the shaft from the belt drive pulley
53522-KMX-10
4. Conveyor unit
5-9
Chapter 5 How to replace consumable parts
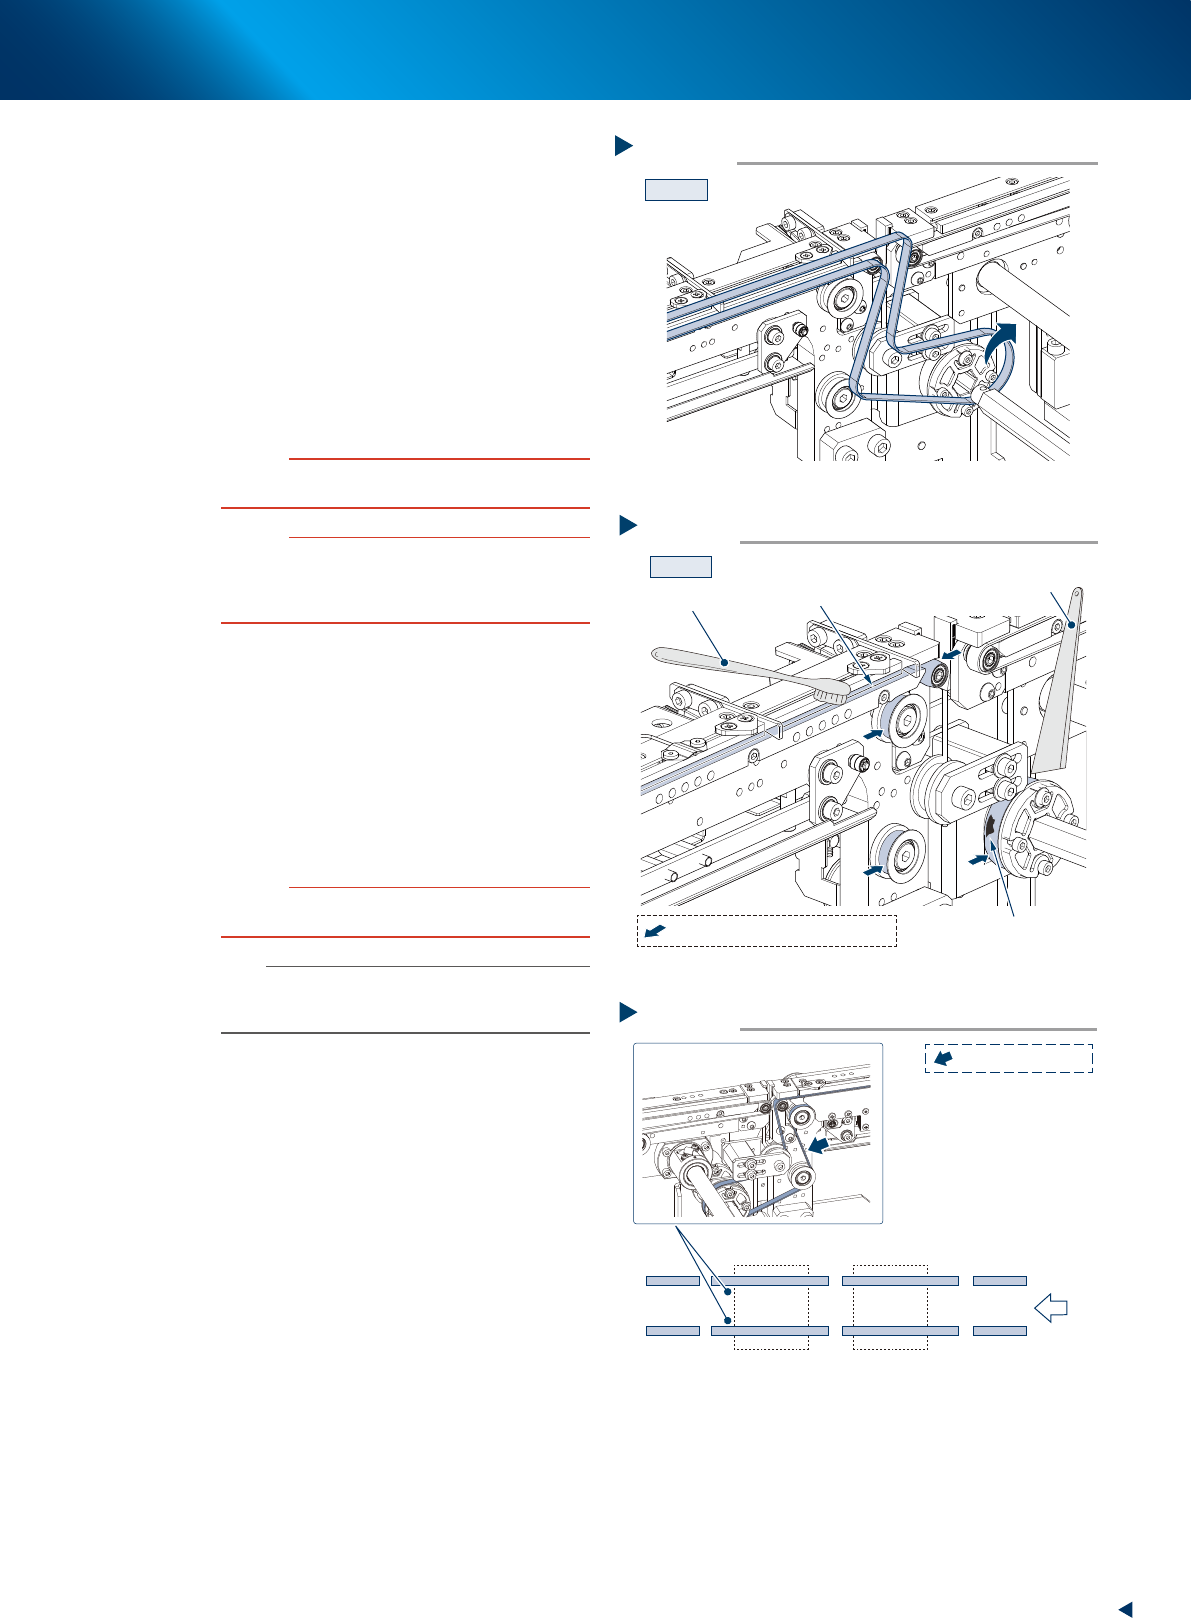
8
Detach the conveyor belt from the
conveyor by passing it through the gap
between the shaft and pulley.
9
Clean the belt guide section and pulleys.
1. Use a vacuum assembly (option) to suction
the belt wear debris on the belt guides and
sensors, etc.
2. Use a plastic spatula or similar tool to
remove the belt wear debris adhering to the
outer peripheral surface of the pulleys.
3. Use a brush or similar tool to remove the
belt wear debris caught in the belt guides.
c
CAUTION
Use a plastic spatula and brush to avoid scratching the
pulleys and guides.
c
CAUTION
Do not use a solvent (IPA, etc.) unless the guides and
pulleys are excessively dirty. If using ethanol, be careful
not to spill the ethanol on the bearing in the pulleys during
cleaning.
0
Replace the conveyor belt.
1. Temporarily place the new belt on the pulley.
2. Insert the shaft to the belt drive pulley.
3. Fix the shaft by tightening the mounting bolt.
4. Move the bracket to the marked position in
Step 4 and attach the mounting bolt.
5. When there is a slack in the belt, adjust the
position of the bracket to apply proper
tension.
c
CAUTION
The tightening torque for the bracket mounting bolt is 3.8
N
•
m. Be careful not to overtighten.
n
NOTE
The tension measuring position and the specified conveyor
belt tension of CV3-axis is shown in the right figure. Use a
tension gauge to adjust the belt tension as needed.
q
Return the conveyor U-axis to original
position by moving it manually to the
reverse direction of Step 5, aligning the
CV3 conveyor position with those of
CV2 and CV4 conveyors.
Step 8
CV3
Detaching the conveyor belt
53523-KMX-10
Step 9
CV3
Cleaning the belt guide section and pulleys
Plastic spatula
Belt guide section
Adherence of belt wear debris
Brush
:Outer peripheral surface of pulley
53526-KMX-10
Step 10
Tension specified value: 400 - 450 Hz
CV1CV2CV3CV4
Tension measuring position and specified tension
Transfer
direction
: Measuring position
53527-KMX-10
4. Conveyor unit
5-10
Chapter 5 How to replace consumable parts
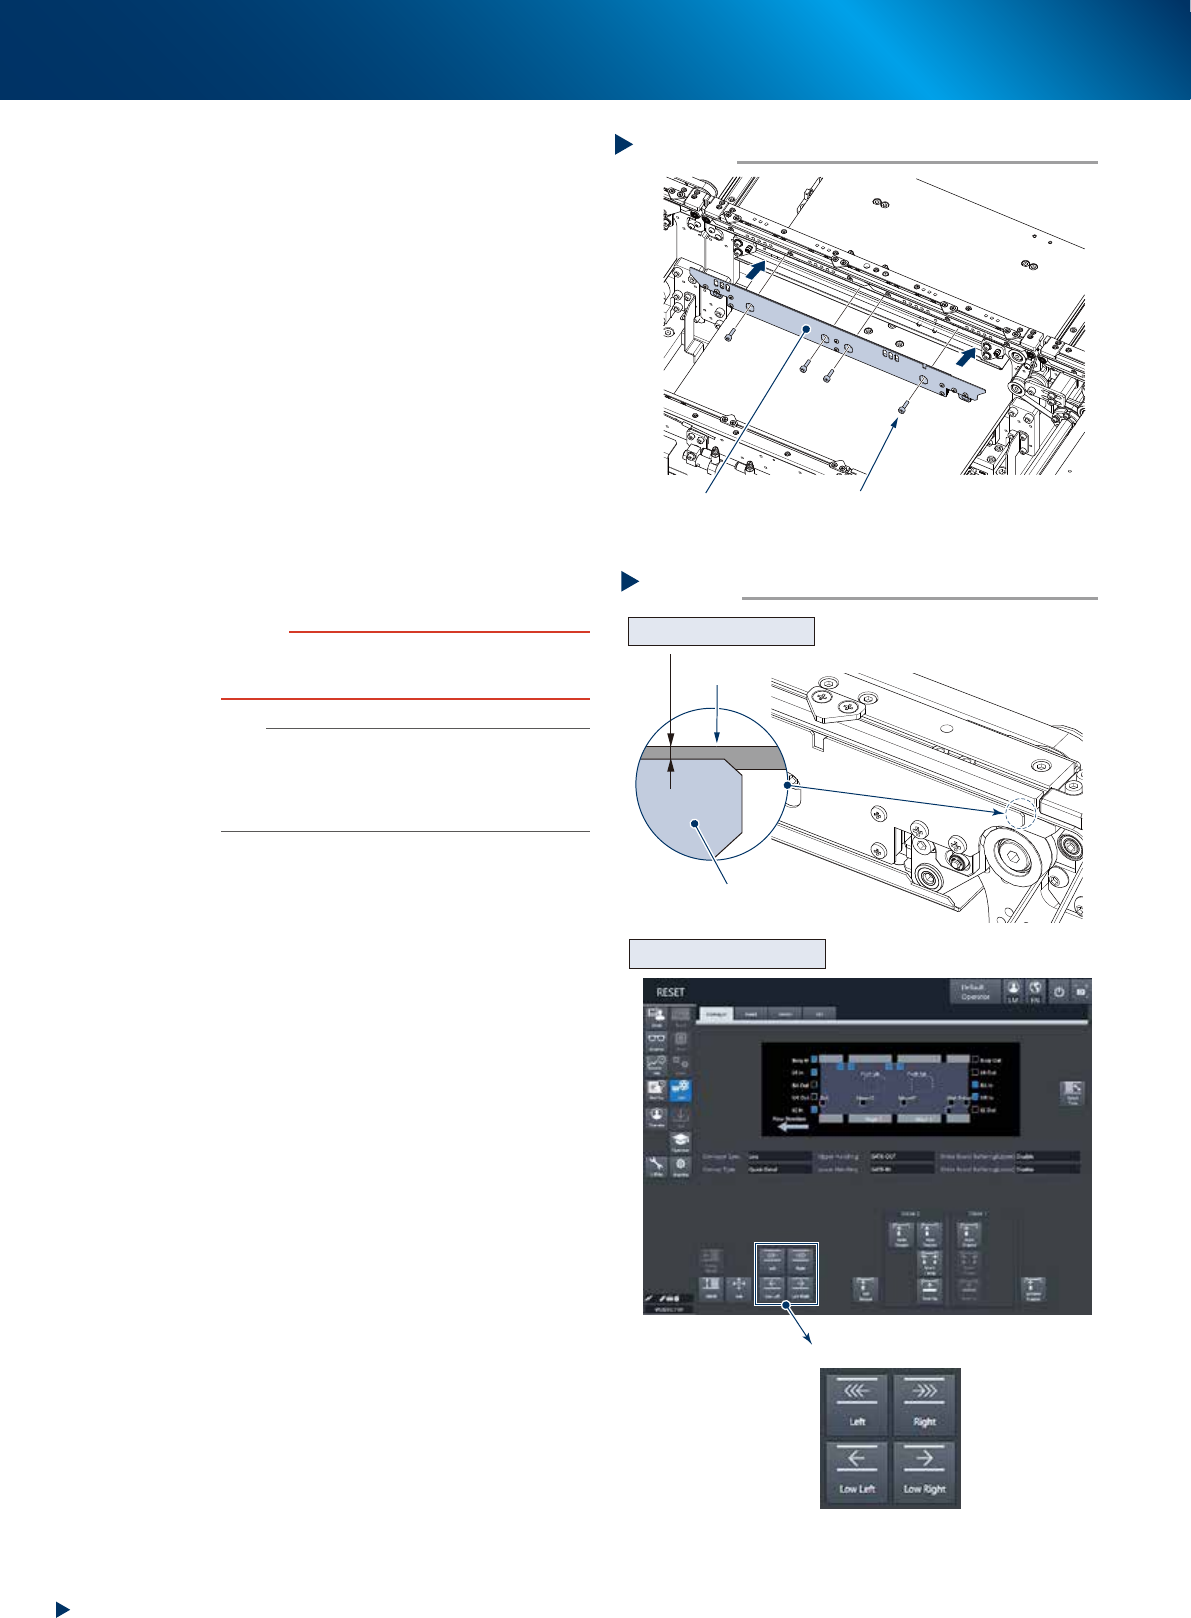
w
Attach the board clamp plate.
1. Attach the board clamp to its original
position. Mount it by tightening the bolts
using a hexagon wrench (3).
2. Retrieve a square cloth.
e
Check that the conveyor belt is attached
correctly.
1. Check that the upper surface of board clamp
is in a position at approx. 0.5mm lower
than that of the belt.
2. Attach the upper cover and close the
machine safety cover. Then attach the feeder
exchange carriage and release the
emergency stop.
3. Press the [Conveyor drive] button on the
[Unit] - [Conveyor] screen to run the
conveyor belt and check its motion.
4. When the conveyor belt does not run evenly
or there is a slack in the belt, adjust again
the position of the bracket.
c
CAUTION
When the upper surfaces of belt and board clamp are
almost even, the board transfer error may occur. Contact
your sales representative as such occasion.
n
NOTE
When the U-axis was moved manually, an error may
occur while changing the conveyor width after work.
In such case, perform the conveyor sensor tuning referring
to "2.3.1 Check the conveyor sensor and its operation"
in Chapter 3.
Attaching the board clamp plate
Step 12
Board clamp plate 4 mounting bolts
53528-KMX-00
Checking the attached conveyor belt
Step 13
[Conveyor drive] button
Checking the attached status
Checking the conveyor motion
0.5 mm
Board clamp plate
Belt
54502-KMX-00