YRM20_Mainte_E.pdf - 第82页
2. Monthly maintenance items 3-15 Chapter 3 Periodic maintenance items 7 Perform aging o per ation. 1. Retrieve a square cloth. 2. Close the machi ne safety cover and attach the feeder exchange carriage, t hen release th…
2. Monthly maintenance items
3-14
Chapter 3 Periodic maintenance items
2.2 Y-axis
This section describes the inspection, cleaning, and lubrication procedures for Y-axis. For details on the
lubrication points and schedule, see "Chapter 4 Lubricating points".
2.2.1 Cleaning/Lubricating Y-axis guides, Cleaning linear scale
1
Prepare for work.
e
1. Remove all items sensitive to magnetic fields
such as wristwatches and magnetic ID cards.
2. Press the emergency stop button and detach
the feeder exchange carriage, then open the
machine safety cover.
3. Place a square cloth on push-up plate.
2
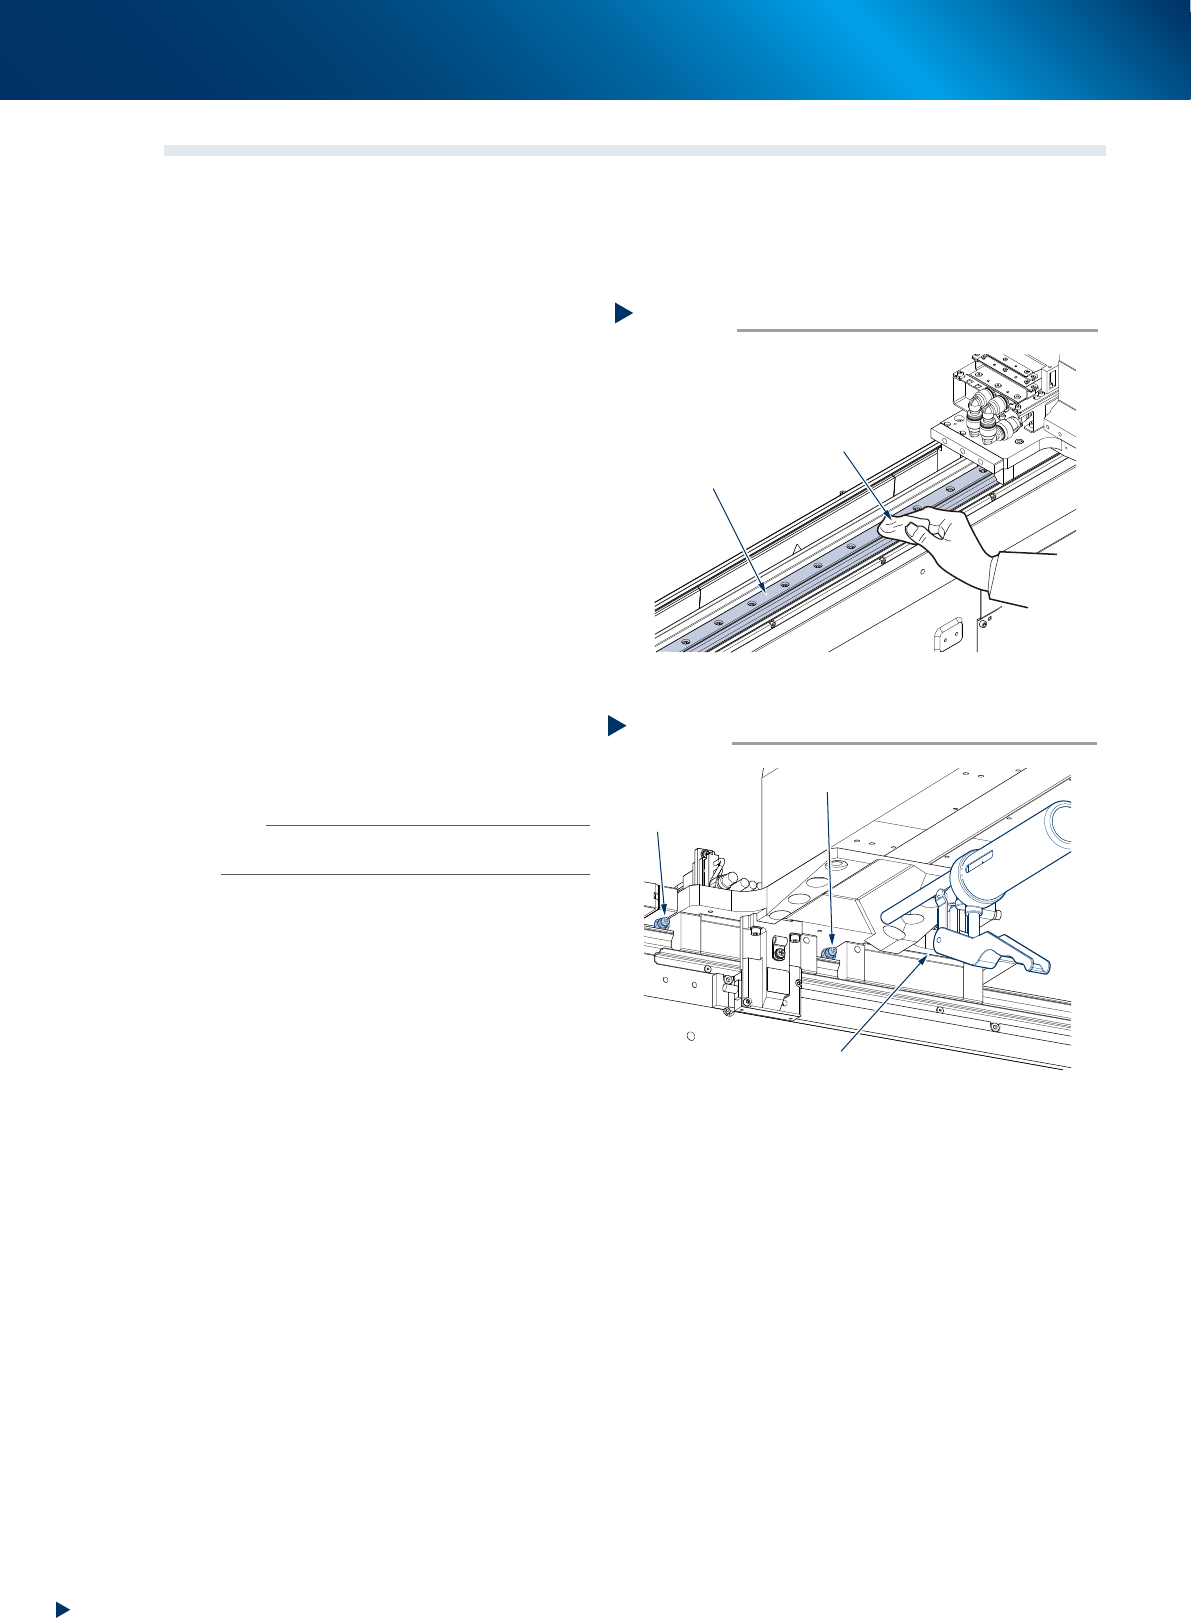
Clean the guide.
1. Move the head unit to rearmost.
2. Wipe the entire guide using a lint-free cloth.
3. Move the head unit to front and wipe the
area not yet cleaned at 2.
3
Inject specified grease (NSL) using a
grease gun (standard type nozzle) at
grease nipple of Y-axis guide (4 per 1
table).
4
Spread grease by moving the head back
and forth several times manually.
n
NOTE
The grease injected into the grease nipples comes out in
the guides as the head moves.
5
Wipe off excess grease that has piled at
both ends of the guides.
6
Apply grease again by repeating Step 3
to 5 two more times. Then visually
check that the grease is evenly applied
over the guides.
Cleaning the guide
Step 2
Lint-free cloth
Guide
53326-KMX-00
Applying grease
Step 3
Grease gun (standard type)
Grease nipple
Grease nipple
53327-KMX-00
2. Monthly maintenance items
3-15
Chapter 3 Periodic maintenance items
7
Perform aging operation.
1. Retrieve a square cloth.
2. Close the machine safety cover and attach
the feeder exchange carriage, then release
the emergency stop.
3. Open the Warm-up screen, and perform
aging operation for about 8 minutes.
8
e
Check the grease condition.
1. After the aging operation stops, press the
emergency stop button and detach the
feeder exchange carriate, then open the
machine safety cover.
2. Wipe off grease which has piled on the
guide and the guide end face.
c
CAUTION
Repeat Steps 7 and 8 until grease piling no longer occur.
Beginning production with grease piling remains could
cause the grease to spatter.
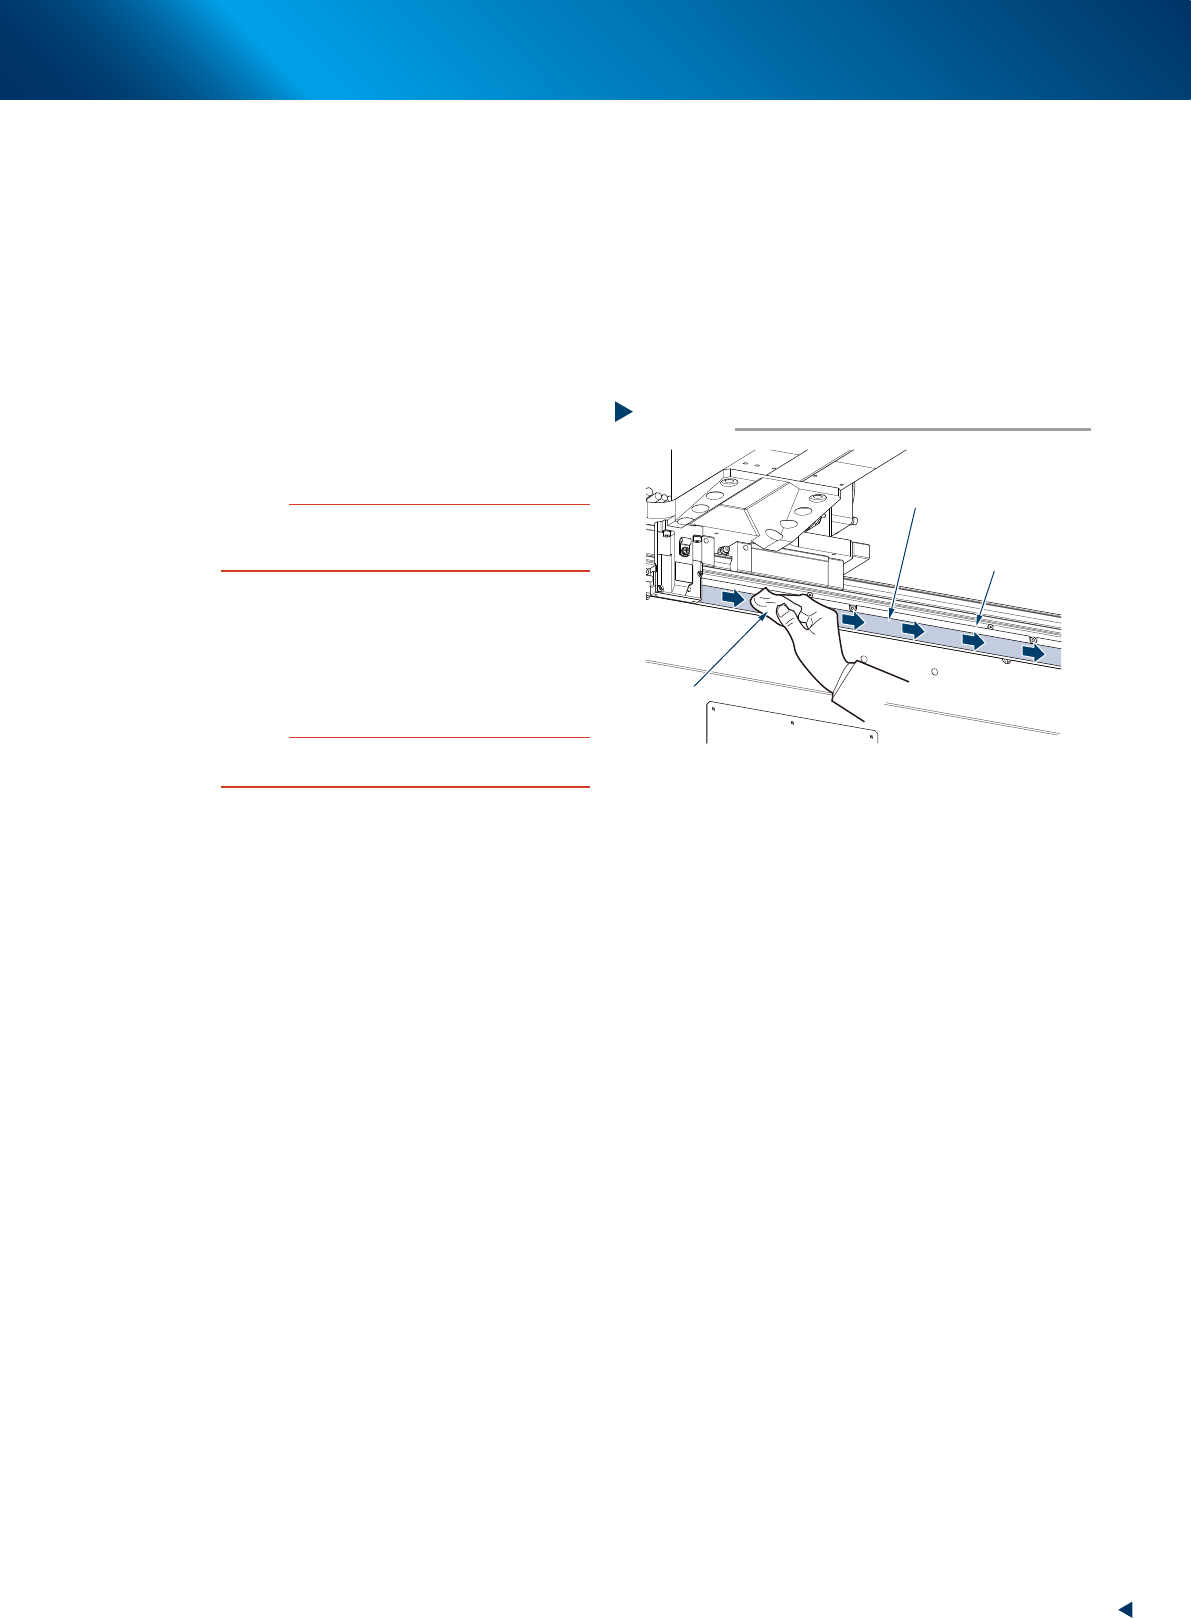
9
Clean linear scale using a lint-free cloth
to dry-wipe.
If significant dirt exists, wipe it in one direction
with a lint-free cloth applied a few drops of
ethanol, then dry-wipe the area.
c
CAUTION
When cleaning the linear scale, use care to avoid rubbing
it with excessive force.
Cleaning the linear scale
Step 9
Lint-free cloth
Linear scale
Wipe in a constant direction
(upon using IPA)
53328-KMX-00
2. Monthly maintenance items
3-16
Chapter 3 Periodic maintenance items
2.3 Conveyor unit
2.3.1 Check the conveyor sensor and its operation
The YRM20 is installed transmission type sensors as conveyor sensor.
The beam receiving condition of sensor varies depending the distance between the beam emitter and receiver
upon changing the conveyor width.
Upon changing the conveyor rail width, the Conveyor Sensor Tuning function is actuated to rewrite the sensor
threshold value automatically by remembering the changing receiving condition of sensor. It is required to be
checked periodically if it operates correctly.
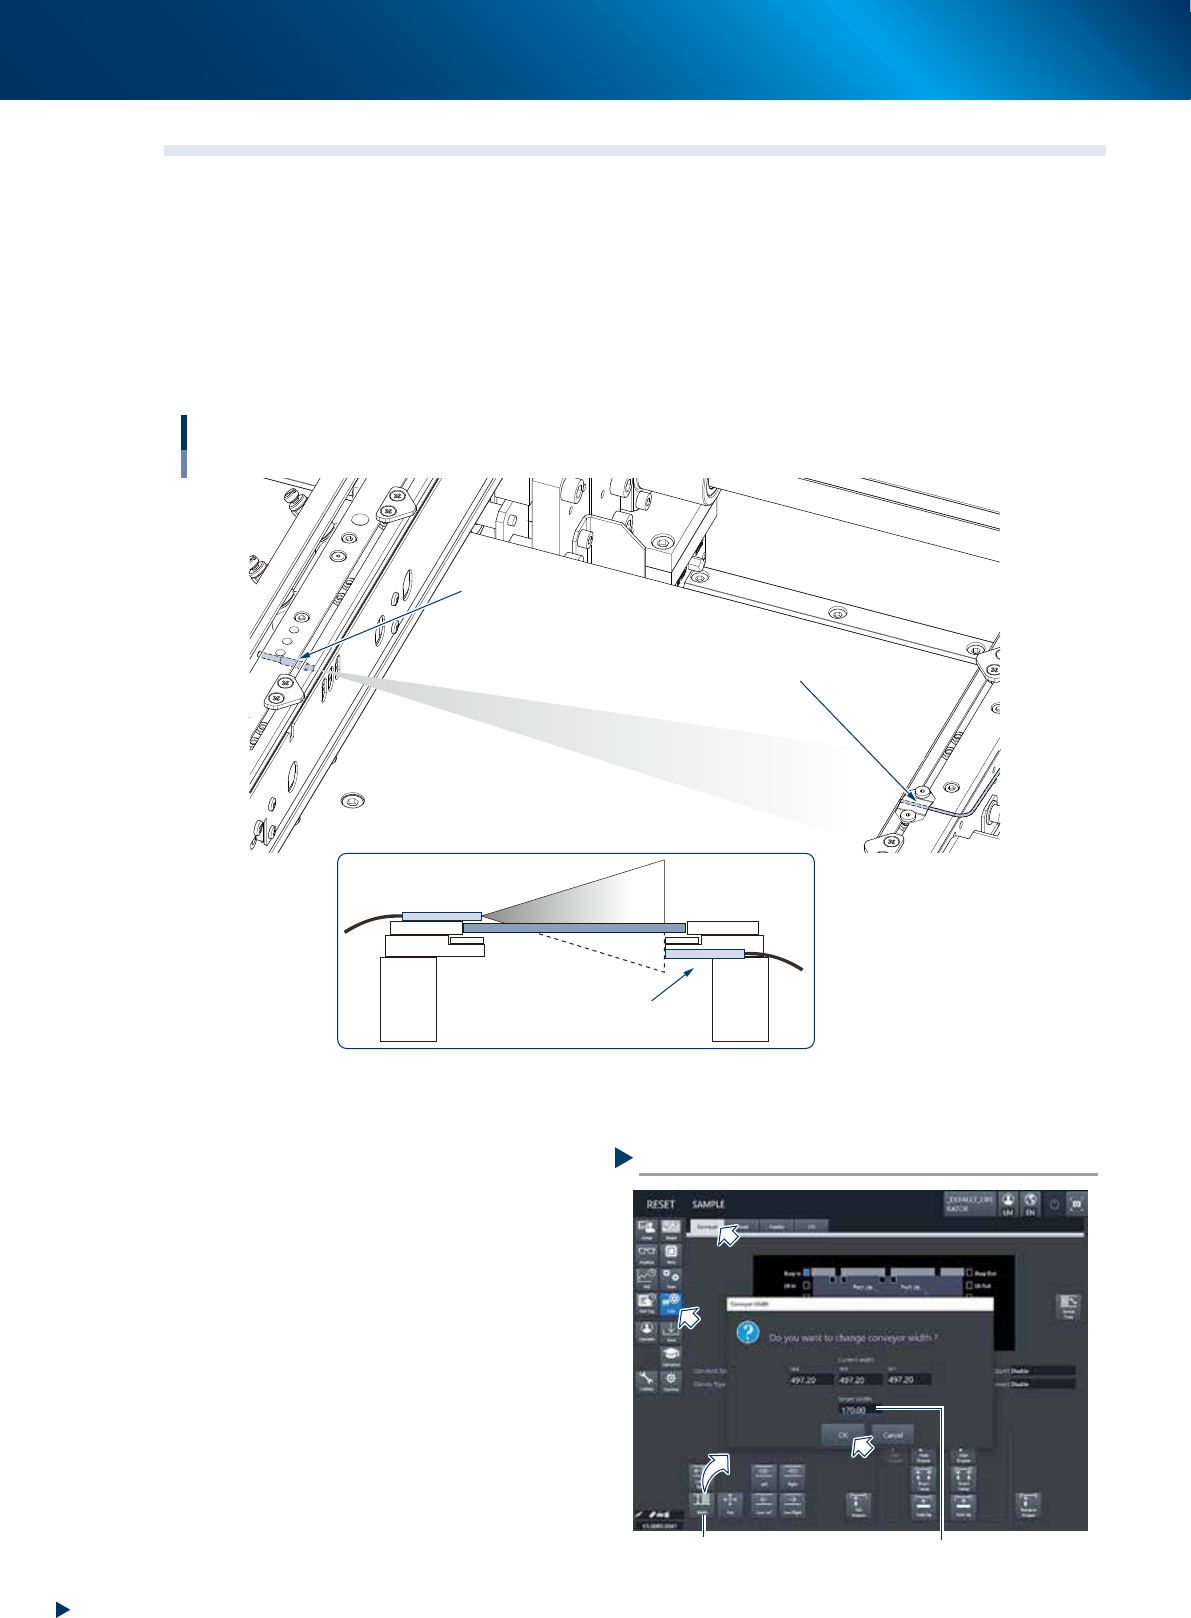
Operating image
Projector
Receiver
Checking the conveyor sensor and its operation
Beam emitting sensor
Bean receiving sensor
53329-KMK-10
►
Checking operation
1
Prepare for work by checking that there
are no board on the coneyor nor pushup
pins at the conveyor motion range.
2
Change the conveyor width.
1. Open the [Unit] - [Conveyor] screen and
press the [Width] button.
2. Conveyor width change screen appears,
then input any conveyor width and press the
[OK] button.
3
Check the message.
After changing the conveyor width, as long as
the Conveyor Sensor Tuning function actuates
normally, no error message appears.
Here finishes the operation.
Checking the conveyor sensor
Input any conveyor width[Width] button
54301-KMX-00