YRM20_Mainte_E.pdf - 第86页
2. Monthly maintenance items 3-19 Chapter 3 Periodic maintenance items 2.4.1 Inspecting and replacing the air filters T he filters should generally be inspected every month, although this depends on the supply air condit…
2. Monthly maintenance items
3-18
Chapter 3 Periodic maintenance items
2.4 RM head unit
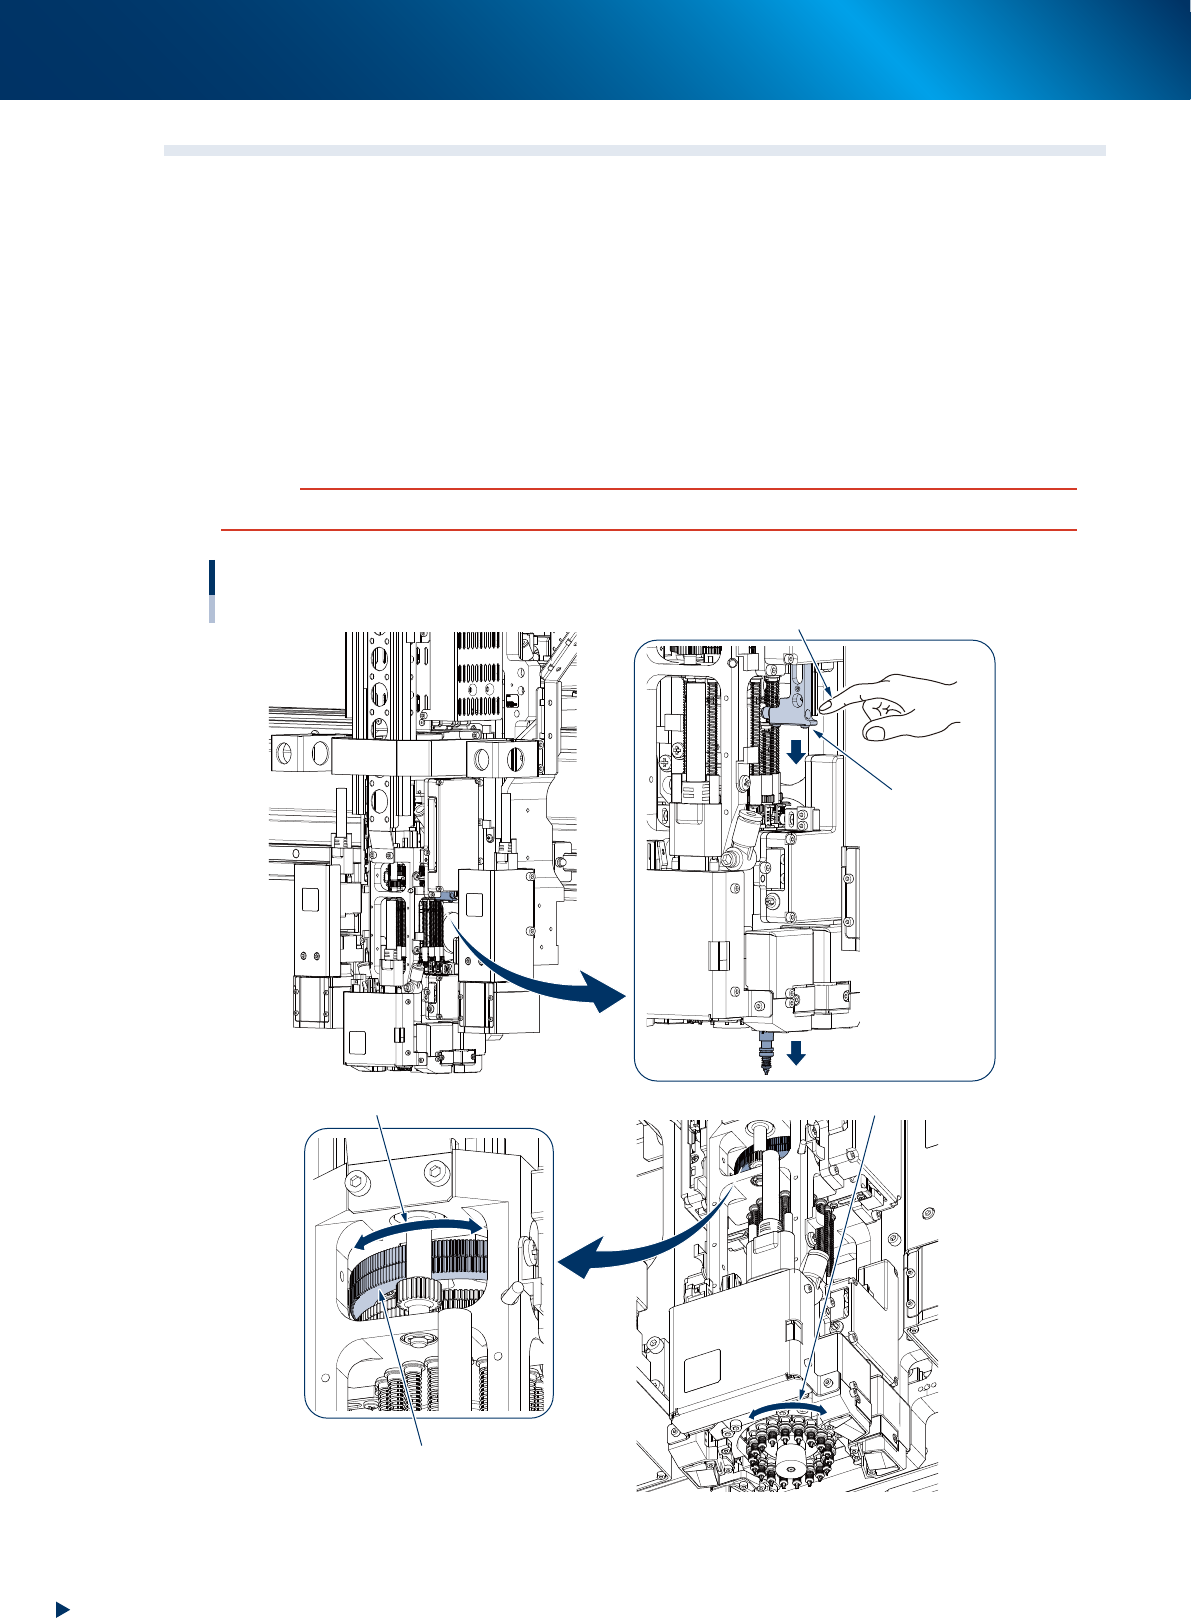
Lowering RM head/nozzle shafts
Maintenance of the RM head requires lowering the nozzle shafts manually in sequence as for example in
"2.4.1 Inspecting and replacing the air filters" and "3.2.1 Inspecting/cleaning nozzle shaft tip".
Here describes the lowering procedure of RM head nozzle shaft.
1
Press down Z-axis of RM head.
Z-axes units are installed on both sides of RM head unit to lower the nozzle shaft.
2
Change the nozzle shaft to be lowered.
Move any nozzle shaft to beneath Z-axis by turning the N-axis gear to rotate the rotary.
c
CAUTION
Make sure that all nozzle shafts have returned to upper end after having lowered the nozzle shafts manually.
Lowering RM head nozzle shaft
1
2
Z-axis of RM head
*installed on
both sides
Press down Z-axis and
lower the nozzle shaft.
Nozzle shaft is lowered
N-axis gear
Turn N-axis gear and rotate the rotary.
The rotary rotates according to N-axis gear
533H4-KMX-00
2. Monthly maintenance items
3-19
Chapter 3 Periodic maintenance items
2.4.1 Inspecting and replacing the air filters
The filters should generally be inspected every month, although this depends on the supply air condition and
the operating time. The filters for the RM head cannot be reused. Replace the filters if contaminated.
Note that using filter insertion tool is convenient to replace multiple filters at once. The following describes
how to replace filters with the tool.
TIP
See "RM head" of "How to check for clogged nozzles (on the [Unit]-[Head] tab screen)" in chapter 2 to check vacuum
level after replacing filters. If it cannot reach normal level, perform "8.1 Cleaning inside of nozzle shaft on RM head unit".
1
Prepare for work.
e
1. Remove all items sensitive to magnetic fields
such as wristwatches and magnetic ID cards.
2. Return all nozzles (if the machine is installed
nozzle station).
3. Press the emergency stop button and detach
feeder exchange carriage.
4. Open the machine safety cover and move
the head unit frontward.
5. Place a square cloth under the head unit.
n
NOTE
When the nozzle station is not installed, remove all the
nozzles by hand.
2
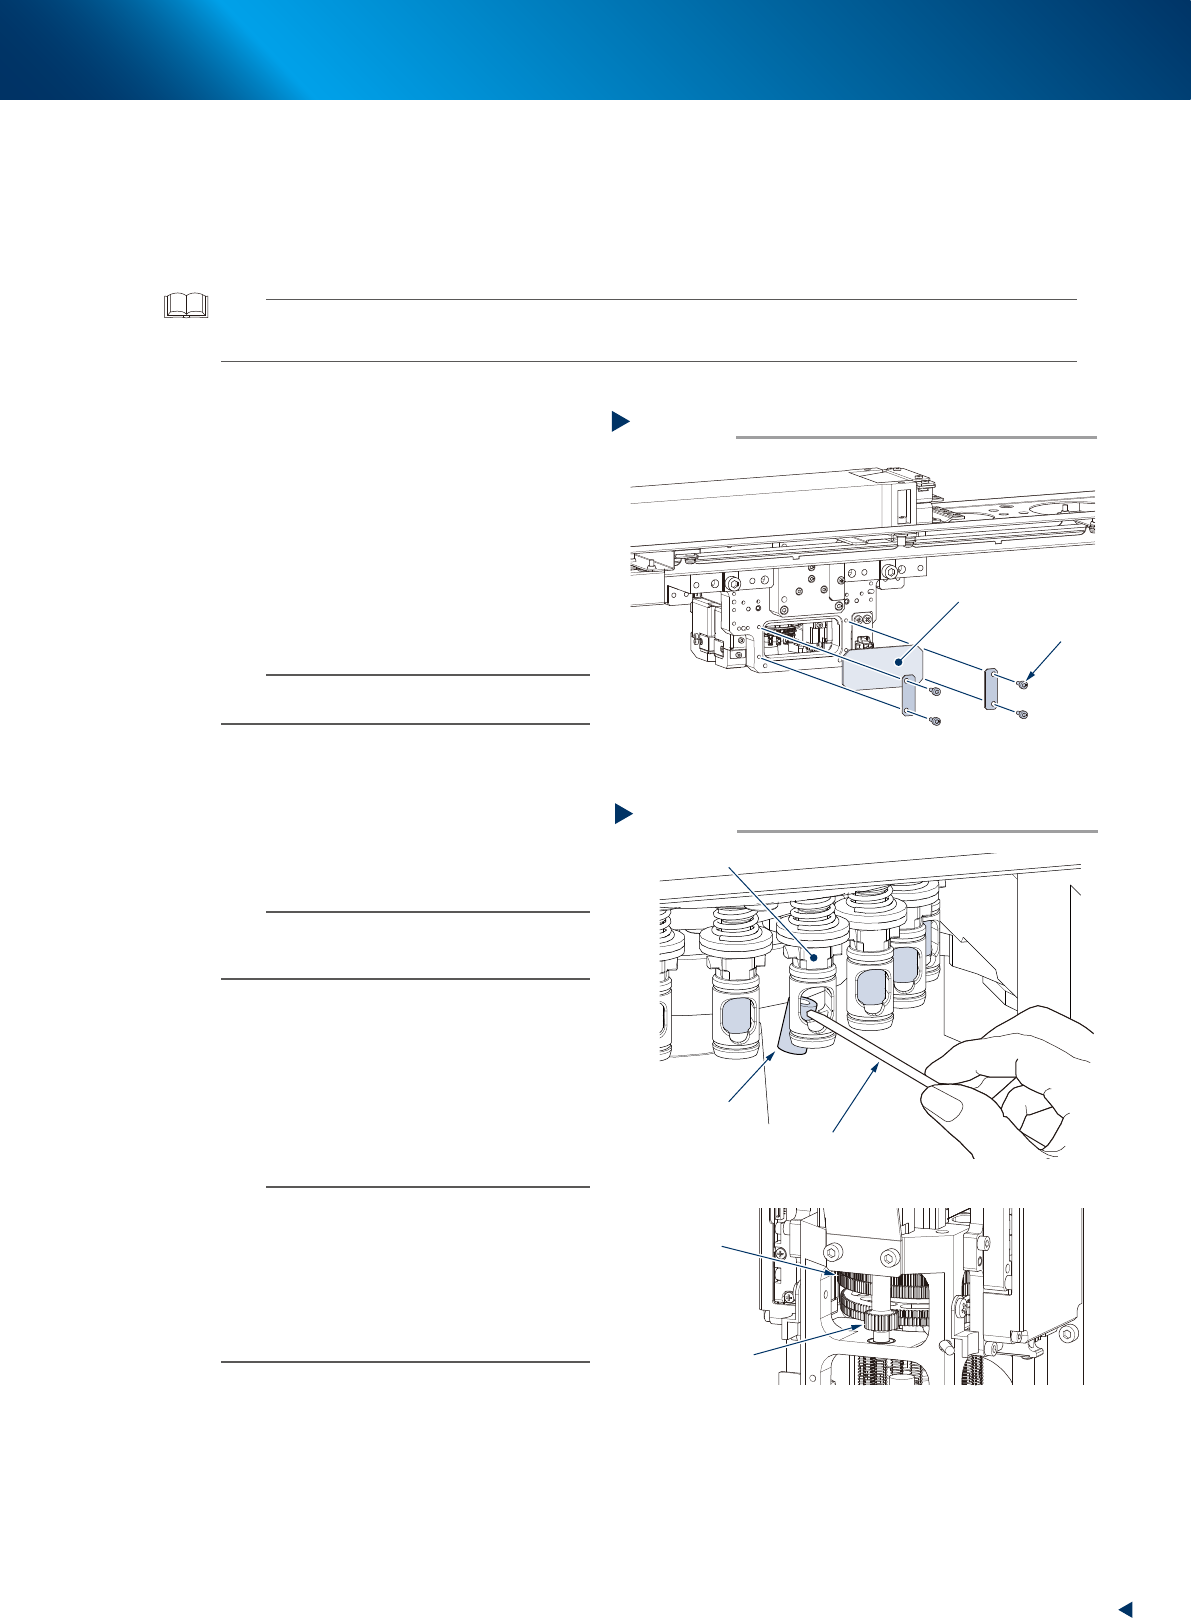
Check the filter codition.
1. Remove 4 bolts on the acrylic board
mounted at the reverse side of head using a
hexagon wrench.
2. Check the filter visually through the window-
like opening.
n
NOTE
The RM head nozzle shaft can be rotated by rotating the
R-axis gear by hand. When rotating the entire holder is
required, rotate the N-axis gear by hand.
3
Detach the filter.
1. As shown in the figure at right, push out the
filter from the end of nozzle shaft using a
flat-head precision screwdriver.
2. Turn the N-axis gear by hand to rotate the
rotary and detach the filters on the opposite
side.
n
NOTE
The filters for the RM head cannot be reused once they
are detached.
As a general guide, the filters should be replaced once
every month, although this depends on the operating time
of the machine. Periodic filter replacement is
recommended.
The filter for RM head:
• 20-pack (KMB-M3856-00X)
• 1000-pack (KMB-M3857-01X)
Removing acrylic board
Step2
Bolt
Acrylic board
53337-KMX-00
Removing filters
Step 3
Precision screwdriver
Front side of head
Filter
Turn N-axis gear
to rotate the rotary
Turn R-axis gear
to rotate the nozzle
shaft
Nozzle shaft
53338-KMX-00
2. Monthly maintenance items
3-20
Chapter 3 Periodic maintenance items
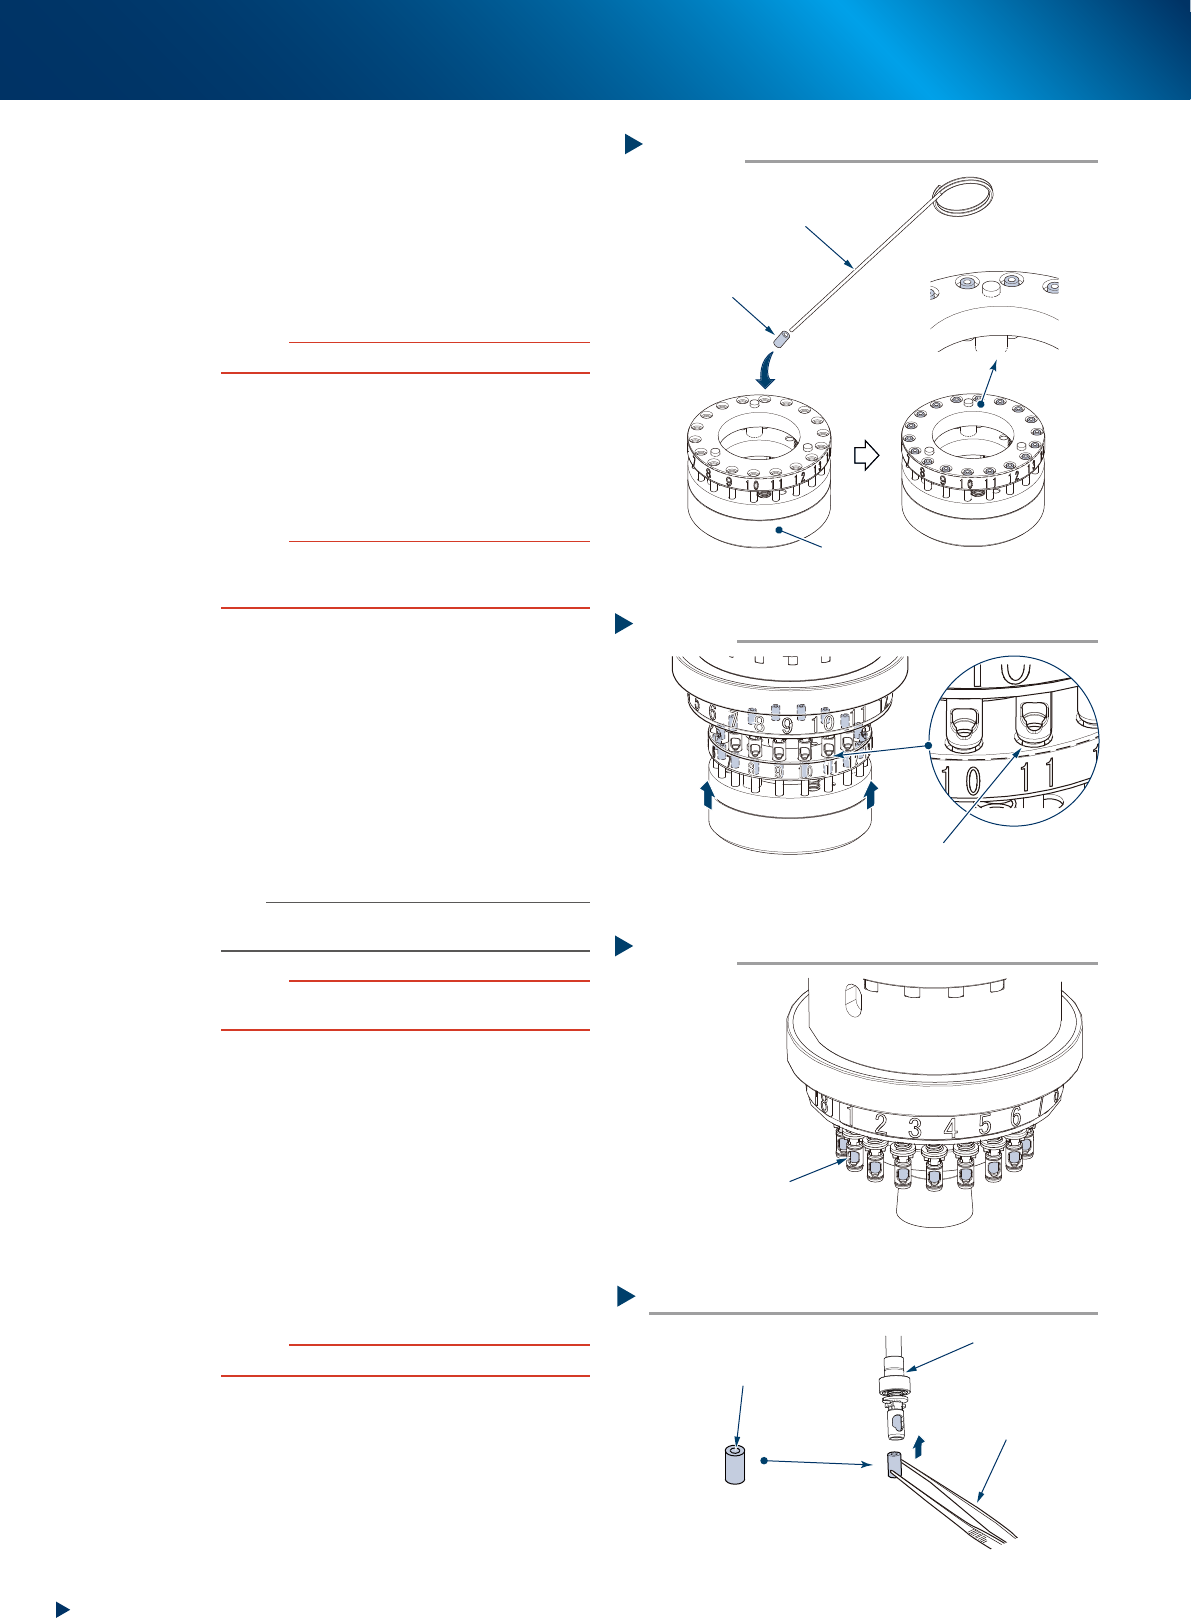
4
Set new filter into hole of filter insertion
tool.
1. Insert needle pierce into hole of filter.
2. Insert filter deeply into hole of tool. At this
time, be careful not to deform the filter, and
also to align the hole number with the
number of shaft which filter is to be
replaced.
c
CAUTION
Make sure to set the filter facing up the hole side.
5
Insert tool into shafts.
1. Align the tool hole number with the number
of shaft which filter is to be replaced.
2. Push up the tool completely to arrows'
direction as shown on the right.
c
CAUTION
Make sure to push up the tool completely. If pushing up
the tool incompletely or insertion position is deviated,
filters get deformed.
6
Check that filters are surely inserted
into shafts after detaching the tool.
7
Attach the acrylic board removed in
Step 2 to its original position.
8
Return nozzles to original positions if
nozzles are detached manually.
1. Return nozzles to original positions.
2. Retrieve the square cloth.
n
NOTE
Make sure to return the nozzle to the head from which the
nozzle is detached.
c
CAUTION
Make sure to return all nozzle shafts to the original
position after lowered nozzle shafts manually.
►
Replacing filter without filter insertion tool
Insert filters into shaft using a tweezers,
and push them to the end of shaft with tips
of tweezers.
c
CAUTION
Make sure not to deform filter or damage to shaft.
Setting filters
Step 4
Filter
Needle pierce
Example: Replacing filters for all heads
Filter insertion tool
Filters-are-set status
533F7-KMX-00
Inserting tool
Step 5
Push up tool aligning numbers
Check that shaft tip and
tool hole are aligned
533F8-KMX-00
Checking filter insertion condition
Step 6
Check that filters are
surely inserted
533F9-KMX-00
Inserting filters
Nozzle shaft
Check the filter direction
Tweezers
Hole side must face up
53339-KMX-00