YSM40R_Mainte_E.pdf - 第114页
3-44 3 Periodic maintenance items 3.3.2 Cleaning and lubricating the spline shaft and ball screw As a general guide, the spline shaft and ball screw for the FL head should be cleaned and lubricated once every 3 months. U…
3-43
3
Periodic maintenance items
3.3 FL head
3.3.1 Cleaning and replacing the air filter
The filters should generally be inspected about every 3 months, although this depends on the supply air
condition and the operating time. If the filter is contaminated slightly, it can be cleaned by using an air blow
tool. Replacing the filter is recommended when it can no longer be adequately cleaned by air blowing.
1
Prepare for work.
e
1. Remove all items sensitive to magnetic fields such as wristwatches and magnetic ID cards.
2. Press the emergency stop button to put the machine in emergency stop.
3. Use the CLAMP ON/OFF switch to lower the feeder exchange carriage and detach it.
4. Move the head unit to a position where easy to perform the task, and place a square cloth under
the head unit.
2
Loosen the filter mounting plate.
Use a Phillips screwdriver to loosen the
screws that hold the filter mounting plate.
3
Remove the filter cap.
The filter cap and filter can be removed
after the filter mounting plate has been
loosened and lowered.
Grip the filter cap and pull it out toward the
front of the head.
53341-N9-00
4
Clean the filter.
If the filter is only lightly soiled, it can be
cleaned by the air blow tool, and then
reused.
53342-N9-00
n
NOTE
If there are heavy dust deposits in the filter or the filter
has discolored, replace it with a new filter (KLF-M7156-
00X). As a general guide, the filters should be replaced
once every 3 months, although this depends on the
operating time of the machine. Regular filter
replacement is recommended.
5
Reattach the filter cap.
1. Reattach the filter cap to the filter and
return the filter to its original position.
2. Place the filter securing plate over the
filter and use a Phillips screwdriver to
secure it.
3. Remove square cloth after working.
c
CAUTION
Make sure that the filter caps are fully inserted before
tightening the screws to hold the filter mounting plate.
TIP
See "How to check for clogged nozzles (on the [Unit]-
[Head] tab screen)" in Chapter 2 to check vacuum
level after replacing filters. If it cannot reach normal
level, perform "5.1.1 Cleaning the spline shaft" in this
chapter.
Removing the filter cap
Step2,3
Filter
Filter cap
Filter mounting
plate
Lock
Release
Cleaning the filter
Step 4
Filter
Air blow tool

3-44
3
Periodic maintenance items
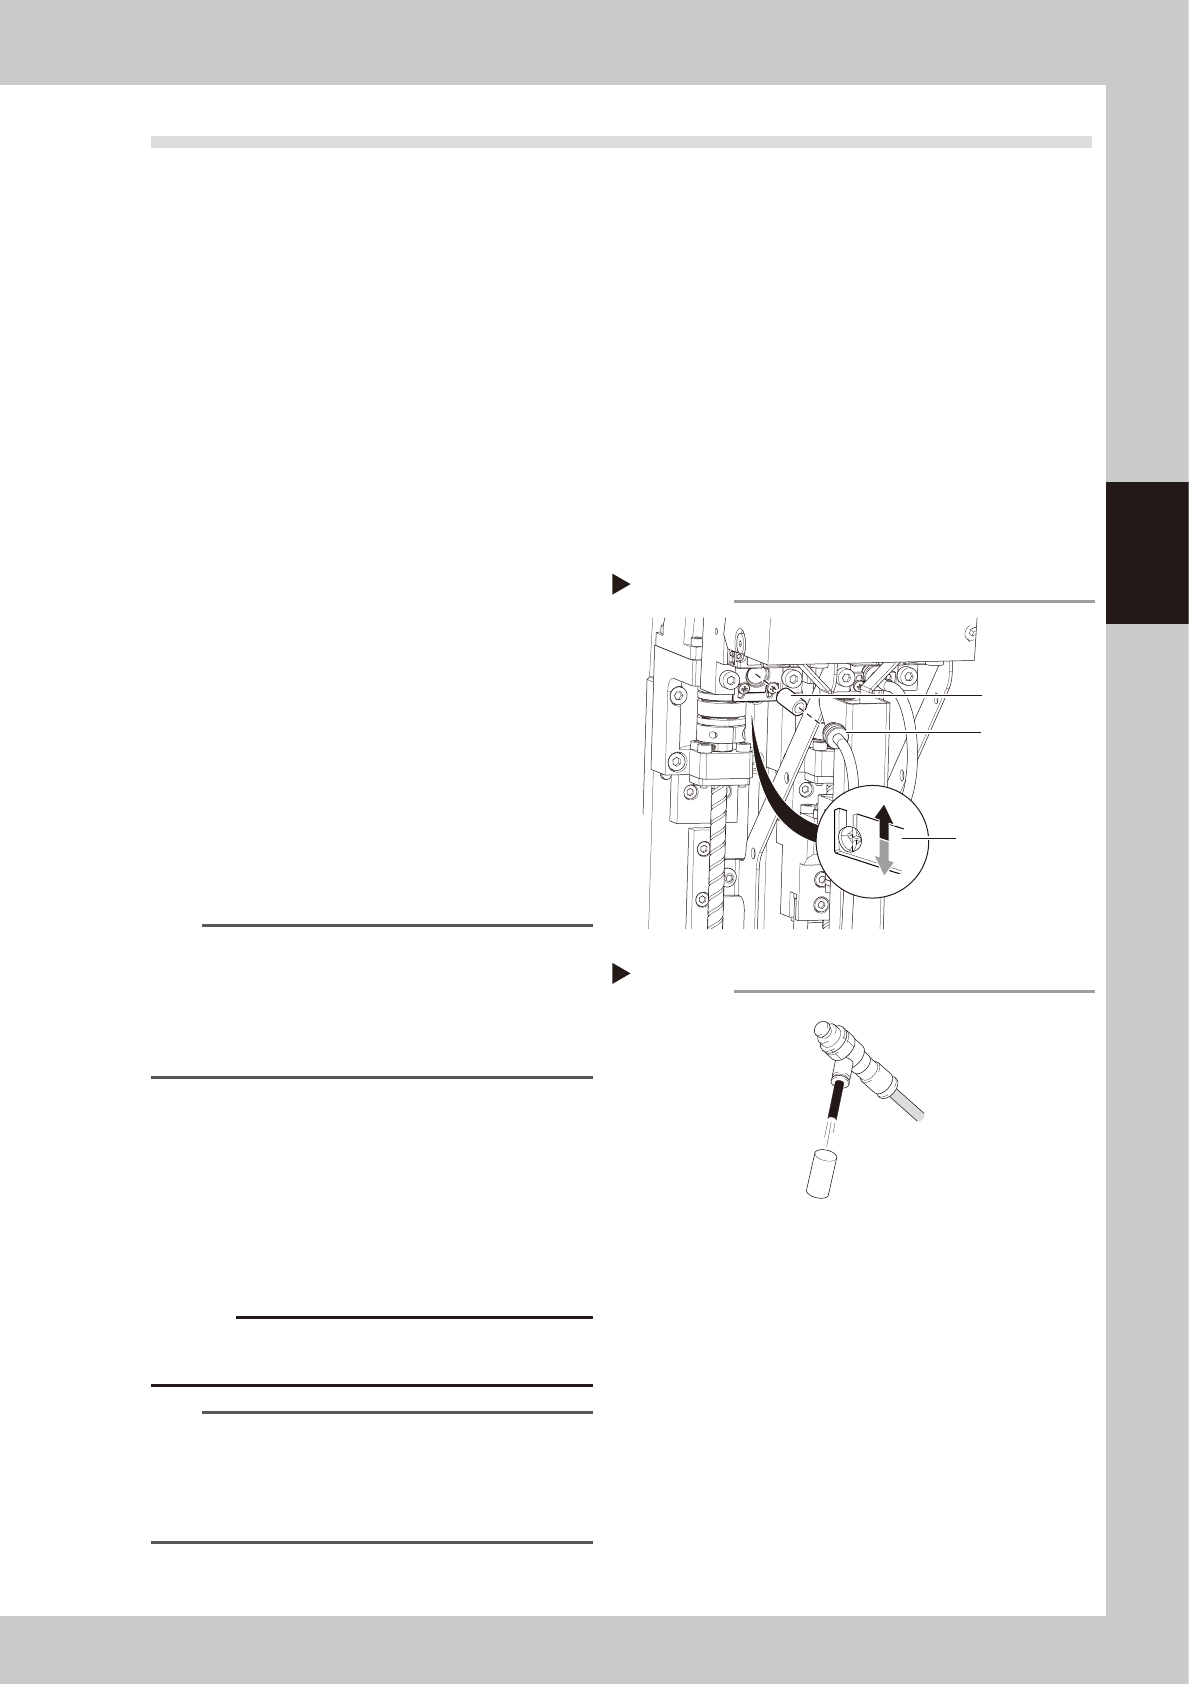
3.3.2 Cleaning and lubricating the spline shaft and ball screw
As a general guide, the spline shaft and ball screw for the FL head should be cleaned and lubricated once
every 3 months. Use the following procedure to clean and lubricate them.
1
Prepare for work.
e
1. Remove all items sensitive to magnetic fields such as wristwatches and magnetic ID cards.
2. Press the emergency stop button to put the machine in emergency stop.
3. Use the CLAMP ON/OFF switch to lower the feeder exchange carriage and detach it.
4. Move the head unit to a position where easy to perform the task, and place a square cloth under
the head unit.
2
Clean the spline shaft.
Use a lint-free cloth to wipe off the dust and
dirt on the spline shaft.
1. Clean the upper part of the shaft.
2. Lower the head manually and clean the
lower part of the shaft.
53343-N9-00
3
Apply grease to the shaft.
Apply a thin uniform coat of the specified
grease (NSL) by hand to the spline shaft.
4
Clean the ball screw.
Use a lint-free cloth to wipe off the dust and
debris on the ball screw.
1. Clean the lower part of the ball screw.
2. Lower the head manually and clean the
upper part of the ball screw.
53344-N9-00
5
Apply grease to the ball screw.
Apply a uniform coat of the specified grease
(NSL) by hand to the ball screw.
6
Wipe off excess grease.
1. Move the head up/down several times.
2. Wipe off the grease which has collected
at the upper and lower ends of the ball
screw and spline shaft (indicated by
circle in the figure at right).
3. Remove square cloth after working.
53345-N9-00
Cleaning the spline shaft
Step 2
Lint-free cloth
Cleaning the ball screw
Step 4
Lint-free
cloth
Wiping off the excess grease
Step 6
3-45
3
Periodic maintenance items
3.4 Base section and others
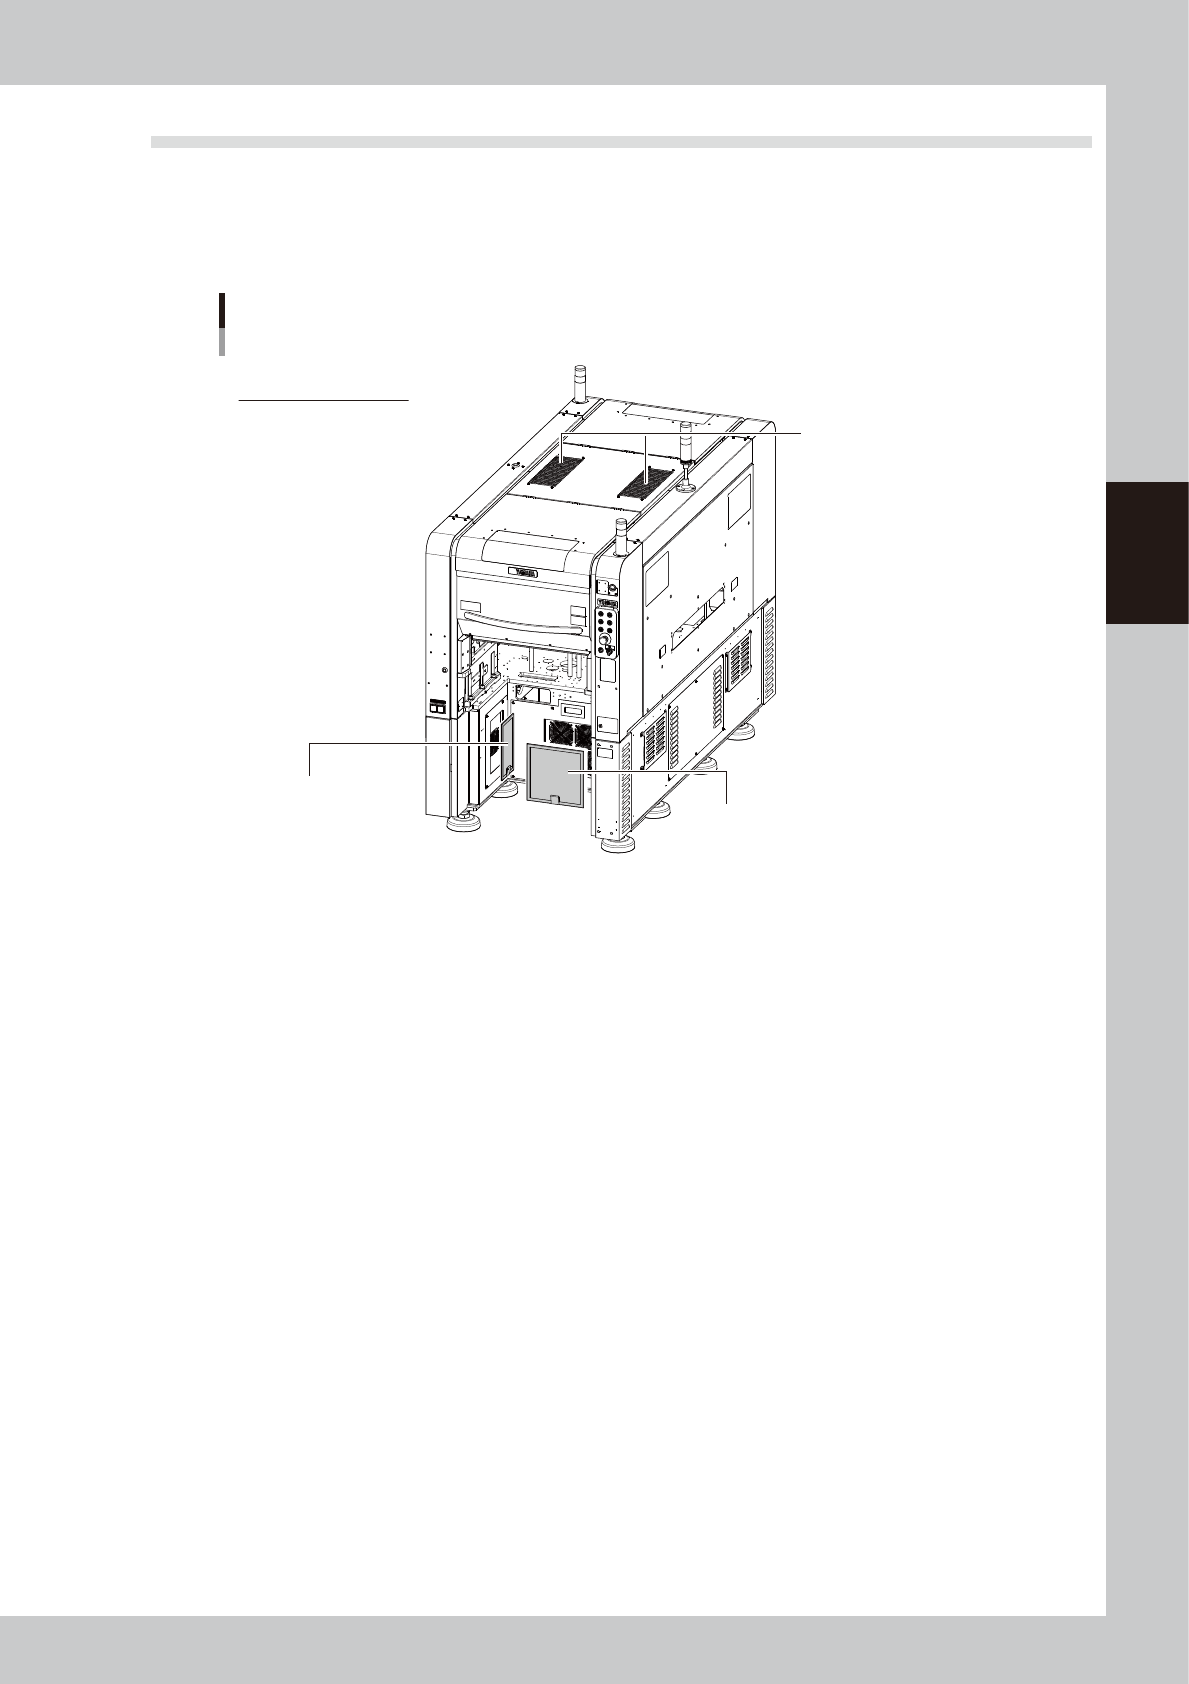
3.4.1 Cleaning the air intake fan filter
Neglecting to clean the intake fan filter can cause blockages and also cause a rise in the internal machine
temperature. Clean each filter regularly to maintain machine performance and ensure a long service life.
Filter attachment points
Rear side of machine
Rear base filter
Conveyor I/O board filter
Ceiling filters
53346-N9-00
There are 3 types of filters which are installed in the following 4 places.
Ceiling : 2 places in the center of the ceiling
Conveyor I/O board : 1 place on the left as viewed from the rear
Rear base : 1 place in the center on the rear