YSM40R_Mainte_E.pdf - 第119页
3-49 3 Periodic maintenance items 4. 6-month maintenance 4.1 Vision system Dust or dirt adhering to the vision system ma y cause mark recognition errors and parts recognition errors. Regular cleaning is recommended to pr…
3-48
3
Periodic maintenance items
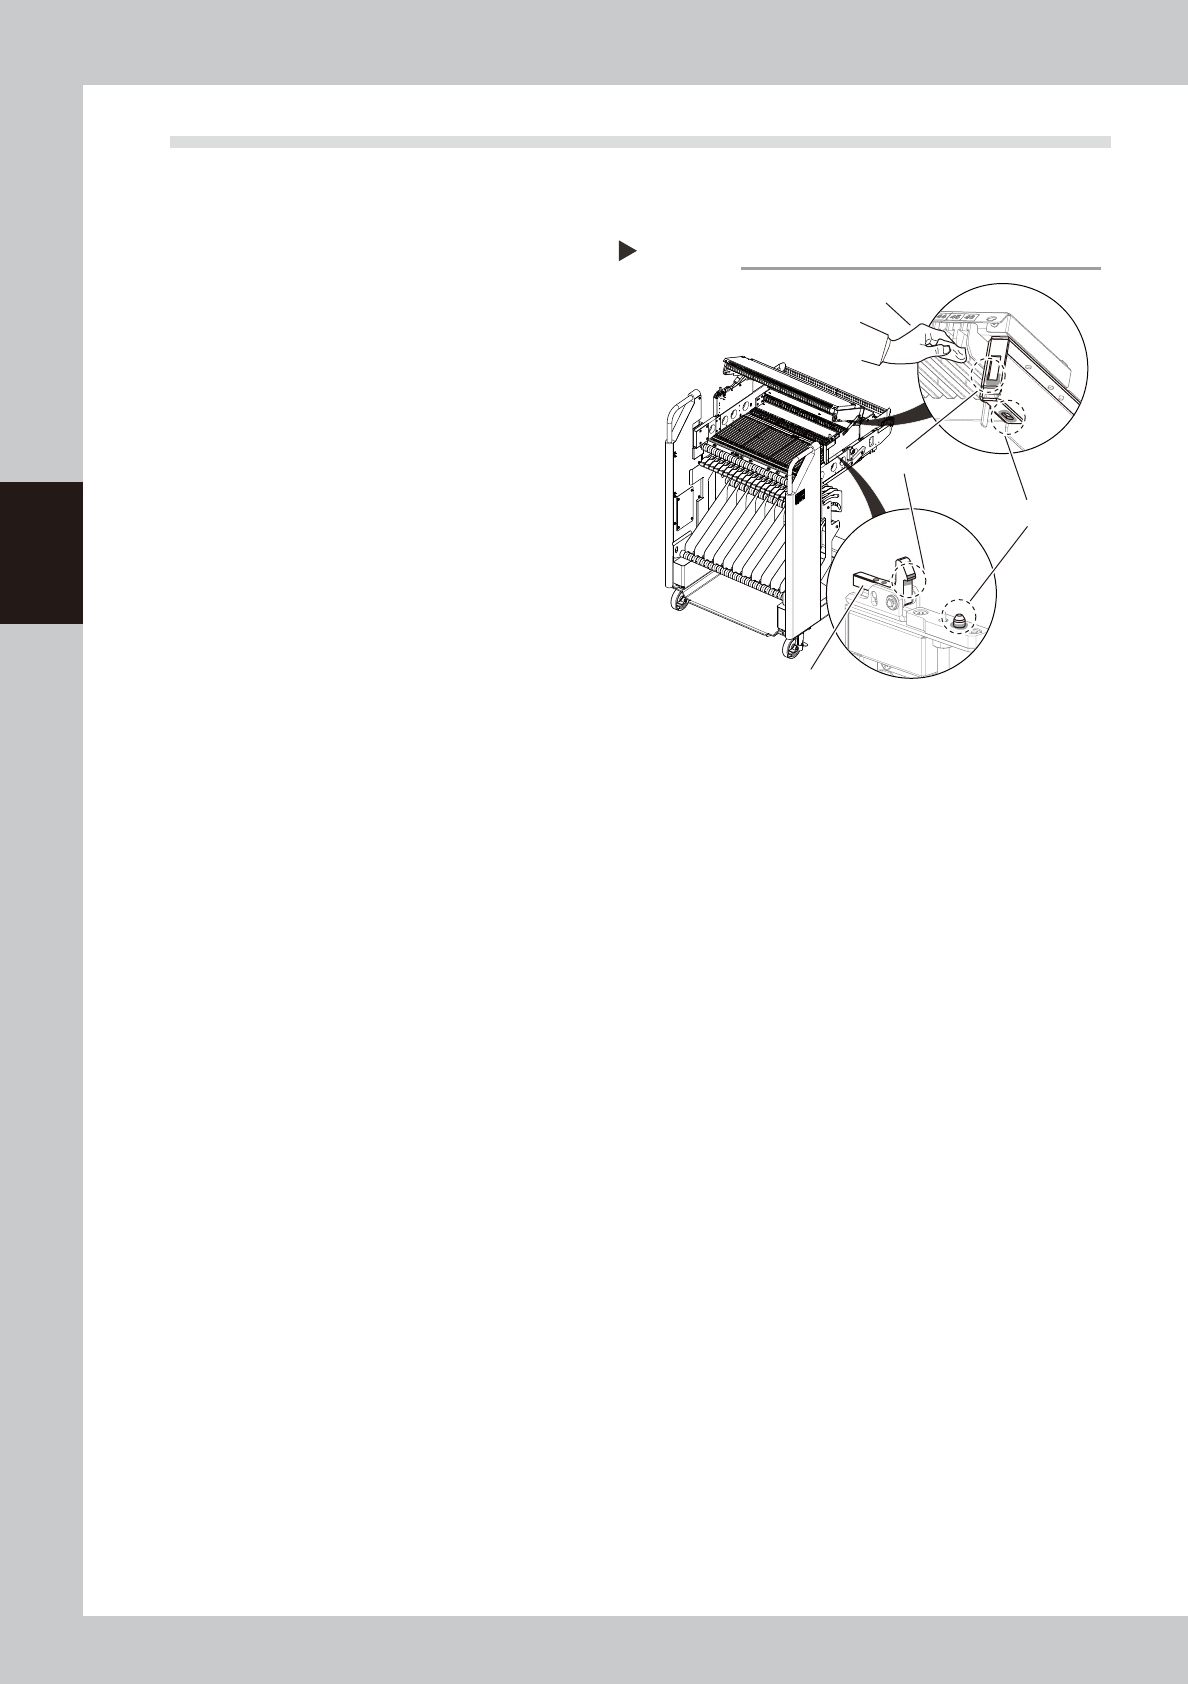
3.5 Feeder exchange carriage
3.5.1 Cleaning/lubricating guide rail cover clamp
1
Detach feeder exchange carriage.
Use the CLAMP ON/OFF switch to unclamp
and detach feeder exchange carriage.
2
Open the feeder exchange carriage
cover.
Release the locks on the left and right of the
feeder exchange carriage. Raise the guide
rail cover.
3
Clean the clamp and positioning
sections.
Use a lint-free cloth to wipe the grease and
dirt from the guide rail cover clamp on the
left and right of the feeder exchange
carriage and also from the positioning
sections.
53350-N9-00
4
Apply grease.
Apply a uniform coat of the specified grease
(NSL) by hand to the cover clamps and also
to the positioning sections.
Cleaning the guide rail cover clamps
Step 3
Cover clamps
Positioning sections
Lock
Lint-free cloth
3-49
3
Periodic maintenance items
4. 6-month maintenance
4.1 Vision system
Dust or dirt adhering to the vision system may cause mark recognition errors and parts recognition errors.
Regular cleaning is recommended to prevent these errors.
c
CAUTION
Do not apply strong force or shock to the camera unit and lighting unit during cleaning. Optical axis adjustment might
become unreliable.
c
CAUTION
If trouble still occurs with the lighting unit even after cleaning as described in this section, contact YAMAHA sales
representatives. Disassembly and cleaning of the lighting unit by the user will void the warranty.
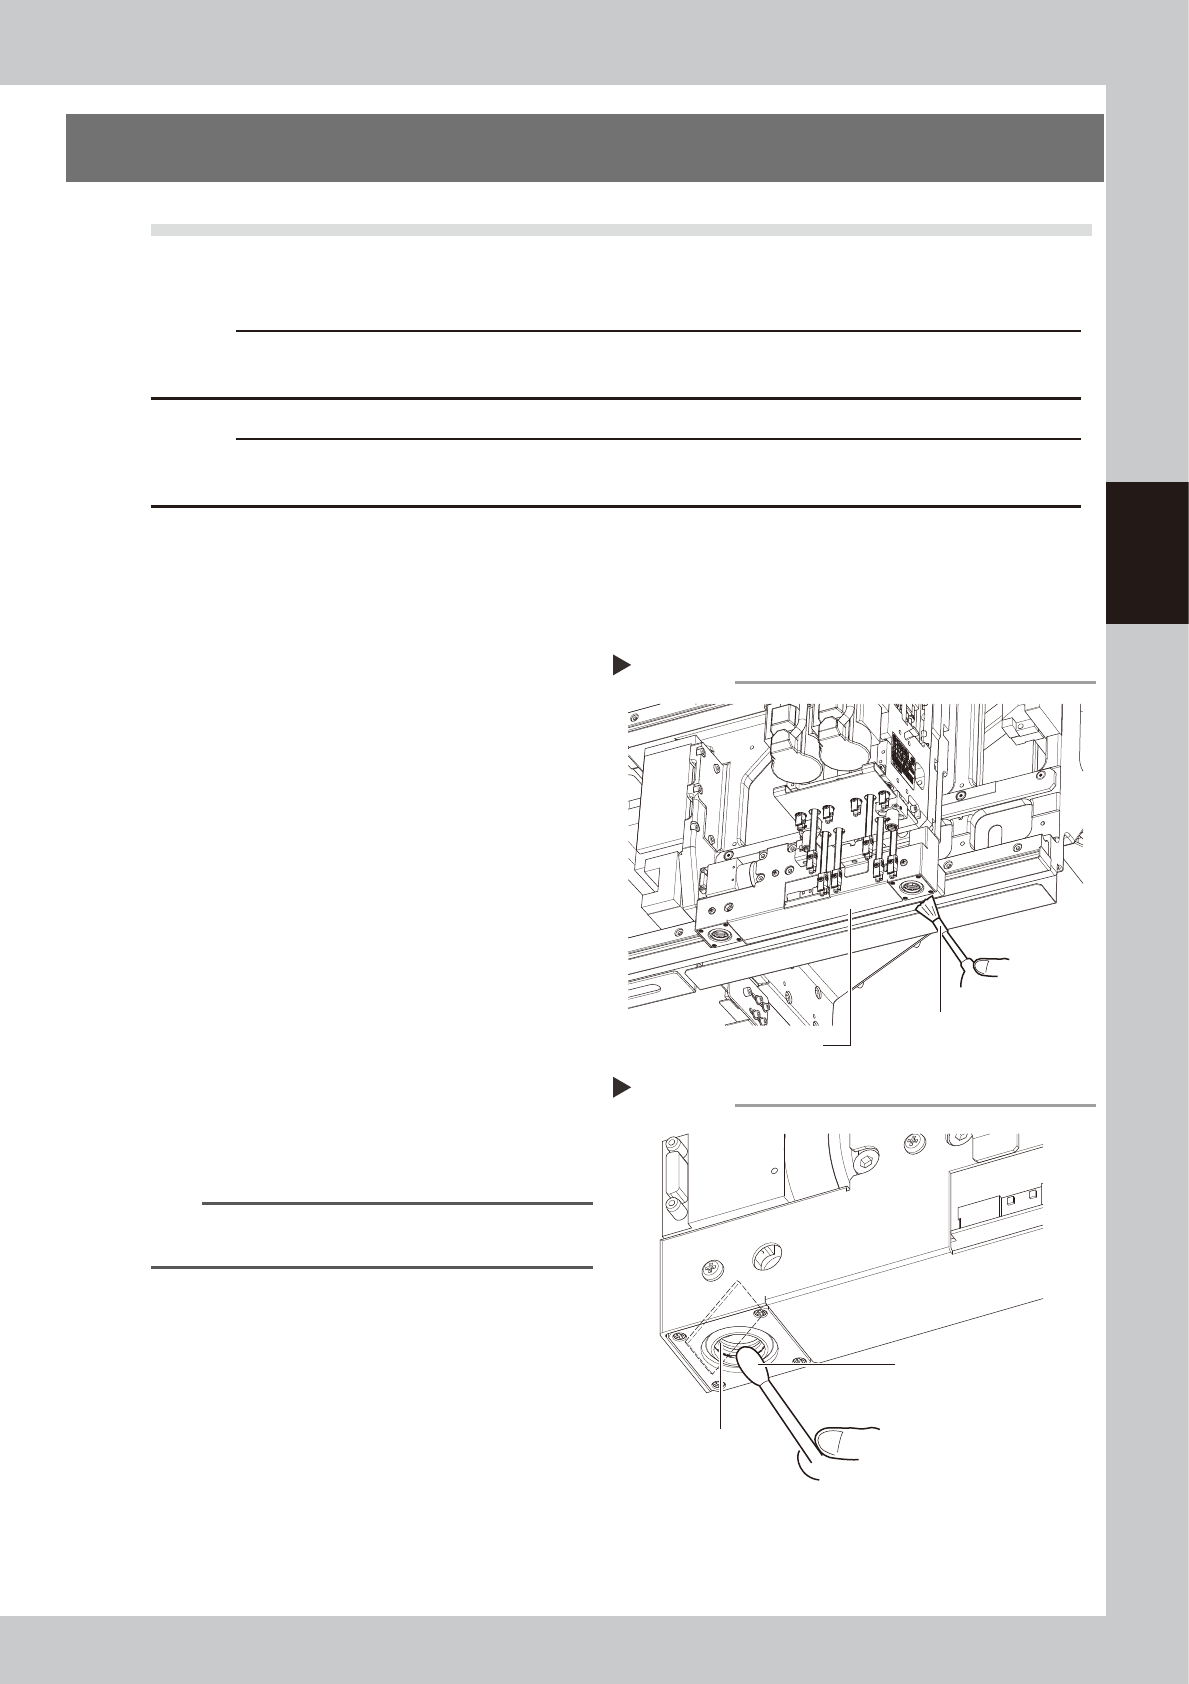
4.1.1 Fiducial camera
The fiducial camera is mounted near the head. The cleaning procedure for the camera's lighting unit is
described below.
1
Prepare for work.
e
1. Remove all items sensitive to magnetic
fields such as wristwatches and magnetic
ID cards.
2. Press the emergency stop button to put
the machine in emergency stop.
3. Use the CLAMP ON/OFF switch to lower
the feeder exchange carriage and
detach it.
4. Move the head unit to a position where
easy to perform the task.
2
Clan the lighting unit.
Use an optical brush to remove the dust
from the lighting unit.
53351-N9-00
3
Clean the reflector plate.
Use a cotton swab slightly dampened with
lens cleaner to clean the reflector plate side
as shown in the figure at right.
53352-N9-00
TIP
The optical brush and lens cleaner are optional
purchase items.
Fiducial camera lighting unit
Using an optical brush to remove dust
Step 2
Optical brush
Cotton swab dampened
with lens cleaner
Cleaning the reflector plate
Step 3
Reflector plate
3-50
3
Periodic maintenance items
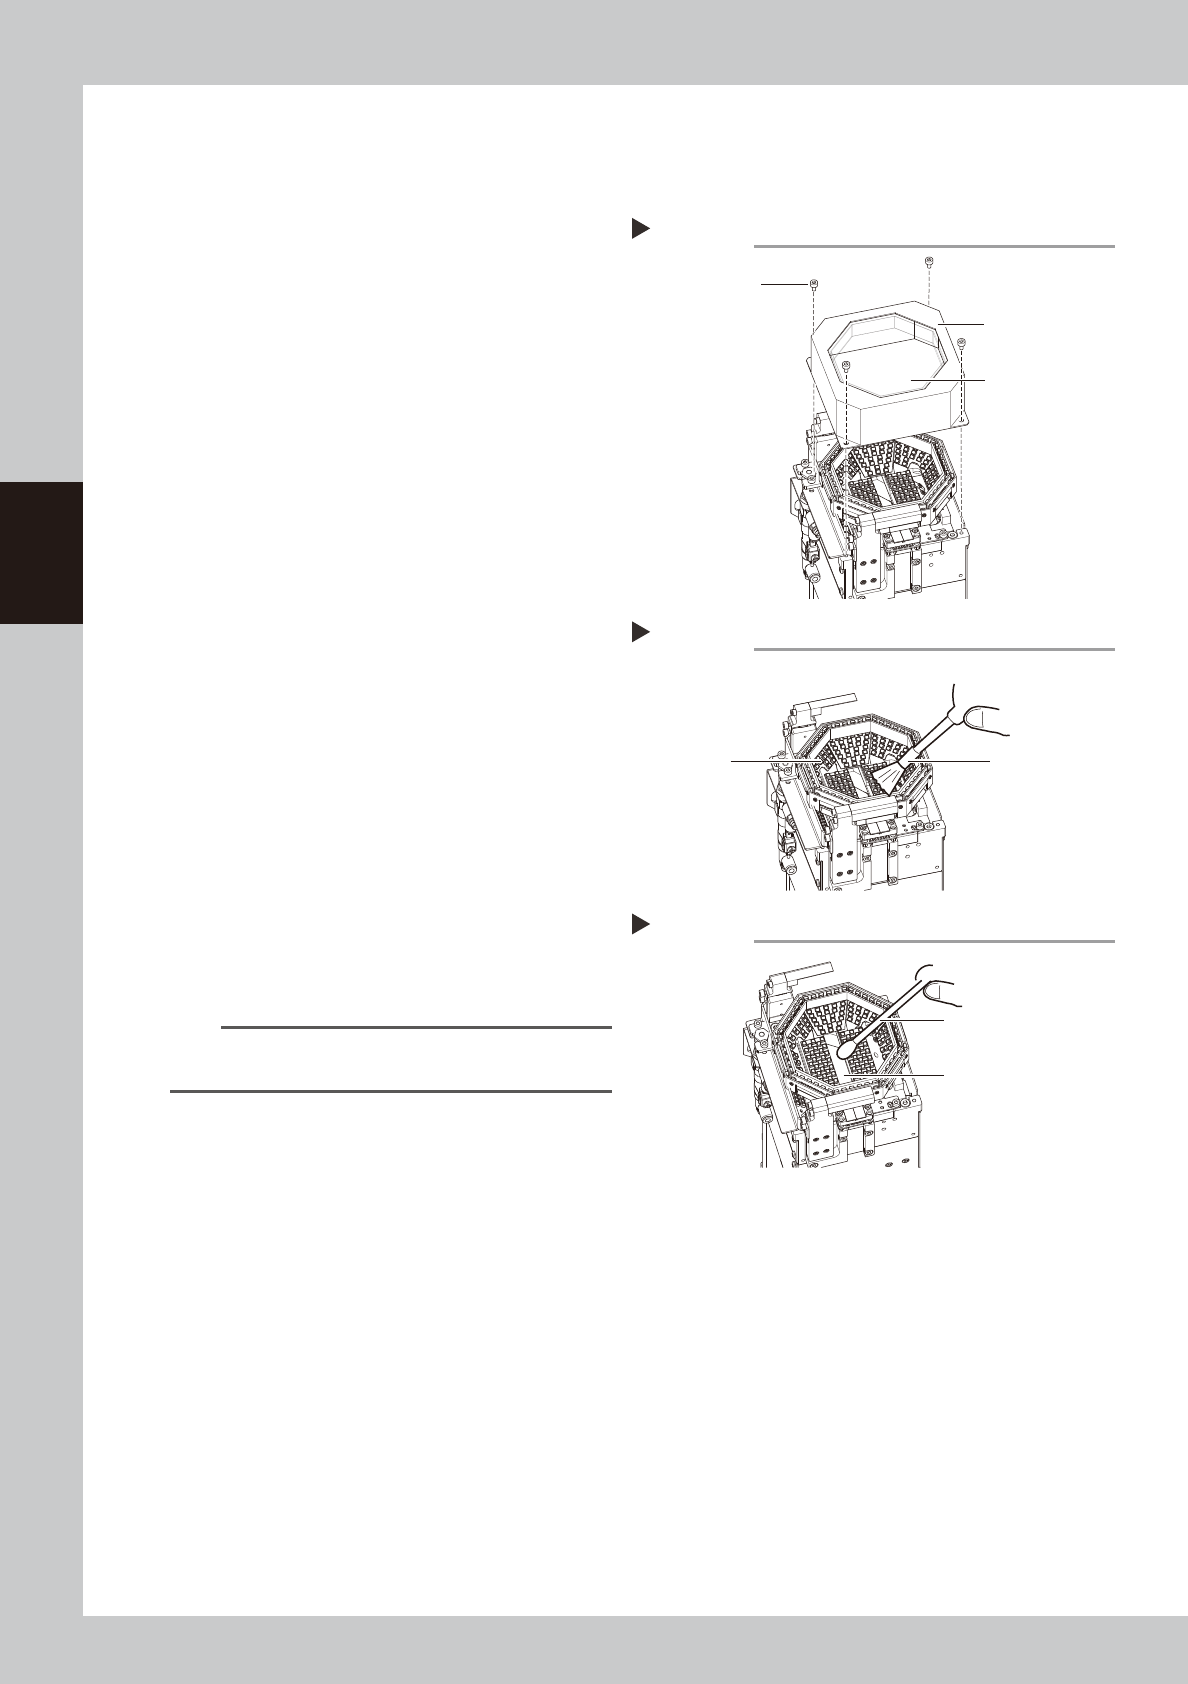
4.1.2 Multi-vision camera
The cleaning procedure for the multi-vision camera lighting unit is given below.
e
1
Prepare for work.
1. Press the emergency stop button to put
the machine in emergency stop.
2. Use the CLAMP ON/OFF switch to lower
the feeder exchange carriage and
detach it.
2
Detach the lighting cover.
Use a hex wrench (2.5) to remove the
cover's 4 mounting bolts, then detach the
lighting's protective cover.
53353-N9-00
3
Wipe the transparent glass with a
cloth.
Wipe the front and back sides of the lighting
cover's transparent glass with a lint-free
cloth dampened with a few drops of lens
cleaner.
53354-N9-00
4
Clean the lighting.
Use an optical brush to remove the dust
from the lighting.
5
Clean the half-mirror.
Use a cotton swab dampened with a small
amount of lens cleaner to clean the half-
mirror.
53355-N9-00
6
Return cover to original position.
Place the lighting cover back in its original
position, then secure it with the 4 bolts.
TIP
The optical brush and lens cleaner are optional
purchase items.
Detaching lighting cover
Step 2
Lighting cover
Transparent glass
Mounting bolt
Cleaning the lighting
Step 4
Lighting
Optical brush
Cleaning the half-mirror
Step 5
Half-mirror
Cotton swab dampened
with lens cleaner