YSM40R_Mainte_E.pdf - 第127页
3-57 3 Periodic maintenance items 5.2.2 Cleaning/lubricating scissors gear As a general guide, the scissors gear should be cleaned and lubricated once per y ear . Use the following procedure to clean and lubricate the sc…
3-56
3
Periodic maintenance items
5
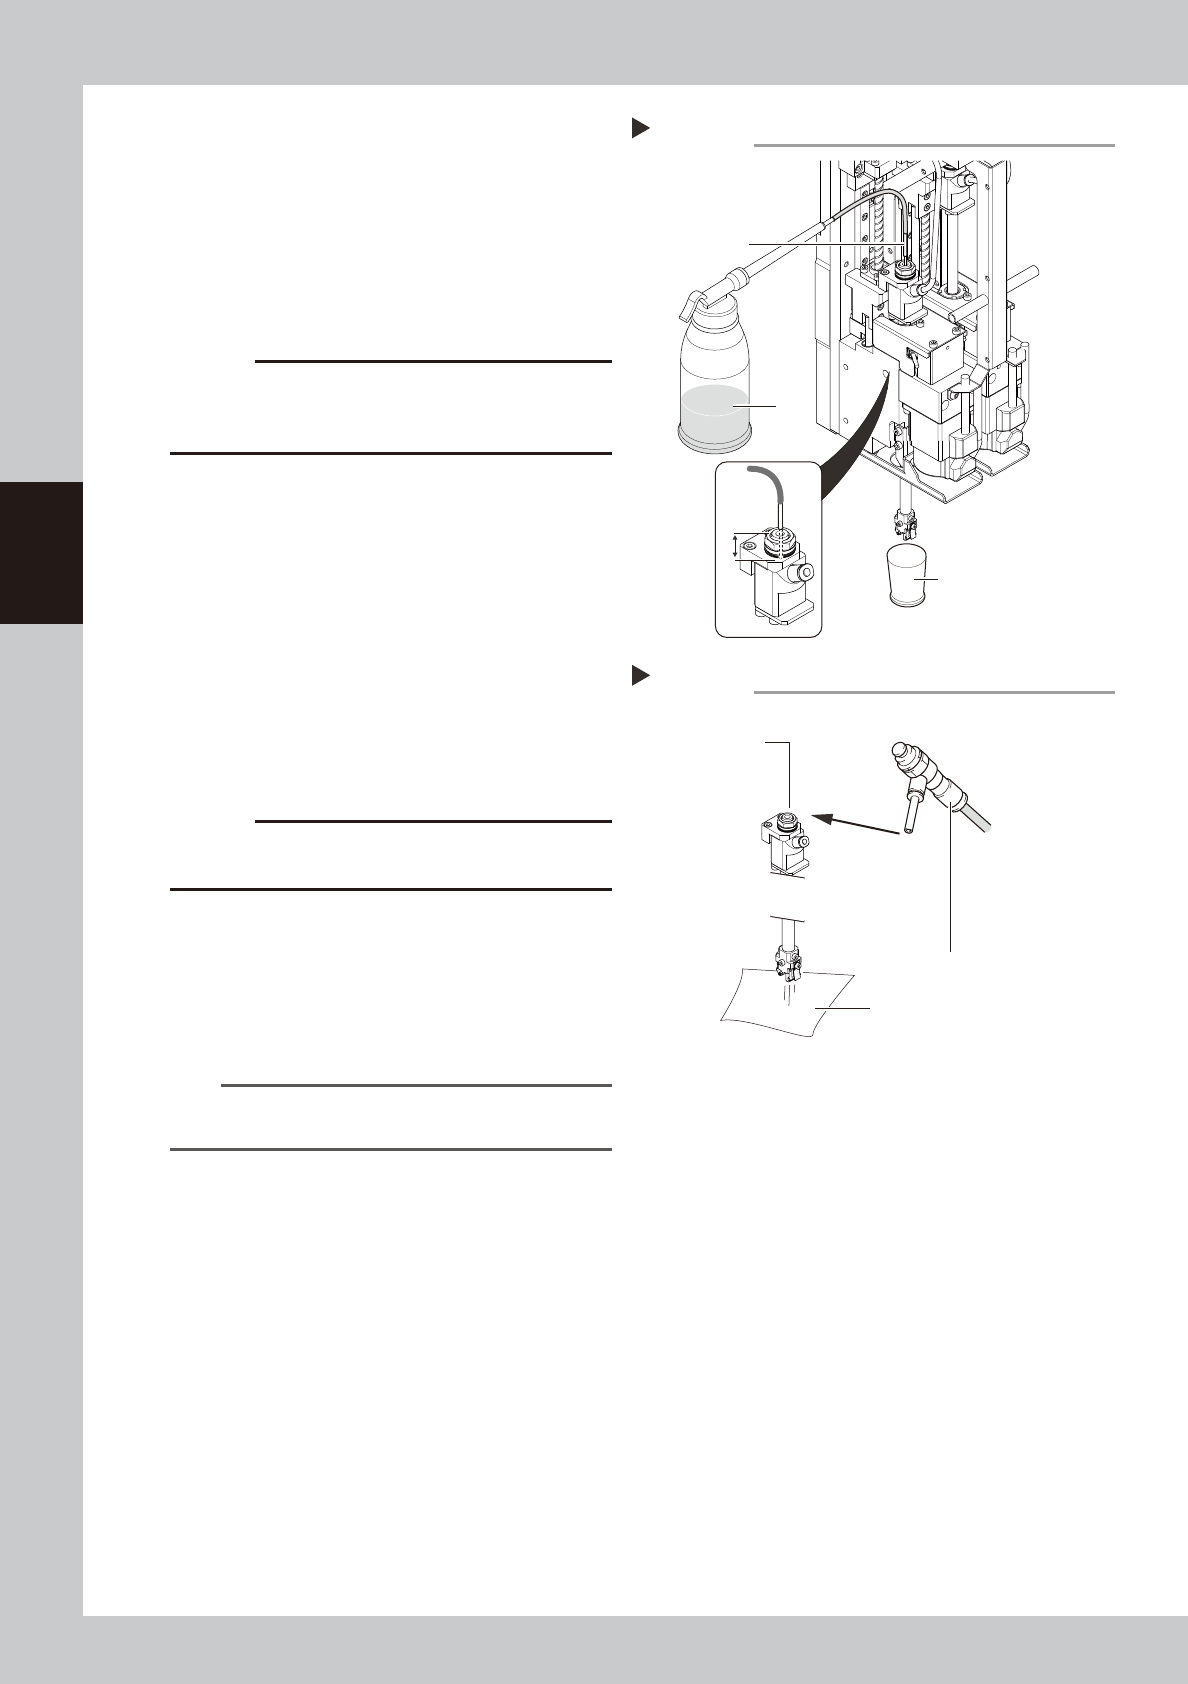
Clean the inside of the spline shaft.
1. Place a paper cup or similar item under
the spline shaft to receive IPA.
2. Insert the nozzle of the cleaning kit into
the cleaning hole of the spline shaft.
3. Pour alcohol (IPA) into the spline shaft air
path to clean away dust and grime.
53367-N9-00
c
CAUTION
Be sure to insert the nozzle tip of the cleaning kit at least
15 mm into the spline shaft. If not inserted enough, IPA
might flow out on the packing.
6
Blow air into the spline air path.
1. Prepare an air blow tool (sold as option)
and connect it to the air fitting on the
feeder exchange carriage.
2. Place a cloth against the end of the
spline shaft, then air-blow the spline shaft
interior with the air blow tool.
3. When the cloth placed against the spline
shaft end is no longer being soiled by the
exiting air, screw the maintenance bolt in
again.
53368-N9-00
c
CAUTION
The exhaust air blow might strike your face, so be sure
to wear safety goggles.
7
Clean the spline shaft of the other
head.
Repeat steps 4 to 6 to clean the inside of
the spline shaft of the other head.
8
Reattach the nozzle.
n
NOTE
Return each nozzle to the head from which it was
detached.
Cleaning the spline shaft
Step 5
Paper cup, etc.
15mm
or more
Nozzle
IPA
Blowing air into the spline shaft
Step 6
Blow air through
this hole.
Air blow tool
Cloth or paper
3-57
3
Periodic maintenance items
5.2.2 Cleaning/lubricating scissors gear
As a general guide, the scissors gear should be cleaned and lubricated once per year. Use the following
procedure to clean and lubricate the scissors gear.
1
Prepare for work.
e
1. Remove all items sensitive to magnetic fields such as wristwatches and magnetic ID cards.
2. Press the emergency stop button to put the machine in emergency stop.
3. Use the CLAMP ON/OFF switch to lower the feeder exchange carriage and detach it.
4. Move the head unit to a position where easy to perform the task, and place a square cloth under
the head unit.
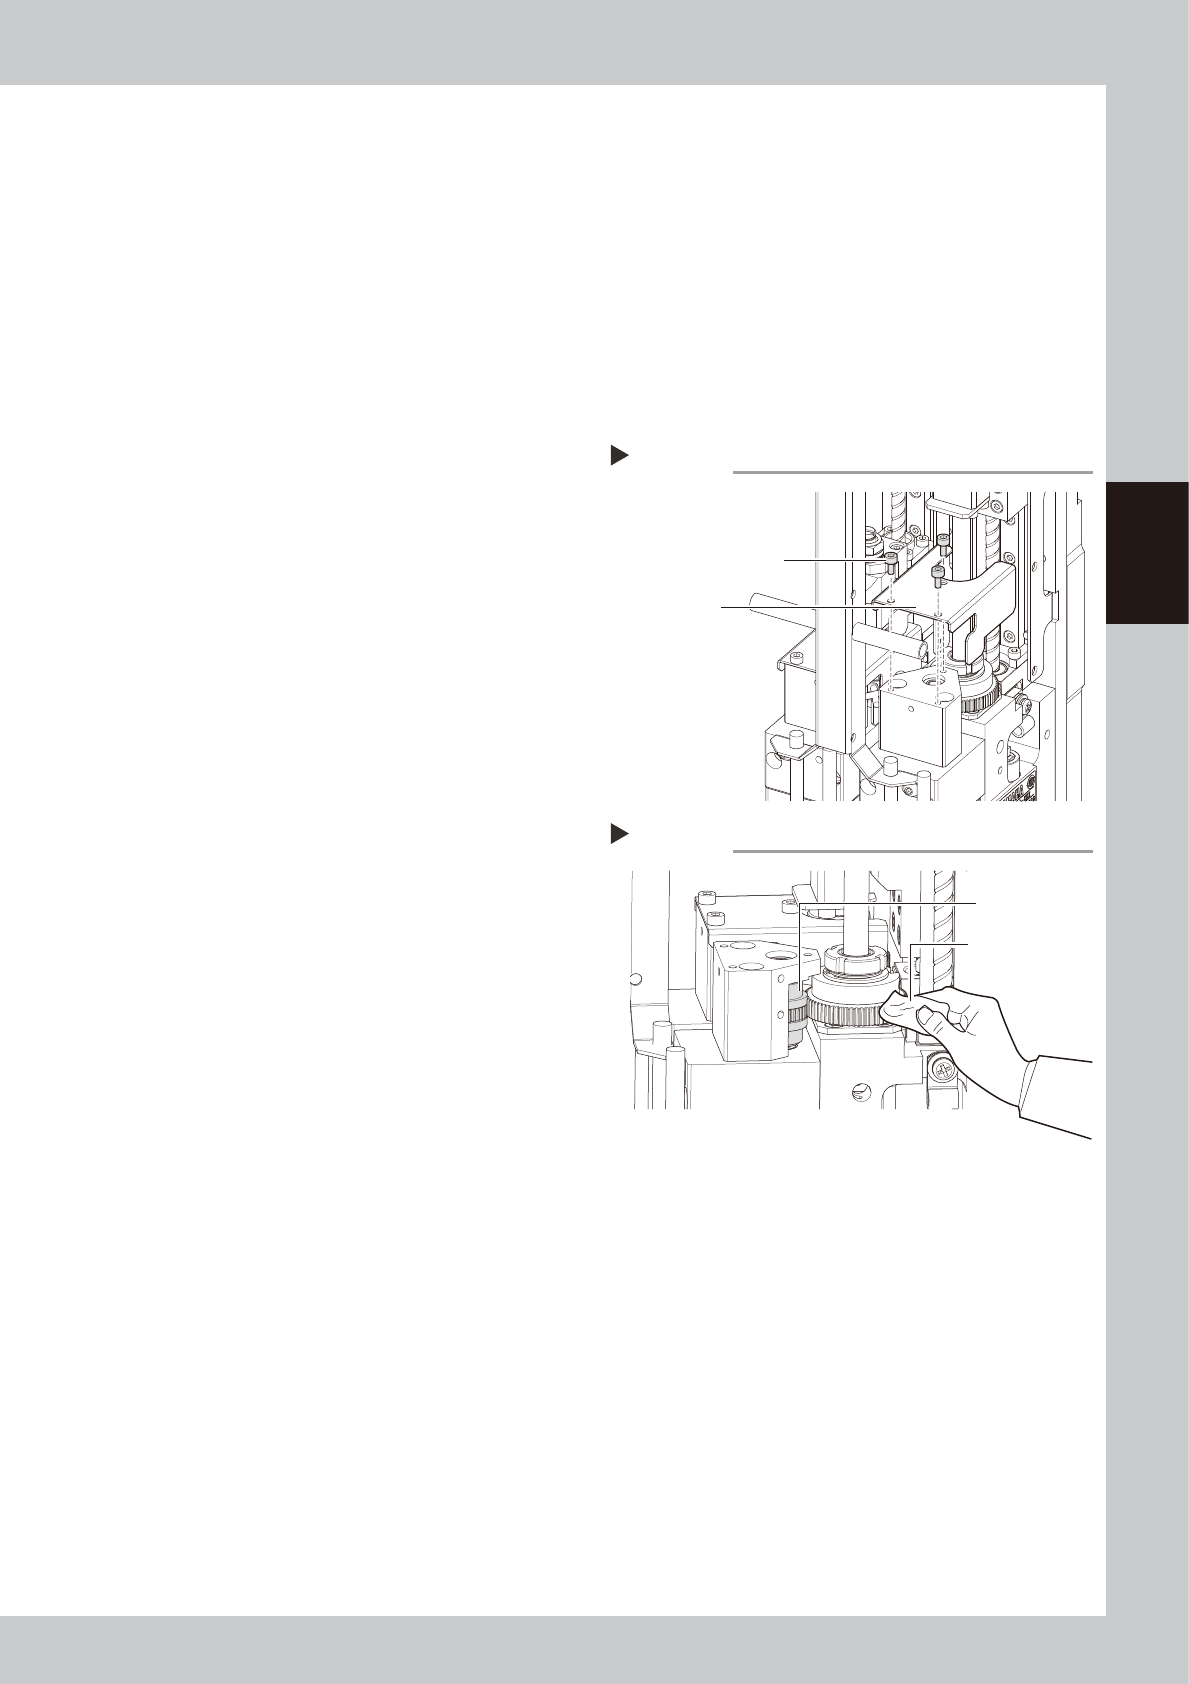
2
Detach the gear cover.
Use a hex wrench to remove the three bolts
that mount the gear cover.
53369-N9-00
3
Clean the rack gear.
While turning the R-axis (gear) manually, use
a lint-free cloth to wipe off the dust and dirt
on the scissors gear unit (scissors gear and
the gear next to the scissors gear).
53370-N9-00
4
Apply grease.
1. While turning the R-axis manually, apply
the specified grease (NSL) to the scissors
gear.
2. Wipe off excess grease with a lint-free
cloth.
5
Reattach the gear cover.
Place the gear cover back in its original
position, and tighten the three bolts with the
hex wrench.
Detaching the gear cover
Step 2
Gear cover mounting bolt
Gear cover
Cleaning the scissors gear
Step 3
Scissors gear
Lent-free cleaning
cloth
3-58
3
Periodic maintenance items
5.3 Conveyor
5.3.1 Inspecting conveyor belt and cleaning guide and pulley
1
Prepare for work.
e
1. Remove all items sensitive to magnetic
fields such as wristwatches and magnetic
ID cards.
2. Press the emergency stop button to put
the machine in emergency stop.
3. Use the CLAMP ON/OFF switch to lower
the feeder exchange carriage and
detach it.
4. Remove the tape cutter duct.
5. Place a square cloth on the push-up
plate.
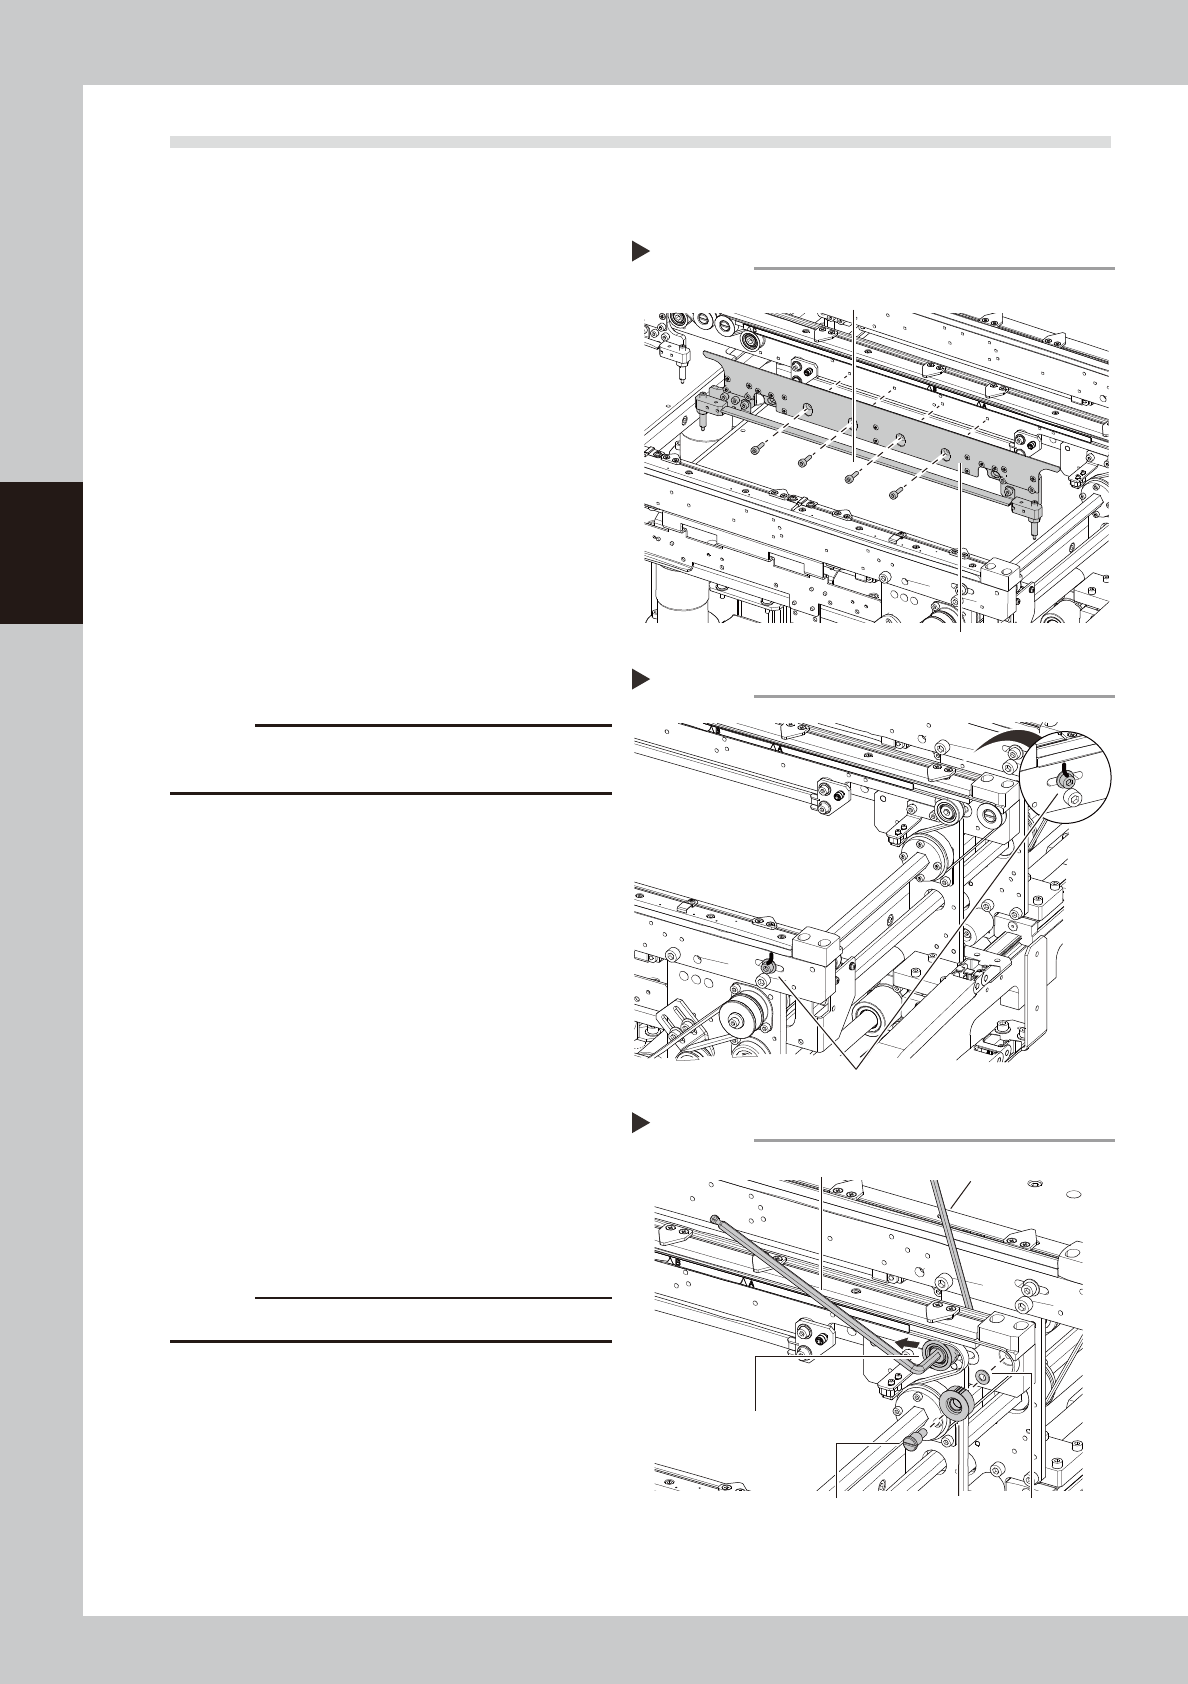
2
Detach the board clamp assembly.
Use a hex wrench (2.5) to remove the bolts (4
places shown in the figure at right) that
mount the board clamp assembly.
53371-N9-00
c
CAUTION
Do not remove any bolts other than the 4 bolts shown in
the figure at right.
3
Put a mark at the pulley position.
Using an oil-based pen, put a mark to
indicate the position of the bolt that mounts
the tensioner pulley.
53372-N9-00
4
Loosen the belt.
1. Use 2 hex wrenches to loosen the belt
tensioner pulley and move it to the end
of the tension adjusting slot (in the
loosening direction).
Hex wrench on pulley side : 5 mm
Hex wrench on bolt side : 4 mm
2. Use a flat-head screwdriver to remove
the end pulley shaft next to the tensioner
pulley loosened, and then remove the
end pulley.
53373-N9-00
c
CAUTION
Use care to avoid losing the washers.
Step 2
Board clamp assembly
Board clamp assembly mounting bolts
Removing the board clamp assembly
Marking the pulley position
Step3
Use an oil-based pen to mark the pulley position.
Loosening the belt
Step 4
Loosen this pulley.
Remove this pulley.
Hexagon wrench (5)
Hexagon wrench (4)
WasherPulley shaft