YSM40R_Mainte_E.pdf - 第164页
4-4 4 Maintenance of options 2. UPS (Uninterr uptible Power Supply) 2.1 Replacing the UPS batter y (3 year) Even though the service life of the UPS ma y vary depending on the operating environment, suc h as ambient tempe…
4-3
4
Maintenance of options
1.2 Replacing ionizer discharge needle (2-year)
Replace the ionizer discharge needle (KHN-M83P1-00X: Needle Set/ 4 sets of discharge needles) once every 2
years or if the LED (+/-PREC, +/-ERR) showing the ion balance error does not go off even after performing the
work steps in "1.1 Cleaning ionizer discharge needle (Monthly)". One ionizer contains 8 discharge needles.
Normally, one each of ionizer is installed on front and rear of the machine. Therefore, 4 discharge needle
packs are required for maintenance work of one machine.
1
Power off the ionizer.
e
1. The power supply to ionizer is stopped by
pressing emergency stop button and
then open the machine safety cover.
2.
Check that all LEDs on ionizer is turned
off.
w
WARNING
A VOLTAGE REMAINS ON THE DISCHARGE NEEDLE
IMMEDIATELY AFTER TURNING OFF THE POWER. BE AWARE
THAT TOUCHING THE DISCHARGE NEEDLE IMMEDIATELY
AFTER TURNING OFF THE POWER IS HAZARDOUS.
2
Turn off the air supply.
Turn the air supply/exhaust switch (valve) on
the lower left of the machine clockwise (EXT)
to turn off the main air.
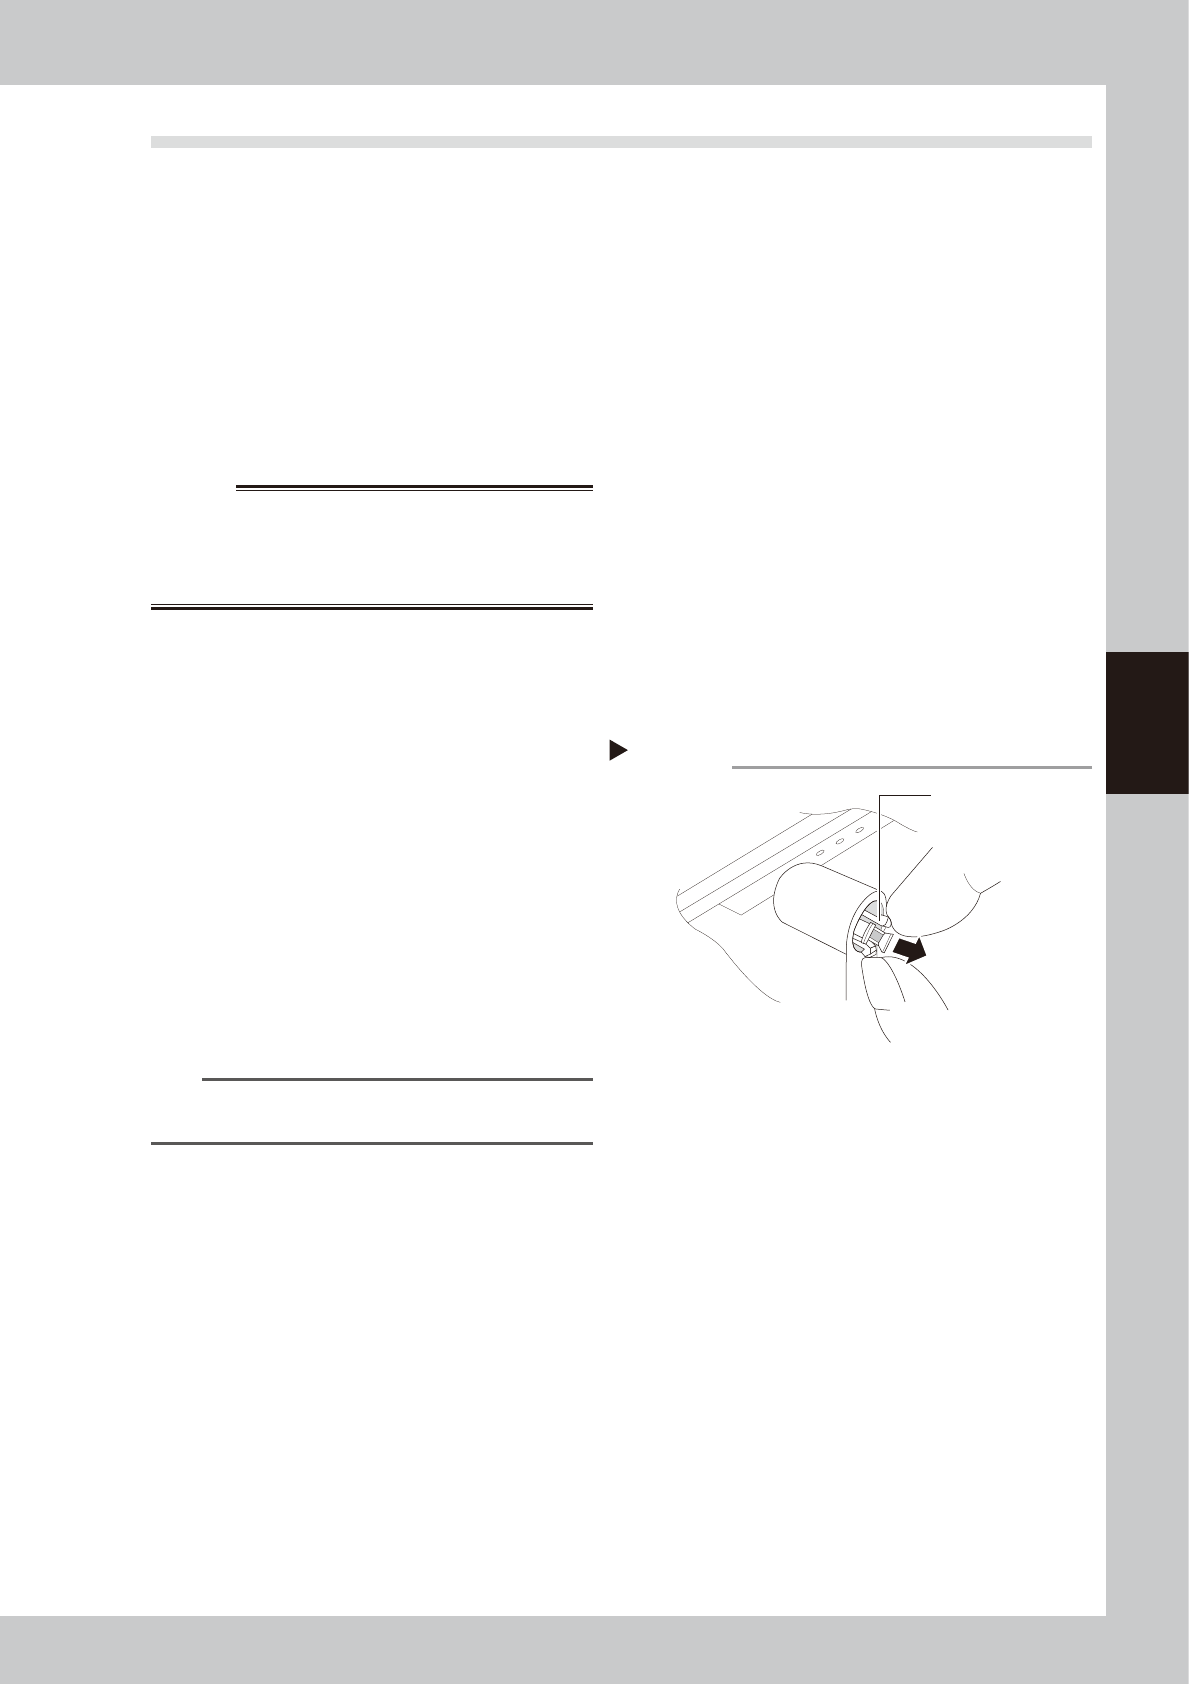
3
Remove the discharge needle.
As shown in the figure on the right, grasp
and squeeze the holder's opposing claws at
2 points and squeeze them toward each
other, then extract discharge needle.
53402-N9-00
4
Replace the discharge needle.
When installing the new discharge needle,
the notched area on the mounting side must
be aligned with the discharge needle unit's
protruding part. When correctly aligned,
press it in.
n
NOTE
See instruction manual issued by ionizer manufacturer
for detailed specification.
Removing discharge needle
Step 3
Holder claws
4-4
4
Maintenance of options
2. UPS (Uninterruptible Power Supply)
2.1 Replacing the UPS battery (3 year)
Even though the service life of the UPS may vary depending on the operating environment, such as ambient
temperature, it is recommended to replace the battery with a new one (KGA-M6566-30X) once every 3 years.
The following describes how to replace the battery that is incorporated into the UPS.
w
WARNING
BATTERY REPLACEMENTS SHOULD BE PERFORMED ONLY BY THOSE WITH ELECTRICAL WORK EXPERIENCE.
1
Power off the machine.
Powering off the machine turns off the UPS
power after several seconds.
w
WARNING
DO NOT ATTEMPT THIS BATTERY REPLACEMENT
PROCEDURE WHILE THE UPS FUNCTION IS RUNNING
(DURING AN EMERGENCY STOP, ETC.).
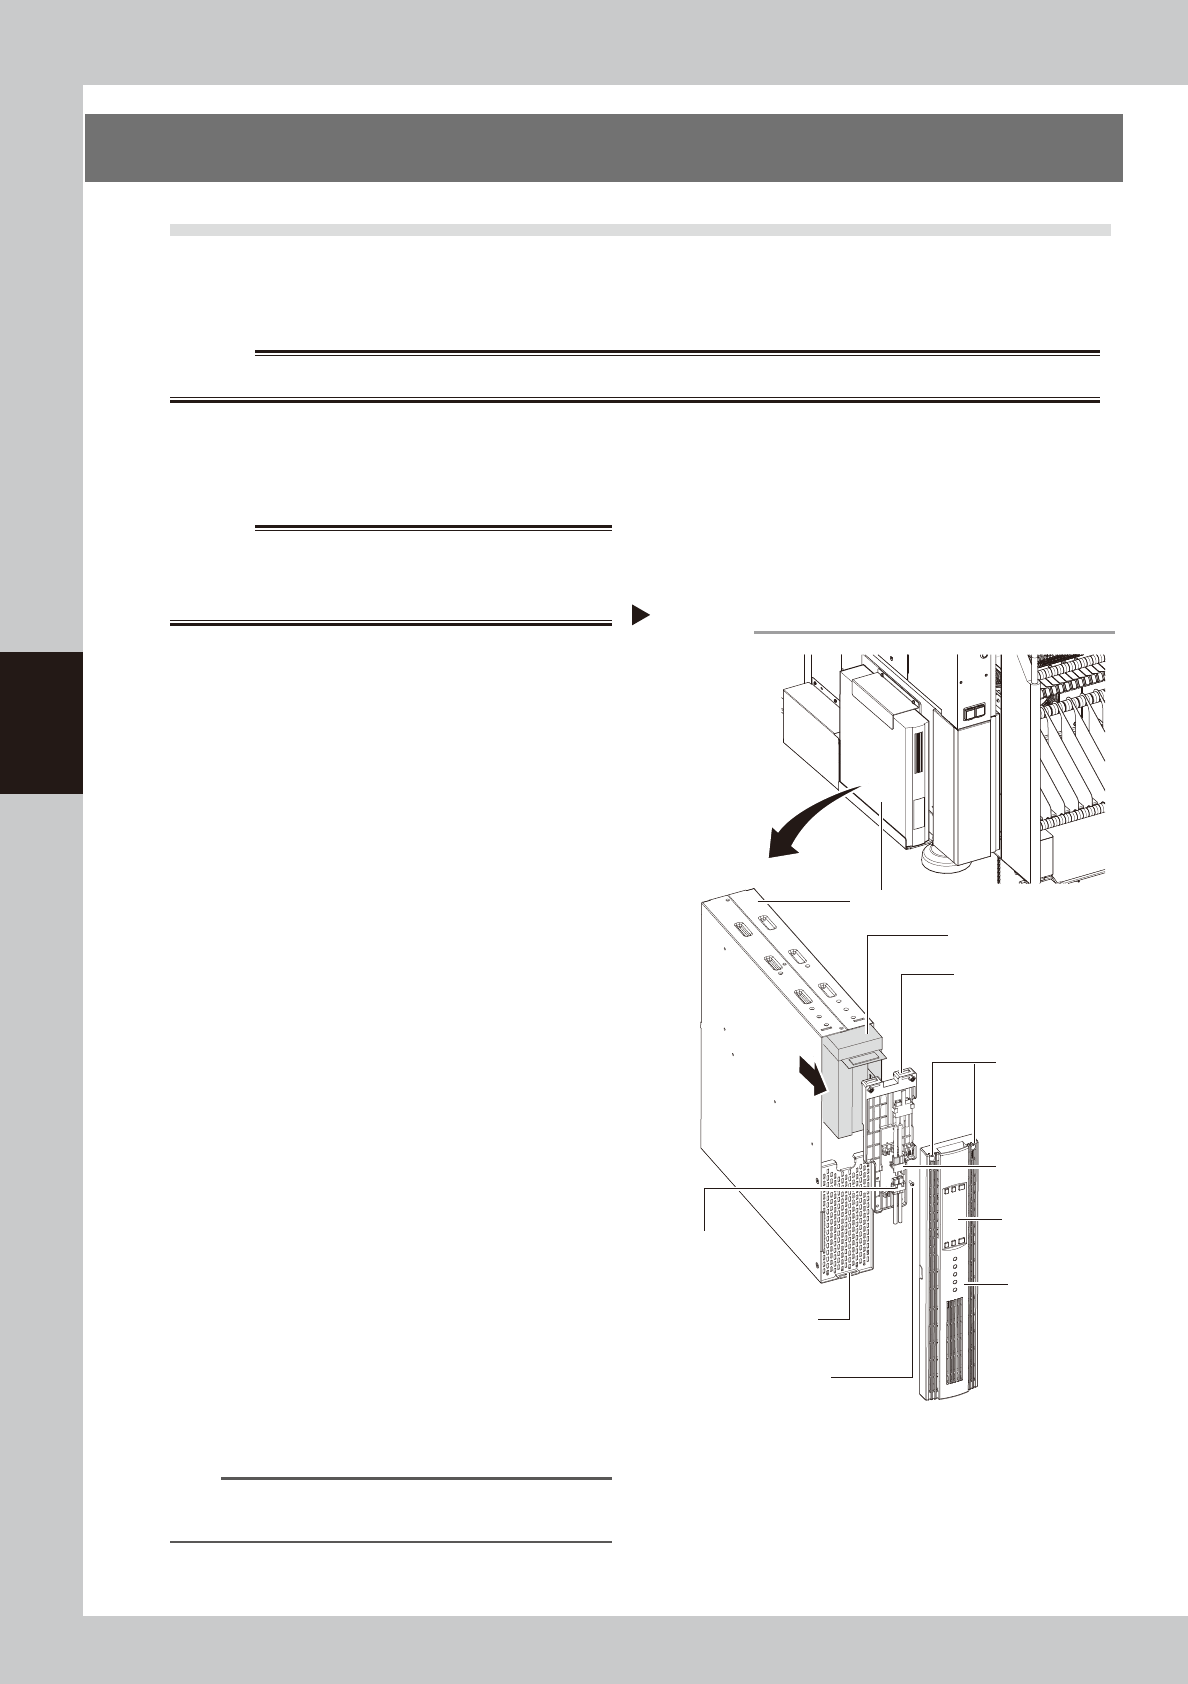
2
Detach the front panel.
Use a Phillips screwdriver to remove the
screws which mount the front panel, then
detach the front panel.
53403-N9-00
3
Disconnect the battery connector.
Disconnect the UPS side and internal battery
side connectors.
4
Remove the battery securing
fixture.
Remove the battery fixture mounting screws,
then remove the battery securing fixture.
5
Replace the detached battery with
a new one.
Extract the old battery and insert a new
battery in its place.
6
Attach the battery.
Reverse Steps 2 to 4 above to attach the
battery.
7
Check the UPS status.
1. Power on the machine.
2. Press the ON button on the UPS operation
panel to check that the BATTERY LED is
OFF.
8
Write the battery replacement date.
Write the battery replacement month/year
on UPS WARNING label (see "Safety
instructions" in this manual).
n
NOTE
For details about how to handle the UPS, see the user's
manual supplied with the UPS.
Replacing the internal battery
UPS unit
Bottom left,
as viewed when
facing the machine's
rear side
Internal battery
Internal battery
side connector
UPS side battery
connector
Battery mounting fixture
Front panel
Front panel hook
Battery mounting screw
Front panel
mounting screws
UPS operation
panel
Step 2-6
4-5
4
Maintenance of options
3. Inspecting, cleaning and lubricating cATS
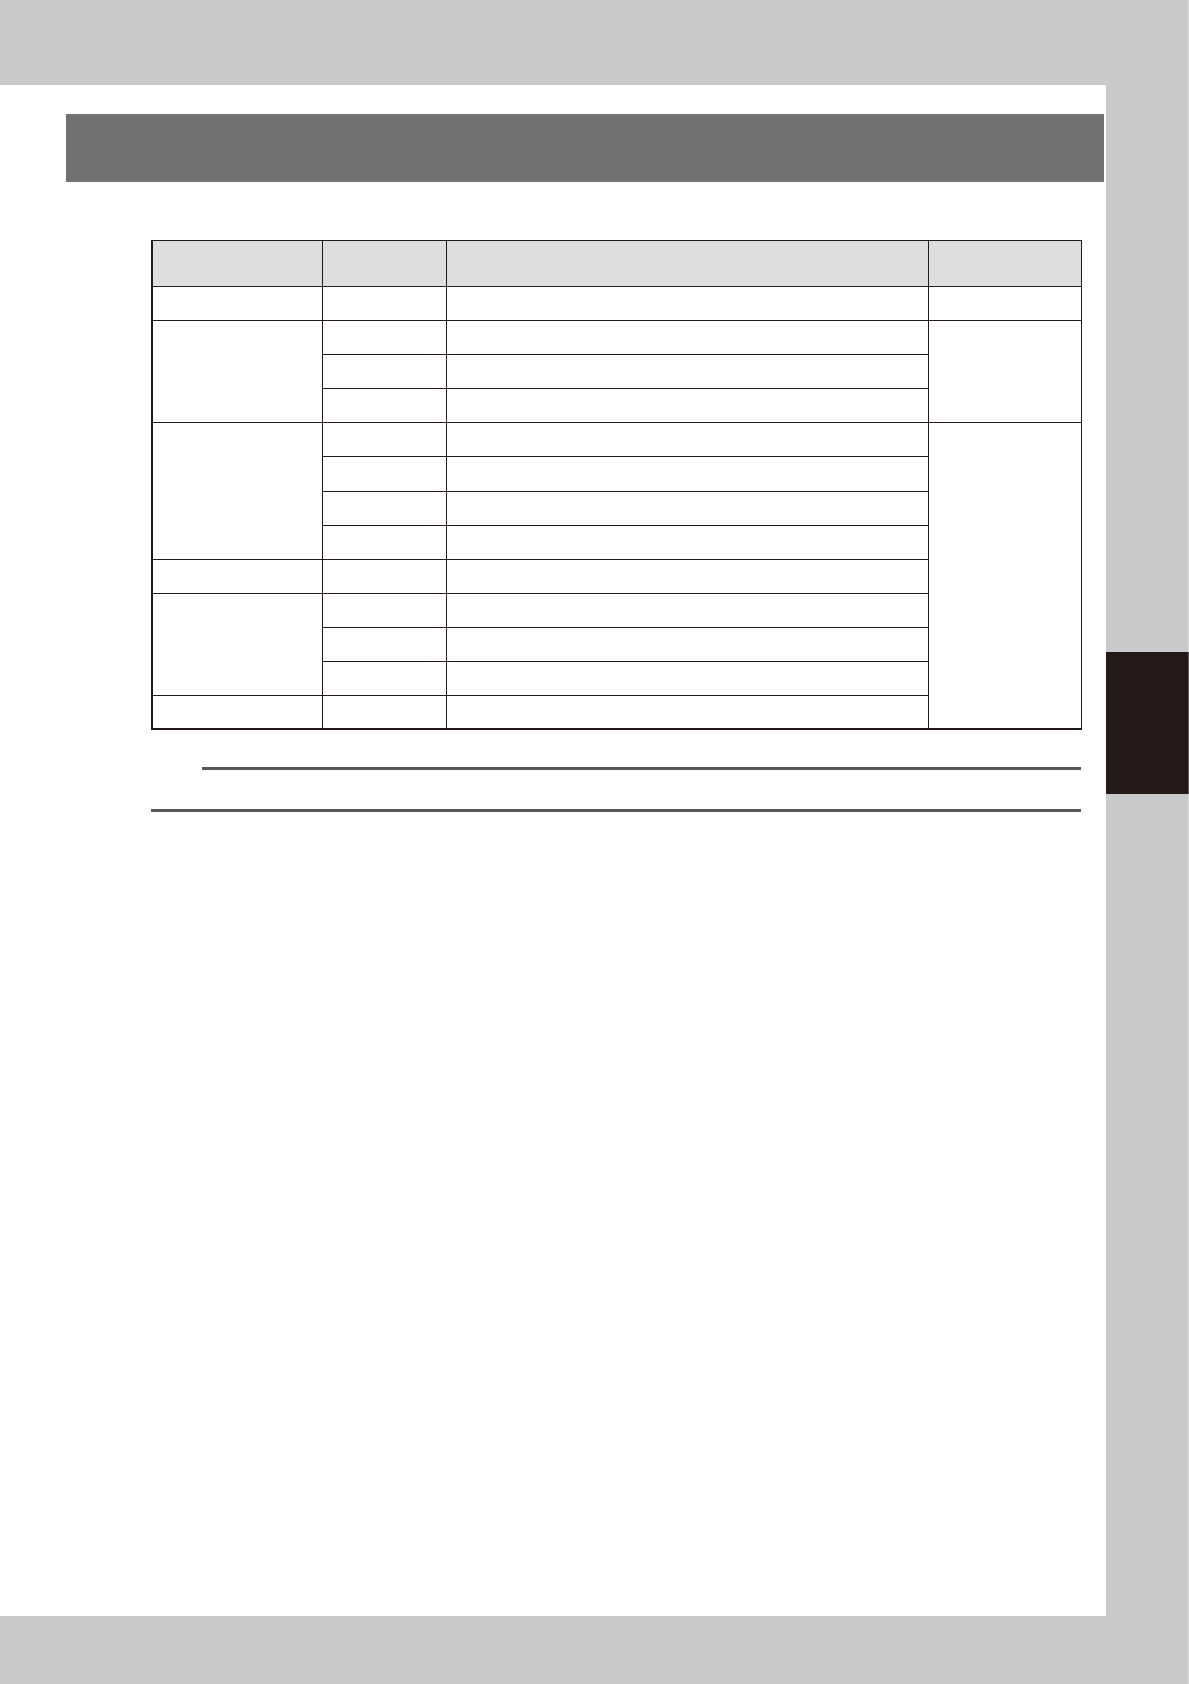
The table below shows a list of checkpoints for each inspection location.
Inspection location Unit name Checkpoints
Inspection
interval
Magazine and pallet Deformation, wear and deterioration Daily
AZ-axis
Guide Adhesion of foreign matter, rust, and grease condition
DailyBelt Belt looseness, wear and deterioration
Ball screw Adhesion of foreign matter, rust, and grease condition
AH-axis
Guide Adhesion of foreign matter, rust, and grease condition
6 months
Belt Belt looseness, wear and deterioration
Ball guide Adhesion of foreign matter, rust, and grease condition
Rack & pinion Adhesion of foreign matter, rust, and grease condition
Parts supply station Wear on guide, looseness or play of pallet clamp
Pickup station
Pallet guide Deformation, wear and deterioration of screw guide and pallet guide
Belt Belt looseness, wear and deterioration
Guide Adhesion of foreign matter, rust, and grease condition
Magazine shaft Ball guide Adhesion of foreign matter, rust, and grease condition
n
NOTE
Use only the greases (grease name: NSL) specified by YAMAHA.