YSM40R_Mainte_E.pdf - 第173页
Chapter 5 Lubricating points Contents 1. Lubricating preparations 5-1 1.1 Compatible grease 5-1 1.2 Grease gun 5-2 2 . Lubricating points/schedule (Main machine) 5 - 3 2.1 X-axis 5-3 2.1.1 4-beam type 5-3 2.1.2 2-beam ty…
4-12
4
Maintenance of options
4.2 Cleaning nozzle station
The nozzle station is accumulated with dirt due to long-term use, although this may vary depending on the
machine operating environment. The spline (nozzle) shafts or filters get dirty through the nozzle if dirt remains
on the nozzle station. Therefore, it is recommended to clean nozzle station at the time when cleaning spline
shaft. This section describes how to clean nozzle station for MU head as an example.
n
NOTE
The nozzles can be easily detached from nozzle station with ANC nozzle attach/detach tool (hereafter "tool"). See
"1.2.4 ANC nozzle attaching/detaching tool" for details.
See "How to detach all nozzles for RS head" for nozzle station for RS head.
1
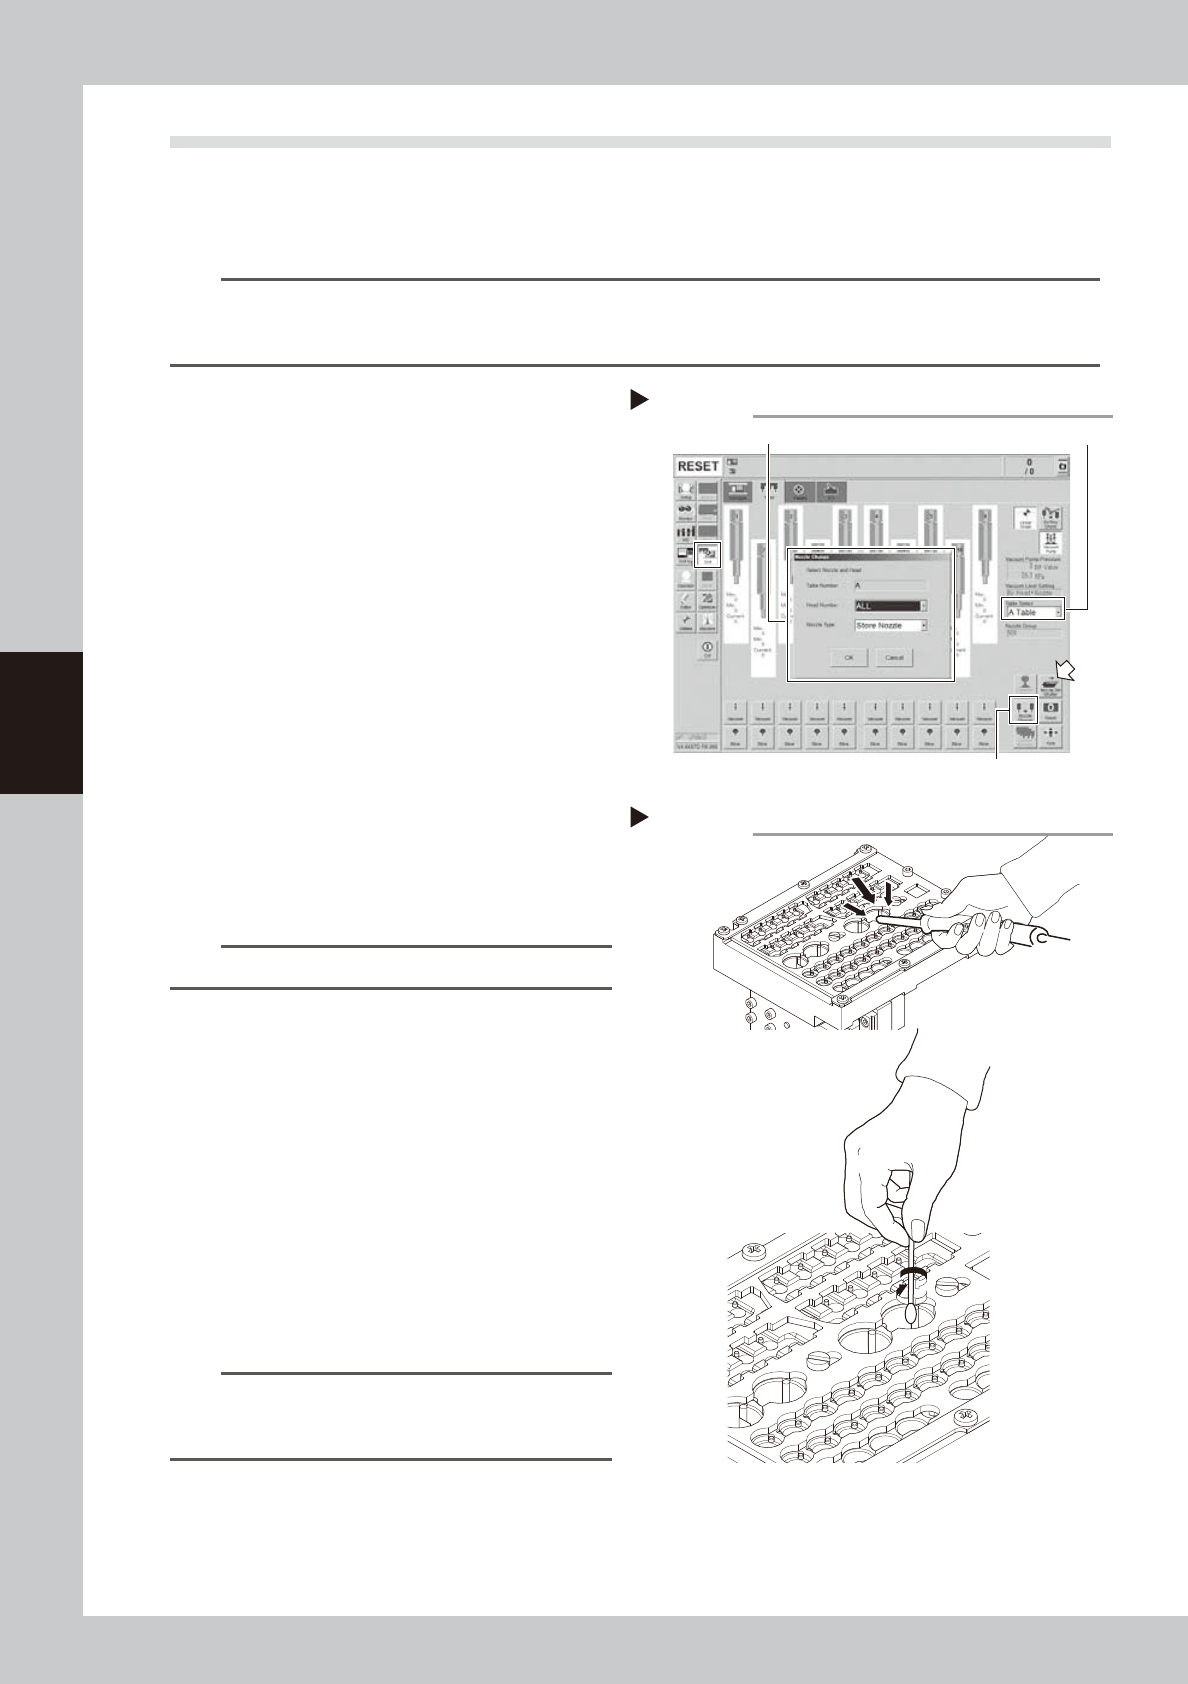
Store all nozzles to nozzle station.
1. Open the [Unit] - [Head] screen.
2. Select desired head unit from "Table
Select".
3. Press the [Nozzle Change] button.
4. Select "ALL" for "Head Number" and
select "Store Nozzle" for "Nozzle Type" on
the "Nozzle Change" screen.
5. Press the [OK] button to return all nozzles
to the nozzle station.
54405-N9-00
2
Close the nozzle station shutter.
Press the [Nozzle. Stn Shutter] button again
and close the nozzle station shutter.
e
3
Detach nozzles.
1. Press the emergency stop button and
then open the machine safety cover.
2. (With tool) See "How to detach all nozzles
for MU head" to detach nozzles.
TIP
Without tool, detach nozzles manually.
4
Check nozzle station.
Check visually that no dirt remains on nozzle
station.
5
Clean nozzle station.
1. Vacuum dirt on nozzle station with
vacuum assembly (option).
2. Apply IPA slightly to cotton swab to wipe
off the inside of nozzle station.
53416-N9-00
6
Return nozzles to original positions.
See "How to attach all nozzles for MU head"
to attach nozzles to nozzle station.
TIP
Without tool, return nozzles manually. See the nozzle
label adhered in machine or machine setting for nozzle
set positions.
Step 1,2
Storing nozzles
Head Number: “ALL” / Nozzle type: “Store Nozzle”
[Nozzle Change] button
Table Select
Cleaning nozzle station
Step 5

Chapter 5 Lubricating points
Contents
1. Lubricating preparations 5-1
1.1 Compatible grease 5-1
1.2 Grease gun 5-2
2. Lubricating points/schedule (Main machine) 5-3
2.1 X-axis 5-3
2.1.1 4-beam type 5-3
2.1.2 2-beam type 5-4
2.2 Y-axis 5-5
2.2.1 4-beam type 5-5
2.2.2 2-beam type 5-6
2.3 W-axis 5-7
2.4 PU-axis 5-8
2.5 Head unit 5-9
2.5.1 MU head unit 5-9
2.5.2 RS head unit 5-10
2.5.3 FL head unit 5-11
3. Lubricating points/schedule (Carriage) 5-12
3.1 Feeder exchange carriage 5-12
4. Lubricating points/schedule (cATS) 5-13
4.1 AZ-axis 5-13
4.2 AH-axis 5-14
4.3 Pickup station and others 5-15
4.4 Both sides of cATS 5-16
5-1
5
Lubricating points
1. Lubricating preparations
1.1 Compatible grease
For greasing procedures, always use the YAMAHA prescribed grease shown below.
c
CAUTION
Using unauthorized grease could damage the machine.
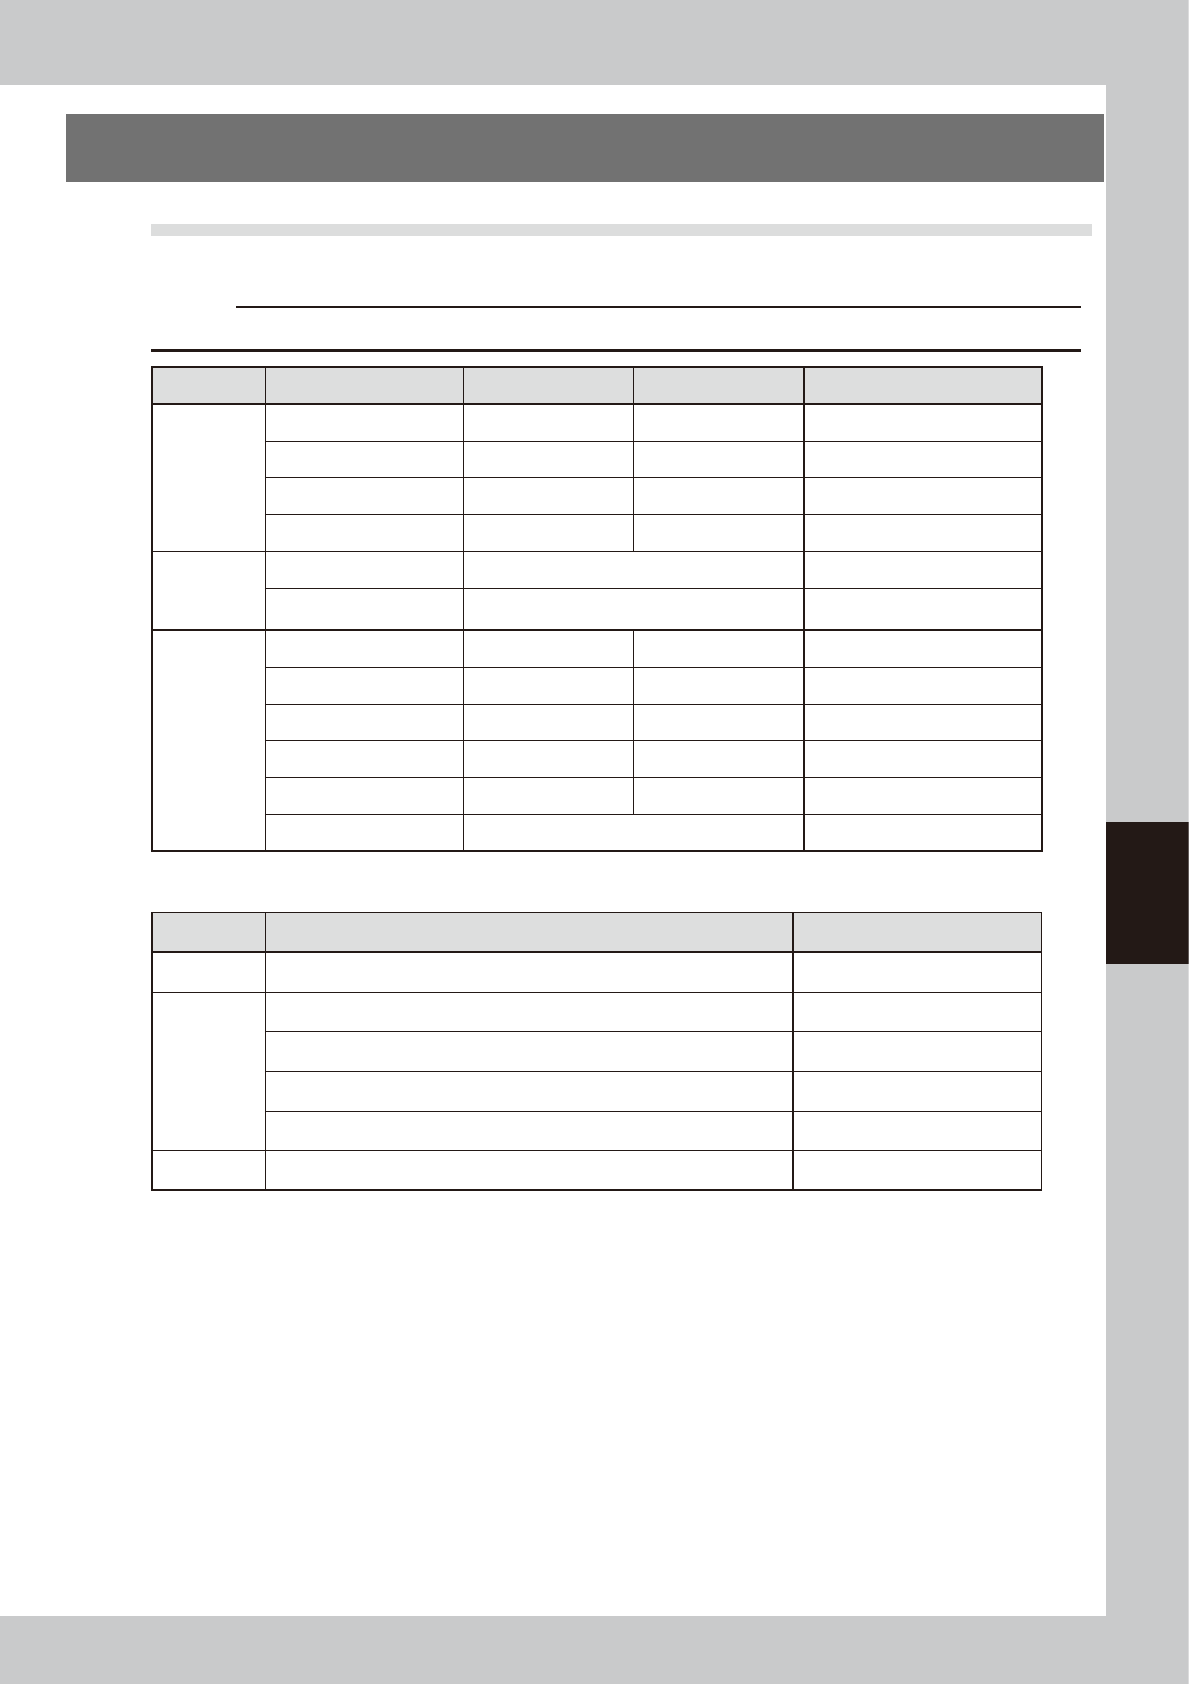
Lubricating point Guide Ball screw Remarks
Main unit
X-axis NSL grease NSL grease
Y-axis NSL grease — Guide only
W-axis NSL grease NSL grease Also used at hexagon spline
PU-axis — NSL grease
Feeder
exchange
carriage
Both sides of feeder car NSL (Cam follower)
Guide rail cover clamp NSL (Cover clamp, positioning section)
cATS
AZ-axis NSL grease NSL grease
AH-axis NSL grease NSL (Ball guide) NSL is also used for rack gear.
Pickup station NSL grease —
Vertical guide NSL grease —
Magazine shaft — NSL (Ball guide)
Both sides of feeder cart NSL (Cam follower)
n
Head unit
Lubricating point Grease
MU Spline shaft NSL
RS
Scissors gear LG2
Spool Grease for spool
Nozzle shaft tip Grease for shaft tip
Upper part of nozzle shaft Oil for upper part of shaft
FL Ball screw, scissors gear, spline shaft NSL