YSM40R_Mainte_E.pdf - 第57页
2-2 2 Daily maintenance items n Maintaining 4-beam head units When maintaining 4-beam head units, move the relev ant head unit only to front. Then access to the head unit as sho wn in the figure below . D B C A D B C A H…
2-1
2
Daily maintenance items
Before beginning work
In most cases, maintenance should be performed after powering off the machine.
However, some maintenance tasks are performed under emergency stop conditions with the power turned on.
In such cases, ensure adequate safety and press the emergency stop before beginning the maintenance.
Power on the machine during maintenance where any servo-axis must be operated or machine operation
checked. In this case, also ensure adequate safety before beginning the maintenance.
When operating the machine, make sure the following conditions are met.
n
Operating conditions
1. Supply air pressure is kept at correct pressure.
2. All safety covers are closed.
3. When the machine is equipped with feeder exchange carriages, all carriages are clamped.
4. Nozzles and other units are attached in place.
n
NOTE
The description "Cancel the emergency stop." is in the procedures of this manual. It means "releasing the emergency
stop and pressing the [Ready] button to turn the servo on".
n
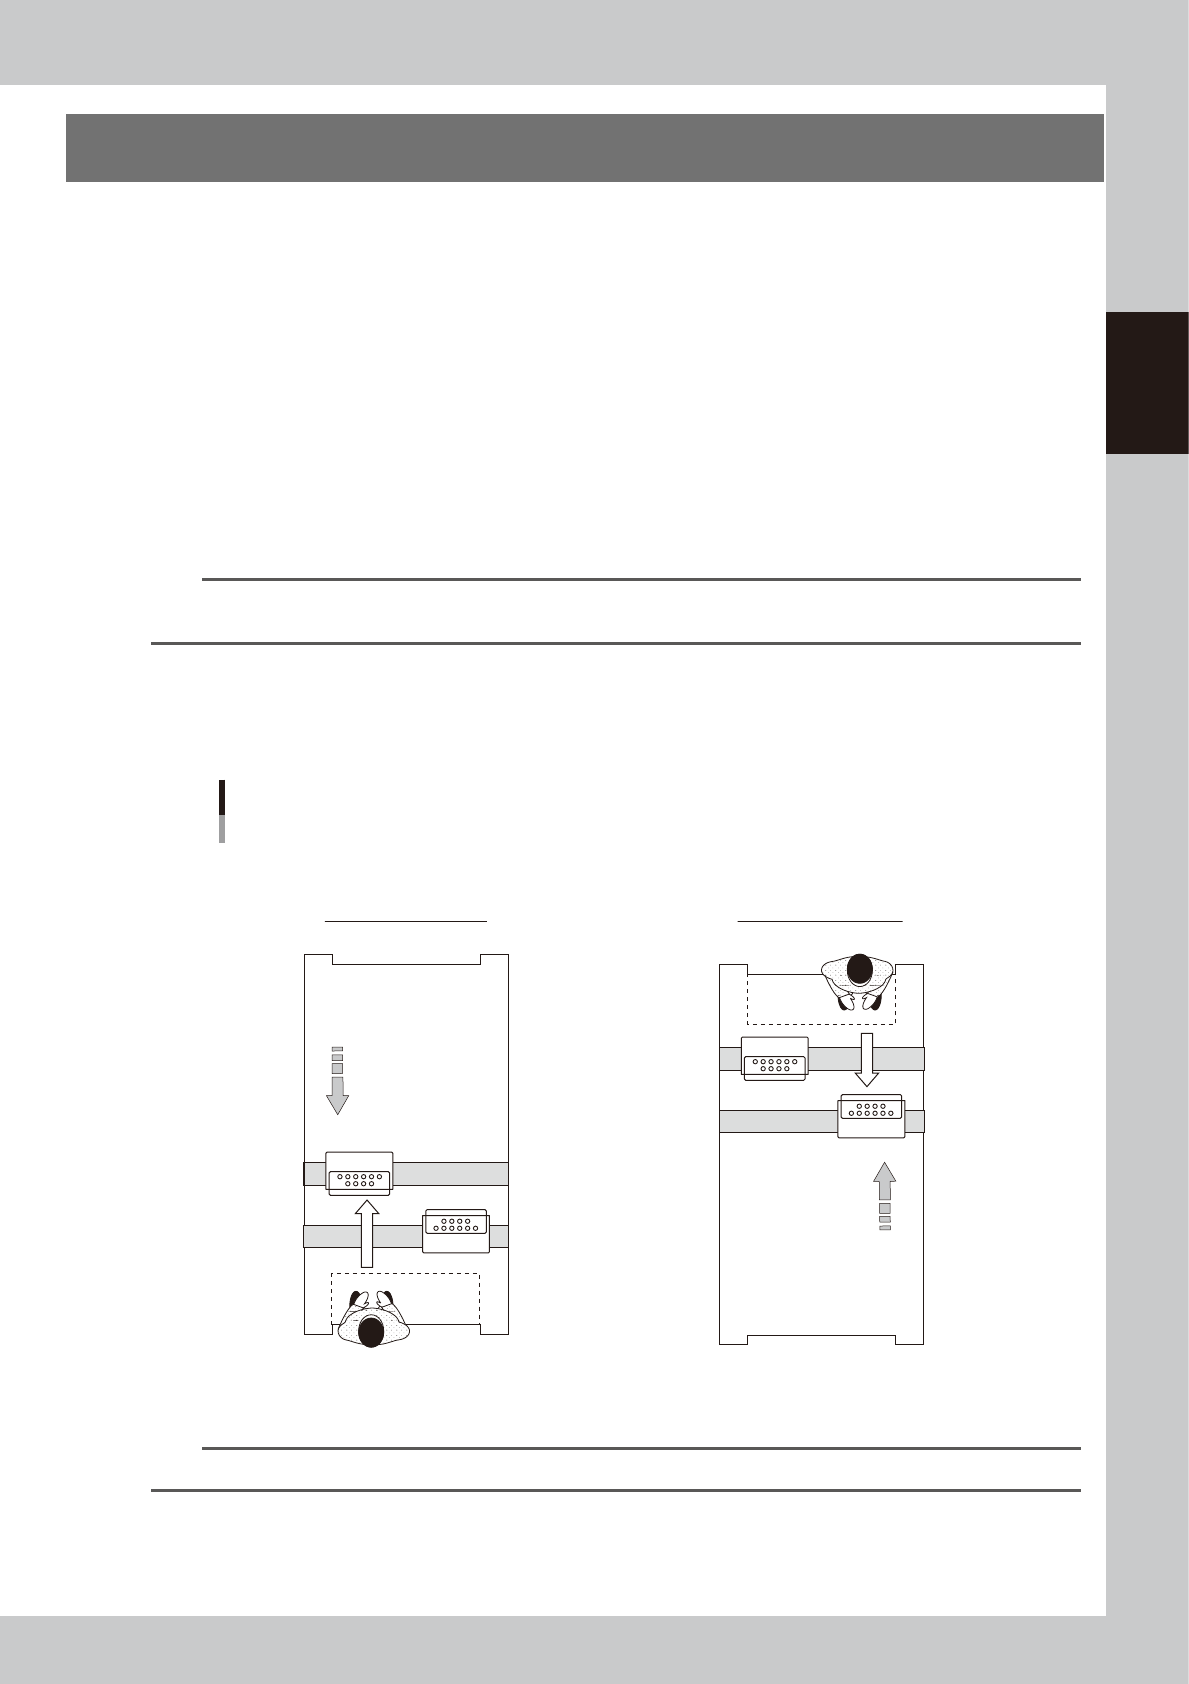
Maintaining 2-beam head units
When maintaining 2-beam head units, move the front head unit to rear and move the rear head unit to front to easily
access to the head unit.
Head units
2-beam type (Example: front/rear MU heads)
■ Maintaining head units
Machine front
Machine front
Maintaining rear head unit
Maintaining front head unit
Move head unit.
Move head unit.
A
B
A
B
5
3
204-N9-00
n
NOTE
The [Head Pos. Front] and [Head Pos. Rear] buttons on "Setup" screen are convenient to move head units.
2-2
2
Daily maintenance items
n
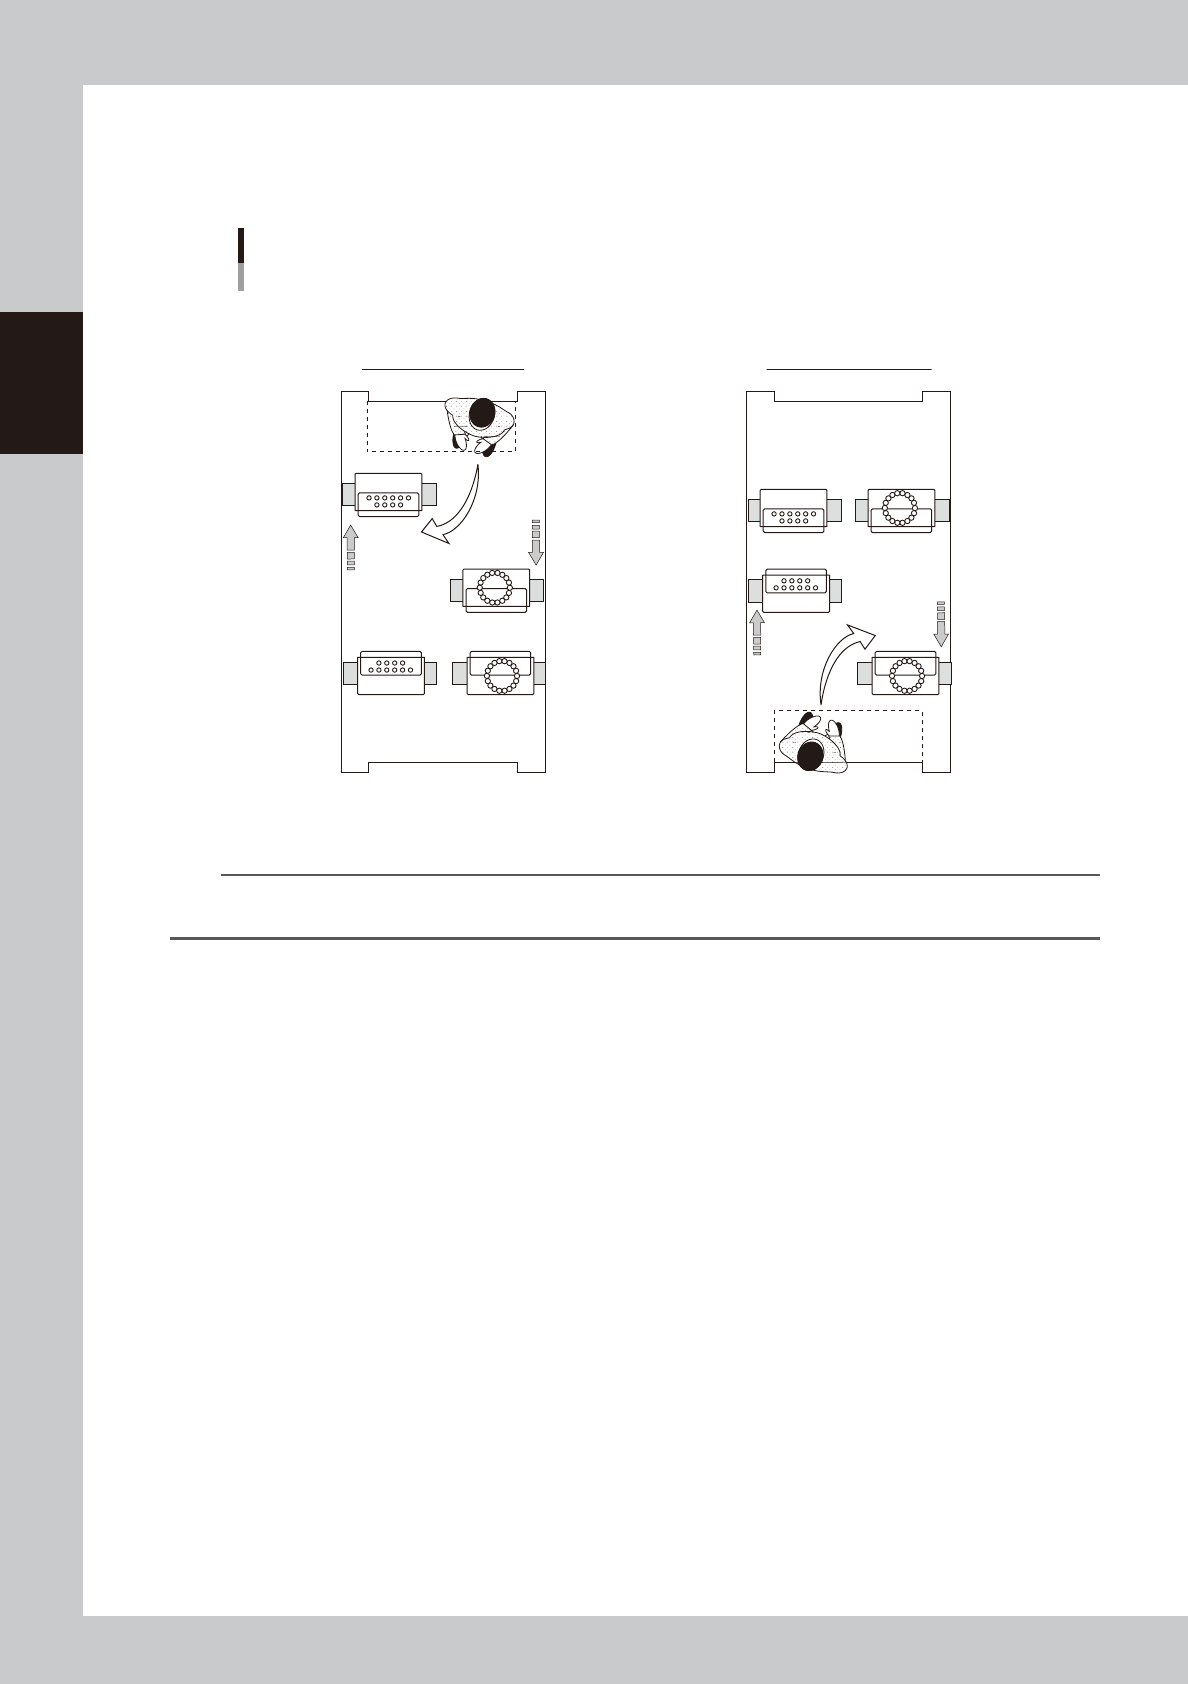
Maintaining 4-beam head units
When maintaining 4-beam head units, move the relevant head unit only to front. Then access to the head unit as shown
in the figure below.
D
B
C
A
D
B
C
A
Head units
4-beam type (Example: MU/RS heads)
■ Maintaining head units
Maintaining rear head unit Maintaining front head unit
Machine front
Machine front
53206-N9-00
n
NOTE
Pressing the [Head Pos. Front] and [Head Pos. Rear] buttons on "Setup" screen before moving head unit is convenient
for maintenance task.
2-3
2
Daily maintenance items
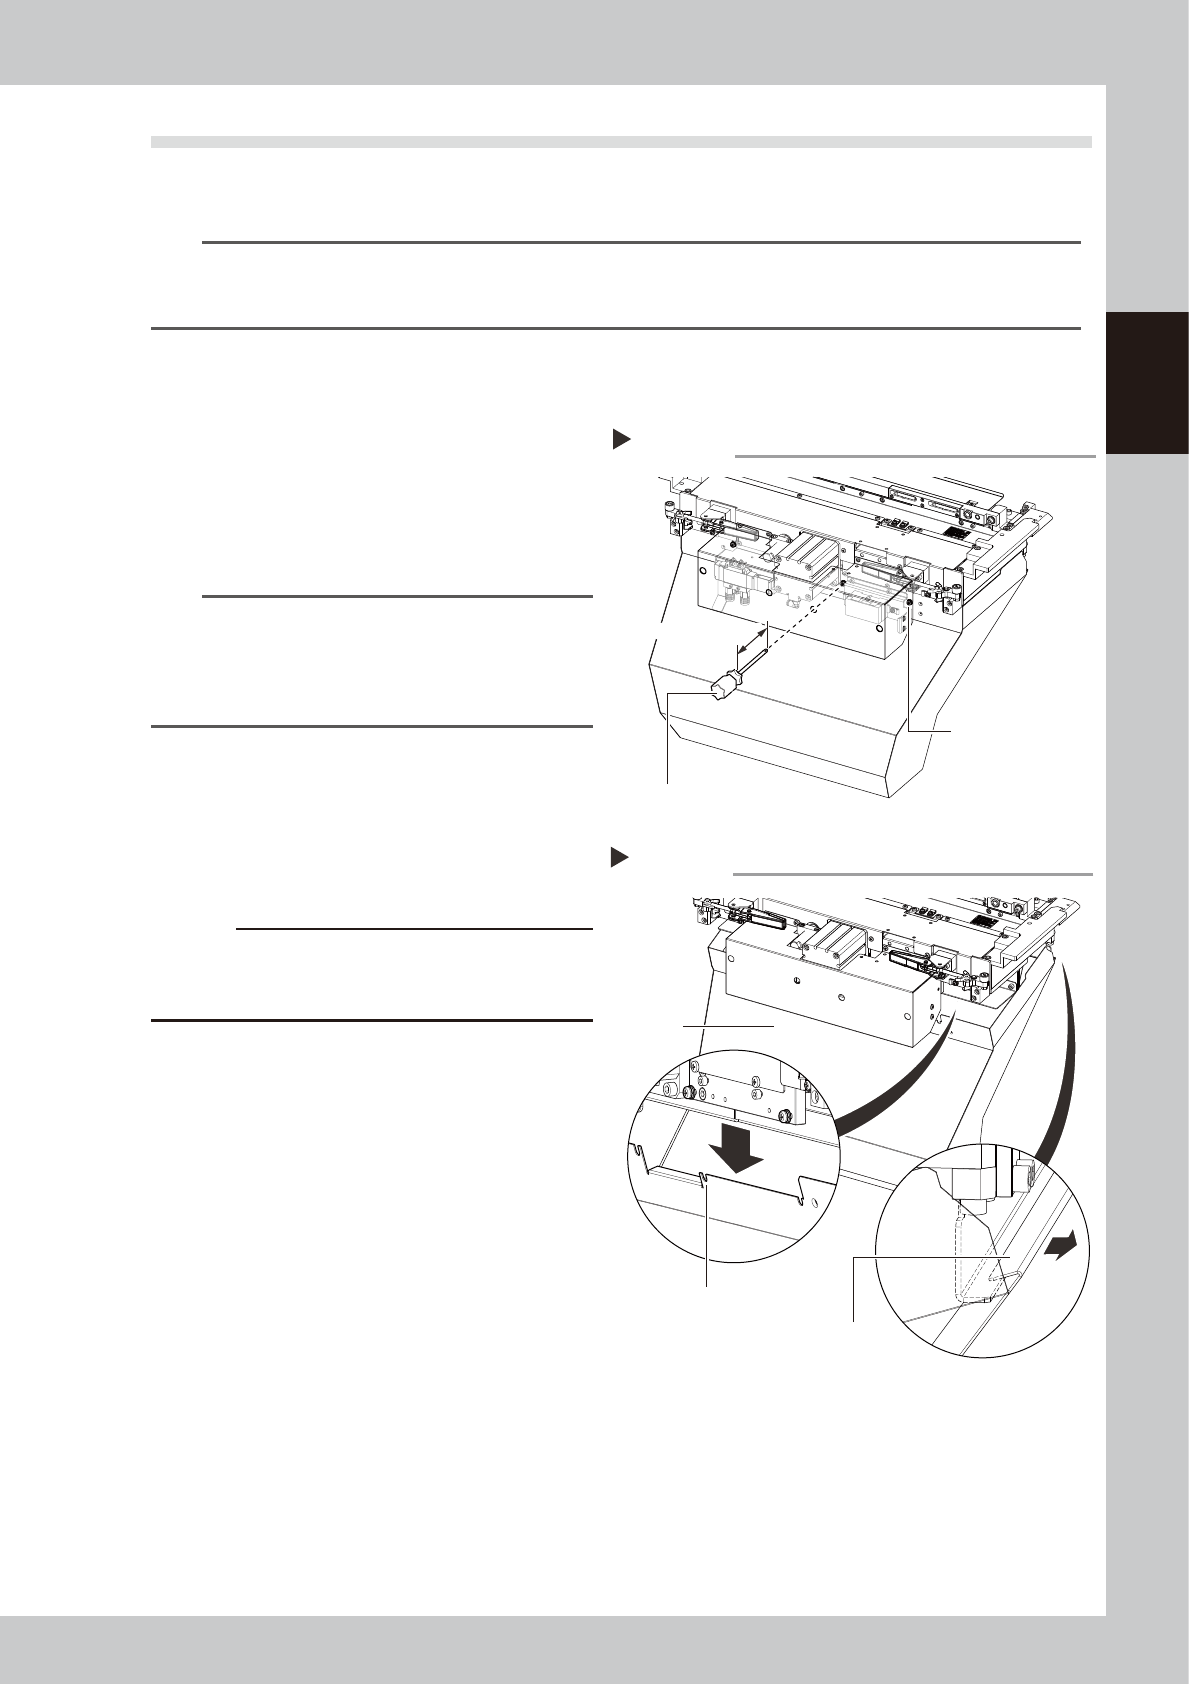
Detaching tape cutter duct
The feeder exchange carriage and tape cutter duct can be detached to make it easier to access to the machine
interior during maintenance work. The procedure for detaching the duct is described below.
n
NOTE
Some maintenance procedures described in this manual include instructions on detaching a feeder exchange
carriage. if it is still not easy to perform the maintenance work with detaching carriage, detach the tape cutter duct
as needed to make the work easier.
e
1
Detach the feeder exchange
carriage.
Press the emergency stop button and then
detach the feeder exchange carriage.
2
Loosen the duct mounting screws.
Use a Phillips screwdriver to loosen 4 duct
mounting screws as shown in the figure at
right.
n
NOTE
Do not completely remove the duct mounting screws.
The duct can be detached simply by partially loosening
the screws.
Use a Phillips screwdriver with a shaft length longer than
100 mm.
53200-N9-00
3
Detach the duct.
As shown in the figure at right, slightly slide
the front side of the duct downward and
then unhook the rear hook to detach the
duct.
c
CAUTION
As the duct will fall when all screws are loosened,
loosen the final screw while supporting the duct from
below.
53201-N9-00
4
Return the duct to original position.
After the maintenance work, etc. has been
completed, Return the duct to original
position in reverse order of detaching.
Remove the duct
Step 3
Duct
Duct securing bolt
position (notched)
Hook
Loosening duct mounting screws
Step 2
Duct mounting screws
(4 pcs)
Phillips screwdriver
Longer than 100 mm