DuraBlue II Customer Product Manual.pdf - 第101页
Service 5-1 1 Part 1126931_01 2018 Nordson Corporation 8. See Figure 5‐7. Remove the pump screws (3) and then remove the pump (2) and O‐rings (1). 1 2 3 Figure 5 ‐7 Replacing a pump 1 O‐rings 2 Pump 3 Pump screw 9. Cle…
Service
5-10
Part 1126931_01
2018 Nordson Corporation
Replacing a Pump (contd)
4. Remove the hydraulic side covers. Refer to Detaching the Exterior
Panels earlier in this section as needed.
5. Place a drain pan under the pump.
6. See Figure 5‐6. Loosen the screws that secure the motor to the base of
the melter and then slide the motor back.
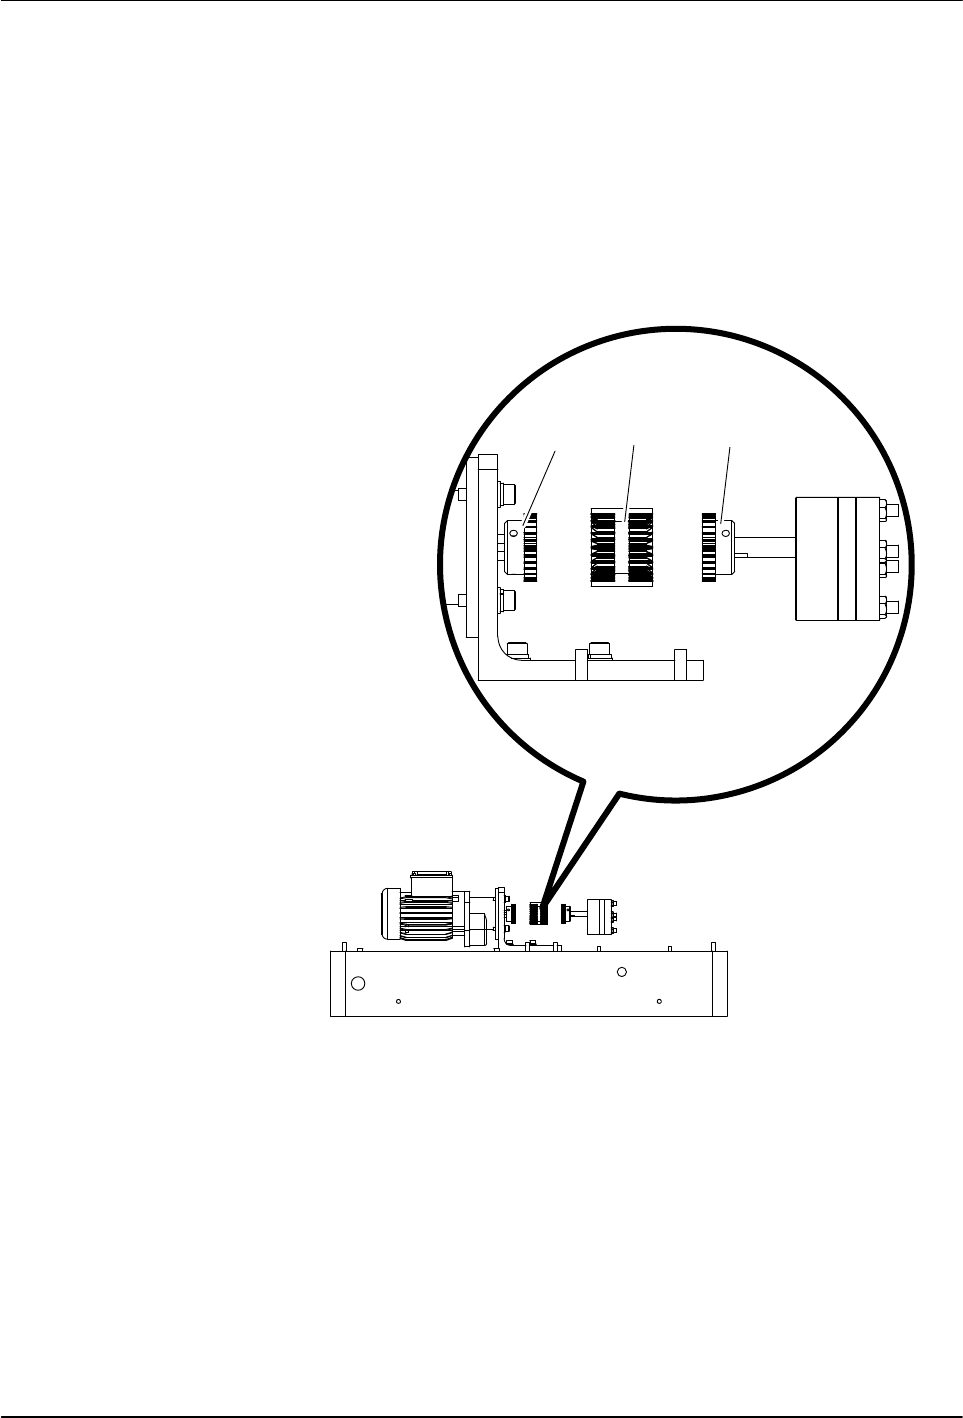
7. Slide the coupling sleeve (2) off of the coupling hubs (1 and 3), loosen
the pump coupling hub set screws, and remove the pump coupling hub.
1
3
2
Figure 5‐6 Coupling assembly components
1 Motor coupling hub
2 Coupling sleeve
3 Pump coupling hub

Service
5-11
Part 1126931_01
2018 Nordson Corporation
8. See Figure 5‐7. Remove the pump screws (3) and then remove the pump
(2) and O‐rings (1).
1
2
3
Figure 5‐7 Replacing a pump
1 O‐rings 2 Pump 3 Pump screw
9. Clean the surface of the manifold where the pump mates to it.
10. Allow the melter to cool to room temperature.
11. Install the pump coupling hub on the pump shaft, ensure that it is flush
with the pump shaft, and tighten the hub set screws.
12. Apply O‐ring lubricant to new pump O‐rings and install them on the pump.
13. Apply anti‐seize lubricant to the pump screws and secure the new pump
to the manifold with the screws. Use a torque wrench to tighten the
screws in a criss‐cross manner to 25Nm(222 in.‐lb).
Service
5-12
Part 1126931_01
2018 Nordson Corporation
Replacing a Pump (contd)
14. Slide motor assembly, including the motor coupling hub and sleeve,
toward the pump until the coupling sleeve engages with pump coupling
hub.
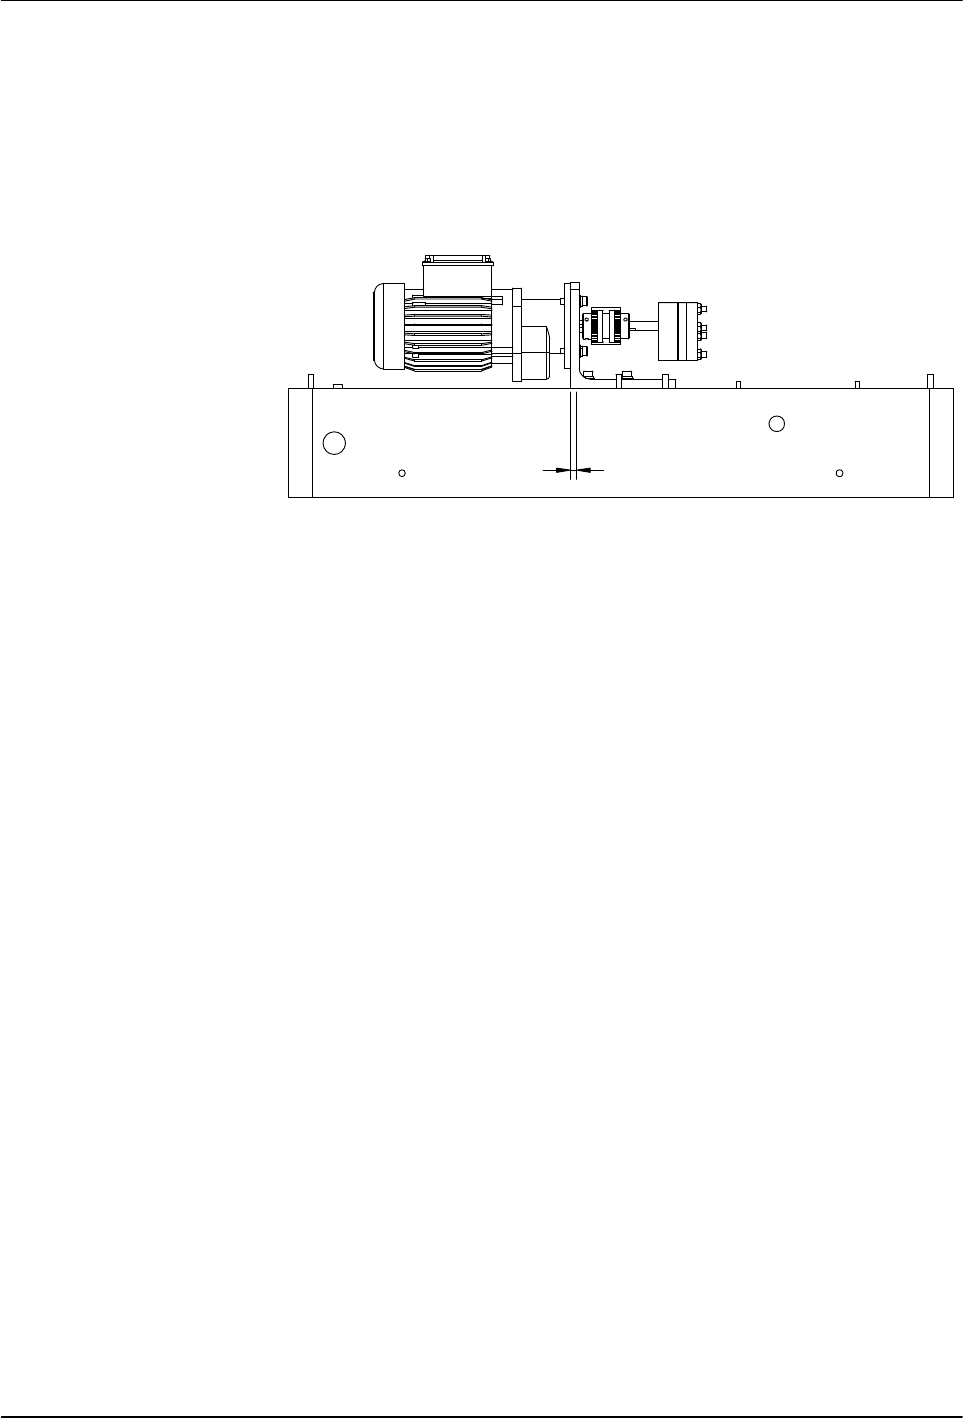
15. Ensure that the coupling sleeve cannot move, then slide the motor
assembly back 4 mm (0.16 in.), as indicated in Figure 5‐8.
4 mm (0.16 in.)
Figure 5‐8 Moving the motor assembly back 4 mm (0.16 in.)
16. Tighten the screws that secure the motor to the base of the melter.
17. To ensure proper motor and pump shaft alignment, verify that you can
freely slide the coupling sleeve back and forth by about 4 mm (0.16 in.)
each way.
18. Restore the system to normal operation.