DuraBlue II Customer Product Manual.pdf - 第93页
Service 5-3 Part 1126931_01 2018 Nordson Corporation Preventive Maintenance Schedule The maintenance intervals are general guidelines based on experience. Depending on the operating environment, production conditions a…
Service
5-2
Part 1126931_01
2018 Nordson Corporation
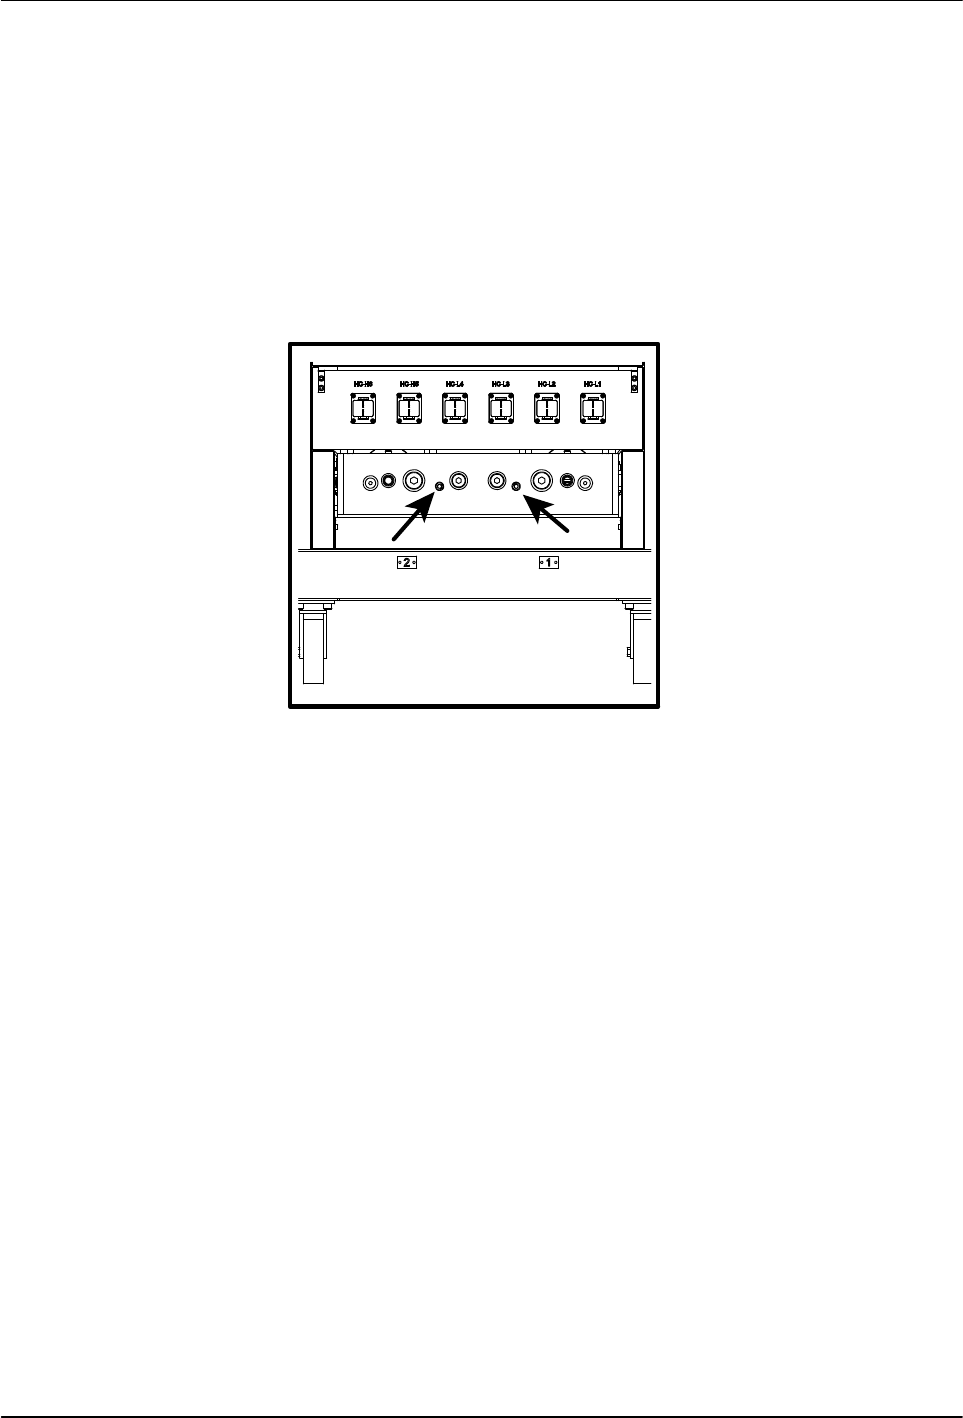
Through the Melter Drain Valves
1. Disable the motor(s). Refer to Section 4, Operation.
2. Place a container under the drain valve ports located on the bottom of the
manifold.
3. Open all the drain valves. Adhesive will drain from the valves.
4. When adhesive stops draining, close the drain valves.
5. Re‐use the material or properly dispose it of according to local
regulations.
Figure 5‐1 Location of the melter drain valves
Service
5-3
Part 1126931_01
2018 Nordson Corporation
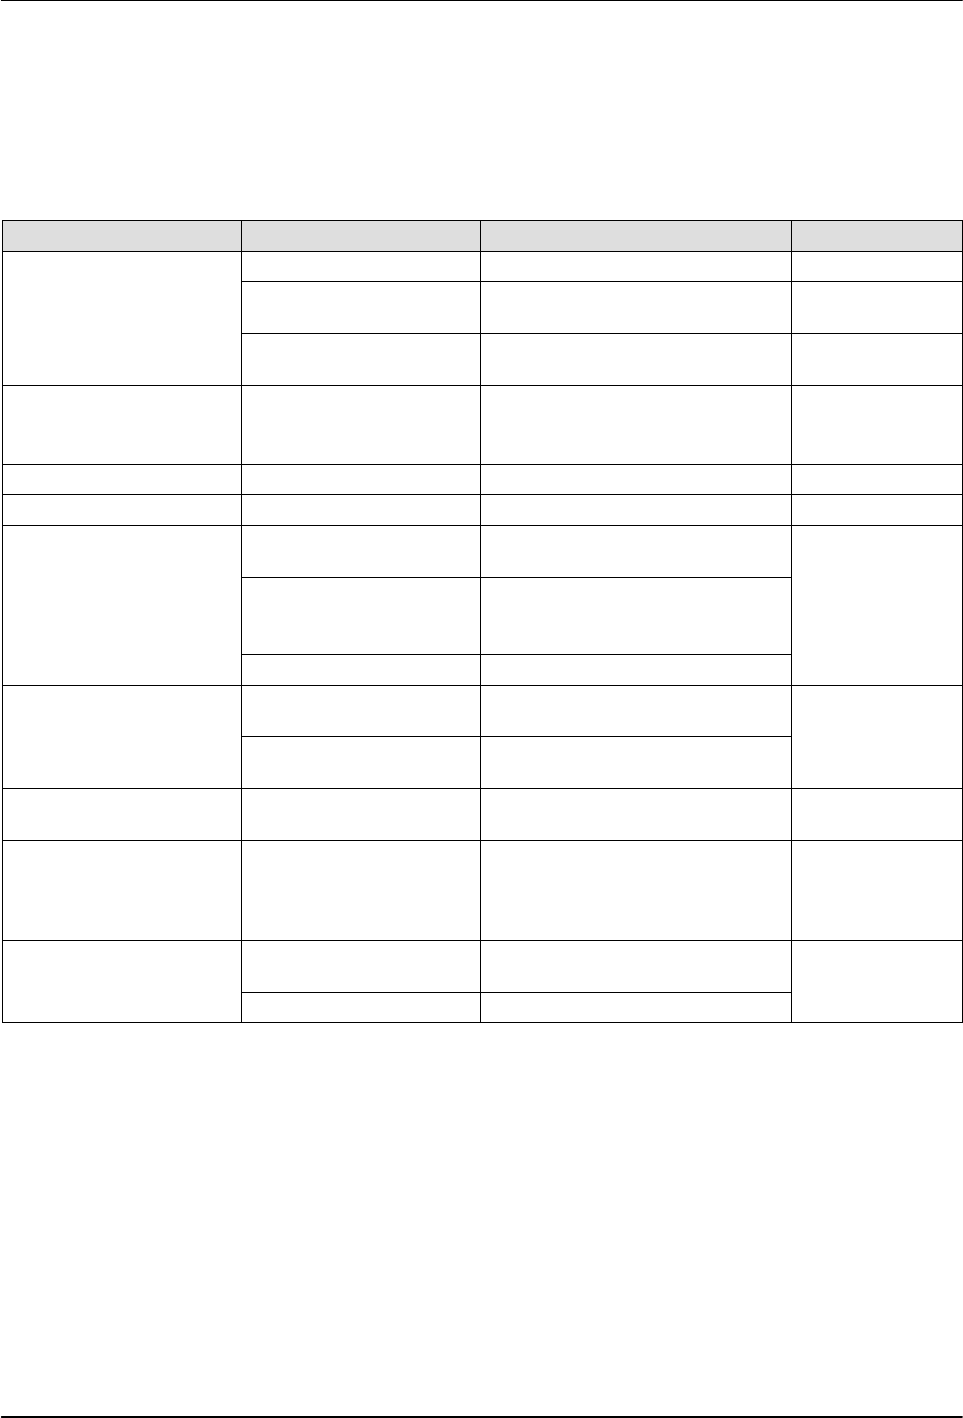
Preventive Maintenance Schedule
The maintenance intervals are general guidelines based on experience.
Depending on the operating environment, production conditions and melter
hours of operation, other scheduled maintenance tasks may prove
necessary.
Melter part Activity Interval Refer To
Complete melter External cleaning Daily External Cleaning
Inspect for external
damage
Daily
Purge with cleaning agent When material is changed Changing the
Material Type
Fan and air filter Check filter, clean or
replace if necessary
Clean fan screen
Depending on dust accumulation;
daily if necessary
Fan and Air Filter
Power cable Inspect for damage Every time the melter is serviced
Air hoses Inspect for damage Every time the melter is serviced
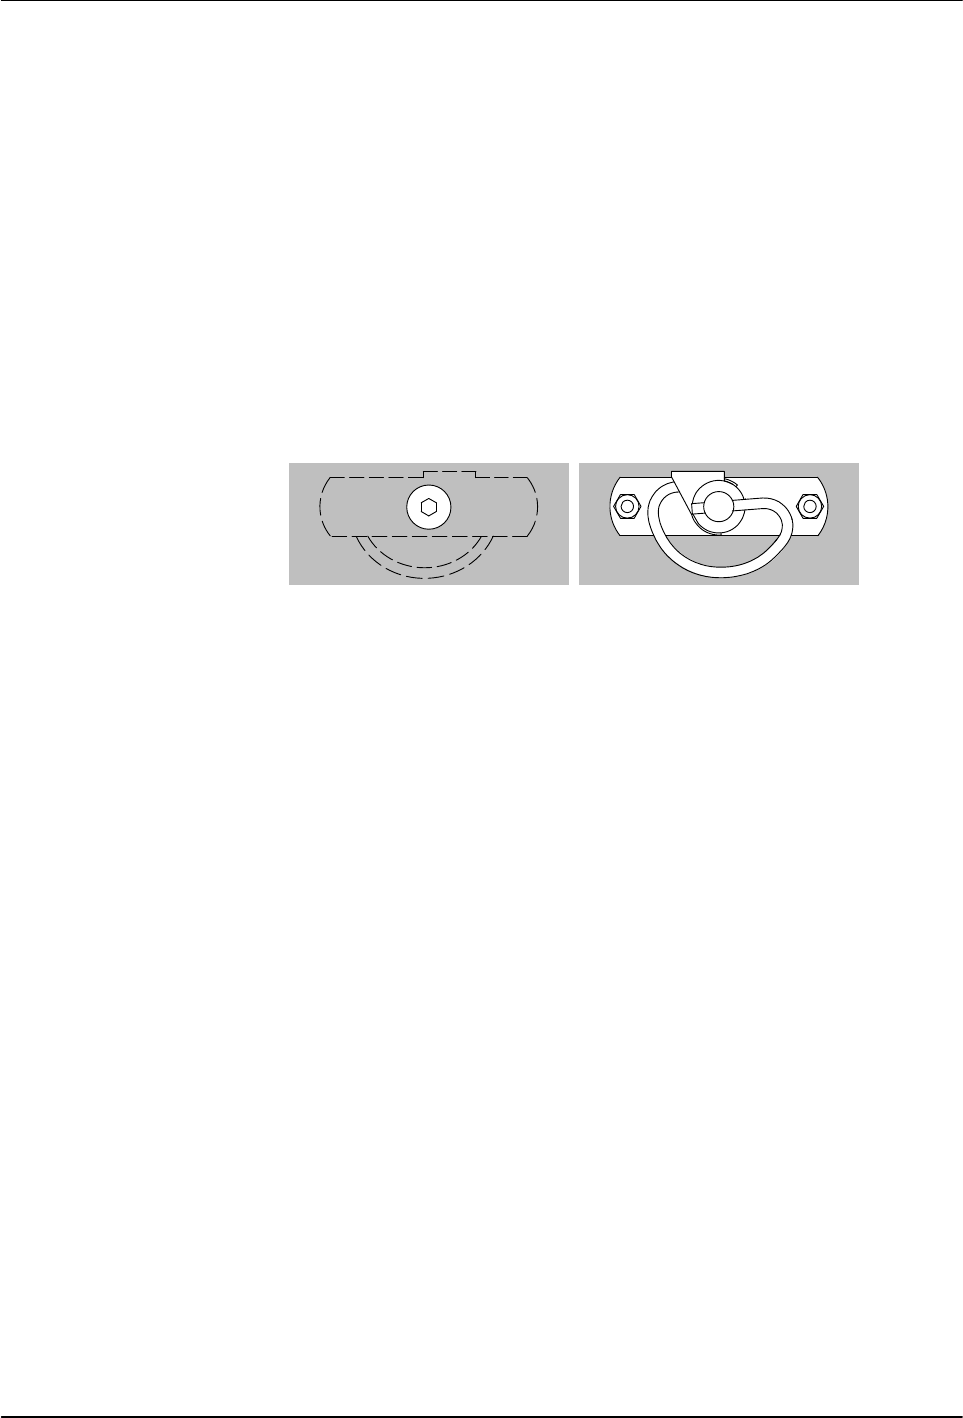
Pump Tighten the gland bolt (if
present)
After initial startup Pump
Check for leakage, tighten
gland bolt (if present) if
necessary
Dependent on hours of operation,
pump speed and pump temperature
Recommendation: Monthly
Tighten fixing screws Every 500 hours of operation
Motor / gear box / coupling Clean fan cover Depending on dust accumulation;
daily if necessary
Motor and Gear
Box
Change lubricant Every 15000 hours of operation or
every 2 to 3 years
Pressure control valve Disassemble and clean Every six months Pressure Control
Valve
Filter cartridge Replace filter cartridge
Disassemble and clean
filter cartridge
Depending on degree of material
pollution
Recommendation: Every 1000
hours of operation
Filter Cartridge
Tank Clean tank by hand When there is material residue in
tank
Cleaning the Tank
Tighten fixing screws Every 500 hours of operation
Service
5-4
Part 1126931_01
2018 Nordson Corporation
Changing the Material Type
1. Run the melter until empty.
2. Determine whether the new material may be mixed with the old material.
May be mixed: Remaining old material can be flushed out using the
new material.
May not be mixed: Thoroughly purge the unit with a cleaning agent
recommended by the material supplier.
NOTE: Properly dispose of the old material according to local regulations.
Detaching the Exterior Panels
Open the protective panels with a 4 mm Allen key.
On the inside
Fan and Air Filter
The air filters must be cleaned (knocked out) or replaced, depending on dust
accumulation.
Refer to Section 7, Parts, for the filter part number.