Oxford ICP-CVD SOP.pdf - 第3页
Page 3 of 11 A) Perform chamber con dition run 1. Visually chec k for a wafer insid e the loadlo ck 2. Check that no wafer is inside the cha mber a) Hold a flashlight against th e window, shi ne straight inside. If you c…
Page 2 of 11
TOOL OVERVIEW
The Oxford PlasmaPro100 ICPCVD is an inductively-coupled plasma (ICP) system designed to deposit SiO2 and SiNx at 20-
5000nm thicknesses. It is typically operated at table temperatures between 70 and 250C. Processes can be run between
0-100mTorr. It is plumbed with SiH4 (4%, in Ar), Ar, H2, N2O, CF4, O2, and N2. It uses helium backside cooling to maintain
wafer temperature during process, using a physical clamp to maintain sample position.
FULL PROCEDURE
Log in via Mendix. Mendix controls power to the
monitor.
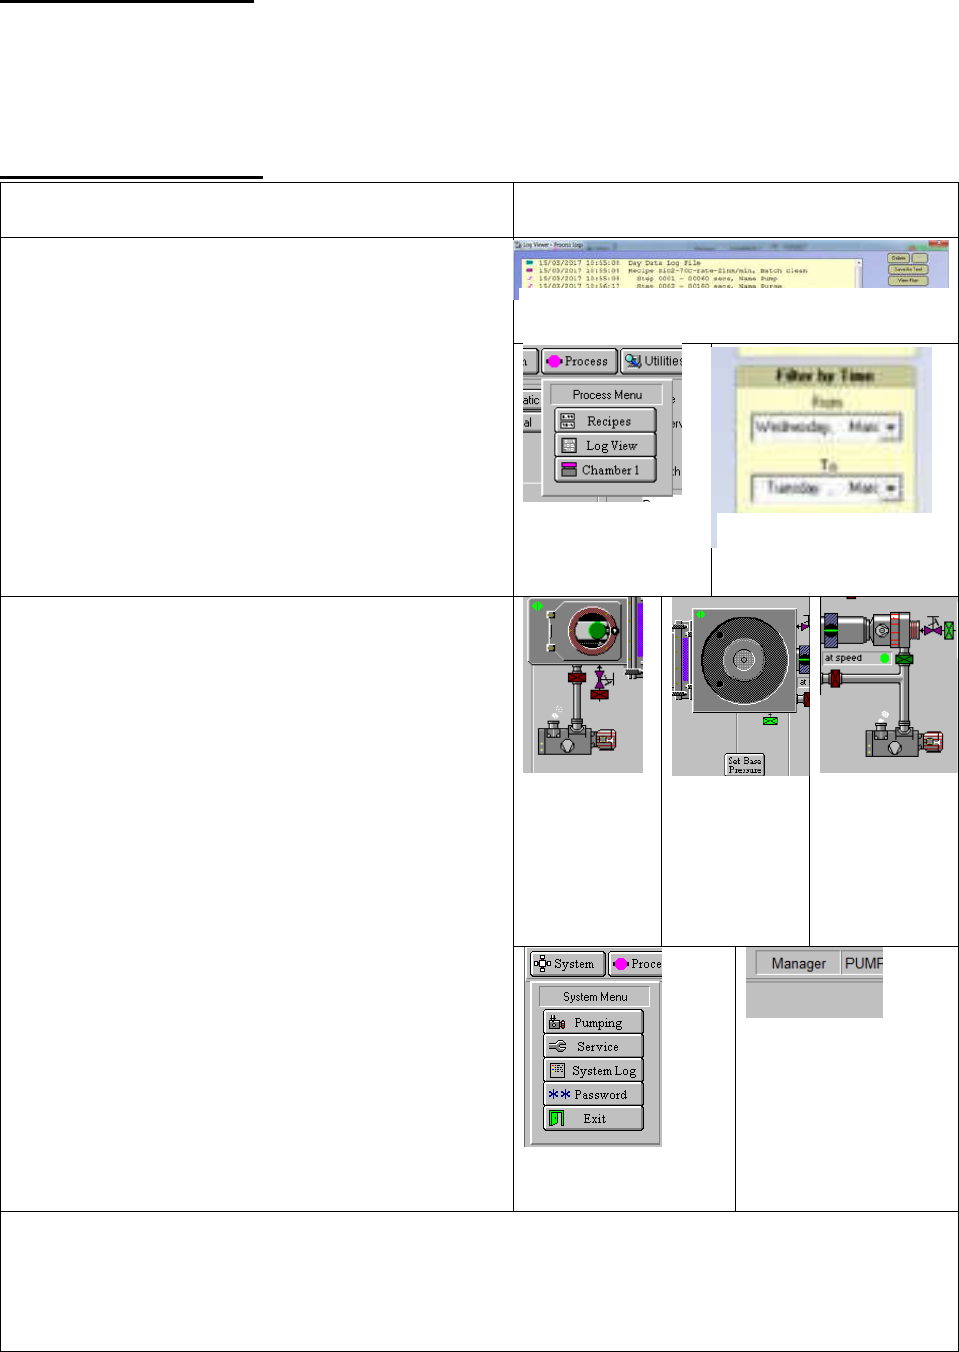
Check Process Logs:
1. Click Process, then Log View
2. In the Log Viewer screen, use “Filter by time” to
make sure a reasonable date range is selected
3. Scroll all the way down to view the most recent
run
4. If the most recent run is an appropriate
chamber clean, you can proceed with your run
(check guidelines for appropriate cleans in
section G)
a. Using the log to view runs in detail is
covered in Appendix A
5. Exit the Log Viewer (x, upper right corner)
Figure 2. Main Menu
dropdown
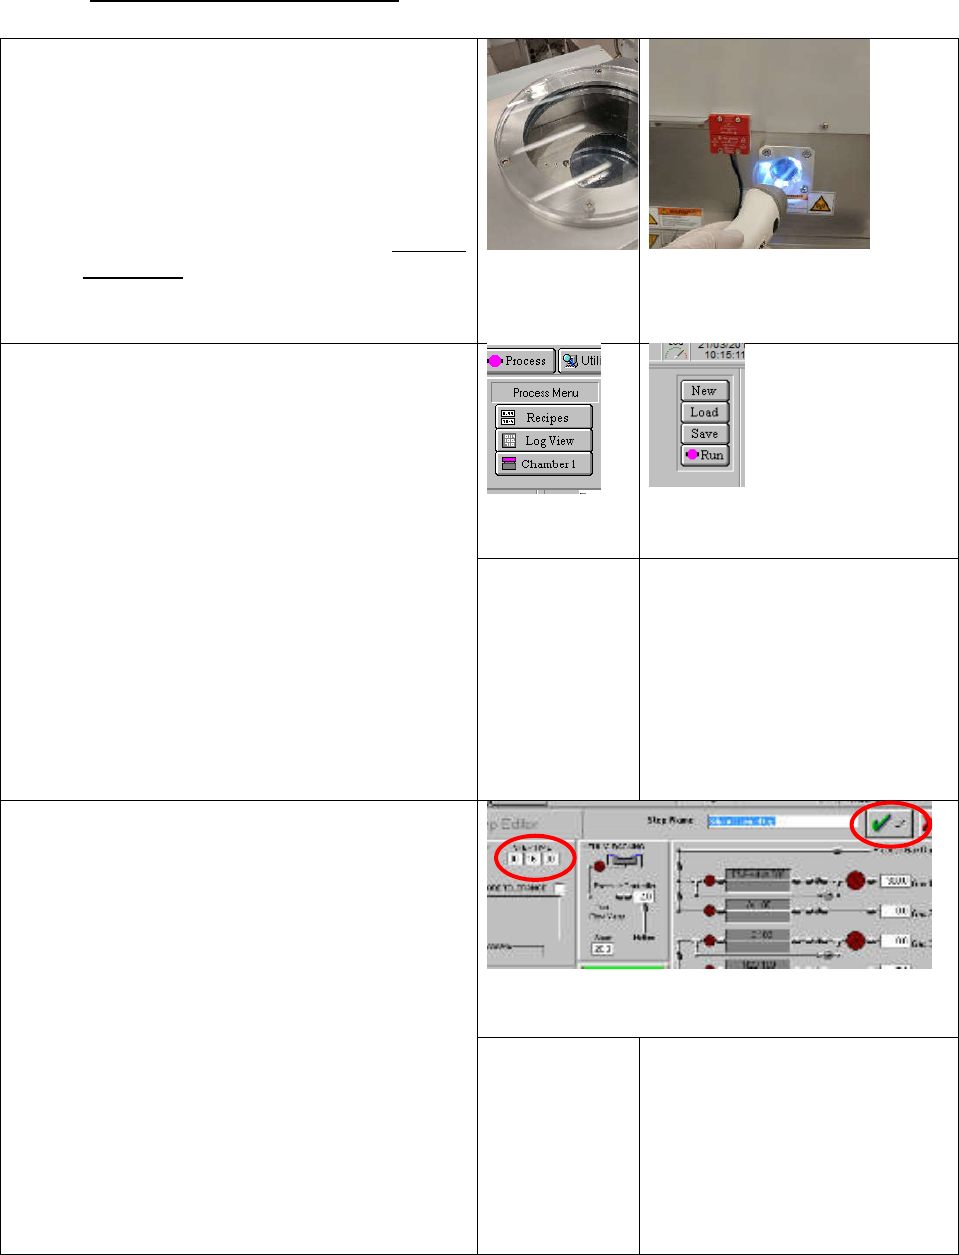
Check the tool condition:
6. Go to Pumping page, from the System menu
7. Check that turbo, backing, and roughing pump
are all running (spinning animation)
8. Check turbo speed (“at speed”)
9. Check vacuum (Penning <~3e-07Torr)
a. If “Red Alert” is shown around the
screen, or the Turbo is off, alert an
MNFL staff member and stop here
10. Check that a) No wafer is shown in the process
chamber, and that b) there is a wafer in the
loadlock
11. Check current user (top of screen). If it reads
anything other than “user”, log in as user:
a. Press System, then Password, and
enter USER/USER in the
username/password boxes in the
popup window.
Figure 4.
Pumping page
view of Loadlock
& roughing
pump. Green
circle indicates a
wafer
Figure 5.
Pumping page
view of process
chamber. Green
circle would
indicate a wafer.
Figure 6.
Pumping page
view of turbo
pump & backing
pump. Note “at
speed”
Figure 7. System menu
dropdown.
Figure 8. Currently logged-
in user displayed at top of
screen.
12.
If the previous user’s cleaning process is not finished:
a. If plasma steps have finished, and the prior total deposition thickness totalled <1um, it is
reasonably safe to abort the cleaning process, and unload the wafer into the loadlock
See Appendix B for explanation of cleaning process steps
Figure 1. Log View page. Scroll down for more recent runs
Figure 3. "Filter by time"
function of Log View
Page 3 of 11
A) Perform chamber condition run
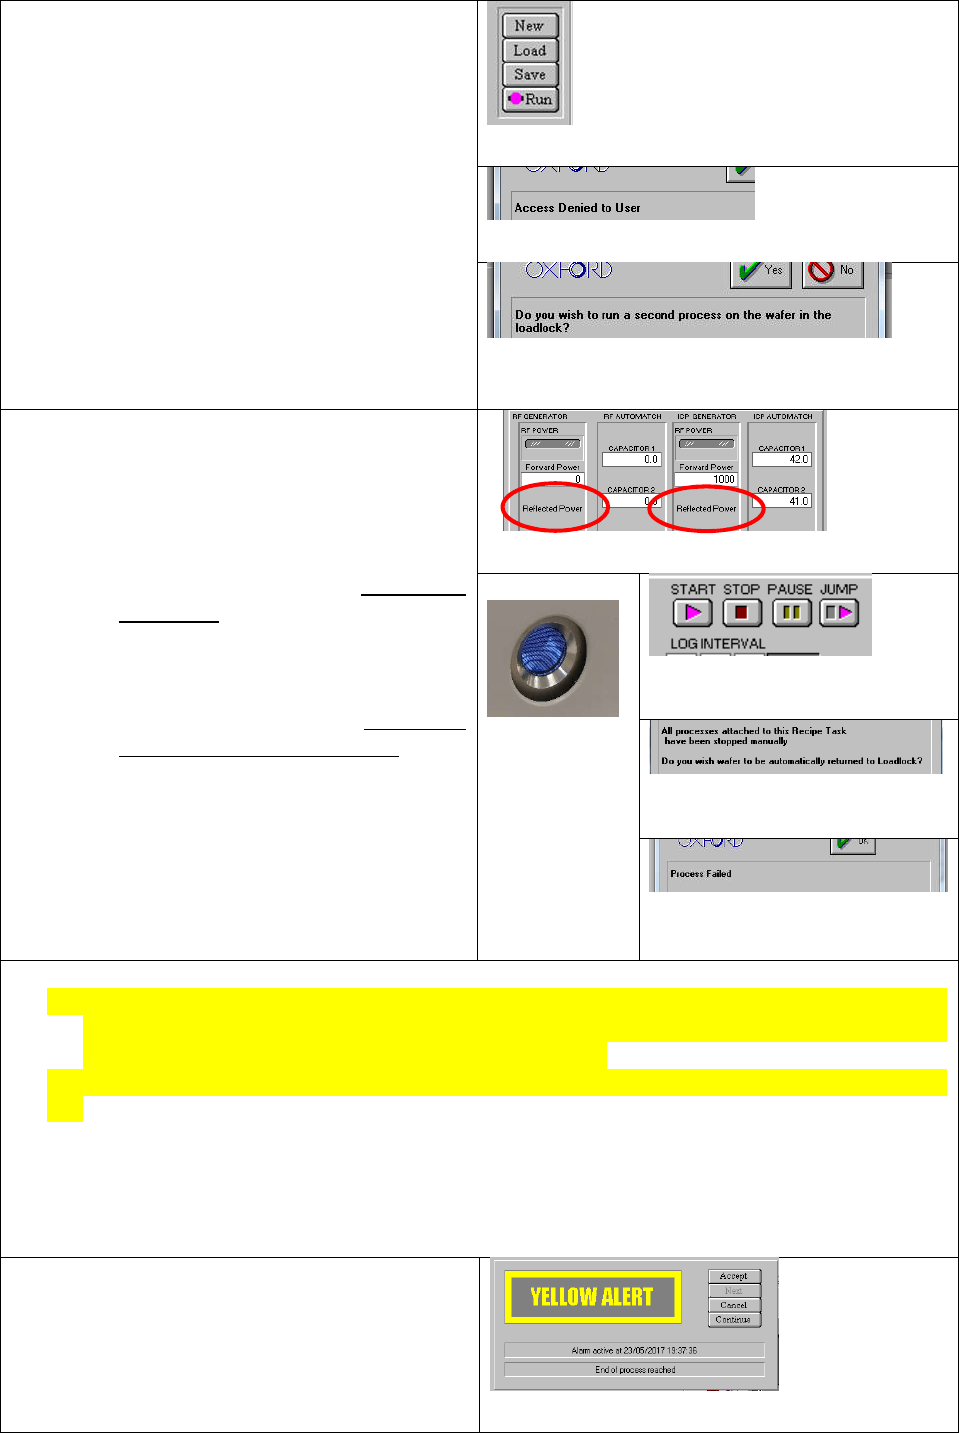
1.
Visually check for a wafer inside the loadlock
2. Check that no wafer is inside the chamber
a) Hold a flashlight against the window, shine
straight inside. If you can see a region with
three small slits radiating outward from the
center, no wafer is inside.
b) If you see a dark shiny continuous disk in
the middle, there’s a wafer inside. Find the
MNFL staff
Figure 9. Loadlock.
Wafer is inside
Figure 10. Flashlight against window,
check for wafer.
3.
Locate your desired recipe
a) Click Process Menu, then Recipes
b) Press Load
c) A popup reading: “Currently loaded recipe
contains unsaved changes. …..”, click Yes.
This will restore the recipe to the staff-
programmed defaults (what we want)
d) Find your desired recipe from the pop-up
list, click OK
NOTE: If heating the chamber from 70C to
250C, run the “@Heat Chamber to 250C”
process before running your conditioning
process. This will take ~25 minutes.
Figure 11. Process
Menu dropdown
Figure 12. Recipe Load button on the
recipes page
[RECIPE
SELECTION
dialog]
[UNSAVED CHANGES popup]
4.
Modify the recipe
a) Left-click on the “Dep” step (different
name in each recipe), click “Edit Step”
i) NOTE: click on the step in the white box
of the Recipe Editor window, not the
step library
b) Change the step time (circled) to allow
deposition of >100nm of material
i) NOTE: can only change step time, not
other parameters
c) Click “OK” to exit the editing screen
Figure 13. Edit Step screen, showing Step time (circled, left) and
"OK" button (circled, right)
[Recipe Editor
window]
Page 4 of 11
5.
Run the recipe
a) From Recipes page, click “Run”, will hear
pump whirring get louder
i) NOTE: Do not click “Save” from the
Recipes page, it will bring up the
“Access Denied to User” popup
ii) NOTE: sample will be loaded from
loadlock into chamber automatically
b) When dialog box comes up asking to “run a
second process”, click yes. The first process
that was run was the previous user’s
cleaning process
c) Process page will come up automatically
Figure 14. Run button on Recipes page
Figure 15. Access Denied popup, if a User tries to save a recipe
Figure 16. "Run a second process" popup.
6.
Monitor Process
a) Wait through “Pump” and “Purge” steps (5
minutes)
b) Once “Dep” step begins, watch RF power
stabilize on screen
i) If Reflected RF (red circles in picture)
does not stabilize at <5W, contact the
MNFL staff
c) Watch for plasma to ignite and stabilize in
chamber;
i) NOTE: if plasma is not visible once RF
power has stabilized, abort the
process, inform the MNFL staff
Figure 17. RF generator portion of Process Chamber page.
Figure 18. Plasma
in the chamber
Figure 19. Stop, Pause, and Jump
buttons.
Figure 20. Process aborted popup.
Always click yes!
Figure 21. Process Failed popup[
To abort a process, click the STOP button, on the process page
a) NOTE: If you stop a process, or it aborts due to a hardware fault, a dialog box will pop up asking if
you want your sample moved to the loadlock. Always click yes!!! You cannot unload your sample
manually, so if you click no, the staff will have to assist you
b) NOTE: NEVER CLICK THE ‘STOP ALL AUTO PROCESSES’ button in the top-right corner of the screen
c) The PAUSE and JUMP buttons allow you to a) temporarily shut off only the RF (Don’t do this,
reignition may not occur correctly), and b) skip the rest of the current step (avoid skipping steps
unless you need to shorten the actual deposition time mid-process)
d) A successfully-aborted process will result in your wafer being returned to the loadlock, where
you’ll see the “Yellow alert”, and a “Process Failed” popup. Remove your wafer, and contact the
MNFL staff
a)
Once process is complete, a “Yellow Alert”
pop-up will appear
b) Click on it, click “Continue”
Wait ~30s for wafer unload sequence to finish
Figure 22. Yellow Alert popup