00196044-05 - sg x und x4i fse_en.pdf - 第420页
Component Handling X Feeder Operation S tudent Guide (FSE) SI PL ACE X Series and X4I Component Ha ndling Edition 01/2009 EN 420 10.2.7.7 Sequence in the 8mm X Feeder Main Men u 10-20: Sequence main menu 8mm X feeder
Component Handling
Operation X Feeder
Student Guide (FSE) SIPLACE X Series and X4I
Edition 01/2009 EN Component Handling
419
10.2.7.6 Settings and Functions in the X Feeder Main Menu
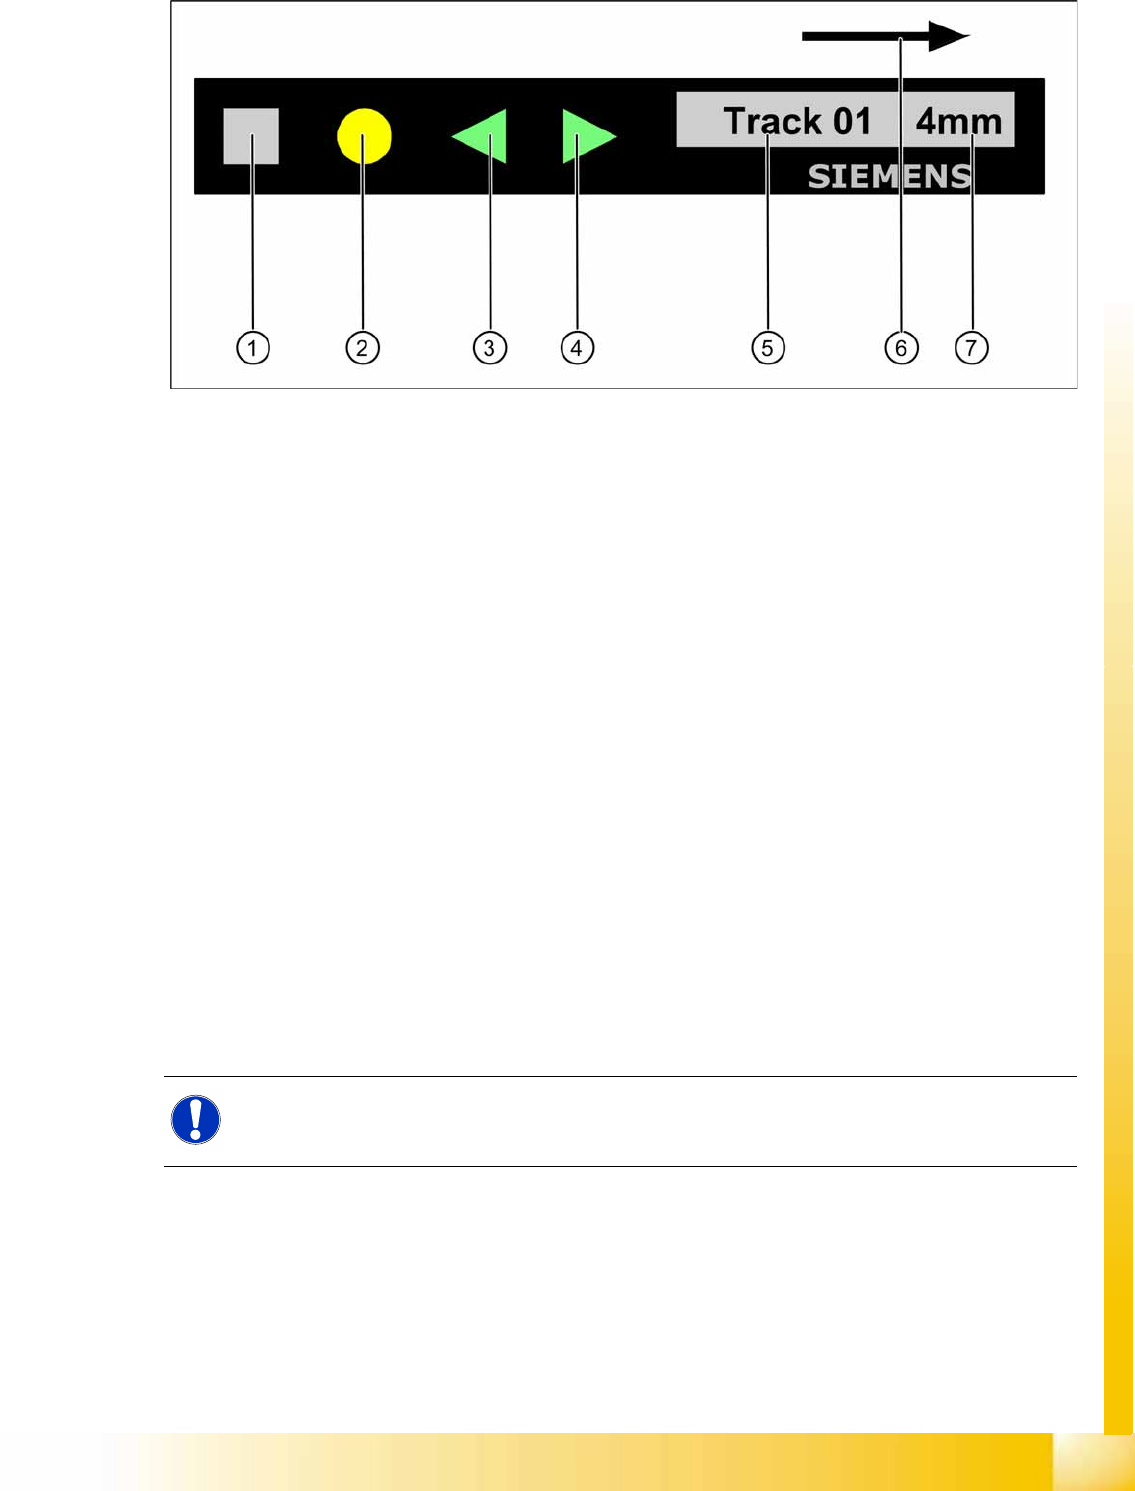
10-19: Control panel for X feeder
Legend
1. "SET" button:
– Press briefly to switch over to the next menu in the main view.
– Prolonged pressing sends a request to call up component verification.
2. "Foil" button:
– Pressing this button starts the drive motor for the cover foil, which runs until the foil has been
stretched tight and
– the motor toggle switch turns off or until the timer has counted 30 seconds.
3. "Backwards" button:
(Both functions should only be performed without the cover sheet fitted).
– Press briefly and the tape is move backwards by the set cycle step.
– Prolonged pressing moves the tape back.
4. "Forwards" button:
– Press briefly to move the tape by the set cycle step.
– Press for longer to move the tape forwards. Make sure the cover foil is not clamped in.
5. Display showing track on location
6. Transport direction
7. Cycle step
NOTE:
If correctly managed in SIPLACE Pro, the cycle for X feeders can be automatically set when a
recipe is downloaded.

Component Handling
X Feeder Operation
Student Guide (FSE) SIPLACE X Series and X4I
Component Handling Edition 01/2009 EN
420
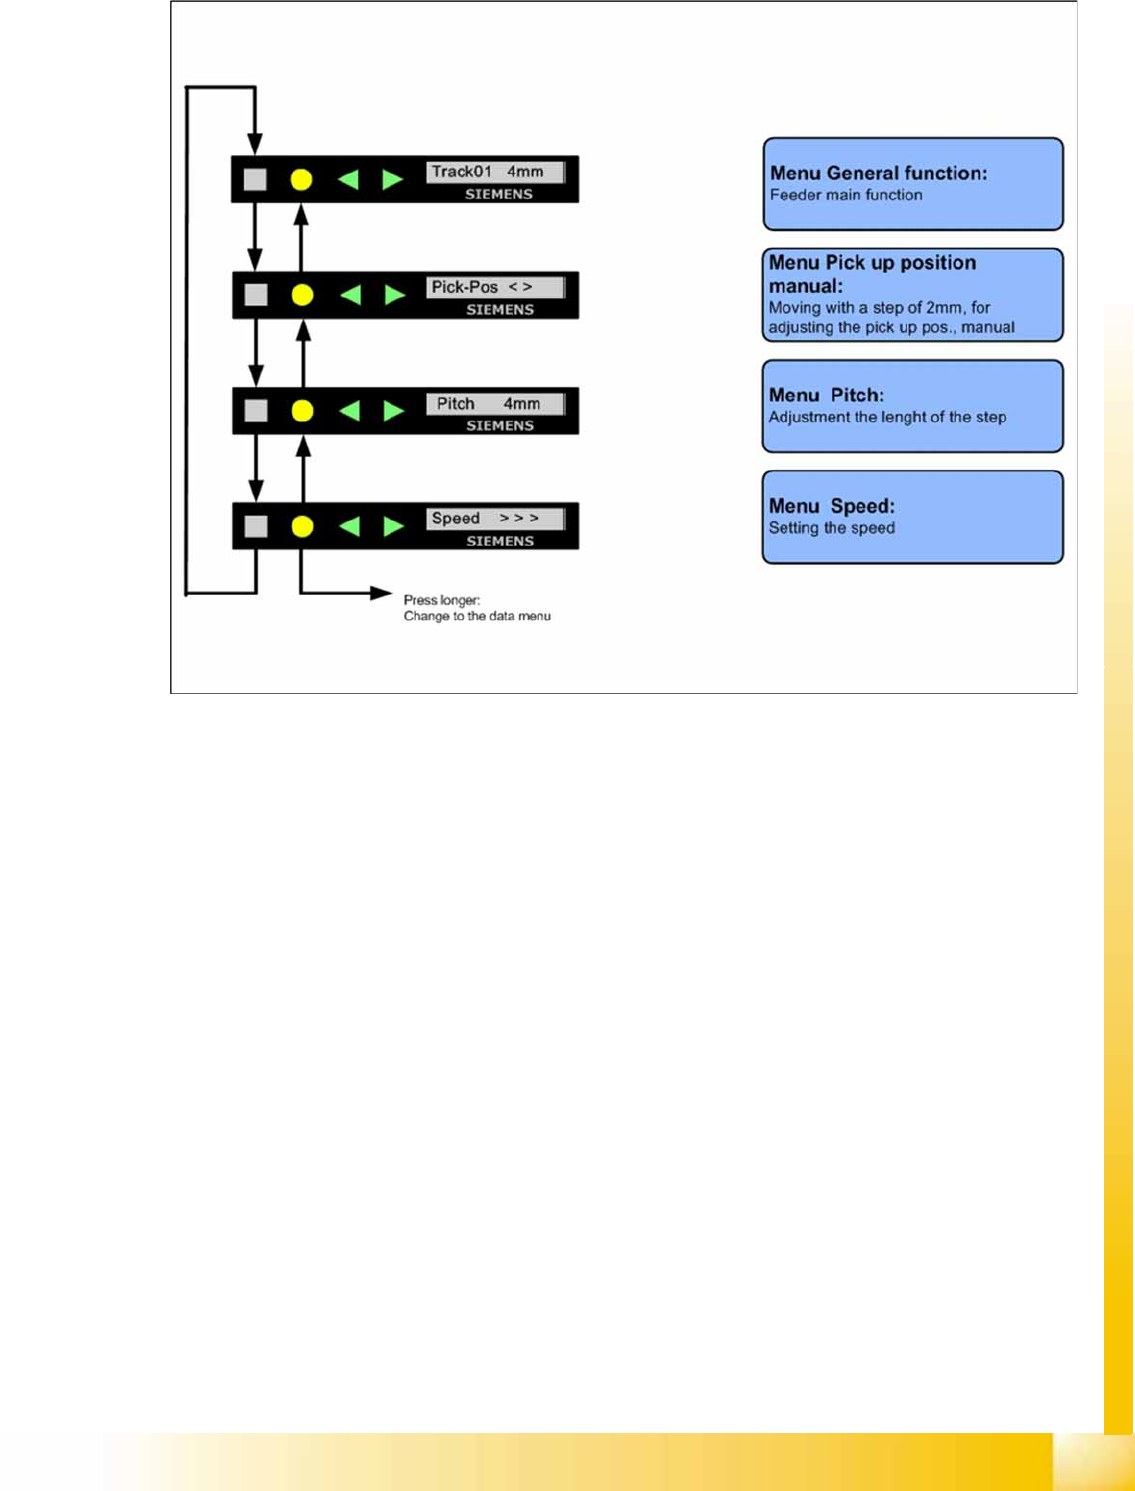
10.2.7.7 Sequence in the 8mm X Feeder Main Menu
10-20: Sequence main menu 8mm X feeder
Component Handling
Operation X Feeder
Student Guide (FSE) SIPLACE X Series and X4I
Edition 01/2009 EN Component Handling
421
10.2.7.8 Sequence in the 12mm X Feeder Main Menu
10-21: Sequence main menu 12mm X feeder
10.2.7.9 Setting the Pick Up Position for the 8 mm X Feeder
X Press the "SET" button.
X It appears the current pick up position on the display (e.g. Pick-Pos 3)
X With the buttons "FORWARD" or "BACKWARD" you can set the new pick up position.
X If you change the pick up position to the previous position, you will see the following message
(example assumes previous position was position 3): Pick-Pos 2 ? on the display.
X Confirm the new pick up position with the yellow button, it appears Pick-Pos 2 ! on the display.
X If pickup position 4 and an 8mm pitch were selected, you will see the menu for manually setting the
"Pickup pos < >" if you press the "SET" button.
X Depend on the Pick up position you can adjust in 2mm steps the correct pick up position.
X Was the pick up position correct appears the menu "Pitch" now and you can set the correct pitch
1,2,4,8mm with the buttons "FORWARD" or "BACKWARD".
X Press the "SET" button two times to confirm your settings.