00198150-02_SM_TX_en.pdf - 第112页
6 Gantries 6.3 Trailing Cable and Printed Circuit Boards 112 Service Manual SIPLACE TX Series 06/2017 Installation ► Installation is performed by following the above instructions in the reverse order. Also observe the fo…
6 Gantries
6.3 Trailing Cable and Printed Circuit Boards
Service Manual SIPLACE TX Series 06/2017 111
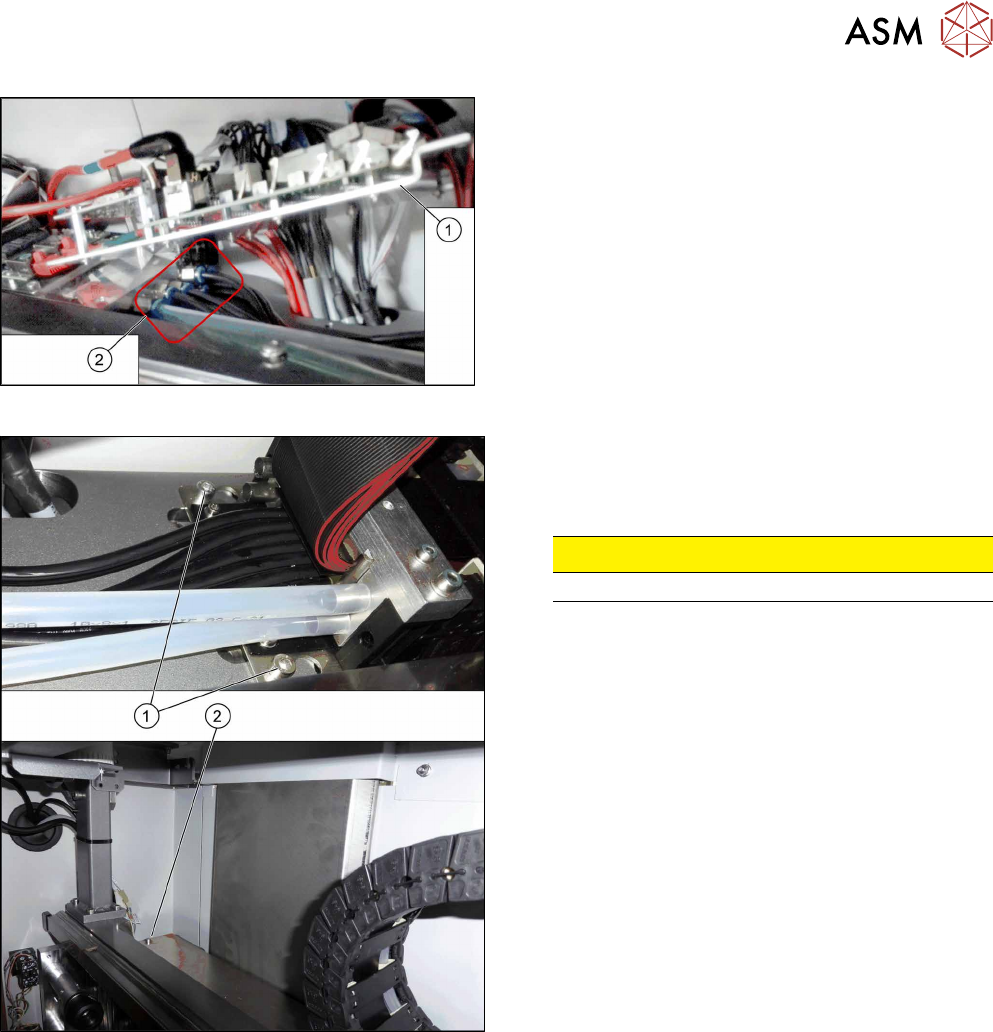
Fig.138: Hoses
► Lift up the console(1) to get access to the
hoses(2).
► Pull the hoses off. You may want to mark their po-
sitions for easier replacement later on.
Fig.139: Trailing cable fastening screws
The trailing cable is fastened with three screws.
► Loosen the two screws(1).
► Loosen the screw(2).
CAUTION!
Do not open any other screws.
.
► Carefully remove the trailing cable from the machine.
6 Gantries
6.3 Trailing Cable and Printed Circuit Boards
112 Service Manual SIPLACE TX Series 06/2017
Installation
► Installation is performed by following the above instructions in the reverse order. Also observe
the following instructions:
CAUTION
Always handle the trailing cable with care
► If a vacuum pump is fitted, also observe the relevant assembly instructions
[00196845‑xx].
► Always handle the new trailing cable with care.
► You might need to enlist the help of a second person.
► Make sure that the flat ribbon cable and the pneumatic hoses are not rubbed against
any parts or folded. Look out for sharp edges.
► Prepare the trailing cable. Place the old and new trailing cables next to one another
and match the length of the new trailing cable hose to the old one.
► If you use the new holder, you will need to dismantle all attached items (boards etc.)
from the old holder and attach them to the new holder.
► If hose ends were damaged during removal, cut these with hose cutters.
► Clean the trailing cable contact surface on the machine base with a dry cloth.
► Carefully insert the new trailing cable into the prescribed position. Make sure you do
not fold or twist the trailing cable.
► Check that the power track chain runs parallel to the machine base. Move the gantry
back and forth.
► If it is difficult to push the hoses onto the tubes, moisten these first with white spirits or
isopropanol.
► Secure screws with Loctite 241 (see below).
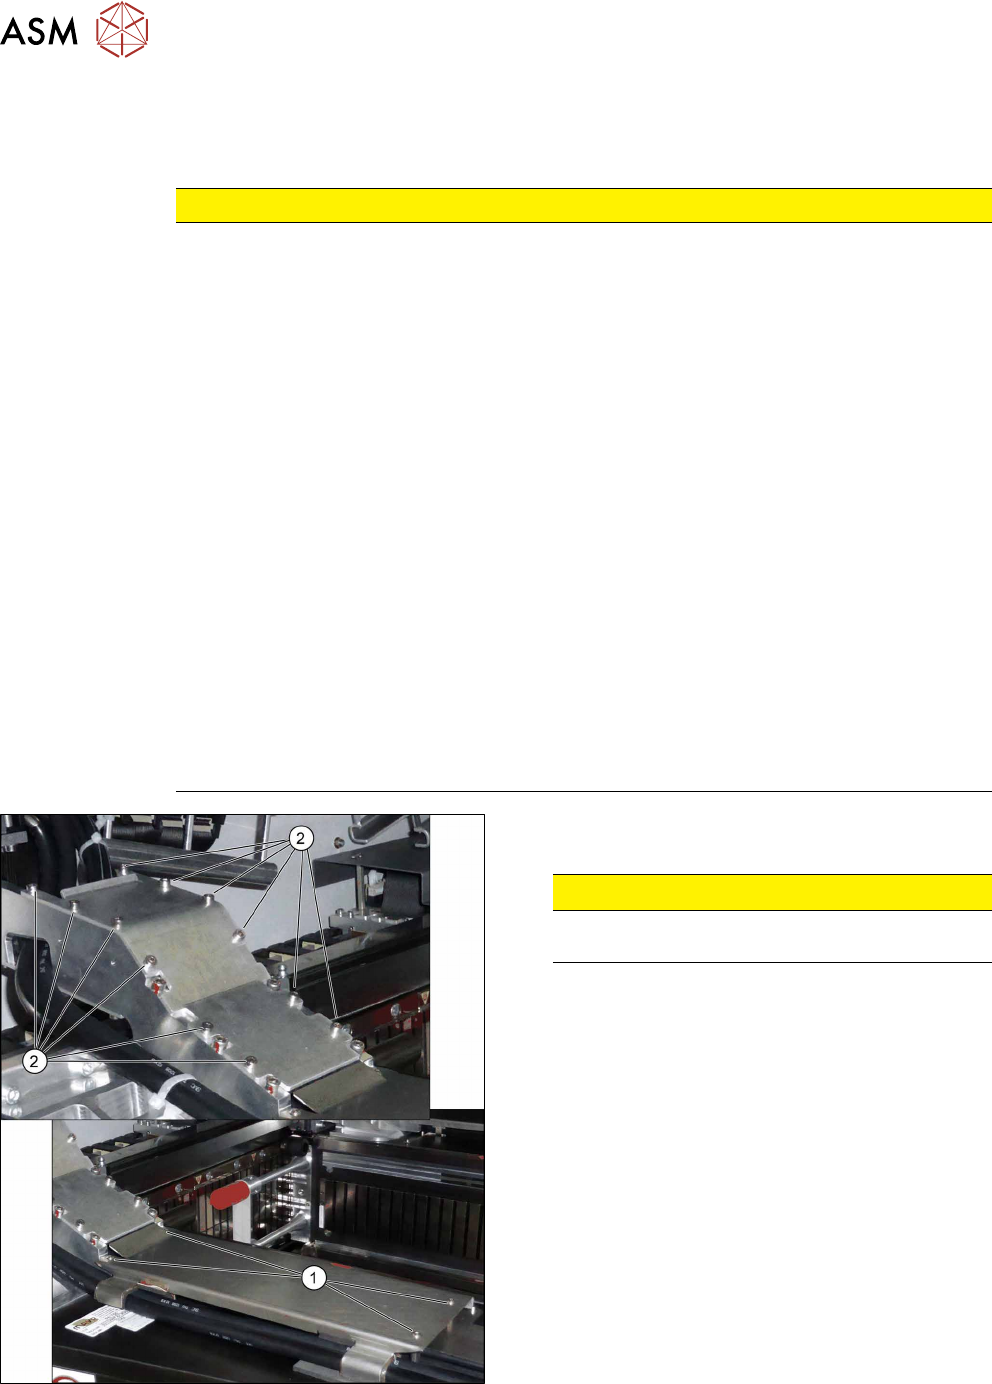
Fig.140: Covers
► Secure the screws(2) of the upper cover with
Loctite 241.
CAUTION!
Do not secure the screws(1) of the lower
cover with Loctite.
.
6 Gantries
6.4 MHCU, Boards and Camera
Service Manual SIPLACE TX Series 06/2017 113
6.4 MHCU, Boards and Camera
6.4.1 Gantries - MHCU, Boards and Camera - Overview
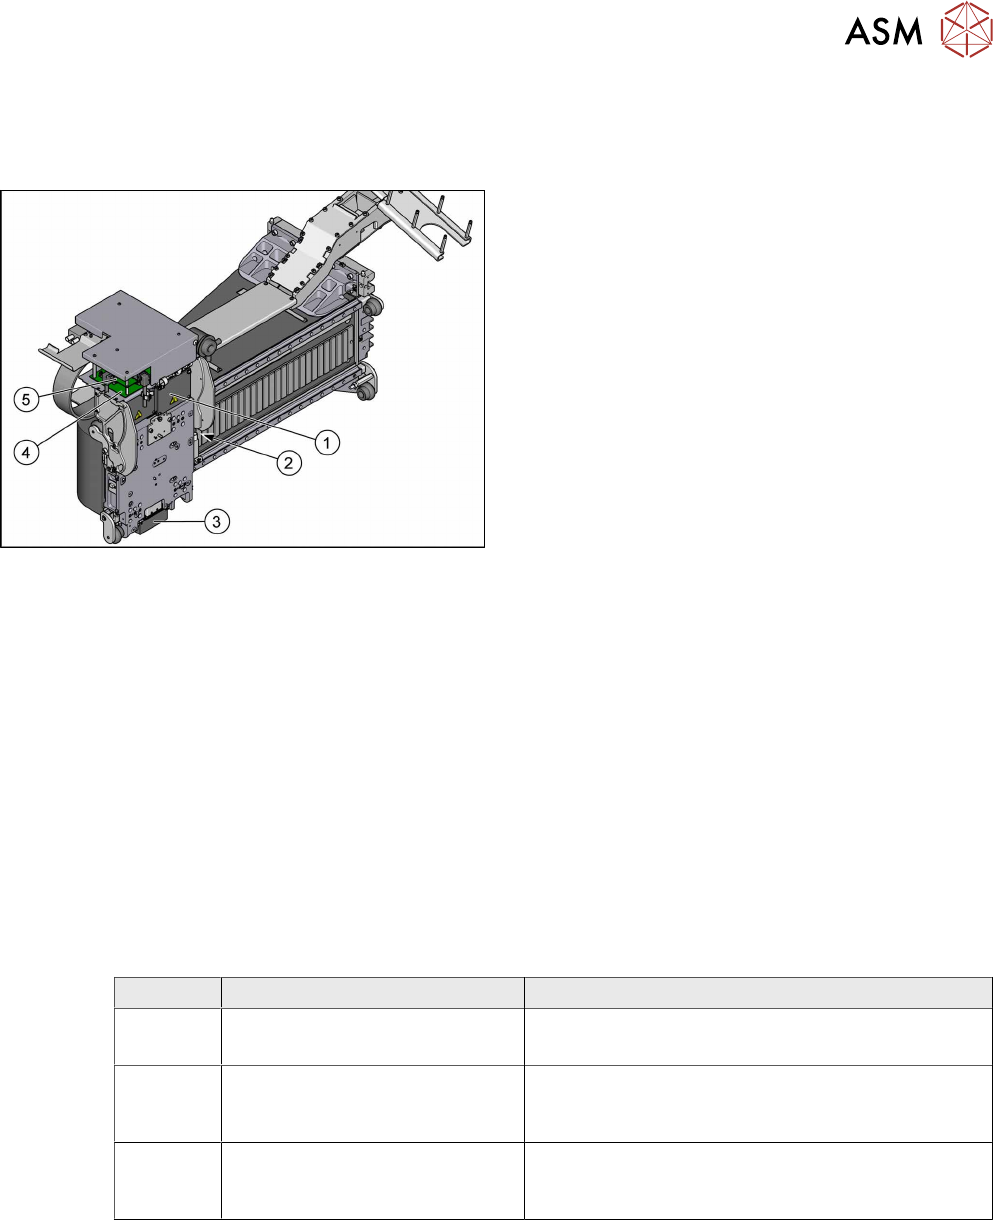
Fig.141: MHCU, boards and camera
1. Head adapter
6.4.2 "Replacing the Head Adapter for the
MHCU" [}113]
2. Gantry temperature sensor
6.4.6 "Replacing the Gantry Temperature
Sensor" [}125]
3. PCB camera
Replacing the PCB Camera
4. Head interface
6.4.4 "Replacing the Head Interface" [}120]
5. Vision Head Interface (VHI)
●
6.4.8 "Error "Gantry Crash"" [}128]
●
6.4.9 "Anticrash Function" [}129]
●
6.4.10 "Count Error" [}129]
●
6.4.11 "eSW Download (SW 70x)" [}130]
See also
2 Replacing the Vision Head Interface (VHI) [03115454-xx] [}117]
6.4.2 Replacing the Head Adapter for the MHCU
Parts, equipment and tools
The following spare parts can be replaced:
●
MHCU assembly, compatible [03090990Sxx]
●
MHCU assembly [03109668‑xx]
●
PCB / X base adapter C&P [03045647Sxx] from FS08
●
Module / X base adapter TWIN [03062201Sxx]
Head Adapter Number of MHCU, base adapters
CPP Module X base adapter C&P
[03071420-xx]
1x MHCU [03090990Sxx] from FS04
1x PCB / X base adapter C&P [03045647Sxx]
C&P20P Module X base adapter C&P 20
P
[03109399-xx]
1x MHCU [03090990Sxx] from FS04
1x PCB / X base adapter C&P [03045647Sxx]
Twin Head adapter Twin (M)HCU /
SX4
[03082096-xx]
2x MHCU [03090990Sxx] from FS04
1x module/ X base adapter TWIN [03062201Sxx]
Removal
► Switch off the machine, disconnect it from the power supply and secure it to prevent
unauthorized reactivation. Observe the instructions in section 1.2 "Preparatory Work..." [}15].
► You may need to dismantle the placement head for better access.
Replacing the SIPLACE CPP/M Head [}206]
Replacing the SIPLACE TwinHead [}210]
Replacing the SIPLACE C&P20 P/M2 Head [}202]