00198150-02_SM_TX_en.pdf - 第157页
7 Conveyor 7.4 Width Adjustment Service Manual SIPLACE TX Series 06/2017 157 7.4.4 Setting the Parallelism of the Adjustment Units for Dual Conveyors Fig.212: Select operator level ► Click the button to enter the Settin…
7 Conveyor
7.4 Width Adjustment
156 Service Manual SIPLACE TX Series 06/2017
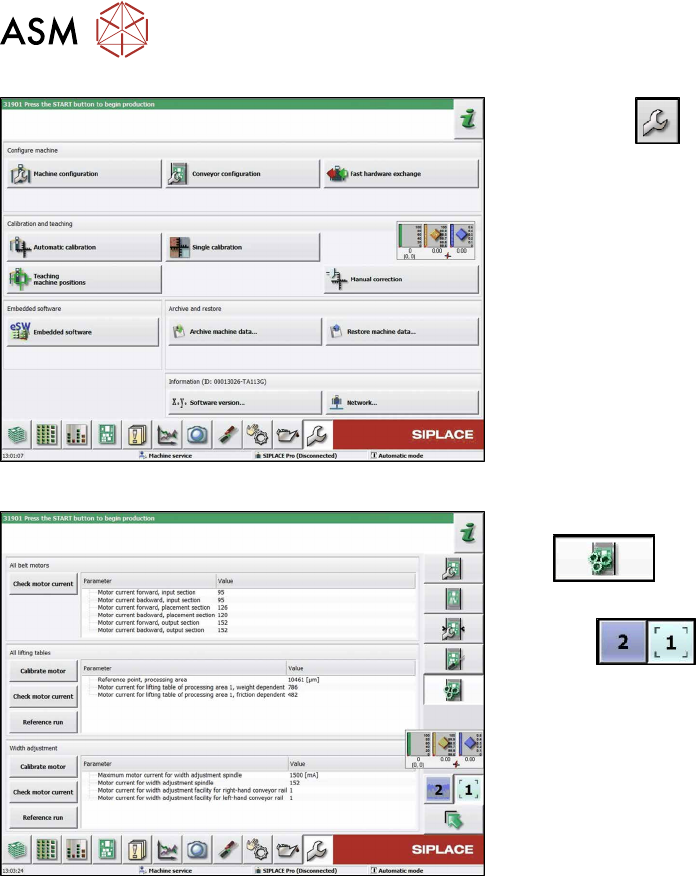
Fig.210: Service menu
► Click the
button to open the Service menu.
► Click on the Conveyor Configurationbutton.
Fig.211: Conveyor menu
► Click on the Initiate conveyor parameters
button.
► Select the required conveyor lane with the but-
tons
.
► Go to the section Width adjustment and select
the button Calibrate motor.
7 Conveyor
7.4 Width Adjustment
Service Manual SIPLACE TX Series 06/2017 157
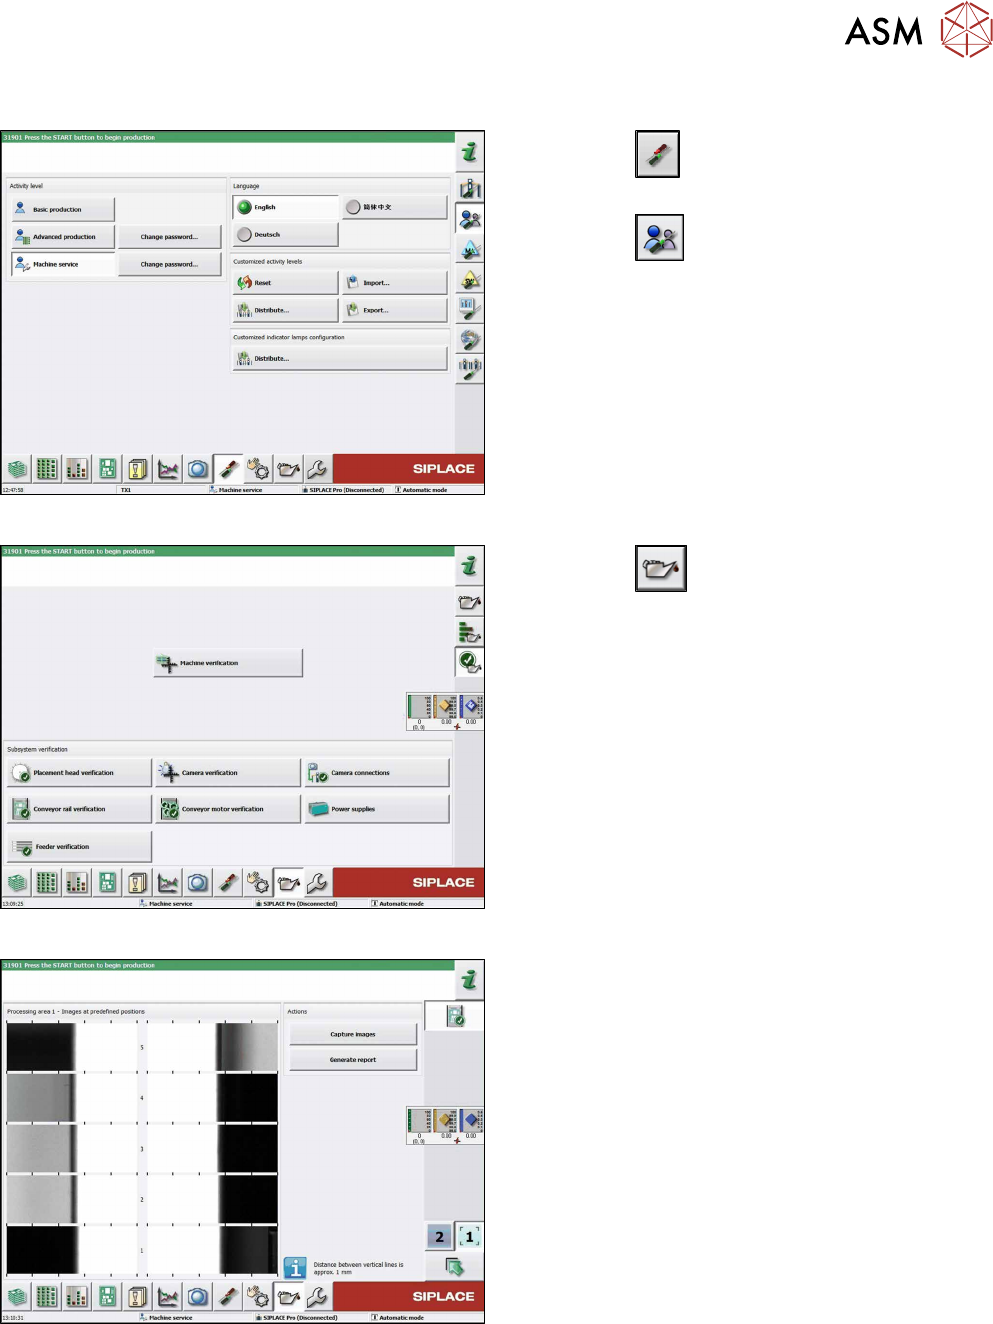
7.4.4 Setting the Parallelism of the Adjustment Units for Dual Conveyors
Fig.212: Select operator level
► Click the
button to enter the Settings
menu.
► Click the
button to open the Check and set
user settings menu.
► Switch to operator level Machine service or bet-
ter.
Fig.213: Maintenance menu
► Click the
button to enter the maintenance
menu..
► Click the Conveyor rail verification button.
Fig.214: Conveyor rail verification
► Click the Capture images button to start test.
7 Conveyor
7.5 Conveyor Belt, Belt Drive and Hexagonal Shaft
158 Service Manual SIPLACE TX Series 06/2017
7.5 Conveyor Belt, Belt Drive and Hexagonal Shaft
7.5.1 Replacing the Toothed Belt (Conveyor Belt)
Parts, equipment and tools
●
Belt tension measuring device [00326015‑xx]
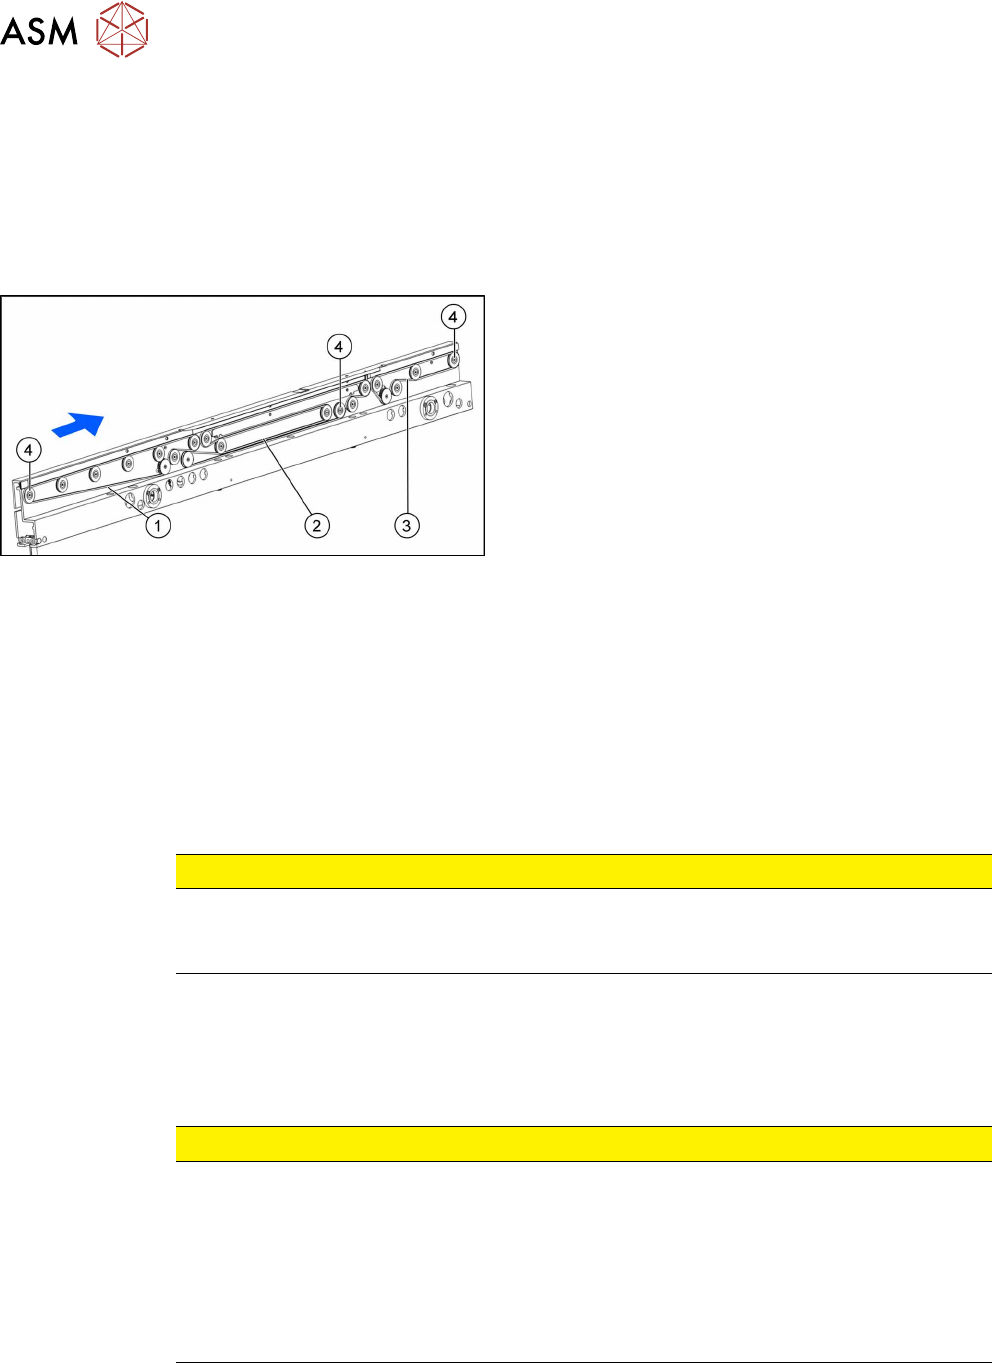
Select the required toothed belt:
Fig.215: Toothed belts
1. Input area:
Synchronous belt L=843 mm [03121441‑xx]
2. PA:
Synchronous belt L=843 mm [03121441‑xx]
3. Output area:
Synchronous belt L=447 mm [03121443‑xx]
4. Movable idler pulleys
Removal
► Use the software or manually move the conveyor rail into a position which allows you best ac-
cess.
– To move the conveyor rail manually, pull the toothed belt of the width adjustment unit.
► Switch off the machine, disconnect it from the power supply and secure it to prevent
unauthorized reactivation. Observe the instructions in section 1.2 "Preparatory Work..." [}15].
► Move all gantries out of the transport area as far as possible at one side of the machine.
► Loosen the movable idler pulley.
CAUTION
Loosen the movable idler pulley only as far as necessary!
► Do not remove the movable idler pulley. Otherwise the T-slot nut on the inner side will
fall into the conveyor rail.
► Carefully unthread the belt drive.
Installation
► Follow the removal instructions in reverse order for installation. Also observe the following in-
structions:
CAUTION
Installation instructions
► Check the new toothed belt before fitting it. Hold it up high. It should hang loose and
should not twist.
► Do not bend or damage the toothed belt.
► Make sure that the toothed belt is positioned accurately in the guidance on the motor
shaft or in the belt drive.
► When you tighten the idler pulley, set the tension of the toothed belt (see below).
See also
2 Setting the Tension of the Conveyor Toothed Belt [}159]
2 Belt Tension [}159]