00198150-02_SM_TX_en.pdf - 第26页
2 Basic Machine 2.3 Replacing the Swivel Head [03006436-xx] 26 Service Manual SIPLACE TX Series 06/2017 2.3 Replacing the Swivel Head [03006436-xx] Parts, equipment and tools ● Swivel head BEM 08-20-501 M8 [03006436-xx] …
2 Basic Machine
2.2 Replacing the Gas Pressure Shock Absorber on the Cover
Service Manual SIPLACE TX Series 06/2017 25
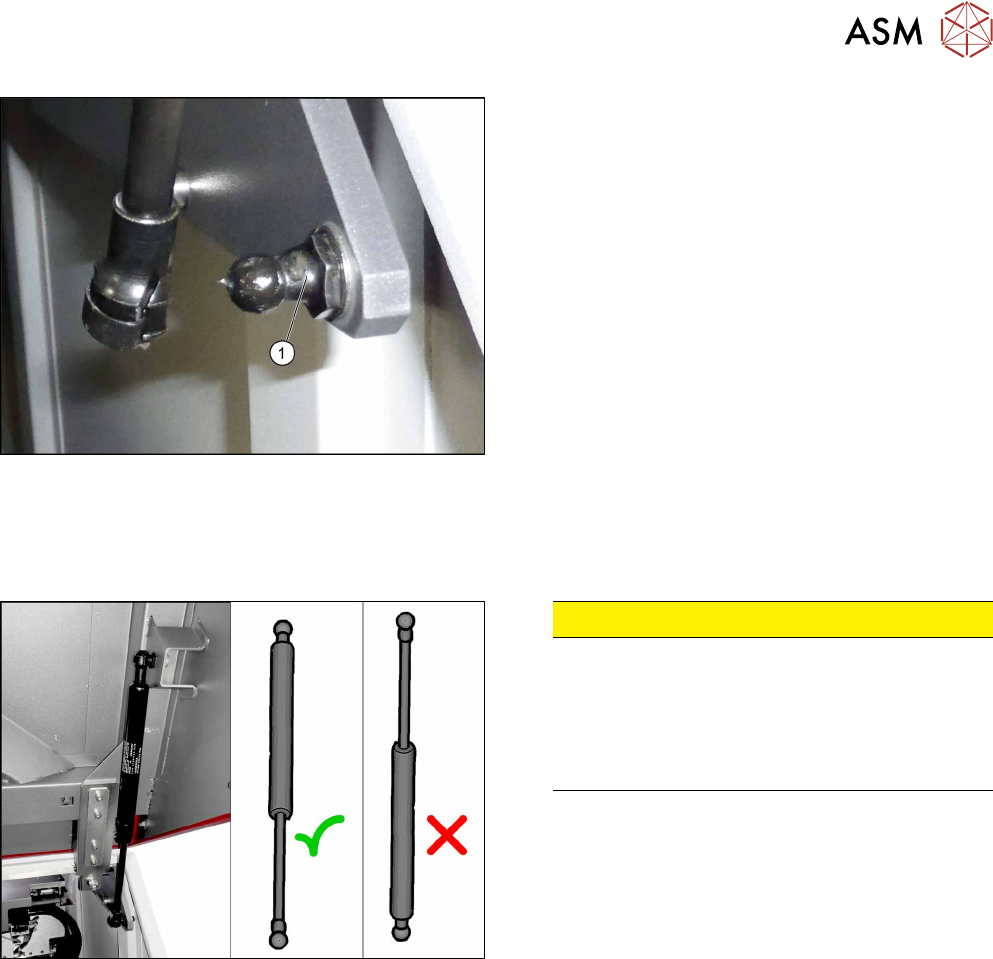
Fig.10: Ball at the gas pressure shock absorber
► If necessary: remove the ball(1) with an open-
ended wrench.
► If necessary: repeat for the ball on the top of the
gas pressure shock absorber.
Installation
► Follow the removal instructions in reverse order for installation. Also observe the following in-
structions:
CAUTION!
Installation instructions
Secure the threads of the balls with Loctite241.
Observe the correct installation direction for the
gas pressure shock absorber.
You may have to compress the gas pressure
shock absorber slightly when installing it.
.
2 Basic Machine
2.3 Replacing the Swivel Head [03006436-xx]
26 Service Manual SIPLACE TX Series 06/2017
2.3 Replacing the Swivel Head [03006436-xx]
Parts, equipment and tools
●
Swivel head BEM 08-20-501 M8 [03006436-xx]
●
Loctite 241 [02101037‑xx]
NOTICE
Second Person
► You might find it advisable to enlist the help of a second person.
Overview
Fig.11: Swivel head
1. Swivel head
Removal
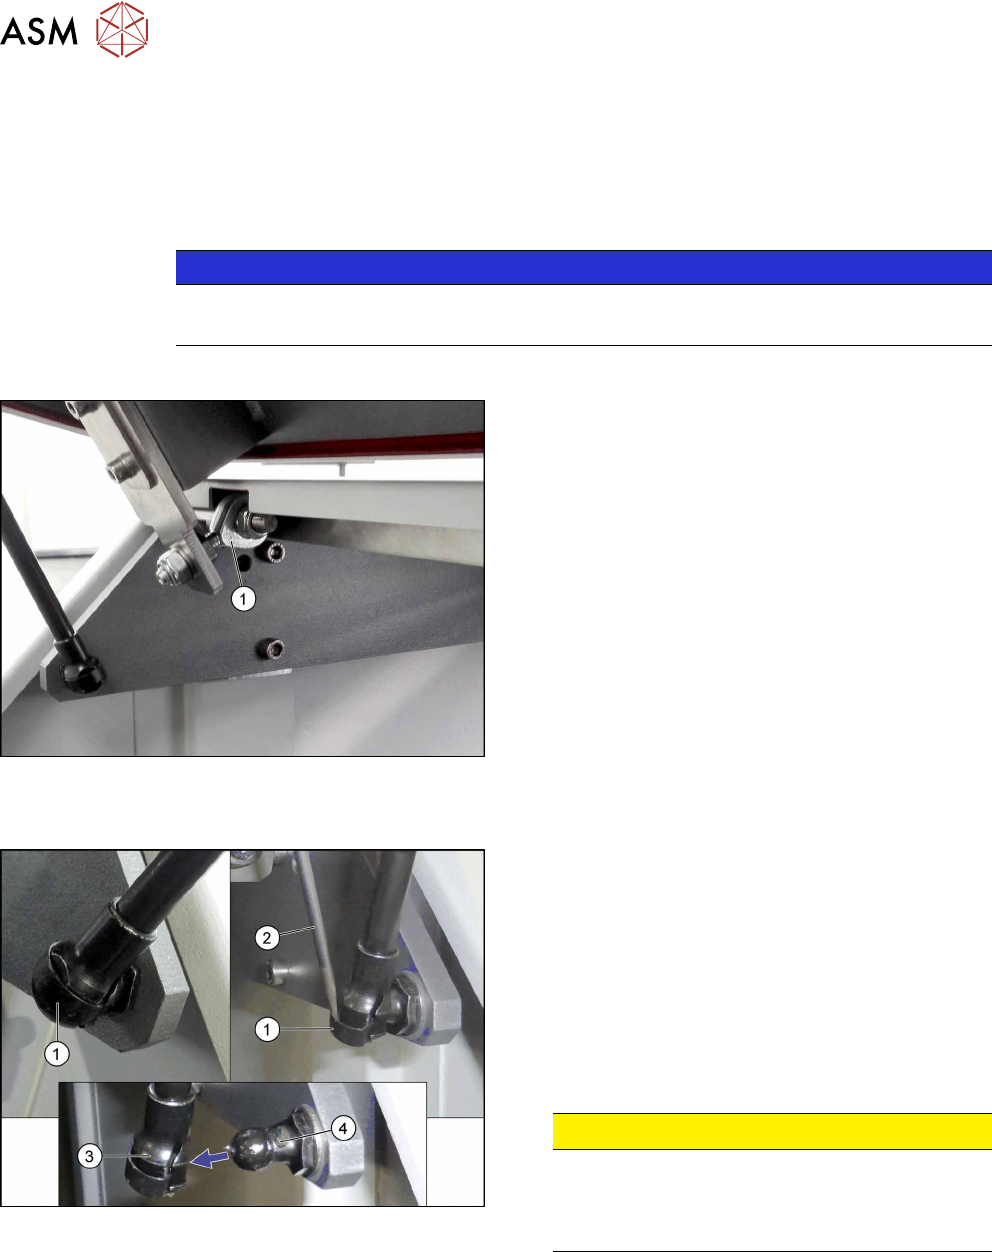
Fig.12: Removing the bottom of the gas pressure shock ab-
sorber
► Open the cover and fix it in a position which gives
you best access for working and which ensures
that it cannot close itself on its own.
A spring(1) is securing the gas pressure shock ab-
sorber on the ball(4).
► Remove the spring(1) on the bottom of the gas
pressure shock absorber. Use a screwdriver(2)
or similar to move the spring a little.
► Pull off the bottom(3) of the gas pressure shock
absorber.
CAUTION!
Cover could fall down
As soon as one gas pressure shock absorber is
released, the cover could fall down if not suffi-
ciently fixed.
.
► Repeat for the gas pressure shock absorber on
the other side of the cover.
2 Basic Machine
2.3 Replacing the Swivel Head [03006436-xx]
Service Manual SIPLACE TX Series 06/2017 27
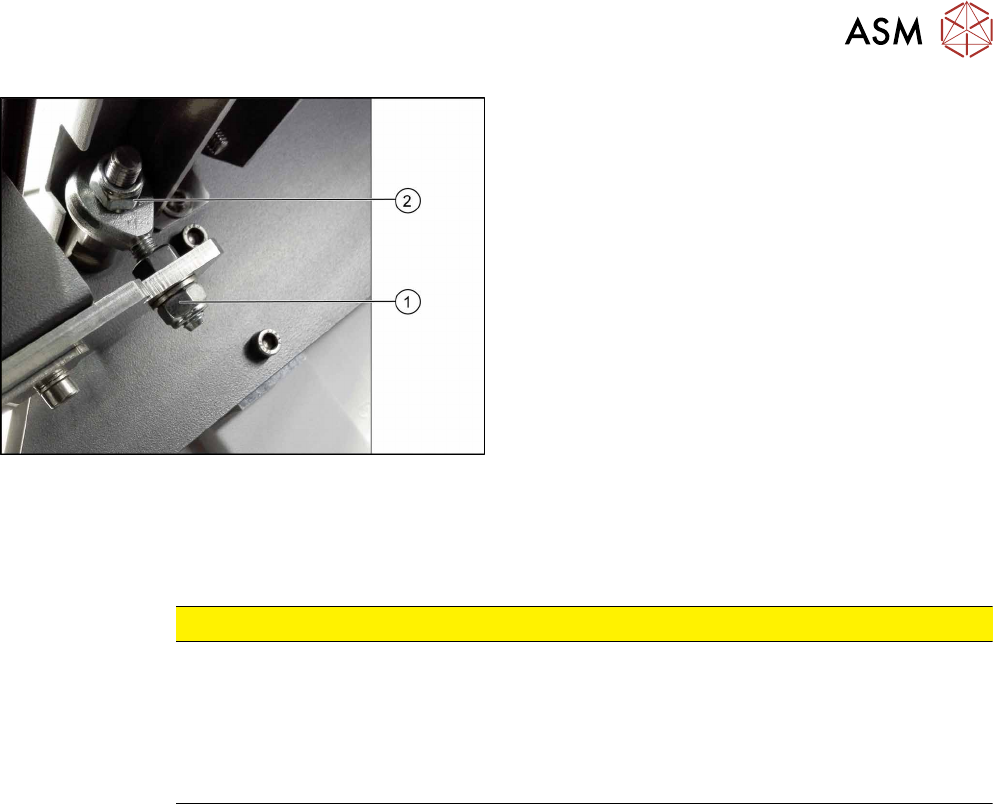
Fig.13: Removing the swivel head
► Close the cover.
► Remove the nut (1).
► Remove the cover from the machine.
► Remove the nut (2).
► Remove the swivel head.
Installation
► Follow the removal instructions in reverse order for installation. Also observe the following in-
structions:
CAUTION
Installation instructions
► If the nuts are not self-locking, secure them with Loctite241.
► Set the nut(1).
Make sure that the cover can move freely for opening and closing.
Make sure that the cover is not distorted.
See also: 2.4.1 "Setting the Covers" [}30]