00198150-02_SM_TX_en.pdf - 第270页
11 Cutter 11.10 Replacing Wiper [03000491-xx] 270 Service Manual SIPLACE TX Series 06/2017 11.10 Replacing Wiper [03000491-xx] Parts, equipment and tools Fig.377: Wiper 1. Wiper (cutter HF) [03000491‑xx] Overview Fig.3…
11 Cutter
11.9 Replacing the Cutter Blades
Service Manual SIPLACE TX Series 06/2017 269
Final work
1
2
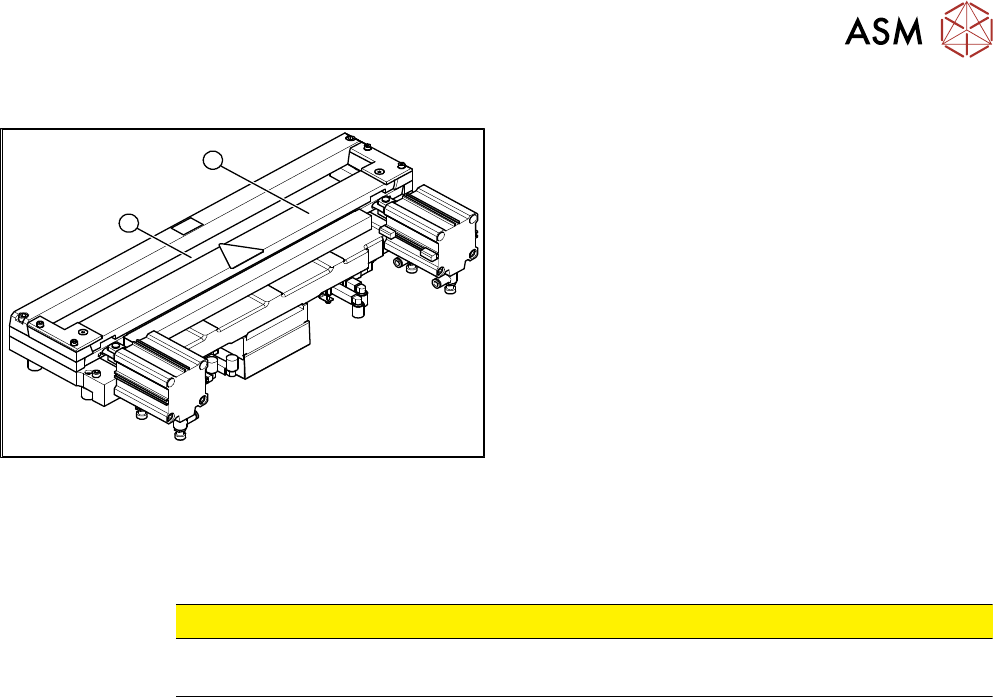
Fig.376: Cutter (using example of X-Series)
► Use a feeler gauge to check the gap between the
tape deflector (1) and the moveable blade (2),
along the entire length and width of the blade.
ð The 0.05 mm feeler gauge should fit through
the gap.
ð The 0.25 mm feeler gauge should not fit
through the gap.
If the gap is not correct, check:
●
Whether the wrong holding-down device has
been installed (with function level < 03).
●
The holding-down devices are those designed for
cutters with function status -04 (= with tape de-
flector).
●
Whether the blades, tape deflector etc. were
cleaned before installation.
If the gap is correct:
► Fit the baffle plate and cover plate. Make sure that the edges are parallel.
CAUTION
Check how the cables are run!
Make sure that the cables and hoses are not pinched or subjected to excess strain.
► Remove the clamps from the cutter/remove the cutter from the assembly plate.
► Further installation is performed by following the above instructions in the reverse order.
See also
2 Replacing the Cutter on the COT Insert [03066690-xx] [}252]
11 Cutter
11.10 Replacing Wiper [03000491-xx]
270 Service Manual SIPLACE TX Series 06/2017
11.10 Replacing Wiper [03000491-xx]
Parts, equipment and tools
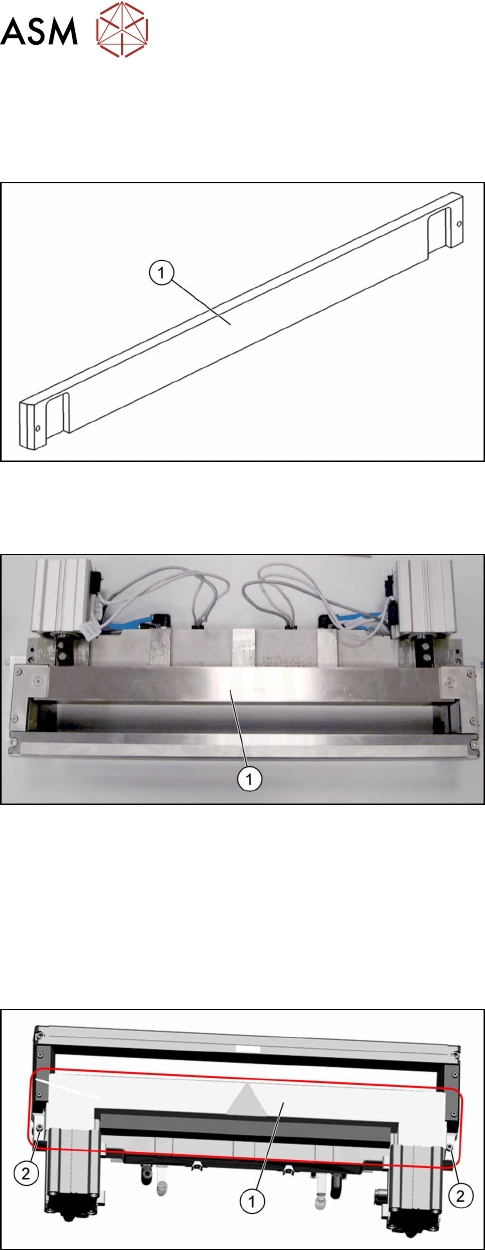
Fig.377: Wiper
1. Wiper (cutter HF) [03000491‑xx]
Overview
Fig.378: Wiper on cutter
1. Wiper
Removal
► Switch off the machine, disconnect it from the power supply and secure it to prevent
unauthorized reactivation. Observe the instructions in section 1.2 "Preparatory Work..." [}15].
► Remove the cutter from the machine.
Replacing the Cutter on the COT Insert [03066690-xx] [}252]
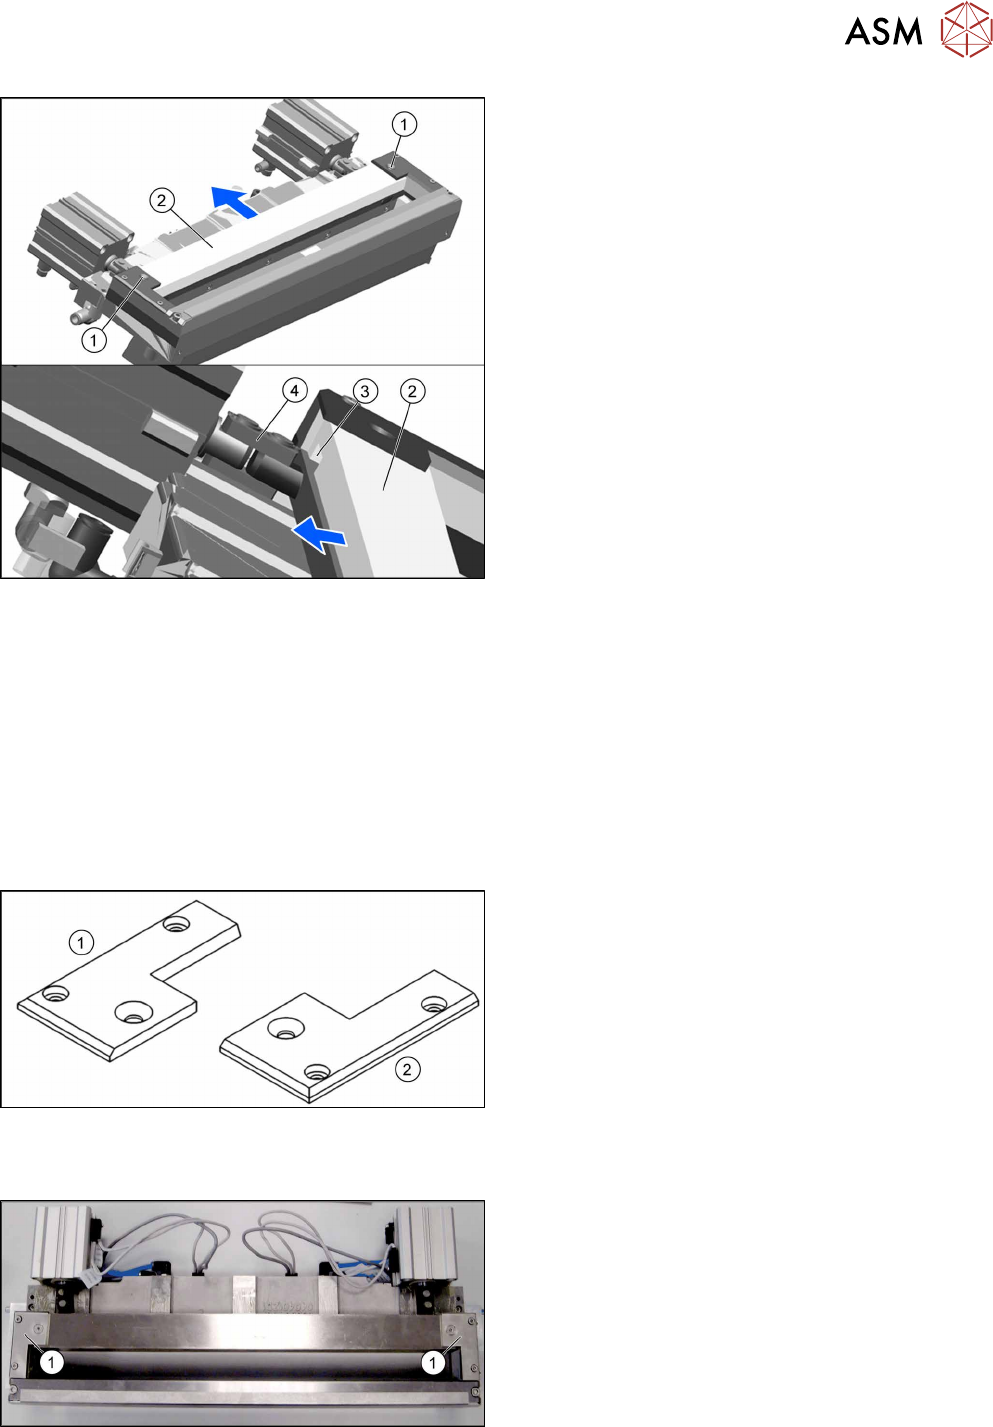
Fig.379: Cover plate
► Remove the screws(2) fastening the top cover
plate(1) and then remove the top cover plate.
11 Cutter
11.11 Replacing Wiper Clip
Service Manual SIPLACE TX Series 06/2017 271
Fig.380: Removing the wiper
► Remove the two screws(1) fixing the wiper(2).
► Remove the wiper(2).
The notch(3) in the wiper will move over the ar-
ticulated joint(4) on the short-stroke cylinder.
Installation
► Follow the removal instructions in reverse order for installation.
See also
2 Replacing the Cutter on the COT Insert [03066690-xx] [}252]
11.11 Replacing Wiper Clip
Parts, equipment and tools
Fig.381: Wiper clips left and right
1. Wiper clip left (SIPLACE HF) [03000506‑xx]
2. Wiper holder, right (cutter HF) [03000505‑xx]
Overview
Fig.382: Wiper clips on cutter
1. Wiper clips