00194598-01.pdf - 第55页
Ceramic substrate centering SIPLACE S- 27 HM 2 Retrofit instructions: ceramic substrate centering for SIPLACE S-27 HM 12/2004 Edition 55 : With the mov able sto p, make s ure that th e pins engage i n the groo ve in the …
2 Retrofit instructions: ceramic substrate centering for SIPLACE S-27 HM Ceramic substrate centering SIPLACE S-27 HM
12/2004 Edition
54
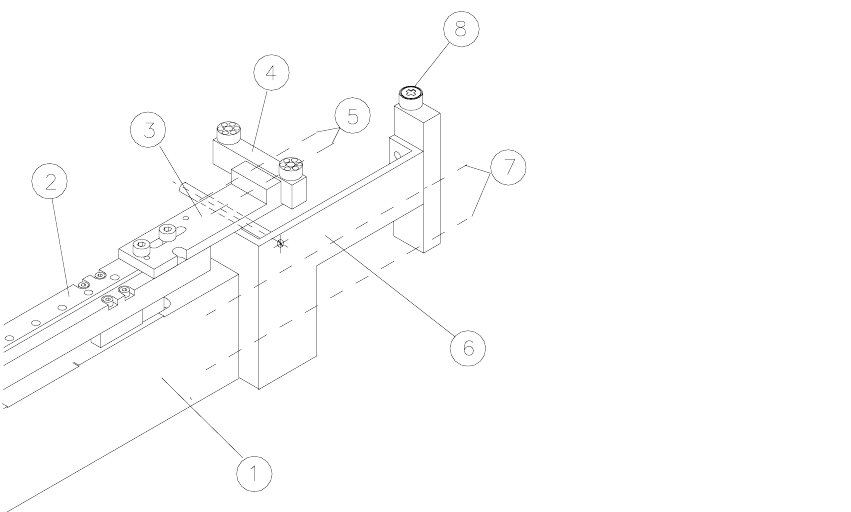
: Detach the stop (= stop unit) fixing on the X-axis carriage unit (2 hexagon socket head screws
M3, see Fig. 2.7 - 2 -> 6, 7).
: Fit the necessary stop unit 1, 2 or 3 (see table above).
2
Fig. 2.7 - 2 Matching the ceramic substrate centering to the size of substrate
Key: 2
1. Base unit
2. X carriage unit
3. Fixing bracket for stop rail, 2 hexagon socket head screws M3 x 8
4. Stop rail (according to size of substrate: see table above)
5. 2 hexagon socket head screws M3
6. Stop unit with spacer bolt (according to size of substrate: see table above)
7. Fixing for stop unit: 2 hexagon socket head screws M3
8. Fixed stop roller
2
2
2
2
Ceramic substrate centering SIPLACE S-27 HM 2 Retrofit instructions: ceramic substrate centering for SIPLACE S-27 HM
12/2004 Edition
55
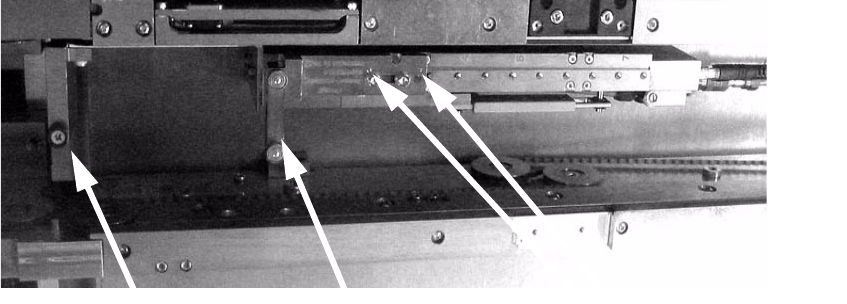
: With the movable stop, make sure that the pins engage in the groove in the carriage unit.
2
Fig. 2.7 - 3 Ceramic substrate centering (side view)
Fixed stop
Movable stop
Pins in the groove
2 Retrofit instructions: ceramic substrate centering for SIPLACE S-27 HM Ceramic substrate centering SIPLACE S-27 HM
12/2004 Edition
56
2.8 Pneumatic diagram
2
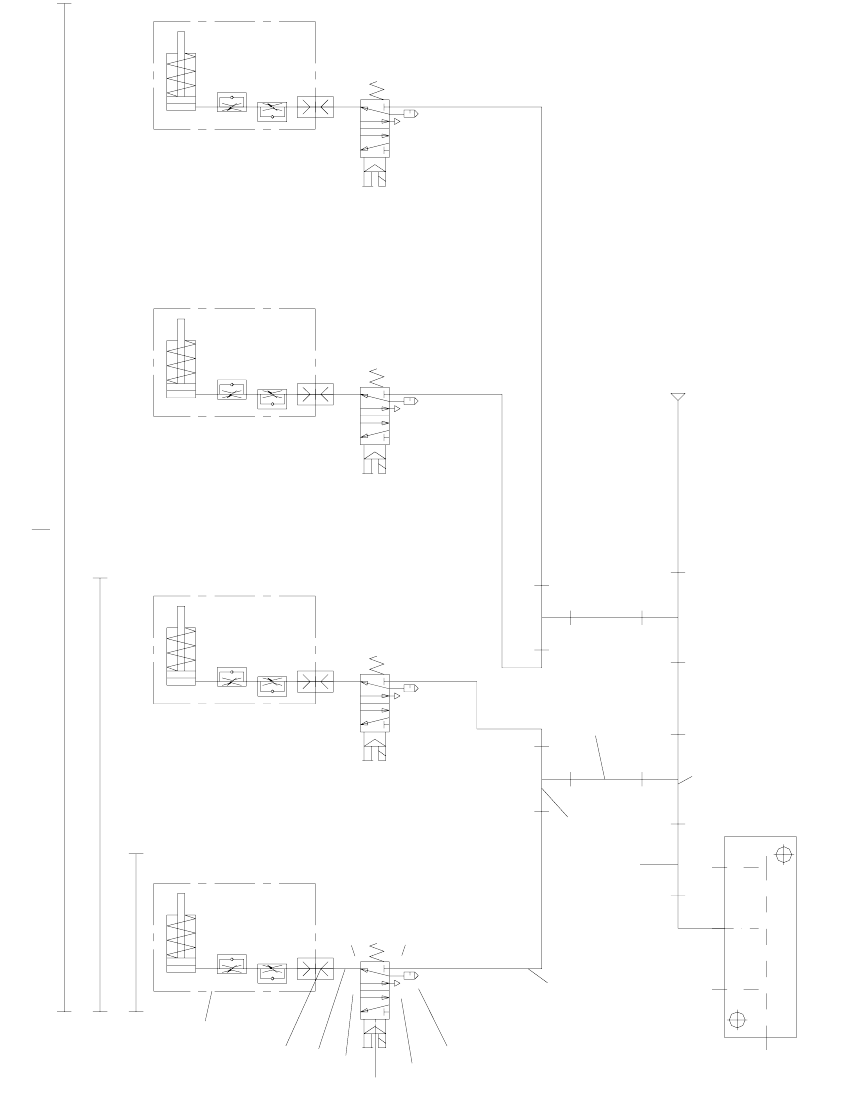
Fig. 2.8 - 1 Pneumatic drawing for ceramic substrate centering unit, HF series, HS-60, S-27 HM (00119671-010501)
Ø8x1.25
p=5.5 bar
Conveyor air distributor
10
10
5
9
8
7
6
6
5
4
3
2
1
HS60 DC + HF DC
S27HM DC + HS60 + HF
Ceramic substrate
centering assembly
5
1
4
3
2
5
1
4
3
2
5
1
4
3
2
5
1
4
2
3
Lock connections 4 and 5 using the item 10 screws.
S27HM