EUKYX-199-2100_G5S2_Instruction_Vol2_E.pdf - 第231页
EUKYX 5-7 199-2100 6. "RECOG IMAGE" Window [ 4] Recognized Im age Displa y Sec tion The sav ed recogniz e d ima ge da ta items are di spl ayed in the fou r panes and the im ages are di spl a yed in order from t…
EUKYX
5-6199-2100
6. "RECOG IMAGE" Window
6. "RECOG IMAGE" Window
When the [Disp. Recg img dt] button is pressed, the images of the components and PCB in the
automatic operation are saved according to the "Recognized Image Save" settings.
Other recognition processing data is saved automatically. (Component Recognition Test, PEC
Recognition Test, Nozzle Recognition, Pocket
Recognition, Badmark (Option), 2-D Barcode (Option) and Various Jig Recognitions, etc.)
Refer to “4.2.2 Image Save” in "Chapter 1" for the details.
When the machine is currently set in a running mode other than "STOP" or "PAUSE", set the
machine in the "STOP" or the "PAUSE" mode and press the [Disp. Rcg img dt] button.
[1]
[2] [3]
[5]
[4]
Graphic
Development
F2E6
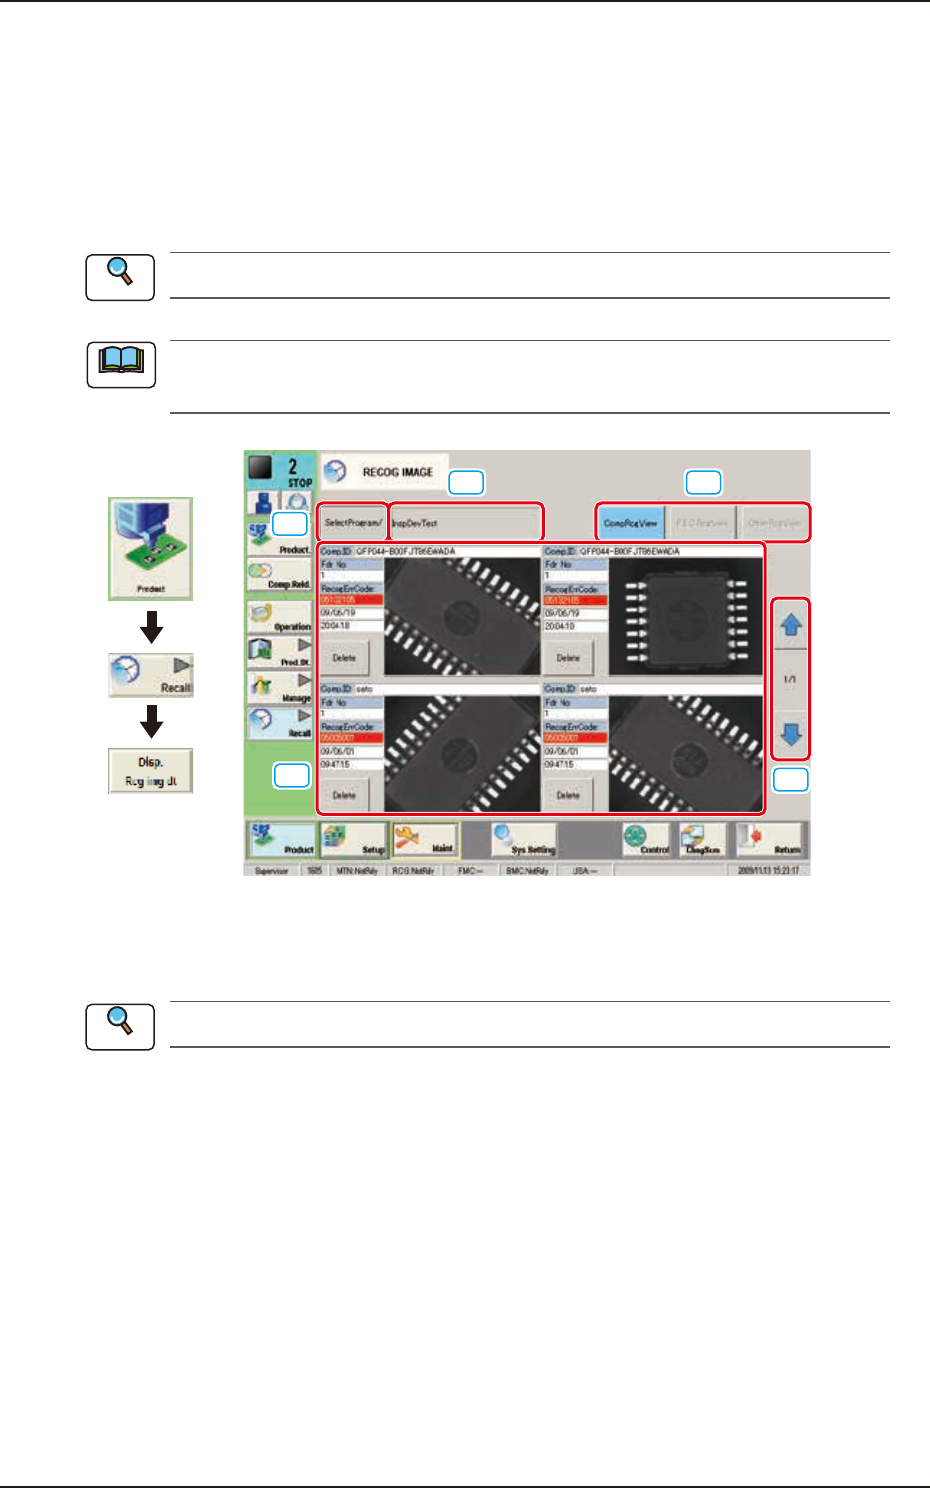
[1] [SelectProgram/] Button
When pressed, the list of the saved recognized image names is displayed.
Refer to “6.1 Recog Image List” for the details.
[2] [ (Selected pattern program name) ] Button
When pressed, the selected pattern program recognized image is displayed.
[3] Displayed Item Change Button
[CompRcgView] Button
When pressed, the component recognized image is displayed.
[PECRcgView] Button
When pressed, the PEC recognized image is displayed.
[OtherRcgView] Button
When pressed, the other recognized images such as teaching, are displayed.
Reference
Note
Reference
EUKYX
5-7199-2100
6. "RECOG IMAGE" Window
[4] Recognized Image Display Section
The saved recognized image data items are displayed in the four panes and the images are
displayed in order from the new one (Upper Left, Upper Right, Lower Left and Lower Right
in this order). When the recognized image to be checked is selected, the recognized image
window appears.
Refer to “6.2 “RECOG IMAGE” Confirmation Window” for the details of the "Recog Image
Window".
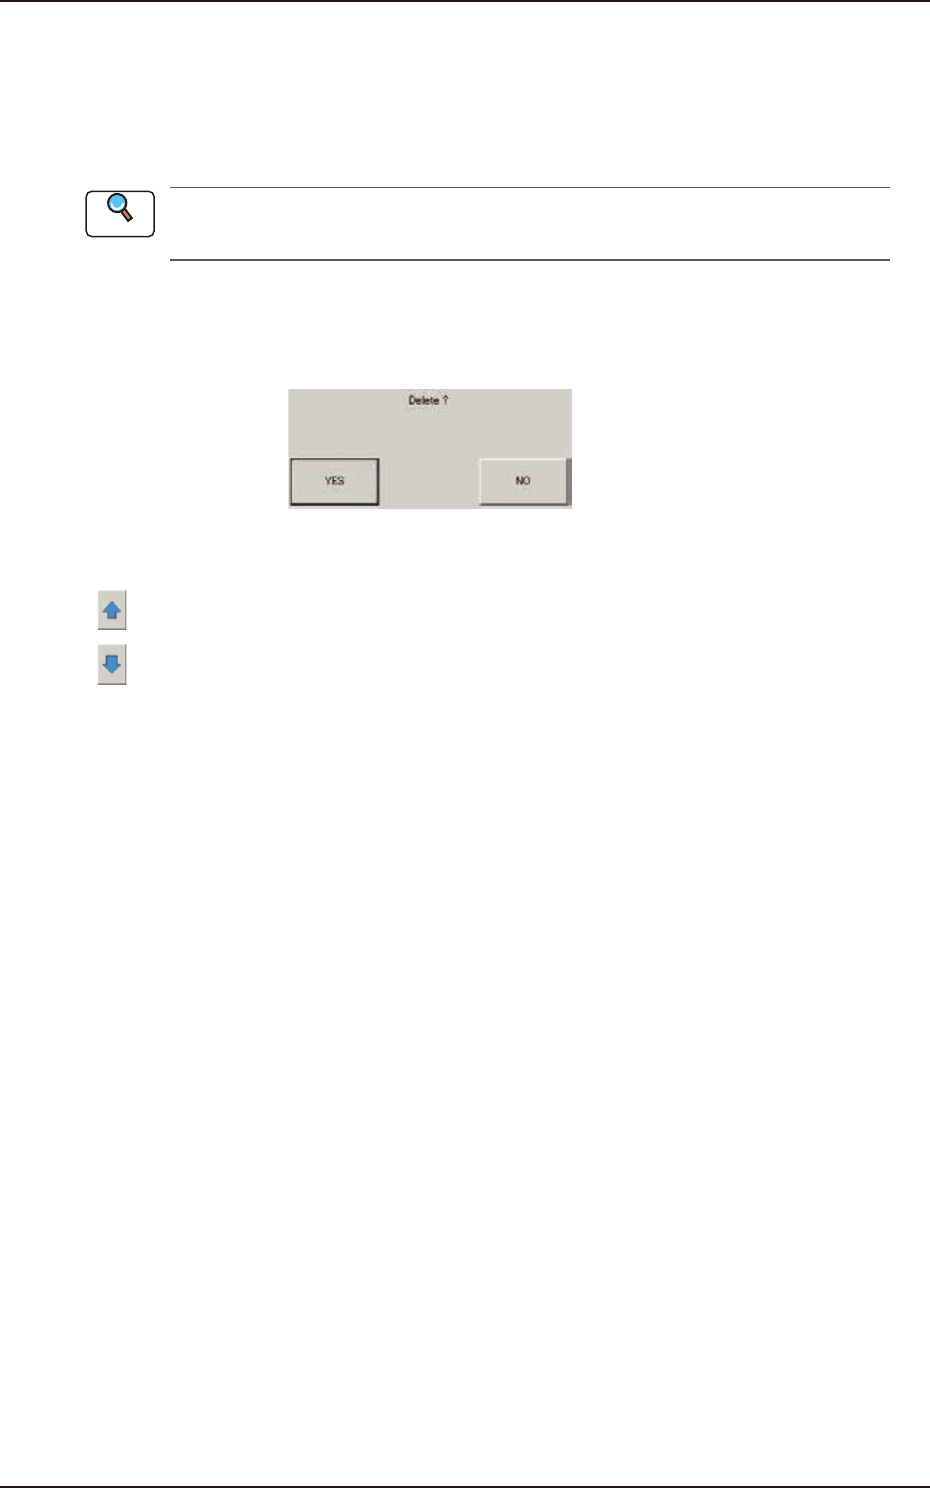
[Delete] Button
When the [Delete] button for the recognized image to be deleted, is pressed, the deletion
confirmation window appears.
F2E7
[5] Page Change Button
[
] : When pressed, the previous page appears.
[
] : When pressed, the next page appears.
Reference
EUKYX
5-8199-2100
6.1 Recog Image List
6.1 Recog Image List
When the [SelectProgram/] button is pressed on the "RECOG IMAGE" window, the following
window appears.
[1] [2] [3]
[4]
[5]
[6]
[7]
Graphic
Development
F2E8
[1] No.
Shown are the saved recognized image Nos.
1 to 100
: The recognized images for the Component Recognition or PEC Recognition for each
pattern program are saved.
101 : The recognized images obtained in the Component Recognition Test are saved.
102 : The recognized images obtained in the PEC Recognition Test are saved.
103 : Other recognized images are saved.
104 : The recognized images obtained in the teaching results are saved.
[2] ProgramName/InspTest InspOther Teach
Shown are the pattern program names, items, etc.
[3] Files
Shown is the number of recognition images saved in "[1] No." pane.
[4] Page Change Button
[
] : When pressed, the previous page appears.
[
] : When pressed, the next page appears.
[5] [Delete] Button
When this button is pressed, the recognized image is deleted.
When the No. for the recognized image to be deleted is selected and the [Delete] button is pressed,
the deletion confirmation window appears.
F2E9
[6] [OK] Button
When this button is pressed, the window returns to the “RECOG IMAGE” window and the
recognized image with the selected No. is displayed.
[7] [CANCEL] Button
When this button is pressed, the window returns to the “RECOG IMAGE” window.