EUKYX-199-2100_G5S2_Instruction_Vol2_E.pdf - 第258页
EUKYX 6-21 199-2100 6. "PCB XFER" Window 6 . "PCB XF ER " Windo w 6. 1 "Local" T ab S heet Us ing thi s function , the PCB on each bl o ck on the con vey or can be moved to the next bloc k. …
EUKYX
6-20199-2100
5. "NOZ.CHG." Window
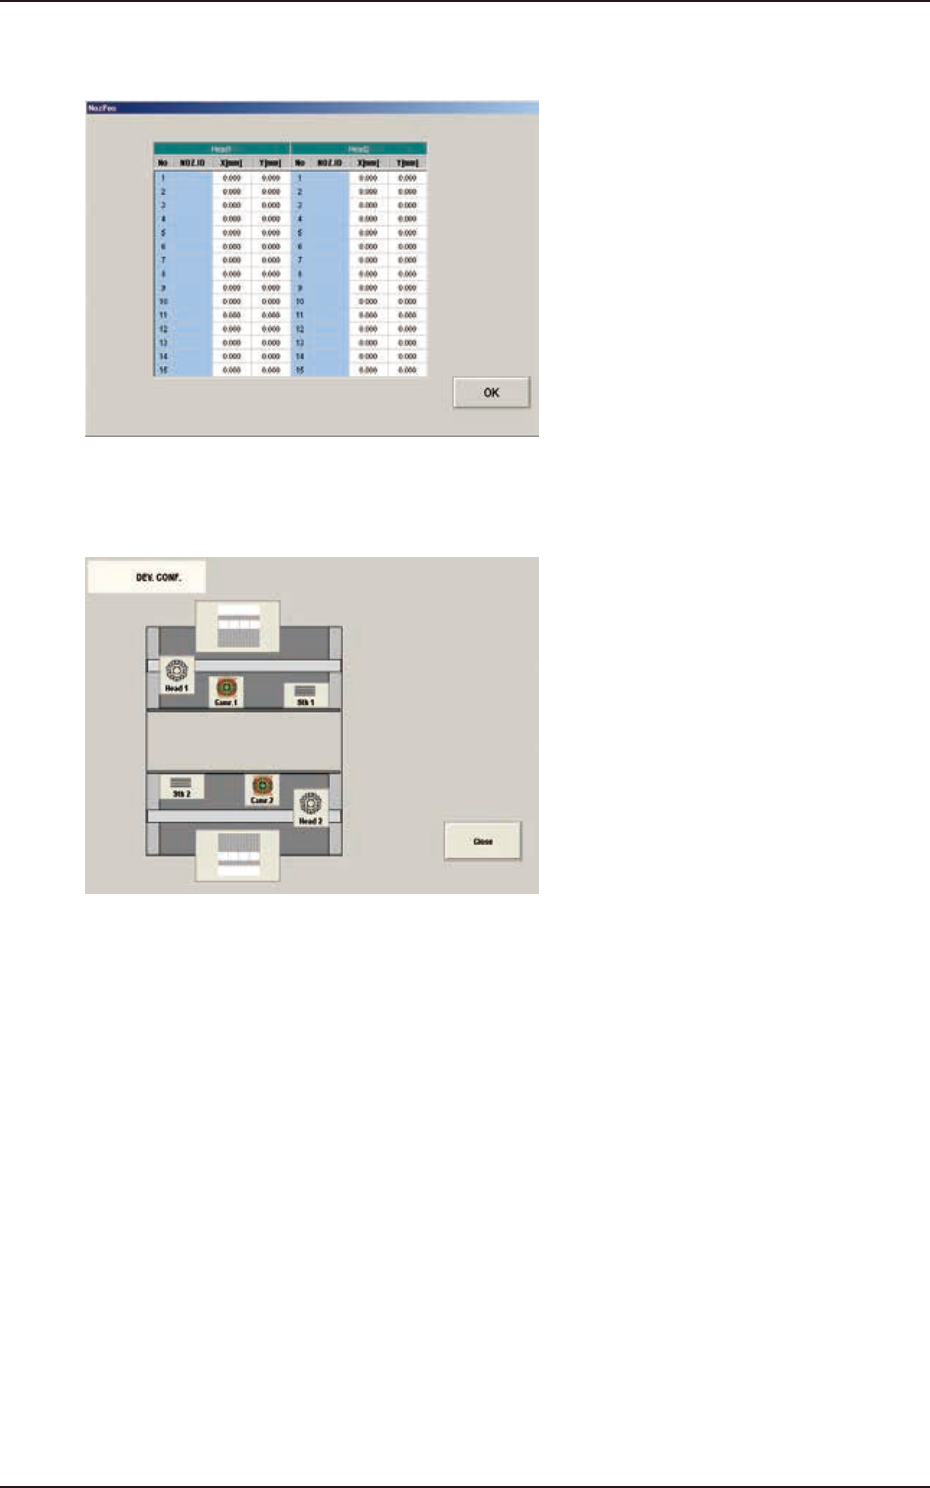
[10] [Noz Pos Teaching Rslt] Button
When pressed, the teaching results for each nozzle position are displayed.
F2F26
[11] [DEV.CONF.SCRN] Button
When pressed, the current device configuration is displayed.
F2F27
EUKYX
6-21199-2100
6. "PCB XFER" Window
6. "PCB XFER" Window
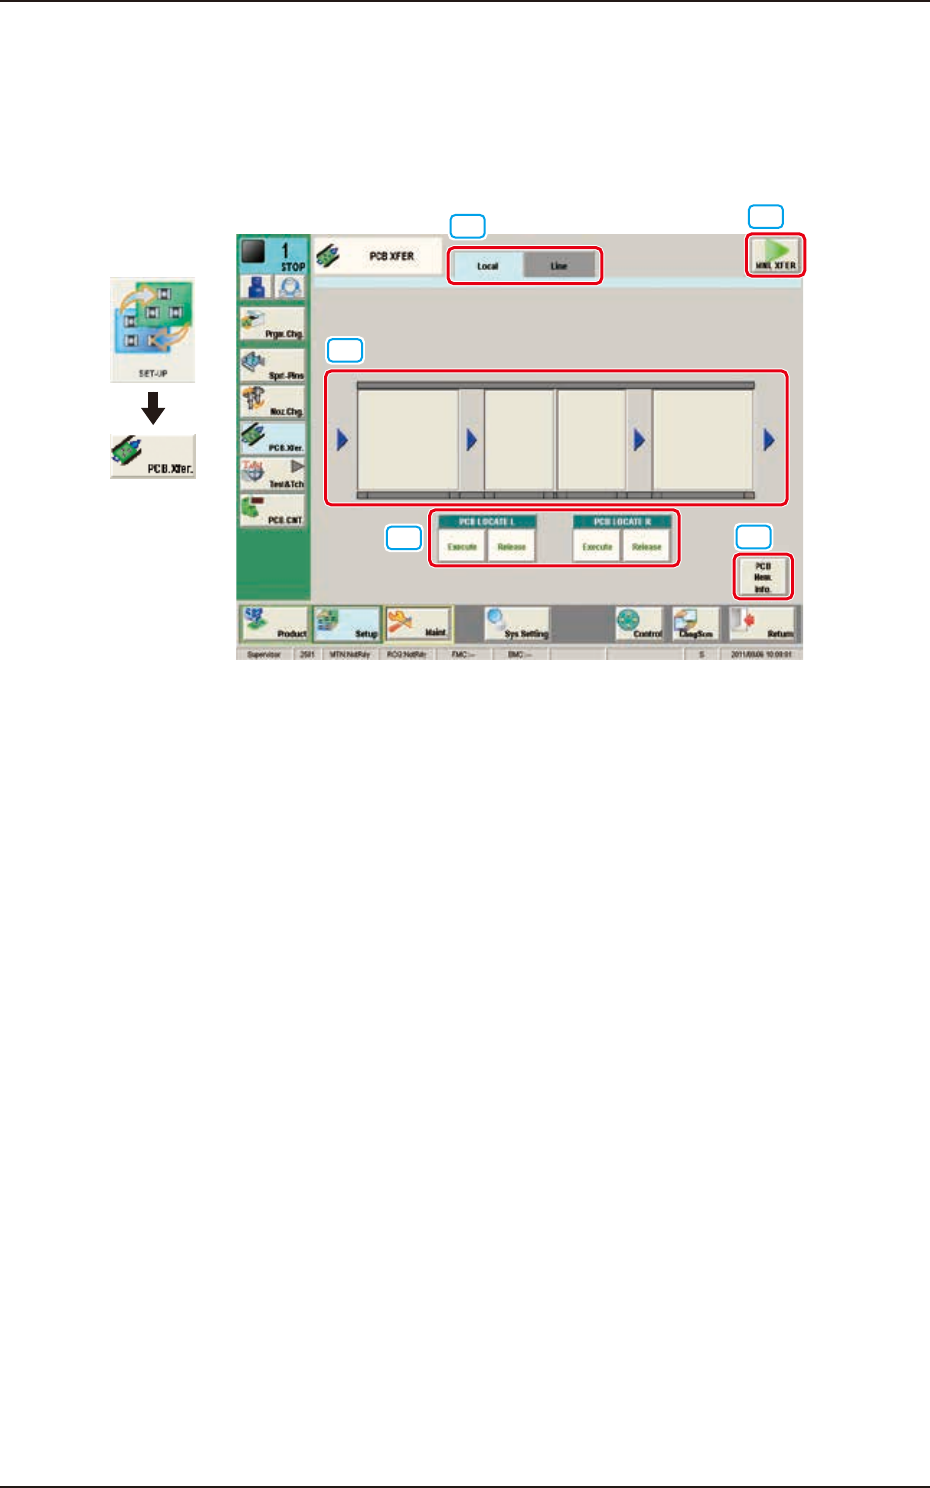
6.1 "Local" Tab Sheet
Using this function, the PCB on each block on the conveyor can be moved to the next block.
[3]
[4]
[1]
[2]
[5]
Graphic
Development
F2F28
[1] “Local/Line” Switch tab
This button switches the "Local" tab sheet and "Line" tab sheet.
[2] [MNL XFER] Button
When pressed, the PCB positioning is performed manually.
[3] Conveyor Image Display Section
Each block in the graphic image of the conveyor is provided with a button function. When the
[START] button on the operation panel is pressed within 10 seconds after pressing a conveyor block
button, the PCB is transferred to the block position.
[4] PCB LOCATE (PCB LOCATE L, R)
The PCB locating operation is performed.
When the [START] button on the operation panel is pressed within 10 seconds after pressing the
[Execute] button, the backup base of the selected stage moves up and the PCB is positioned.
When the [START] button on the operation panel is pressed within 10 seconds after pressing the
[Release] button, the backup base moves down and the PCB positioning is released.

EUKYX
6-22199-2100
6.1 "Local" Tab Sheet
[5] [PCB Mem. Info.] Button
In the case that PCB presence/absence does not agree with the memory due to the removal of the
PCB, the PCB presence/absence data can be setup using the window operation.
F2F29
Light Blue : PCB Presence Status
Gray : PCB Absence Status