EUKYX-199-2100_G5S2_Instruction_Vol2_E.pdf - 第263页
EUKYX 6-26 199-2100 7.1 "Fdr Pick-up T ch" Window 7 . 1 "Fd r Pic k -up T ch " Windo w In thi s wi ndow , the teachi ng is per formed with the manu al a l ignmen t operation us ing the PEC recogniti o…
EUKYX
6-25199-2100
7. "Test&Tch" Submenu
7. "Test&Tch" Submenu
Graphic
Development
F2F32A
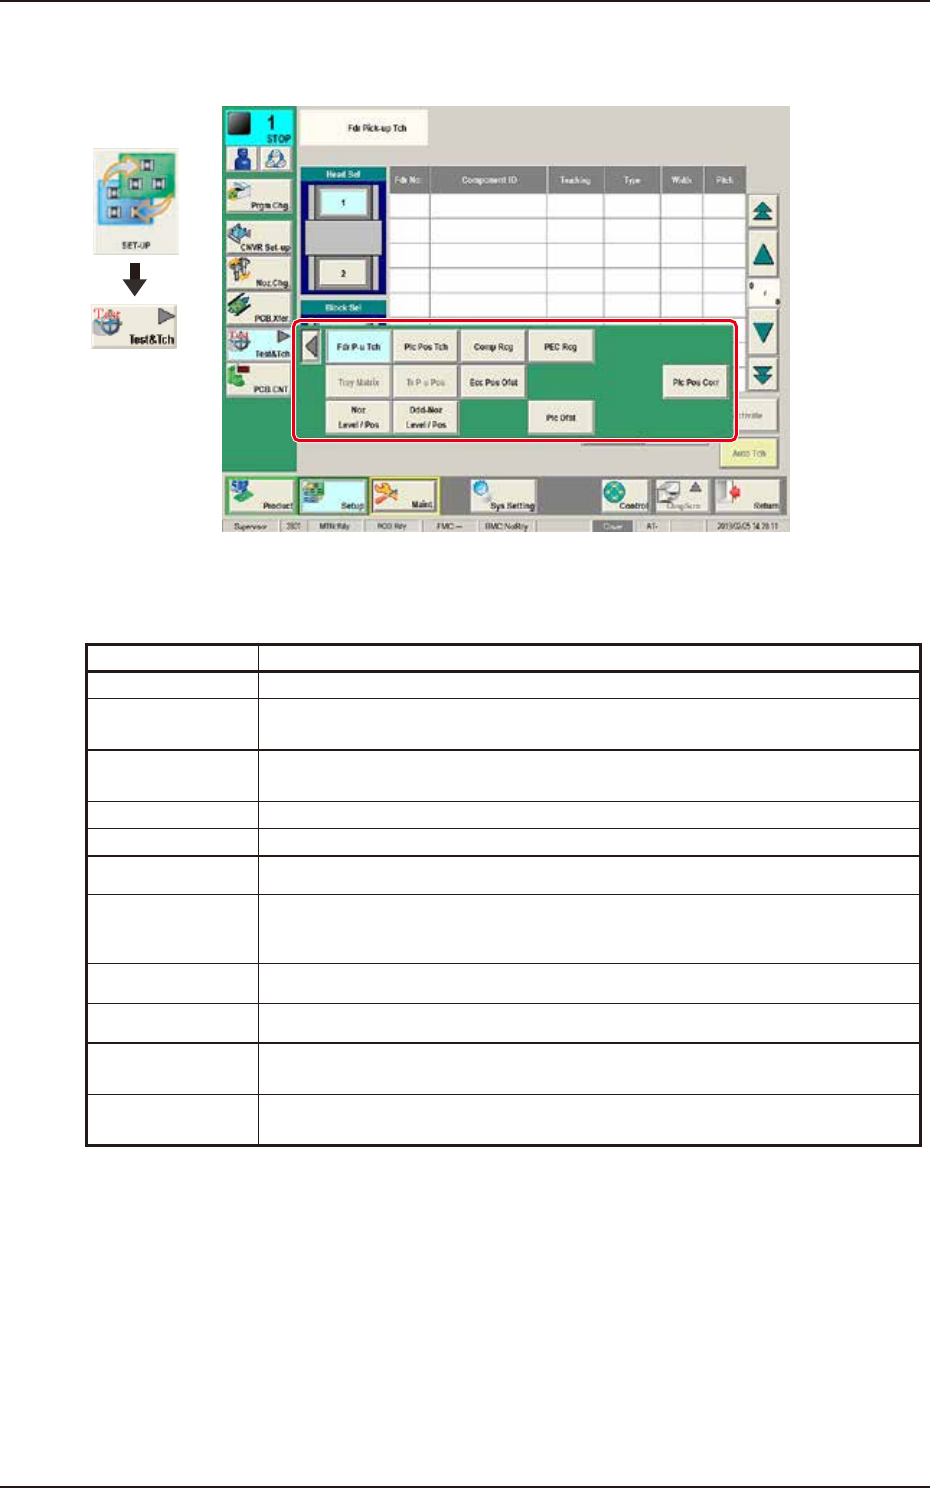
The "Test&Tch" menu is provided with the following 10 buttons. When each button is pressed, the
corresponding window appears.
Buttons Description
Fdr P-u Tch Teaches operation related to the pick-up position.
Plc pos Tch Checks and performs Place Pos Teach. The teach result is reflected to P and O
data.
Comp Rcg The corresponding window enables the operator to perform the component
recognition test for the component designated in the test ID.
PEC Rcg Performs the PEC recognition mark test.
Tray Matrix Used when the multi-layer tray feeder (option) is used.
Tr P-u Pos Used when the multi-layer tray feeder (option) is used.
Ecc Pos Ofst Performs the pick-up position teaching for the component which can not be
picked up at its center.
Plc Pos Corr Performs Place Pos Teach. The result is reflected to pickup/place data.
Noz Level / Pos Teaches the positions and levels of the nozzles X and Y.
Odd-Noz Level /
Pos
Teaches the positions and levels of the odd shaped nozzles X and Y.
Plc Ofst Teaches the Placement Offset and reflects the teaching result to the component
library.
EUKYX
6-26199-2100
7.1 "Fdr Pick-up Tch" Window
7.1 "Fdr Pick-up Tch" Window
In this window, the teaching is performed with the manual alignment operation using the PEC
recognition camera, for the offset data items to absorb the dispersion caused by each feeder’s
difference in characteristics, out of the offset data items related to the feeder’s component pick-up
operation on the feeder base.
Graphic
Development
F2F33
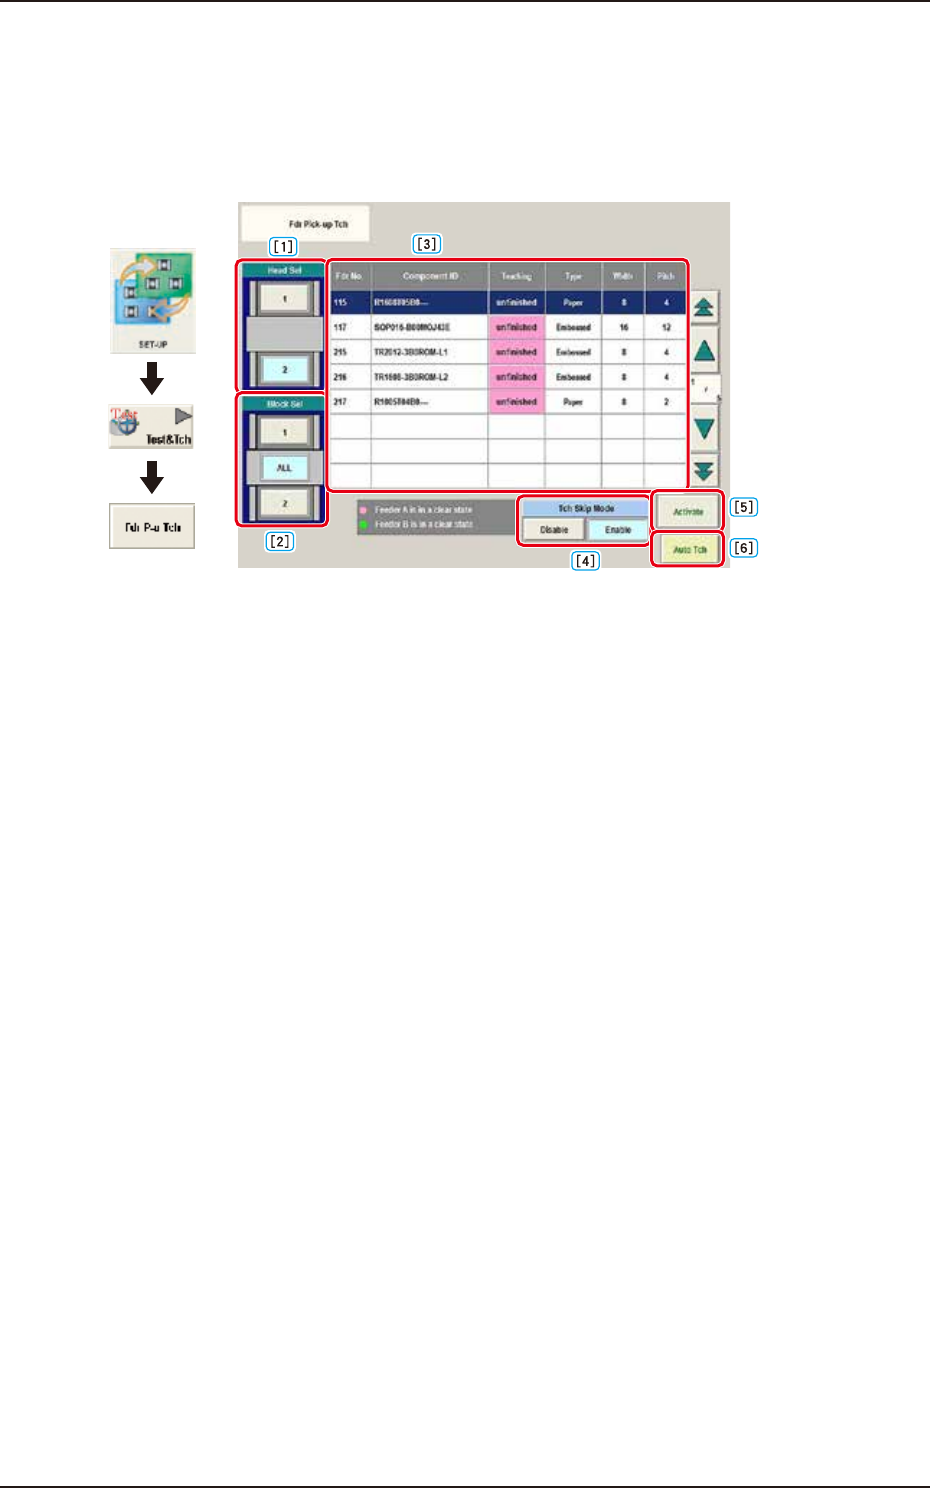
[1] [Head Sel] Button
The buttons showing each head are displayed as images.
Using these buttons, the head (PEC recognition camera) to be used in the teaching is selected.
[2] [Block Sel] Button
The buttons showing each feeder base are displayed as images.
Using these buttons, the block where the teaching is performed, is selected.
[3] Tape Feeder List
Selects the tape feeder to be taught from the selected block.
[4] Tch Skip Mode
Select “Disable“ or “Enable“ for teach skip mode.
Disable
: Teach skip mode is not used.
Enable : Teach skip mode is used. Teaching is not performed for the feeder that “Skip“ or
“Finished“ is displayed in the “Teaching“ column.
[5] [Activate] Button
When pressed, the "Manual Alignment" window appears for the selected tape feeder No.
[6] [Auto Tch] Button
Teaching for all tape feeders of selected block is performed automatically.
EUKYX
6-27199-2100
7.1 "Fdr Pick-up Tch" Window
7.1.1 Fdr Pick-up Tch
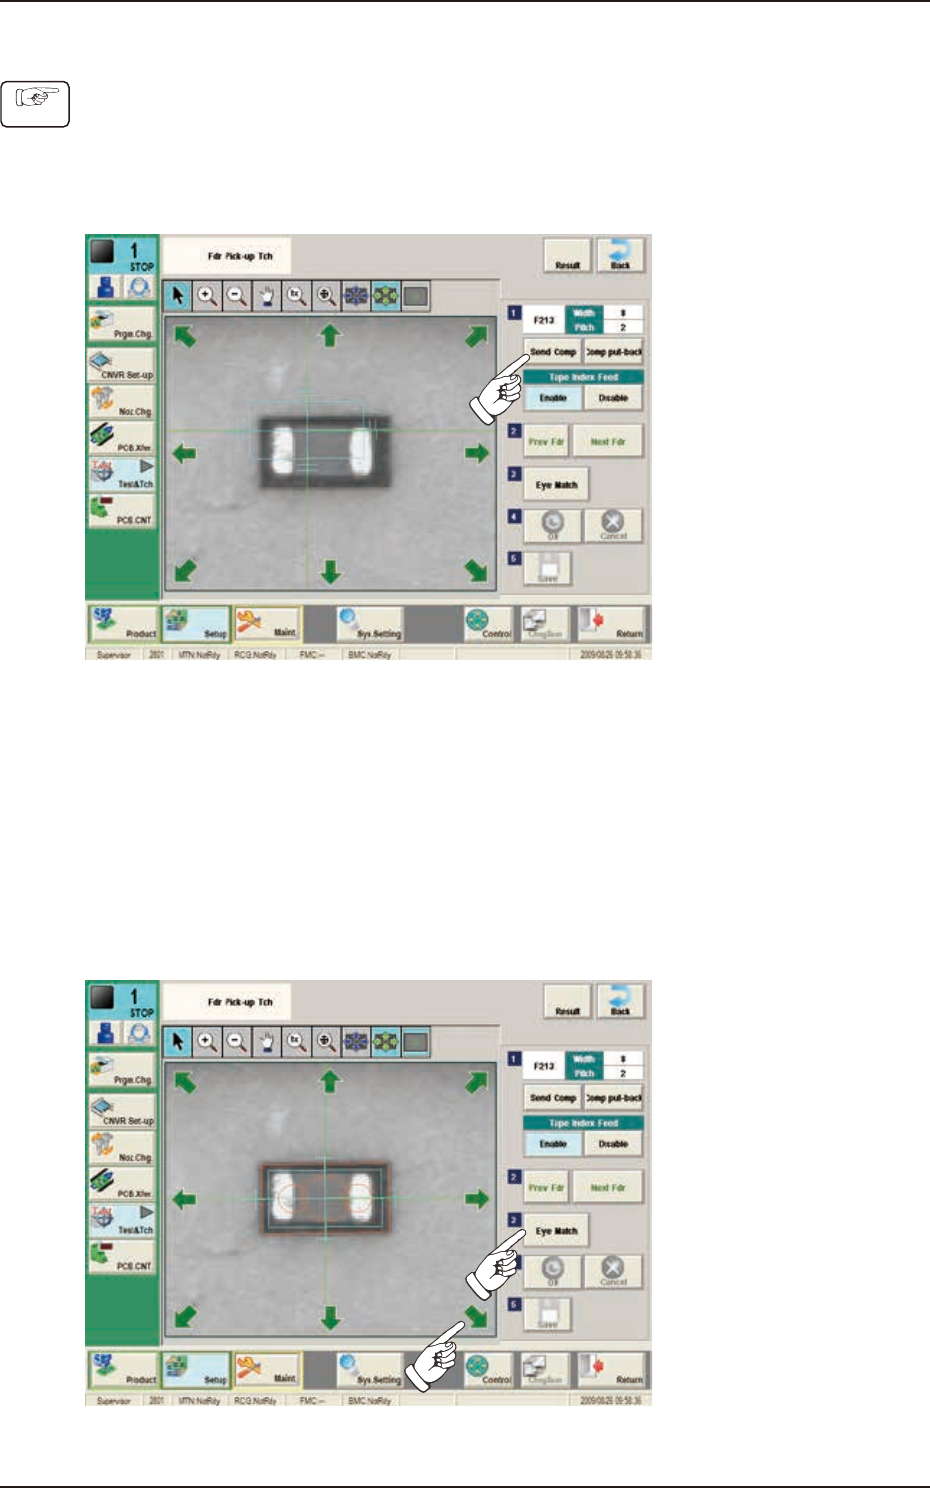
(1) Press the [Head Sel] button on the “Fdr Pick-up Tch“ window.
(2) Press the [Block Sel] button.
(Select the appropriate block and select the tape feeder where the teaching is performed).
(3) Press the [Activate] button.
(The window is changed to the manual alignment window for the selected tape feeder.)
F2F34
(4) Press the [Send Comp] button. (Find the place necessary on the tape).
(5) When the manual alignment is not required :
Press the [Prev Fdr.] or [Next Fdr.] button to perform the manual alignment for the other
tape feeder.
When the manual alignment is required :
Follow the steps (6) and later.
(6) Press the [Eye Match] button.
(Start the manual alignment operation from the position shown using an arrow).
F2F35
Procedure