EUKYX-199-2100_G5S2_Instruction_Vol2_E.pdf - 第290页
EUKYX 6-53 199-2100 7 .3.6 Windo ws display e d with [ T each ] button ■ “Component Librar y T eaching” Window The “Component L ibrary T each ing“ wi ndow is d isp la yed by pressi ng the [ Recog ] button or [ T each] bu…
EUKYX
6-52199-2100
7.3 "COMP RCG" Test Window
• Picking up component automatically from feeder to perform component recognition test:
(1) Select the test ID on the "COMP RCG" test window.
(2) Press the [Fr.] button. (The component recognition test window will be displayed).
(3) Press the [Feeder] button for the "Pick-up mode".
When the test ID is selected on the "Sel. From Comp Dt" tab sheet, "Feeder" is selected for the
"Pick- up mo de".
(4) Select the head to be used for the component recognition using the button in the "Head
Sel" section.
(5) Press the [Fdr No.] button and enter the lane No. where the test component pick-up is
available.
(6) Press the [Noz select] button to select the nozzle No. to be used for the recognition.
(7) Press the [Fr.] button. (The head will be moved and the operation buttons will be changed).
(8) Press the [Recog] button and within 10 seconds, press the [START] button on the operation
panel. (The test component will be picked up from the tape feeder).
(9) Press the [Recog] button and within 10 seconds, press the [START] button on the operation
panel.
(10) Confirm the recognition results in the "Results" pane.
• When the recognition result is normal, go to the step (12).
• When the recognition result is abnormal, go to the step (11).
(11) Confirm the component condition in the "Recognition Image Display" section.
When any error is found in the component, replace it.
When there is no error in the component, confirm the data in the test ID and correct it.
After that, perform the component recognition test again.
(12) Execute the hysteresis test.
Refer to “7.3.4.1 Hysteresis Test” for the details.
(13) Press the [Dscd] or [Collect.] button and within 10 seconds, press the [START] button on the
operation panel.
Discard : When selected, the discard operation is performed based on the component
discharge position data in the test ID.
Collection
: When selected, the head is moved to the lane No. specified using the “Coll. Pos”
button and the test component is collected manually.
(14) Press the [ZERO] button and within 10 seconds, press the [START] button on the operation
panel. (The XT beam will be returned to the home position and the test will be ended).
Procedure
Note
Reference
EUKYX
6-53199-2100
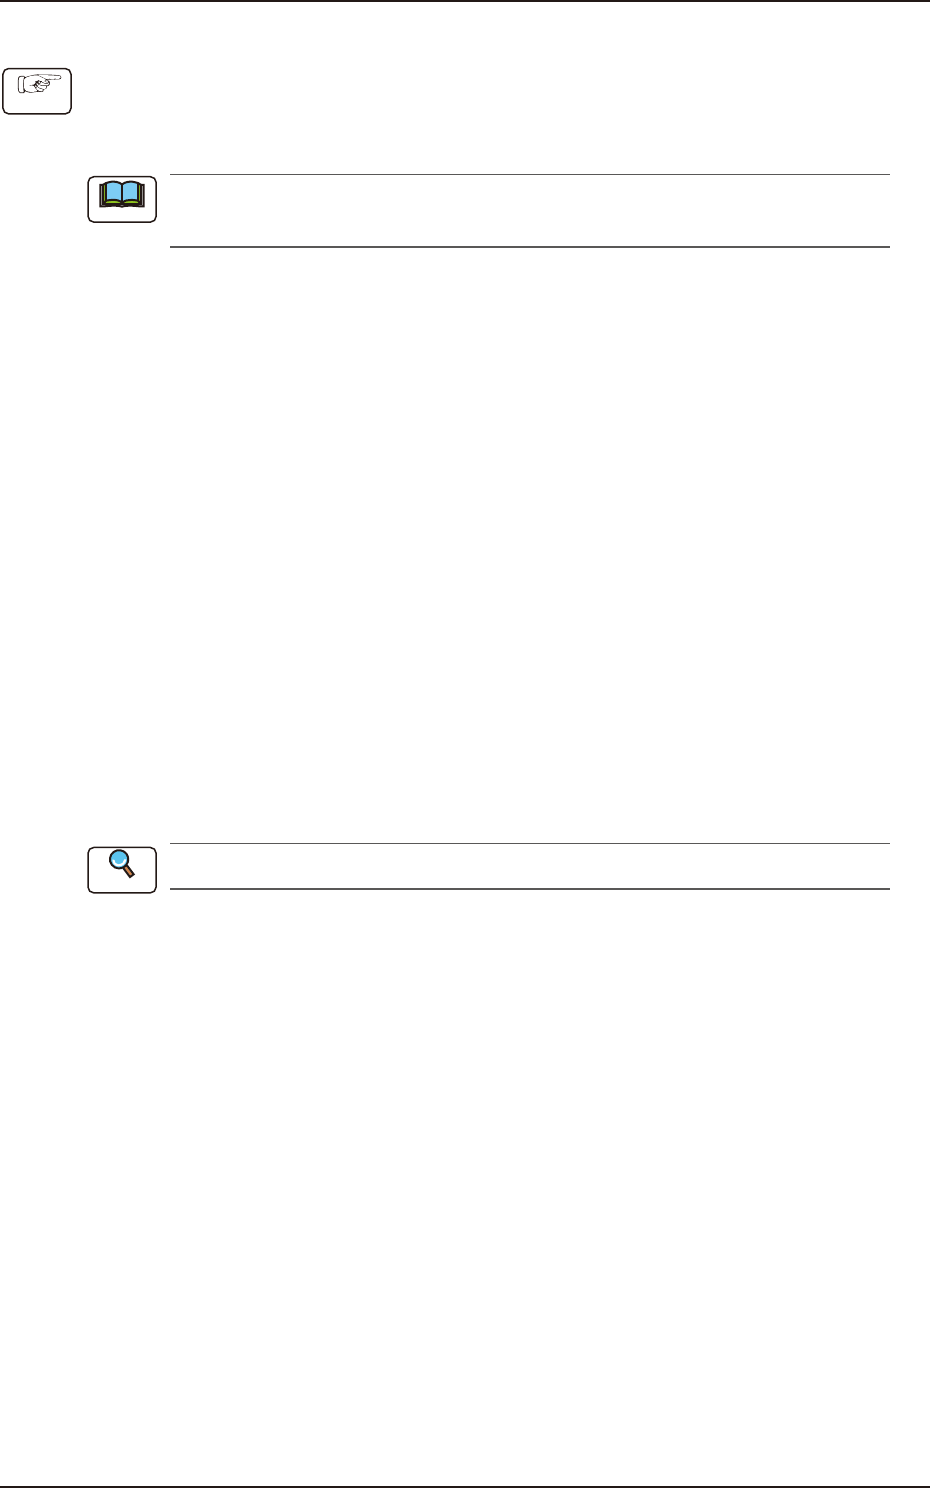
7.3.6 Windows displayed with [Teach] button
■
“Component Library Teaching” Window
The “Component Library Teaching“ window is displayed by pressing the [Recog] button or [Teach]
button on the “COMP RCG“ window.
See “7.3.6.1 Explanation of “Component Library Teaching” Window” in this chapter for
"Component Library Teaching" Window.
F2F56A
■
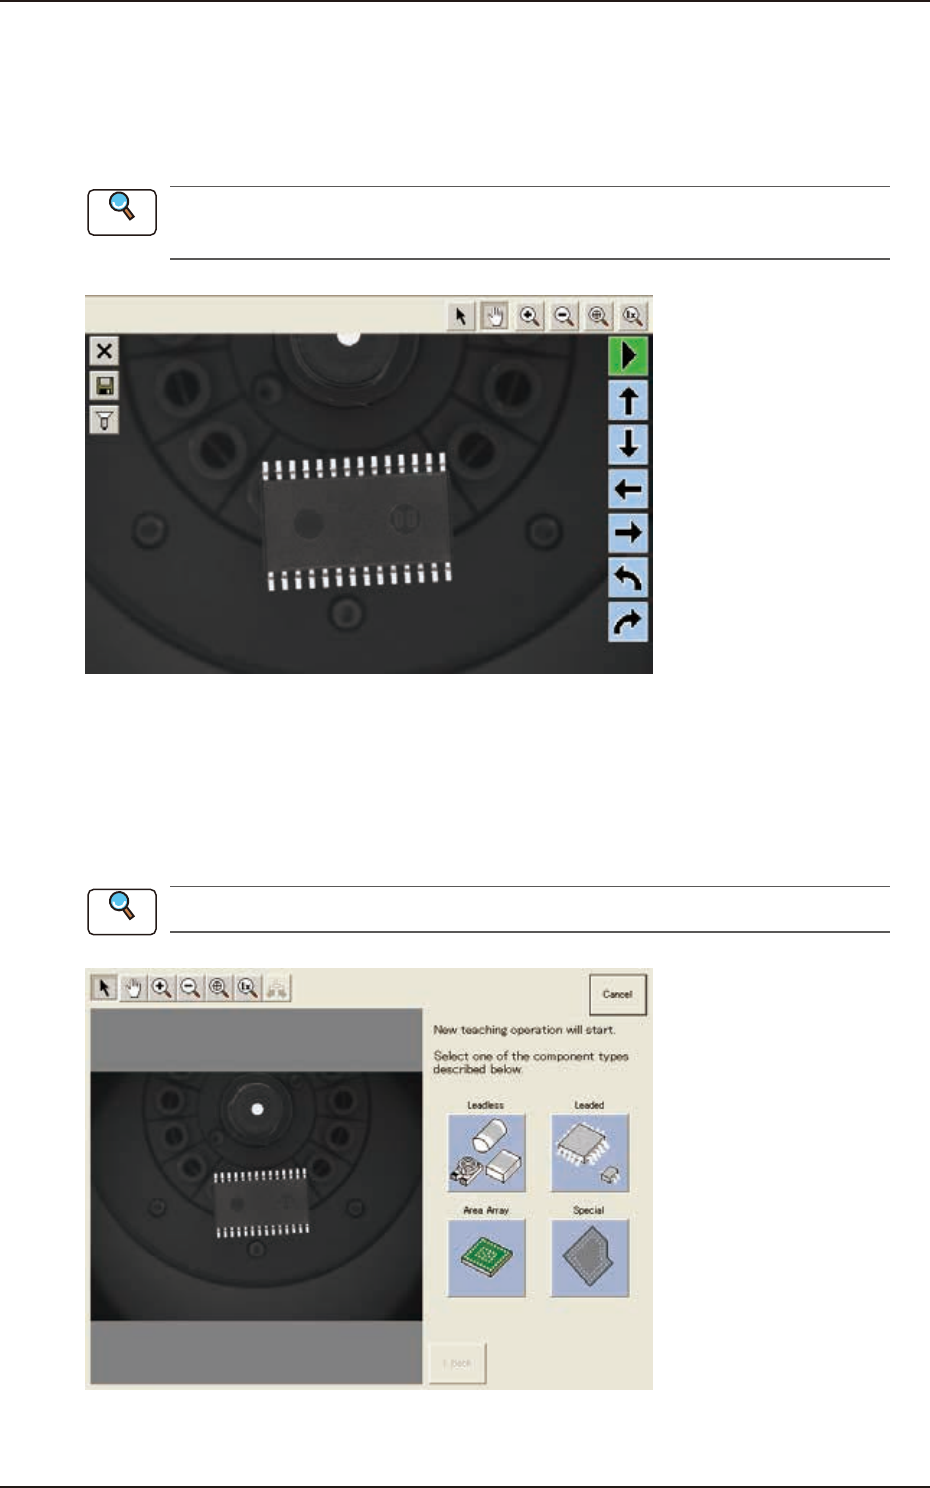
“Create teach wizard” Window
Create a new component data for recognition test on “Library Teaching New Creation” tab on the
“Comp Recog“ window. Then press the [Next] button. The component recognition test execution
window appears. When the [Recog] or [Teach] is pressed on the window, the following “Create
teach wizard” window appears. Proceed the operation according to the instructions on the window.
See “7.3.7 “Create Teach” Wizard” in this chapter for “New teaching wizard” window.
F2F56
Reference
7.3 "COMP RCG" Test Window
Reference
EUKYX
6-54199-2100
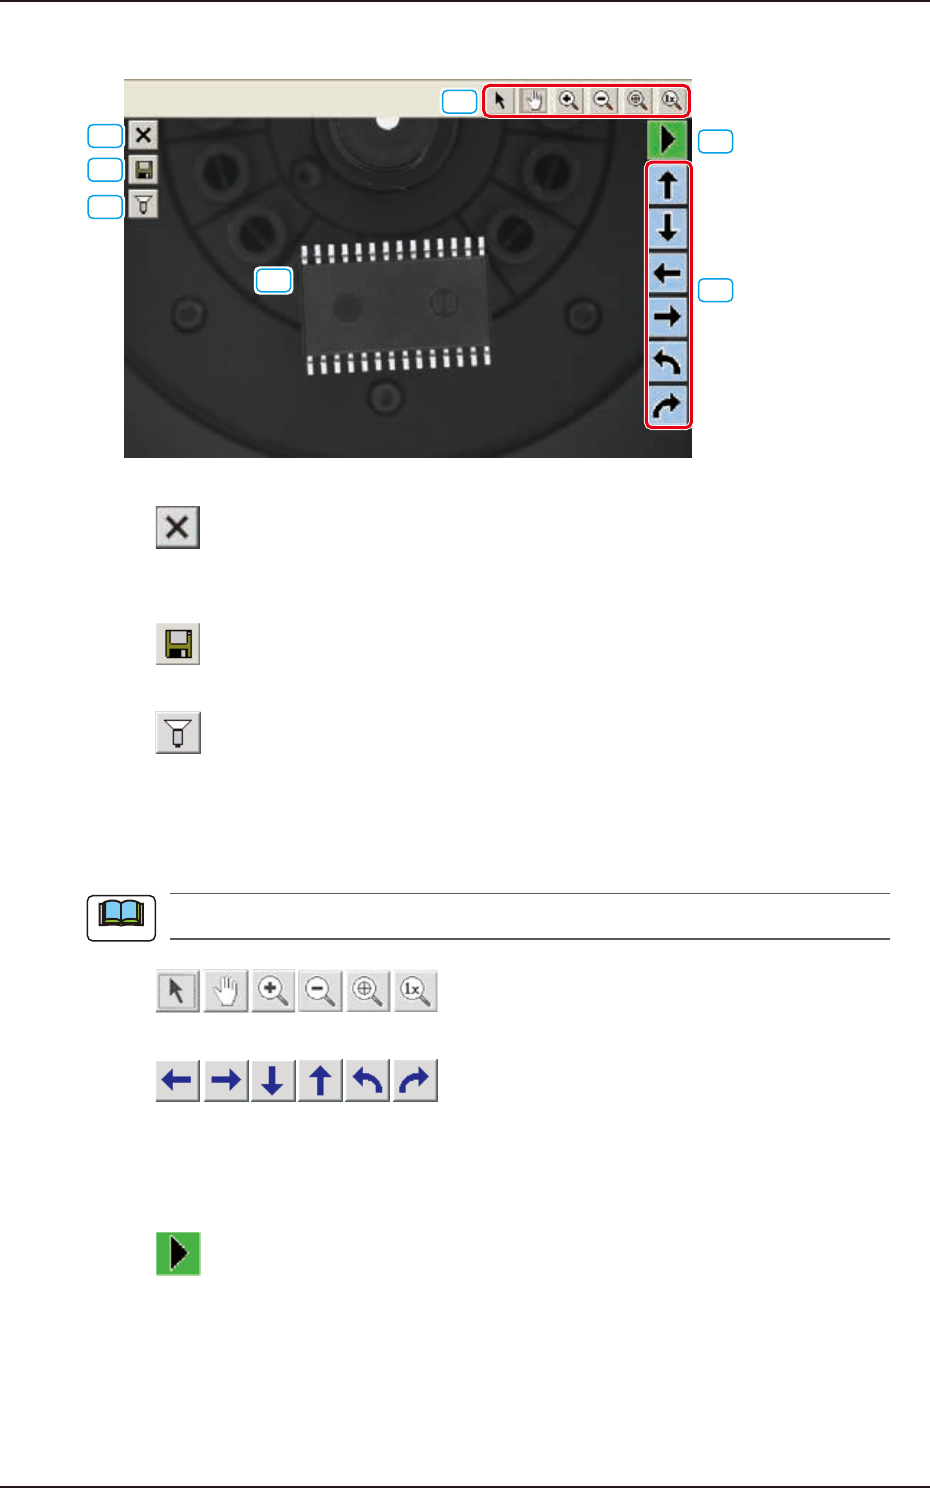
7.3.6.1 Explanation of "Component Library Teaching" Window
[1]
[2]
[3]
[4]
[5]
[6]
[7]
F2F57
[1] [ ] Button
Press this button to exit from the component library teaching session.
To save the edited data, press the [Yes] button. Pressing the [No] button aborts the data.
[2] [
] Button
This saves the edited data.
[3] [
] Button
This opens an image capture dialog box, making it possible to capture an image according to the
specified condition.
At the time of "New Teaching" or "Modification Teaching", the captured image is used for the
teaching operations.
The lighting pattern specified in this dialog box is not reflected on the library data.
[4] [
] Buttons
These buttons move the displayed image.
[5] [
] Buttons
When one of these arrow buttons is selected, the selected graphic moves or rotates slightly in the
selected direction.
When the coordinate system, the mold size, or the outward length is selected, the whole graphic
moves or rotates slightly in the selected direction.
[6] [
] Button
When this button is pressed the graphic image movement speed is changed.
Note
7.3 "COMP RCG" Test Window