EUKYX-199-2100_G5S2_Instruction_Vol2_E.pdf - 第318页
EUKYX 6-81 199-2100 7.4 "PEC RCG" T est Window [ 3] [Mark Pos Edit ] But ton Us ing thi s button, the PEC recogniti on mark position i s s etup. Eac h item is shown as a button and when each b ut ton is pressed…
EUKYX
6-80199-2100
7.4 "PEC RCG" Test Window
7.4 "PEC RCG" Test Window
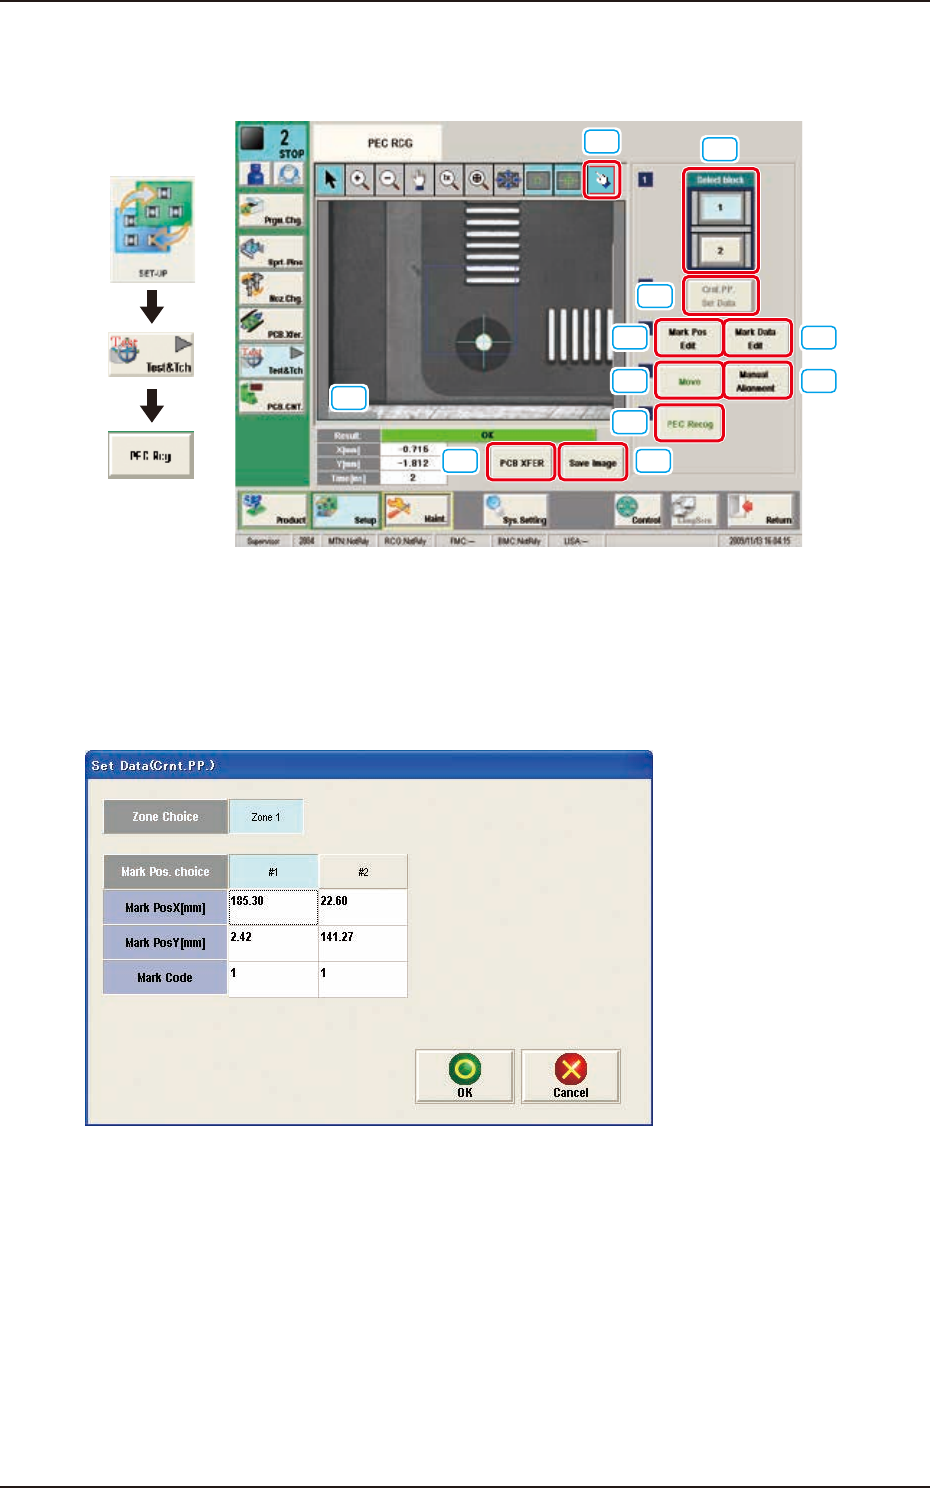
This window enables the operator to perform the PEC recognition mark recognition test.
[1]
[2]
[3] [4]
[5]
[6]
[7]
[9] [10]
[8]
[11]
Graphic
Development
F2F113
[1] [Select block] Button
The buttons showing each block are displayed using images. Using one of these buttons, the block
used for the PEC recognition test is selected.
[2] [Crnt. PP. Set Data] Button
When this button is pressed, the [Set Data (Crnt. PP.)] window appears.
F2F114
When [Zone n] is selected for the "Zone Choice" for the global recognition position and the [#n]
button is selected and then the [OK] button is pressed, the position data and PEC recognition mark
code are set.
The set data is displayed in the Mark Pos X, Y data boxes on the "[3] Mark Pos. Edit" window and
"[4] Mark Data Edit" window.
EUKYX
6-81199-2100
7.4 "PEC RCG" Test Window
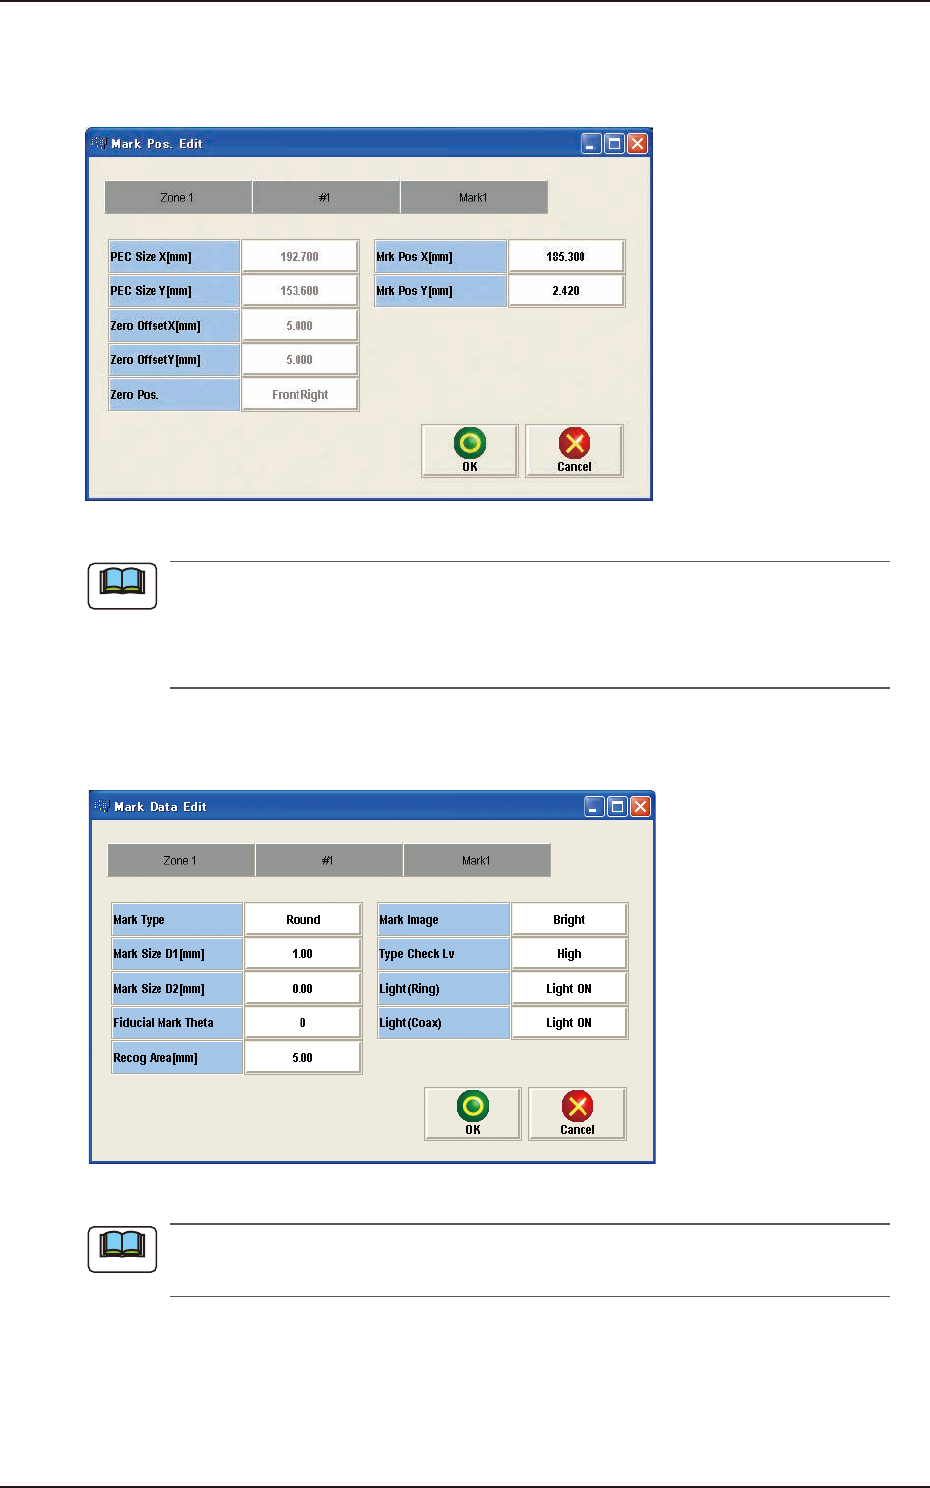
[3] [Mark Pos Edit] Button
Using this button, the PEC recognition mark position is setup. Each item is shown as a button and
when each button is pressed, the corresponding data set window appears.
F2F115
(a) When the pattern program has been setup, the parameters for the “PEC Size X[mm]”
and “PEC Size Y[mm]” are automatically set.
(b) When the settings have been performed in the "Cmt PP Data Setting" window, the “Mrk
Pos X[mm]” and “Mark Pos Y[mm]” also have already been setup.
[4] [Mark Data Edit] Button
Press each button to set the PEC recognition mark.
F2F116
When the settings have been performed in the "Cmt PP Data Setting" window, the PEC
recognition mark data has already been setup.
Note
Note
EUKYX
6-82199-2100
7.4 "PEC RCG" Test Window
[5] [Move] Button
Using this button, the beam is moved to the set position.
[6] [Manual Alignment] Button
Using this button, the window where the recognition position setup using the manual alignment
operation, is opened.
[7] [PEC Recog] Button
When this button is pressed, the PEC recognition test is prepared.
[8] Result:
In this pane, the PEC recognition test results are displayed.
[9] [PCB XFER] Button
When this button is pressed, the "PCB Transfer" window appears.
See “6. “PCB XFER” Window” in this chapter for details.
[10] [Save Image] Button
When this button is pressed, the "Image Save" window appears.
This window is used to save the test results.
[11] [
(Re-Recognition)] Button
After pressing this button, the recognition image is touched in the "Manual Alignment" window to
re-recognize the marks.
Reference