00198365-03_UM_JTF-ML2_TX12_V1-V2_EN - 第47页
4 Setting up and commissioning 4.2 Retrofitting in the SIPLACE TX-Series User Manual SIPLACE TX V1/V2 Series JEDEC Tray Feeder (JTF-ML2) 11/2019 47 Fig.79: Hooking in the tower ► Hook in the tower at the SIPLACE JTF‑ML2…
4 Setting up and commissioning
4.2 Retrofitting in the SIPLACE TX-Series
46 User Manual SIPLACE TX V1/V2 Series JEDEC Tray Feeder (JTF-ML2) 11/2019
4.2.5.6 Mounting the output conveyor extension
Fig.77: Mounting the output conveyor extension
► Fit the complete output conveyor
extension. To do this, read the
assembly instructions "Input and
Output Conveyor Extension
SIPLACE TX" [00198141‑xx].
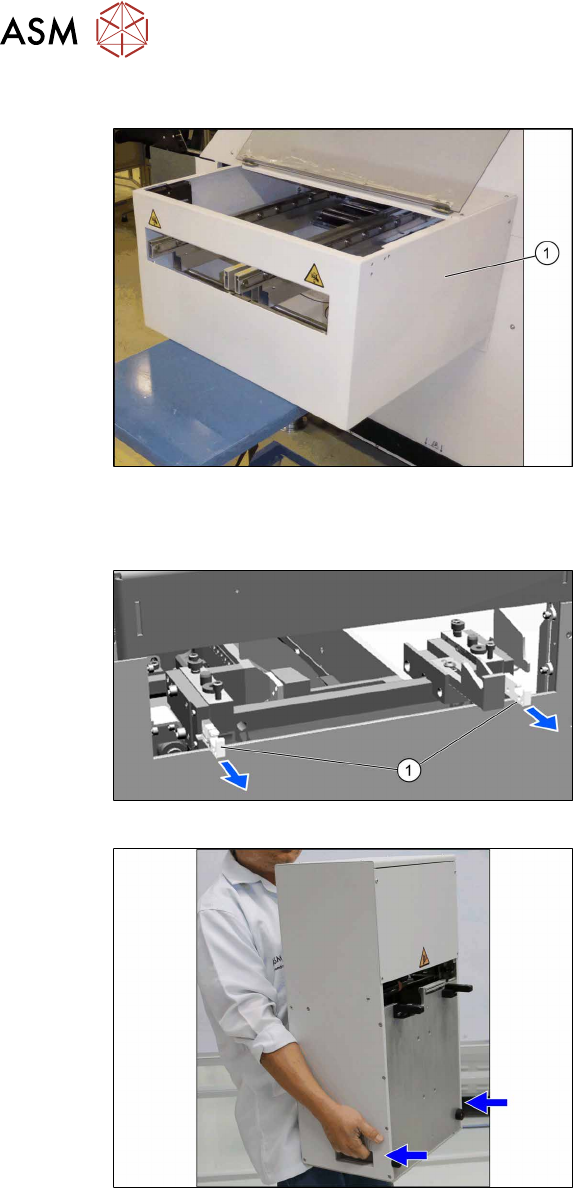
4.2.5.7 Mounting the tower
Pulling out the Hooks
► Pull out both hooks(1) at the SIPLACE
JTF‑ML2 adapter.
Fig.78: Holding the tower
► Hold the SIPLACE JTF‑ML2 as shown
at the two handles.
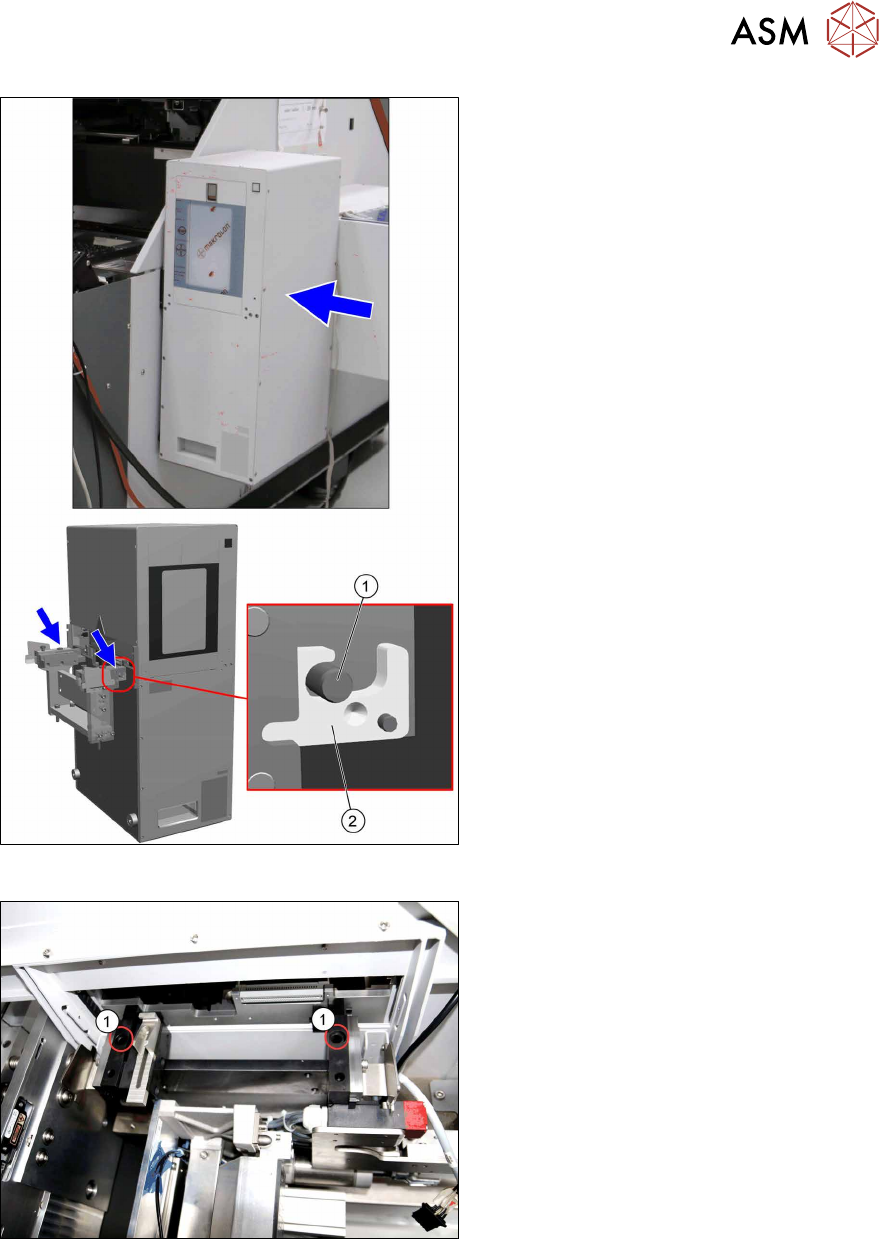
4 Setting up and commissioning
4.2 Retrofitting in the SIPLACE TX-Series
User Manual SIPLACE TX V1/V2 Series JEDEC Tray Feeder (JTF-ML2) 11/2019 47
Fig.79: Hooking in the tower
► Hook in the tower at the SIPLACE
JTF‑ML2 adapter.
The bolts(1) have to be at the
hooks(2).
Fig.80: Tighten the tower
► Fasten the tower with two screws(1)
ISO7379 - 10x25-12.9 on the
SIPLACE JTF‑ML2 adapter.
4 Setting up and commissioning
4.2 Retrofitting in the SIPLACE TX-Series
48 User Manual SIPLACE TX V1/V2 Series JEDEC Tray Feeder (JTF-ML2) 11/2019
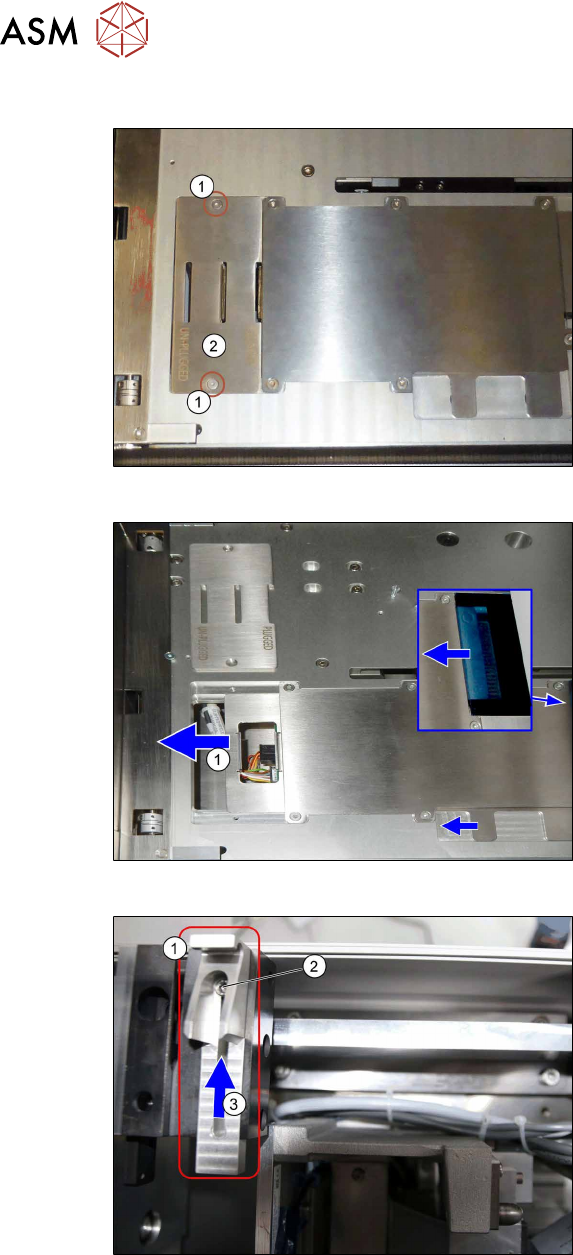
4.2.5.8 Mounting the conveyor
Fig.81: Mounting the conveyor 1
► Check if the screws(1) and the
cover(2) has been removed.
If not: Remove the screws and the
cover.
Fig.82: Mounting the conveyor 2
► Check if the plate(1) has been moved
to the left.
If not: Push the plate until end position
to the left.
Fig.83: Mounting the conveyor 3
► Loosen the screw(2) at conveyor
pivot(1).
► (3) Push the conveyor pivot until end
position towards the tower.
► Tighten the screw(2).