00195963-03_MM SWS-EN.pdf - 第13页
13 After Completing the Mainte nance Work Close al l protective c overs of the placem ent mach ine and a ll previously opene d modules of the SWS (See ” Opening and Clos ing the Int erior of the SWS” on page - 1 4.). …
Wear Parts
Item number
Vacuum plate compl. DLM/R-lightbeige
Part of Servicebox
03037984-03
Sealing unit
Part of Servicebox
[00387580-01]
O-Ring 5 X 2 NBR Wafersupport
Part of Servicebox
[03073457S01]
Vacuumpump Sound Absorber U-1/8 (Festo)
[03050536-01]
Sparepart set Vacuum pump
Part of Servicebox
[03079140-0]
Fuse SMD Flip-Chip F1 - 24V/3AT
[03078645-01]
Fuse SMD Wafertable F1 - 24V/2AT
[03078644-01]
Fuse SMD Wafertable F2 - 5V/0,5A-FF
[03078647-01]
Fuse SMD Waferlift 24V - 3AT
[03078645-01]
Fuse SMD Supply F1 - 24V - 3AT
[03078645-01]
Fuse SMD Supply F2 - 5V/1AT
[03078643-01]
Micro Fuse Waferheating 6,3AT (Glas)
[03078846-01]
Important Points to Note when Carrying out Maintenance Work
The given maintenance intervals for checking and exchanging the filter elements are valid for the
specified compressed air quality only (see the compressed air specifications in the User Manual
[00195941-xx]). If other qualities are used, the maintenance intervals should be shortened accord-
ingly.
CAUTION
It is strictly prohibited, to clean any modules within the SWS by means of compressed air.
Enter the completed maintenance work in the maintenance schedule. We recommend that you
carry out the jobs in the order given in the maintenance schedule.
Before Carrying out Maintenance Work
Unless stated differently for the individual tasks, proceed as follows:
Shut down the placement machine and the SWS properly and switch them off.
Secure the placement machine and the SWS against unauthorized reactivation.
Make the required modules of the SWS accessible (See ”Opening and Closing the Interior of
the SWS” on page - 14.).
13
After Completing the Maintenance Work
Close all protective covers of the placement machine and all previously opened modules of
the SWS (See ”Opening and Closing the Interior of the SWS” on page - 14.).
Remove the devices against unauthorized reactivation.
Switch on the SWS and the placement machine.
Opening and Closing the Interior of the SWS
Opening and Closing the Protective Covers of the Placement Machine
Open the relevant protective cover of the placement machine, to make the interior of the SWS
accessible from above.
Carry out the necessary maintenance work and close the protective cover.
Swiveling out the Magazine Lift
For maintenance work on modules that cannot be accessed from above, it is necessary to make
the interior of the SWS accessible via the front.
CAUTION
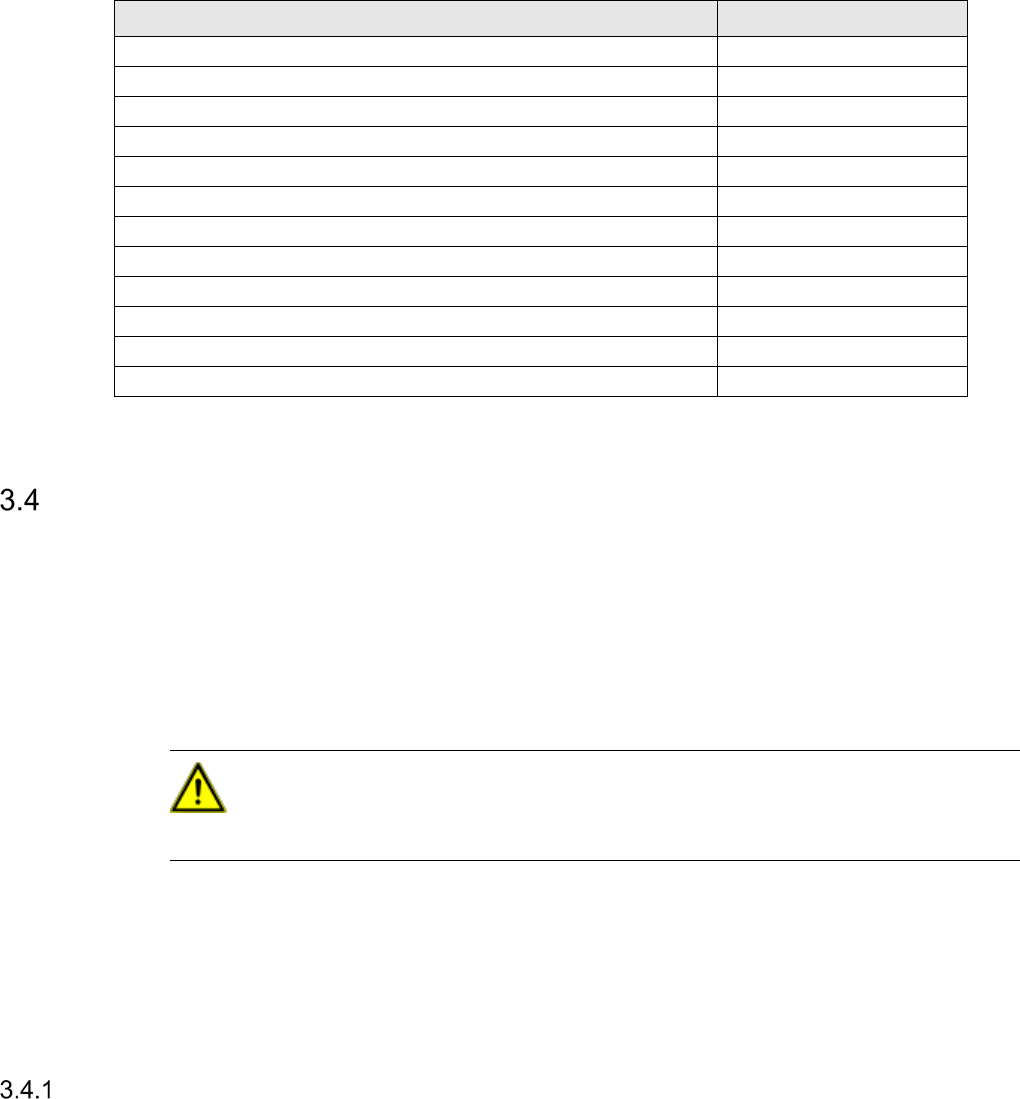
Make absolutely sure that the supporting foot of the SWS is swung out to the side, before you
swivel open the magazine lift. Otherwise you risk that the magazine lift may tilt.
Swing the support foot of the SWS out to the side.
Open the lower door of the magazine lift using the machine key.
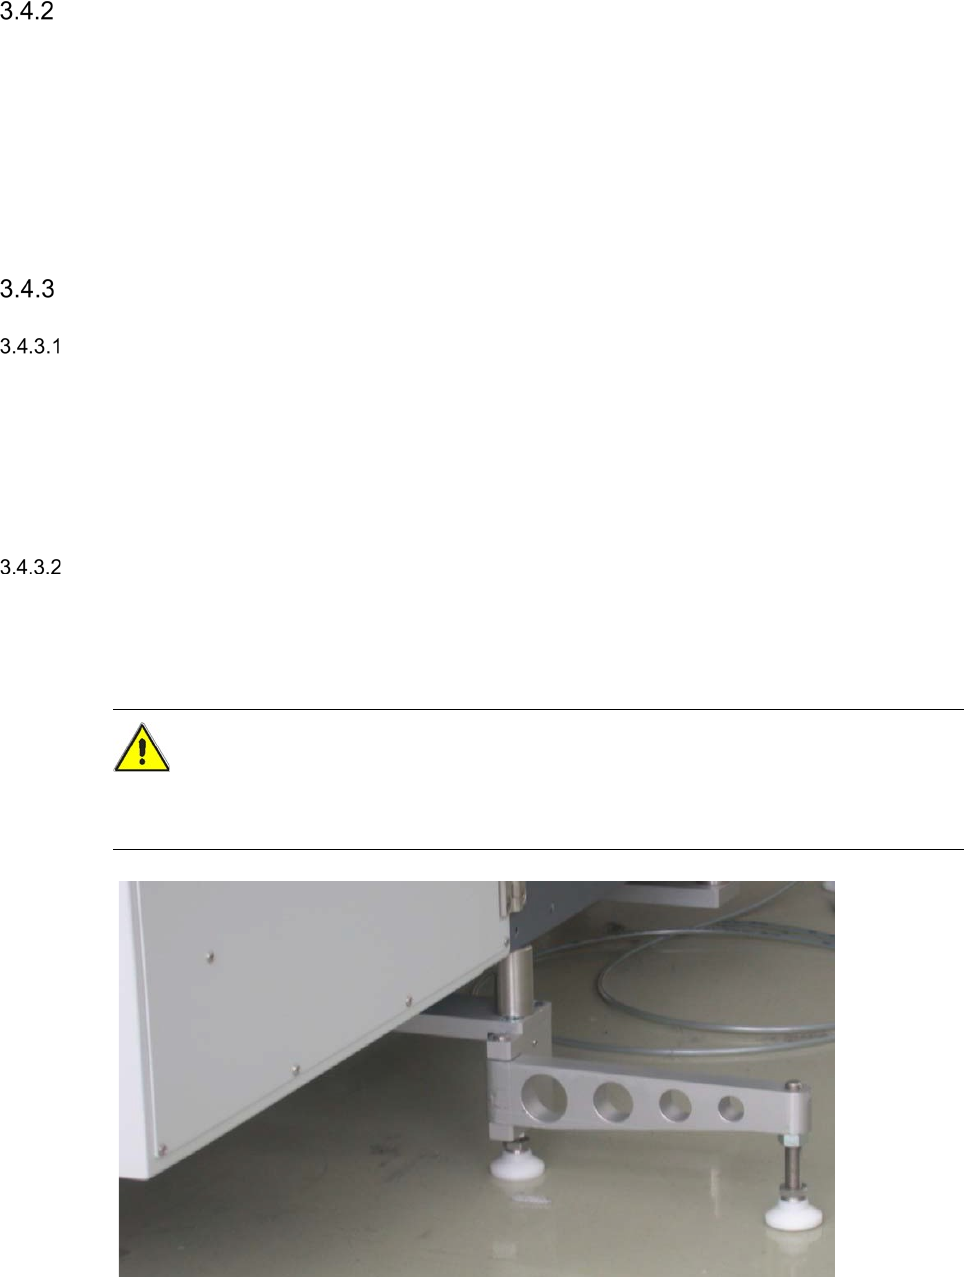
Legend
[1] Screw
Remove the screw that fixes the magazine
lift to the SWS.
At locations 1 and 3 these screws are lo-
cated on the right side, at locations 2 and 4
on the left side.
Swivel the magazine lift to the side.
The interior of the SWS is now accessible
via the front.
Carry out the necessary maintenance work
and close the magazine lift.
Closing the Magazine Lift
Swivel the magazine lift back to its initial position.
Fix the magazine lift to the SWS with the two previously removed screws.
Close the lower door of the magazine lift using the machine key.
Swing the support foot of the SWS back in, so that it stands parallel to the SWS (See ”Fig.
2.5 - 1” on page - 20.).
Pulling out the Supply Unit
For maintenance work on components that must be accessible from the front and the side, it is
additionally necessary to pull out the supply unit.
CAUTION
When pulling out or pushing in the supply unit, make absolutely sure, that the electrical cables
and pneumatic lines do not get caught or even pulled of.
Open the magazine lift (See ”Swiveling out the Magazine Lift” on page - 14.).
Remove the two screws at the supply unit.
Pull the supply unit out.
Carry out the necessary maintenance work and push the supply unit back in.