00195963-03_MM SWS-EN.pdf - 第34页
Legend [1] Pris ms for cer amic bal ls [2] magnetic contact s urfaces Wipe the m agnetic co ntact s urfaces and the prisms with a lin t - free cloth. Clean th e surfaces w ith a cleani ng bud mo istened with ethy l a…
33
Cleaning the Magnets and Ceramic Spheres of the Needle System
Interval: 3-month
Equipment
:
Lint-free cloth, ethyl alcohol, cleaning buds, lint-free
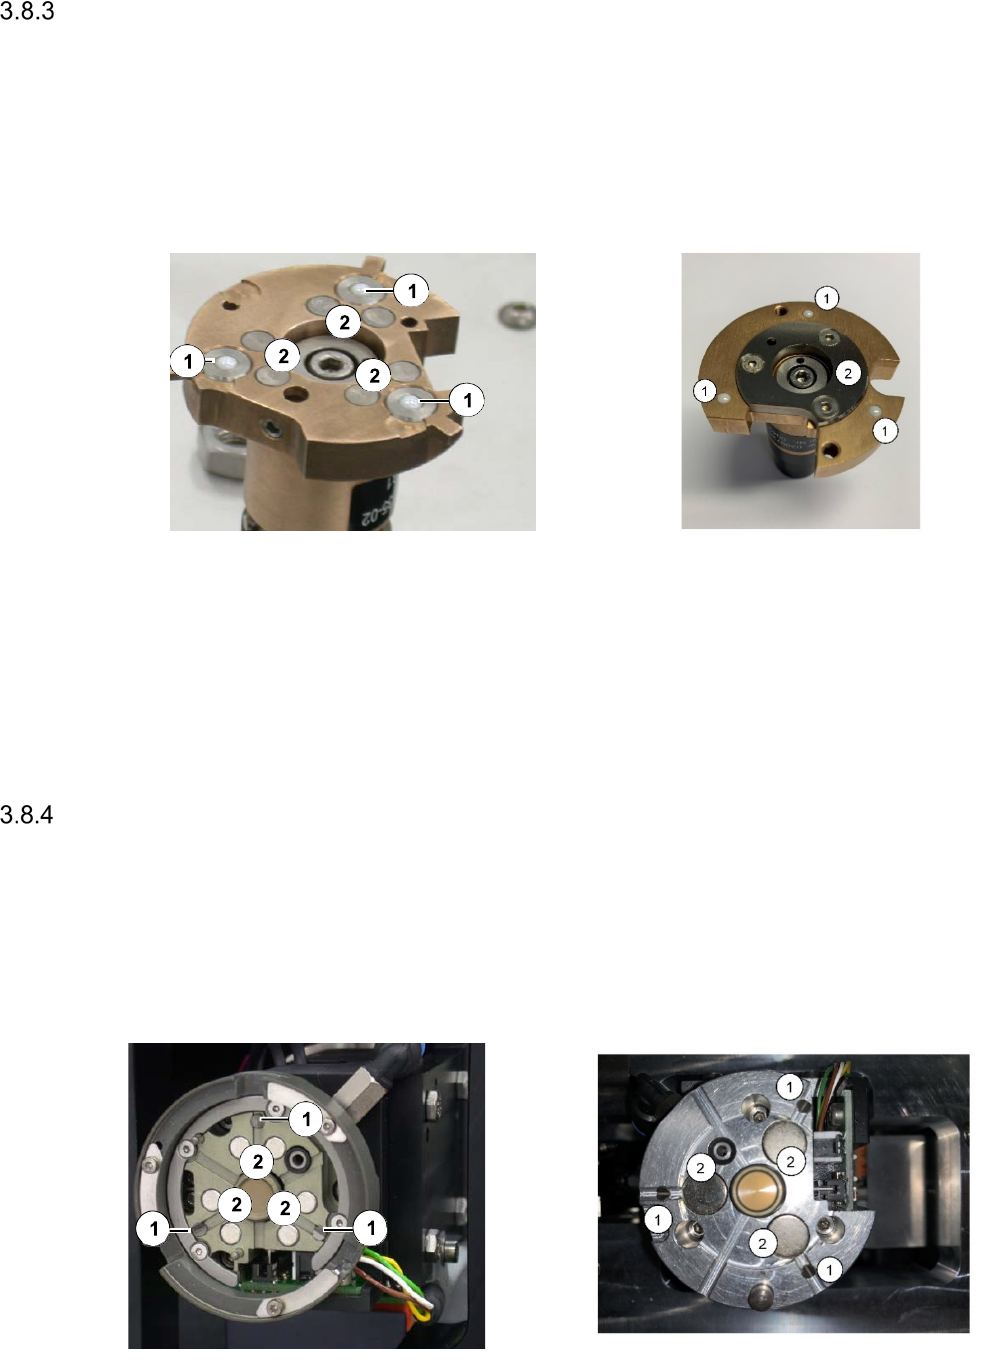
Dirt on the magnets and the ceramic spheres on the underside of the needle system must be re- moved
regularly, to ensure the correct positioning of the needle system within the centering unit.
Legend
[1] Ceramic spheres
[2] Magnets
Wipe the magnets and the ceramic spheres with a lint-free cloth.
Clean the surfaces with a cleaning bud moistened with ethyl alcohol.
Cleaning the Prism and the Magnetic Contact Surfaces at the Centering Unit
Interval: 3 months
Equipment: Lint-free cloth, ethyl alcohol, cleaning buds, lint-free
Dirt on the magnets and the prisms on the underside of the centering unit must be removed reg-
ularly, to ensure the correct positioning of the needle system within the centering unit.
Legend
[1] Prisms for ceramic balls
[2] magnetic contact surfaces
Wipe the magnetic contact surfaces and the prisms with a lint-free cloth.
Clean the surfaces with a cleaning bud moistened with ethyl alcohol.
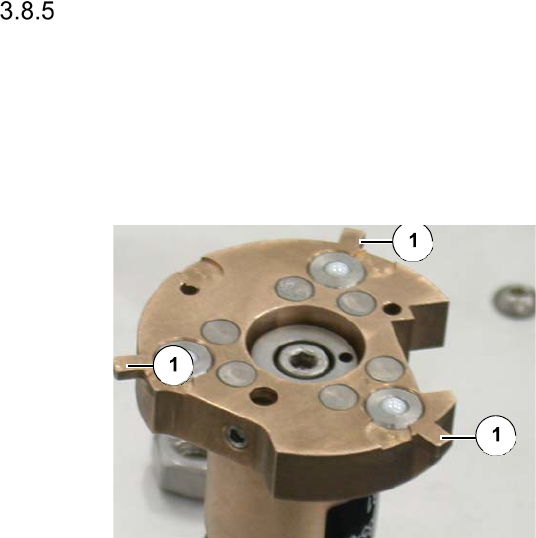
Checking the Suppression Pins of the Needle System
Interval: 3 months
Equipment: None
The suppression pins of the needle system must regularly be checked for breakage or bending,
to assure a correct positioning of the needle system within the centering unit.
Legend
[1] Suppression pin
Make sure that the three suppression pins
are neither bent nor broken.
If the pins are damaged, the needle system
has to be replaced (see the Service Man-
ual for details).
35
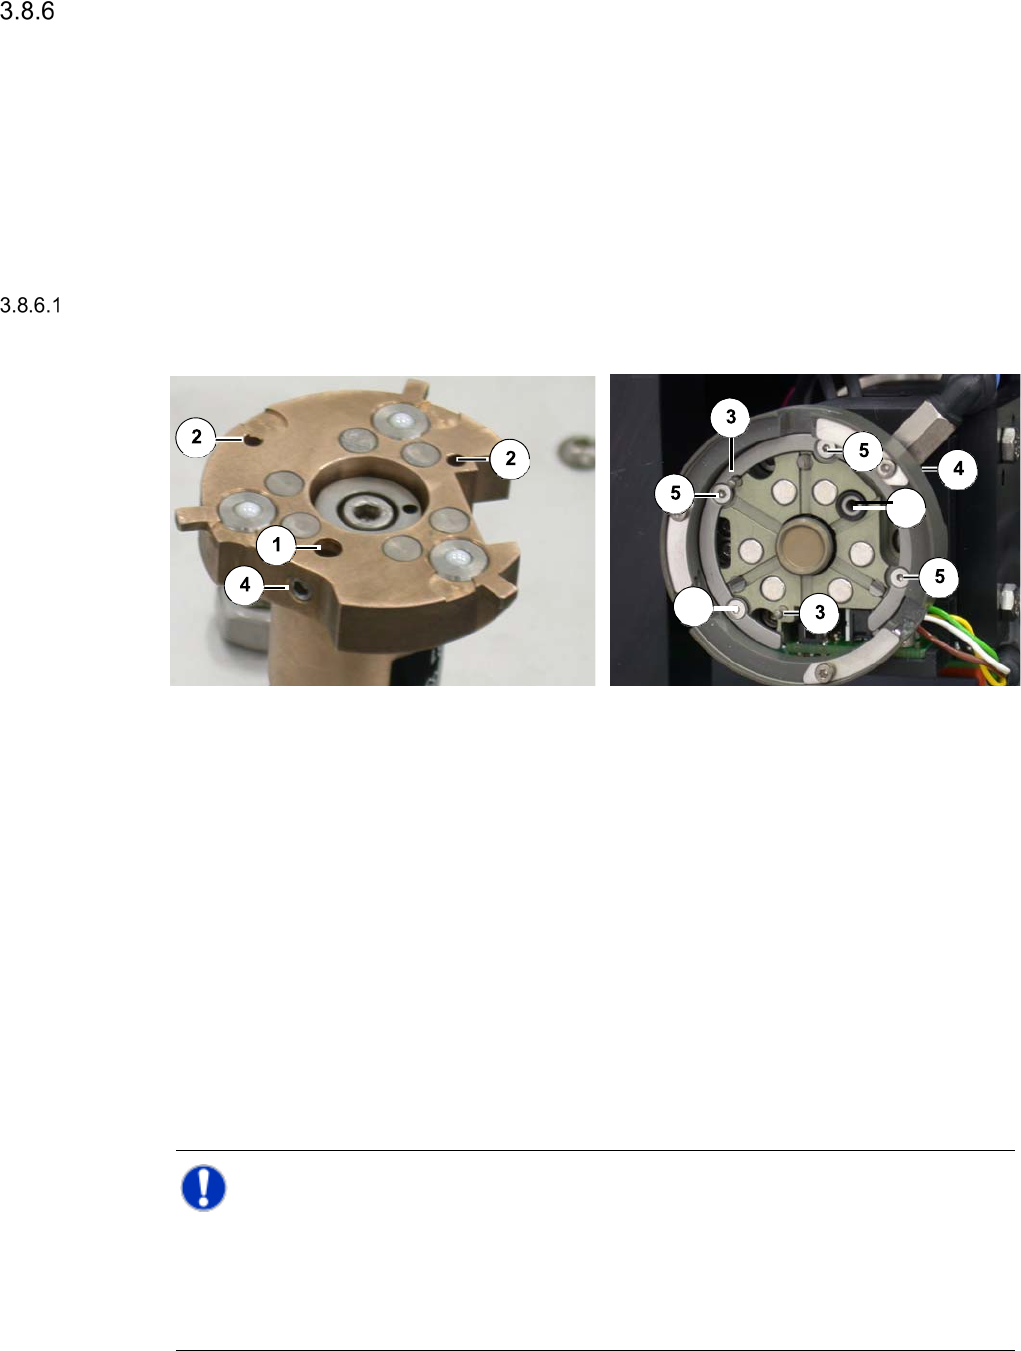
Checking the Sealing Ring at the Needle System and the Centering Unit for Leaks
Interval: 4 months
Equipment: None
In order to assure a leak tightness of the vacuum, the sealing rings [1] of needle system and cen-
tering unit must regularly be checked for signs of wear.
Bajonett lock
Needle system Centering unit
Legend
[1] Sealing Unit with sealing
[2] Adjustment hole
[3] Adjustment pin
[4] Hexagon socket screw on the side
[5] Fastening screws with adjustment ring
Check the sealing ring for visible signs of wear. If
necessary, sealing unit must be exchanged.
To do this, slightly loosen the hexagon socket screw on the side that fixes the sealing unit.
To loosen the hexagon socket screw, remove the pneumatic connection below of it.
Pull out the sealing unit.
Insert the new sealing unit and push it down until the stop.
Carefully fasten the hexagon socket screw.
NOTE
If the hexagon socket screw on the side is difficult to access, it may be necessary to remove the
4 fastening screws of the adjustment ring (item 5) and to lift the ring off.
Replace the adjustment ring afterwards and fasten it before fastening the hexagon socket screw
on the side.
1
5