00195963-03_MM SWS-EN.pdf - 第36页
Legend [1] O ring Grease the O - ring w ith UNISILCO N L250L (thin lubricant film). Magnet - lo ck The follow ing desc ription is explained us ing the new need le ejector un it (magne tic). The procedure is identic al …
35
Checking the Sealing Ring at the Needle System and the Centering Unit for Leaks
Interval: 4 months
Equipment: None
In order to assure a leak tightness of the vacuum, the sealing rings [1] of needle system and cen-
tering unit must regularly be checked for signs of wear.
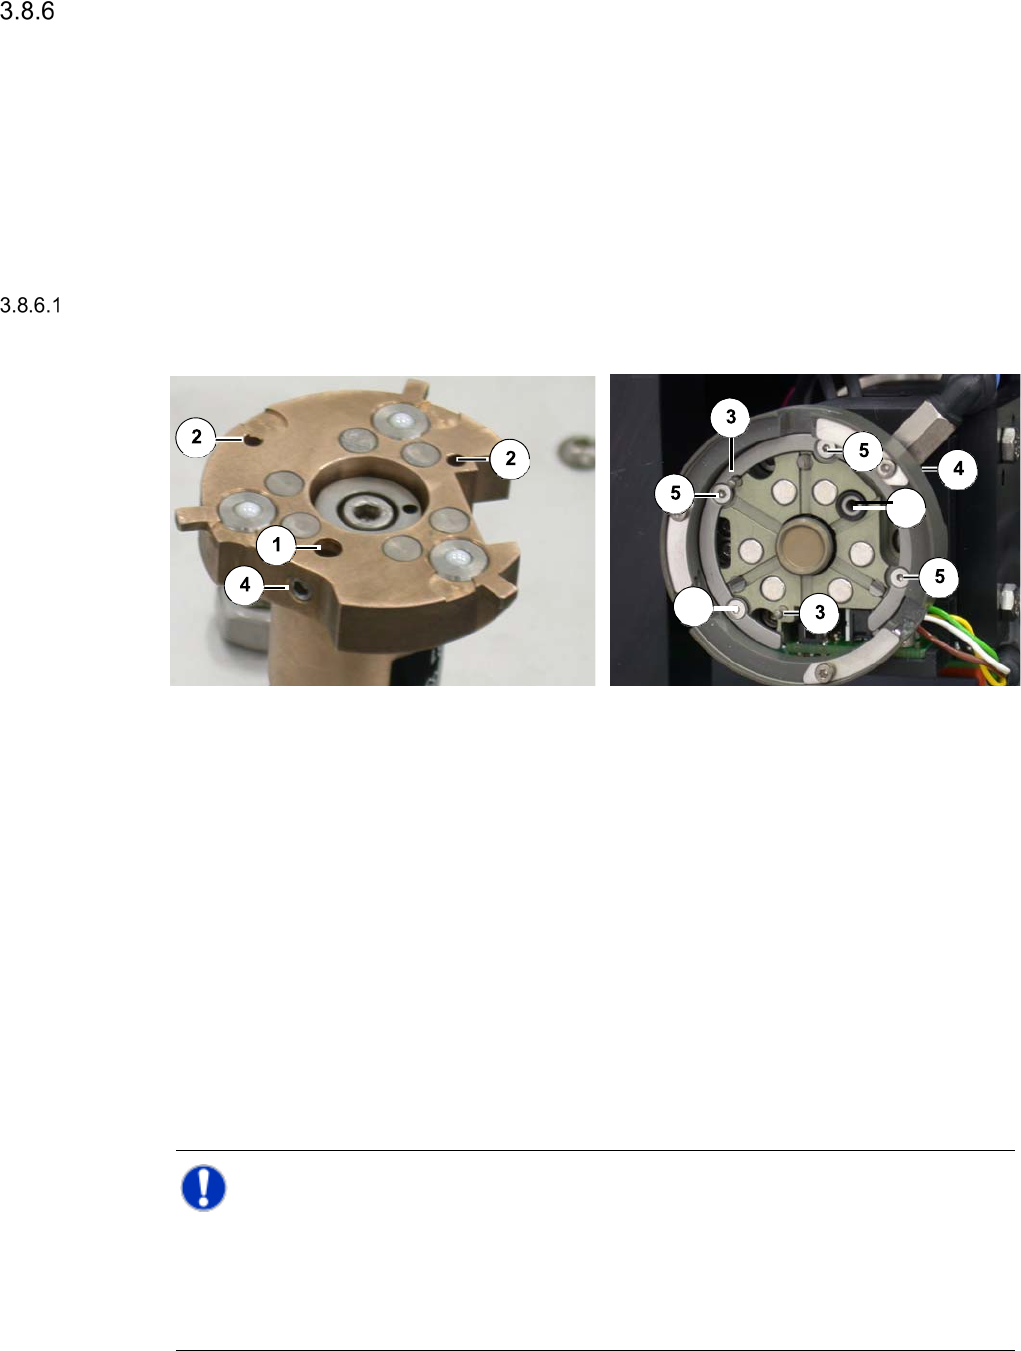
Bajonett lock
Needle system Centering unit
Legend
[1] Sealing Unit with sealing
[2] Adjustment hole
[3] Adjustment pin
[4] Hexagon socket screw on the side
[5] Fastening screws with adjustment ring
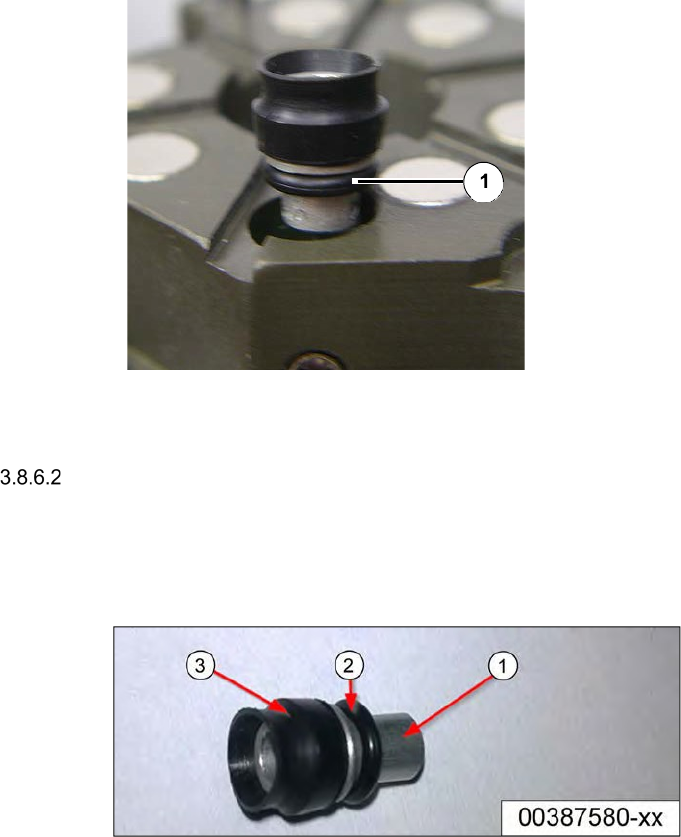
Check the sealing ring for visible signs of wear. If
necessary, sealing unit must be exchanged.
To do this, slightly loosen the hexagon socket screw on the side that fixes the sealing unit.
To loosen the hexagon socket screw, remove the pneumatic connection below of it.
Pull out the sealing unit.
Insert the new sealing unit and push it down until the stop.
Carefully fasten the hexagon socket screw.
NOTE
If the hexagon socket screw on the side is difficult to access, it may be necessary to remove the
4 fastening screws of the adjustment ring (item 5) and to lift the ring off.
Replace the adjustment ring afterwards and fasten it before fastening the hexagon socket screw
on the side.
1
5
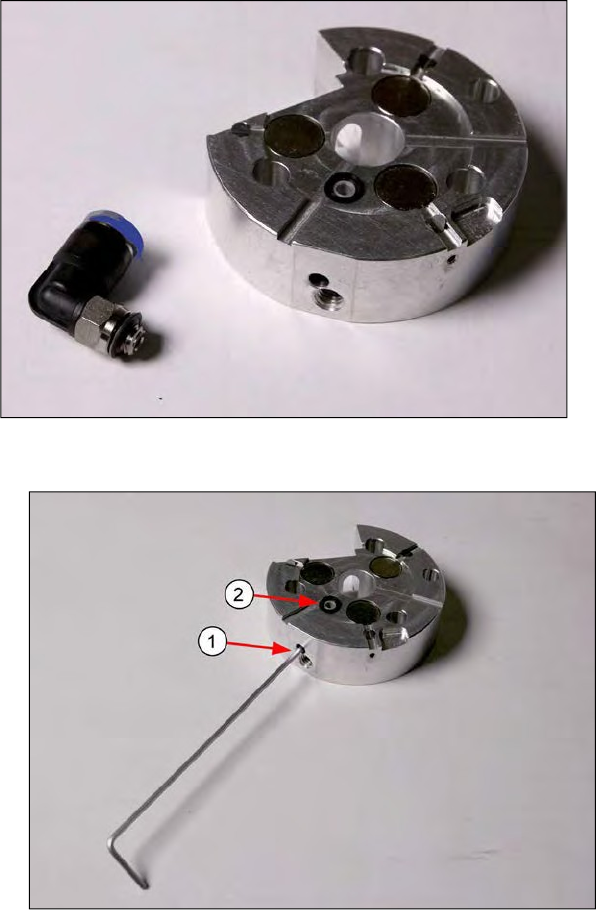
Legend
[1] O ring
Grease the O-ring with UNISILCON L250L
(thin lubricant film).
Magnet-lock
The following description is explained using the new needle ejector unit (magnetic). The
procedure is identical for the needle ejector unit with the bayonet fastening.
Parts
The following spare parts are available:
●
[00387580-xx] Sealing unit
(suction adapter [1] incl. vacuum suction unit [2] and O-ring [3] prefitted)
●
[00201141-xx] O-ring 3*1 NBR 70 B (defined as maintenance/wear part)
37
Procedure
► Remove the pneumatic connection using a fork wrench. Pay attention to the seals.
► Loosen or remove the grub screw [1] (Allen key 1.5) fixing the sealing unit [2].