00195963-03_MM SWS-EN.pdf - 第38页
: ► Pull t he sealing unit up an d out. If it is not possible to pull th e sealing un it out, c lamp a small Allen key i nto the se aling unit dri lled hole an d try to p ull it up. ► It shou ld then be possible t o remo…
37
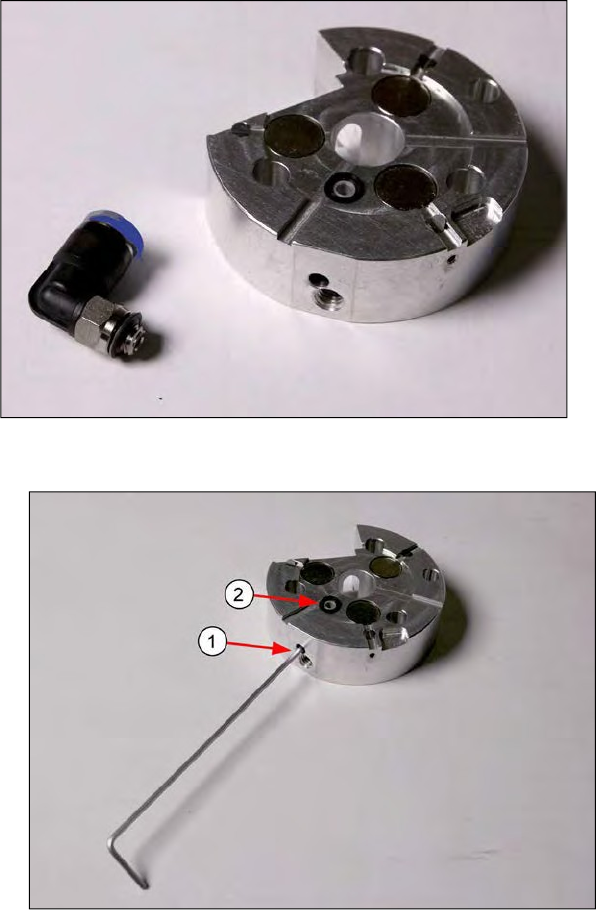
Procedure
► Remove the pneumatic connection using a fork wrench. Pay attention to the seals.
► Loosen or remove the grub screw [1] (Allen key 1.5) fixing the sealing unit [2].
:
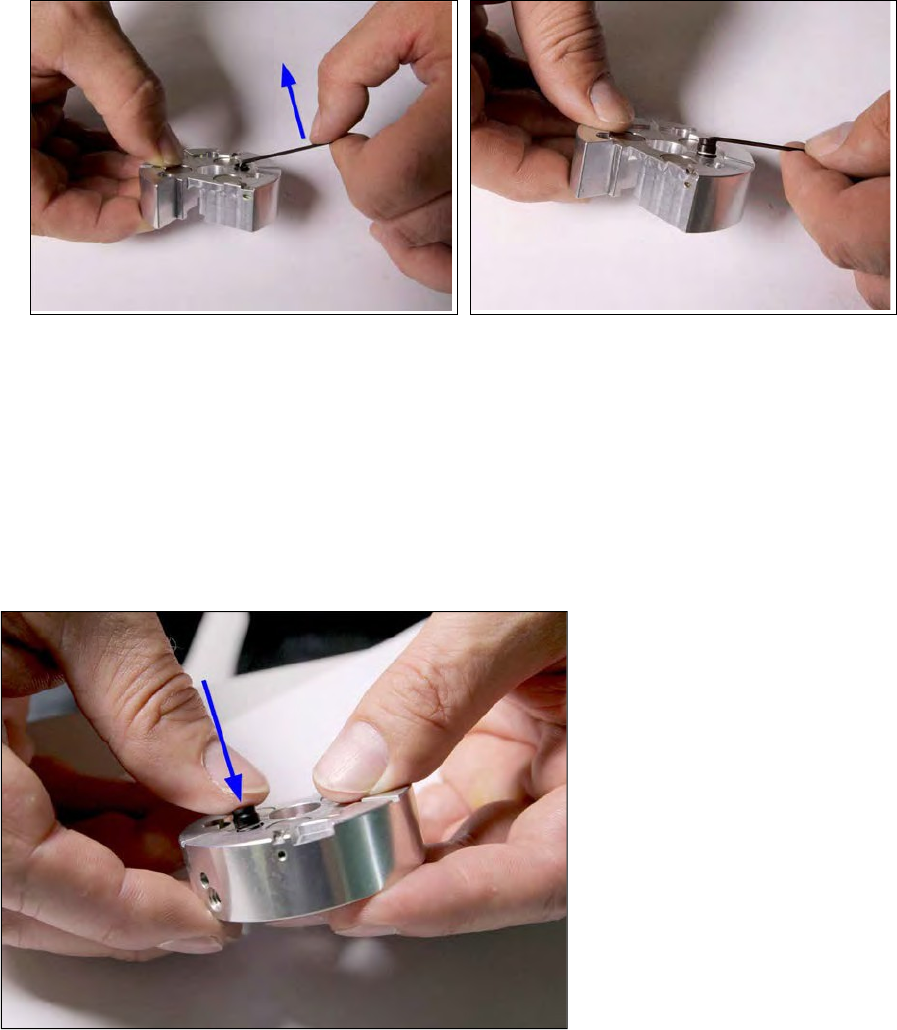
► Pull the sealing unit up and out.
If it is not possible to pull the sealing unit out, clamp a small Allen key into the sealing
unit drilled hole and try to pull it up.
► It should then be possible to remove the sealing unit.
► Take the new compete sealing unit and grease the O-ring with UNISILCON L250L (thin
layer of lubricant).
► Place the new sealing unit incl. O-ring into place and push down as far as the stop
39
.
►
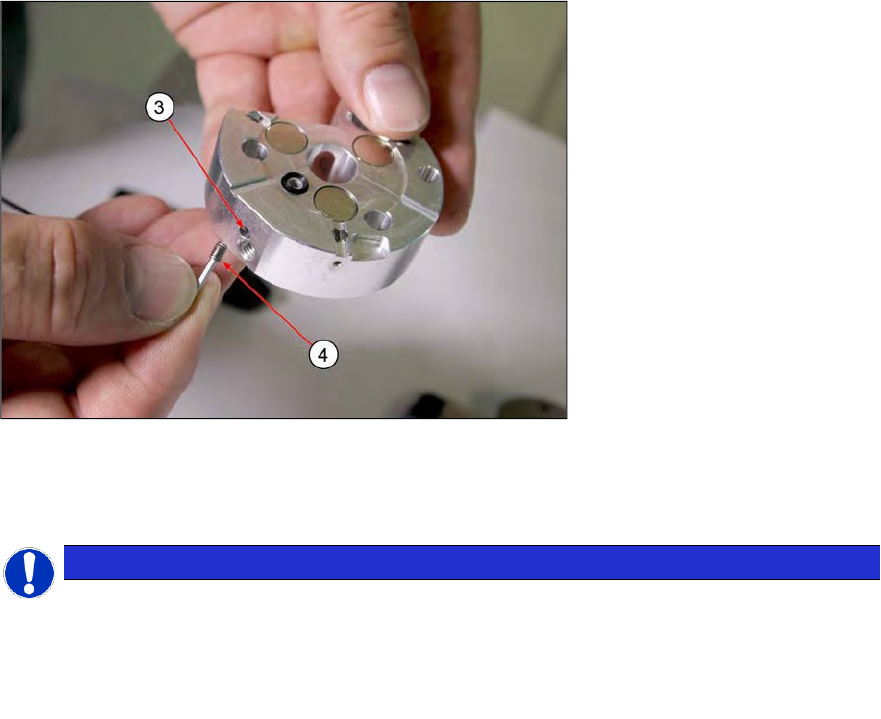
► Screw the grub screw [4] into the threaded hole provided [3] and fix the sealing unit into
place (tighten with care).
Finally Complete the die ejector.
NOTICE
Old needle ejector unit with bayonet fastening
► If the side Allen screw on the centering unit is difficult to access, you may need to
remove the four screws fastening the lock ring and remove this ring.
► Place the lock ring back and fix into place, before tightening the Allen screw on the
side.