00195963-03_MM SWS-EN.pdf - 第41页
41 1 Checking the Rotary Locking for Ease - of - Movement Interval: 6 months Equipment: None The rotary locking tha t fixes the the nee dle system mus t be eas ily rotatabl e. The n eedle system inserted must be plac ed …
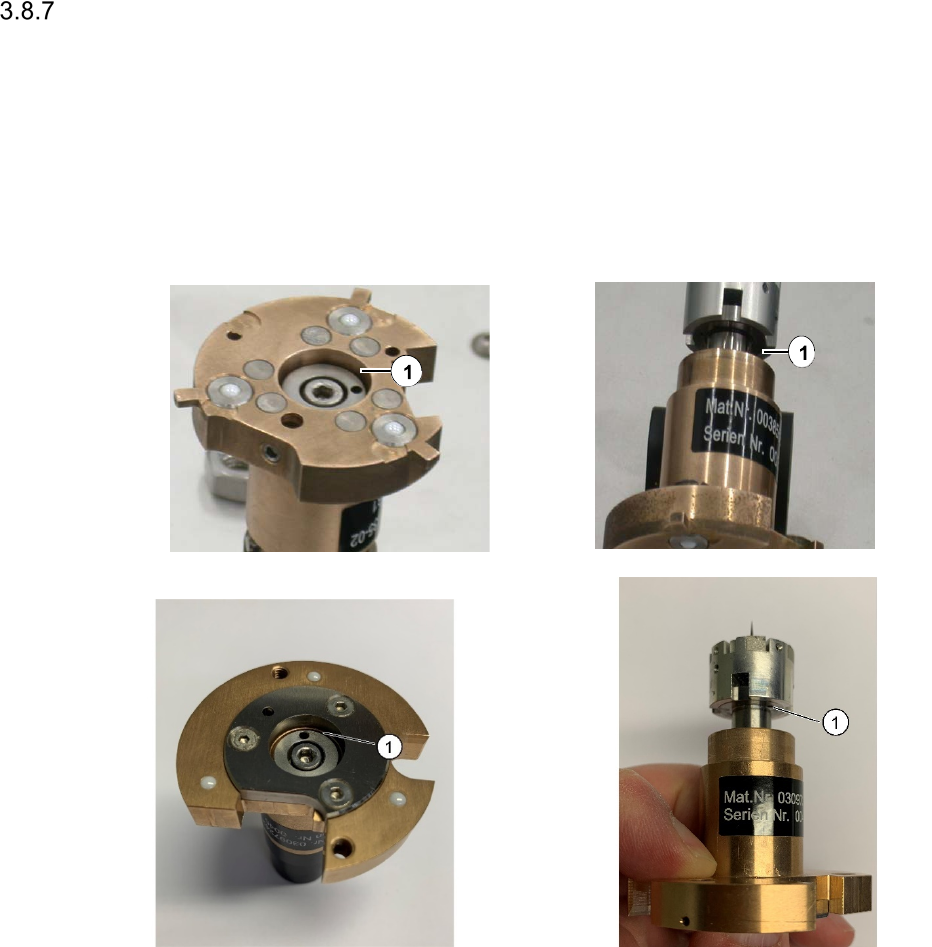
Lubricating the Shaft for the Z Movement at the Needle System
Interval: 4 months
Equipment: Spray grease (aerosol)
The shaft for the Z movement (ejection) must be easily movable by hand in its bronze guide and
should therefore be lubricated regularly.
Legend
[1] Lubrication point
Slightly move the Z shaft out of its bronze guide.
Spray a bit of spray grease on the lubrication points shown [1].
41
1
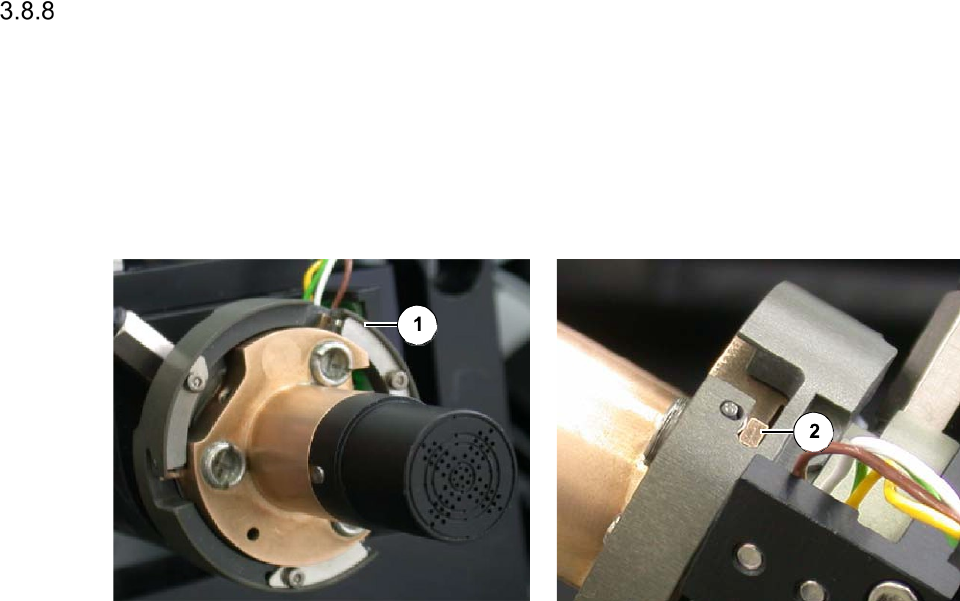
Checking the Rotary Locking for Ease-of-Movement
Interval: 6 months
Equipment: None
The rotary locking that fixes the the needle system must be easily rotatable. The needle system
inserted must be placed securely in the locking.
Legend
[1] Rotary locking open
[2] Rotary locking with fixed suppression pin
Check, if the rotary locking is free of debris and clean it if necessary.
Vertically, insert the needle system into the rotary locking.
Turn the rotary locking counterclockwise, until the suppression pin is fixed correctly [2].
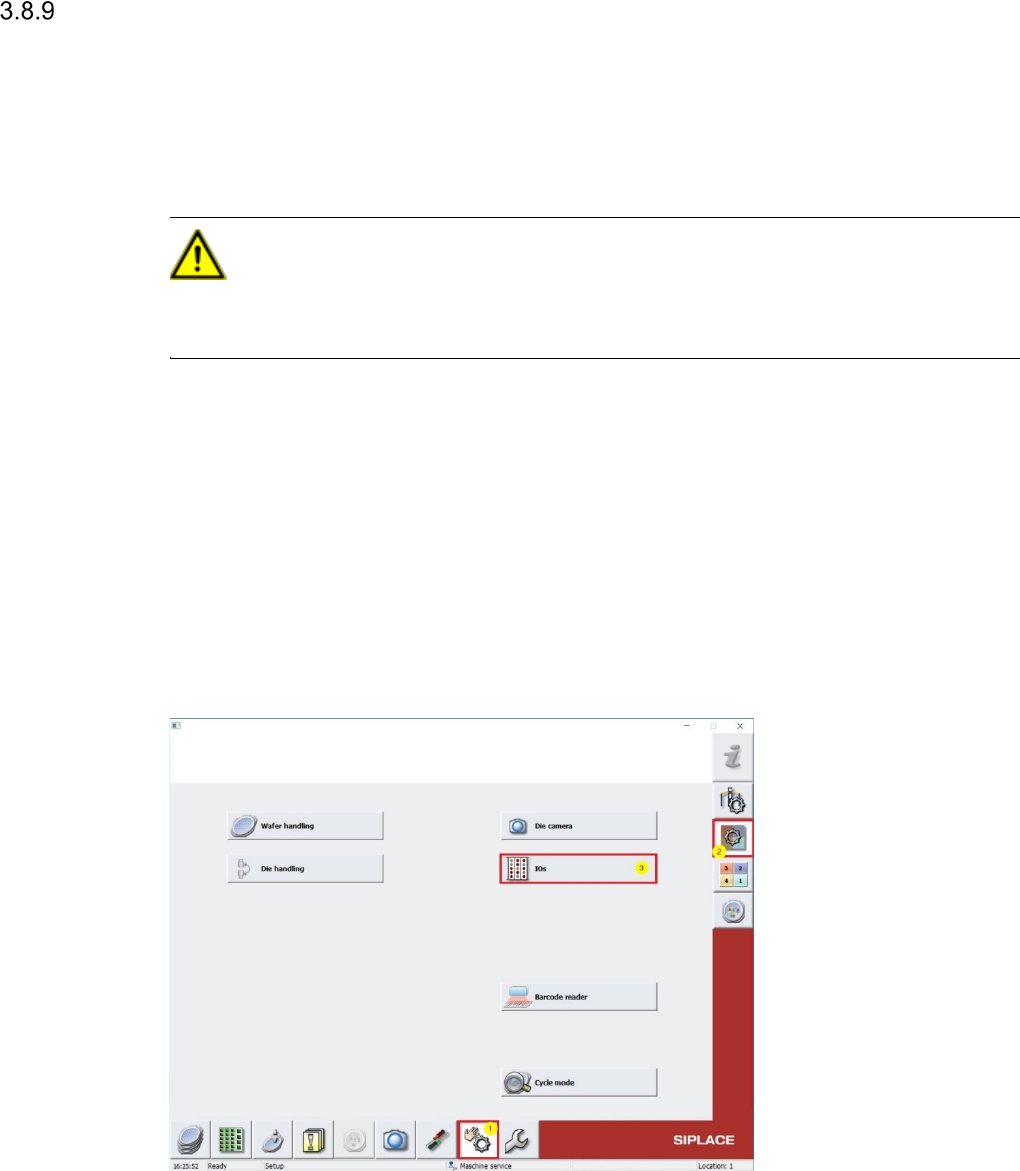
Checking the Die Ejector for Vacuum leaks
Interval: 6 months
Equipment: SWS GUI
In order to exclude a vacuum loss at the die ejector, its vacuum value must be checked regularly.
CAUTION
For this check the Service user level is required in SWS GUI. Only appropriately trained personal
is allowed to carry out this check.
- SWS must be referenced.
- Move the wafertable in the Changeposition (s. Kap.2.8.1).
- Move the die ejector in Up-position (s. Kap.2.8.2).
- Open any cover from the CA-Placement machine, to get access to the SWS
The power supply to the gantry axes and the SWS axes is interrupted immediately. The gantry
axes and all SWS axes will come to a standstill. A corresponding message is issued on the
screen. Skip the message.
Change to Menu Manual operations [1] -> Manual operations subsystems [2] -> IOs [3]
(see screenshot below)
Change to Menu Manual operations USBIO [1] and select folder USB outputs [2] (see
screenshot below) and switch off all parts consuming vaccum (Dxx Vacuum …) by using OFF
buttons (see. 3), in case one of these Outputs is active. This has to be done also for all air
supply consumer outputs. (Dxx Pressure ...) (s. 3).