00195963-03_MM SWS-EN.pdf - 第48页
Checking the Nozzl e At tachment a t Die - Attach - Modul for Leaks Interval: 3 months Equipment: Vacuum CAUTION For this c heck the Servi ce us er level is r equired in SWS GUI. Only appro priately tra ined persona l is…
47
Maintenance Work at the Die Attach Unit
Remove the EMC cover first, to make the die attach unit accessible. After completing your work,
replace the cover and fix it.
Magnetic field warning
The die attach unit contains a strong magnet. Make sure, that no metallic objects get into the vi-
cinity of the die attach unit, since they are attracted by the magnet.
Cleaning the Driver and Checking for Ease-of-Movement
Interval: Weekly
Equipment: Ethyl alcohol, cleaning buds, lint-free
The driver at the die attach unit must be cleaned regularly to ensure a correct transfer between
flip unit and die attach unit.
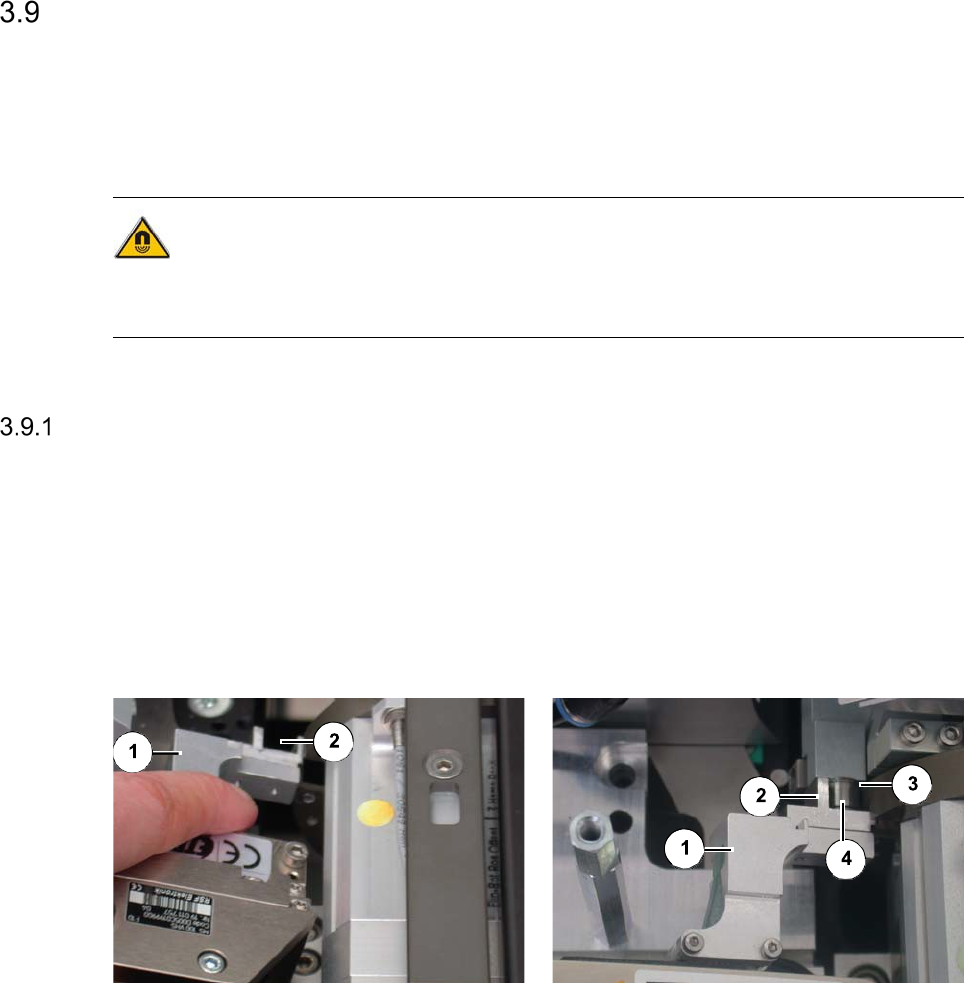
Driver without transfer to the flip unit Driver with transfer to the flip unit
Legend
[1] Crank [2] Driver
[3] Segment 1 of the flip unit [4] Roller plunger
Carefully, pull the crank of the die attach unit [1] back by hand until the driver [2] can be ac-
cessed.
Clean the driver with a cleaning bud moistened with ethyl alcohol.
Release the crank.
Move the crank backward and forward a few times. Repeat this with segment 1 of the flip
unit in the transfer position. The crank should be easily movable.
Control the roller plunger for cleanliness.
Checking the Nozzle Attachment at Die-Attach-Modul for Leaks
Interval: 3 months
Equipment: Vacuum
CAUTION
For this check the Service user level is required in SWS GUI. Only appropriately trained personal
is allowed to carry out this check.
- SWS must be referenced.
- Open any cover from the CA-Placement machine, to get access to the SWS
The power supply to the gantry axes and the SWS axes is interrupted immediately. The gantry
axes and all SWS axes will come to a standstill. A corresponding message is issued on the
screen. Skip the message.
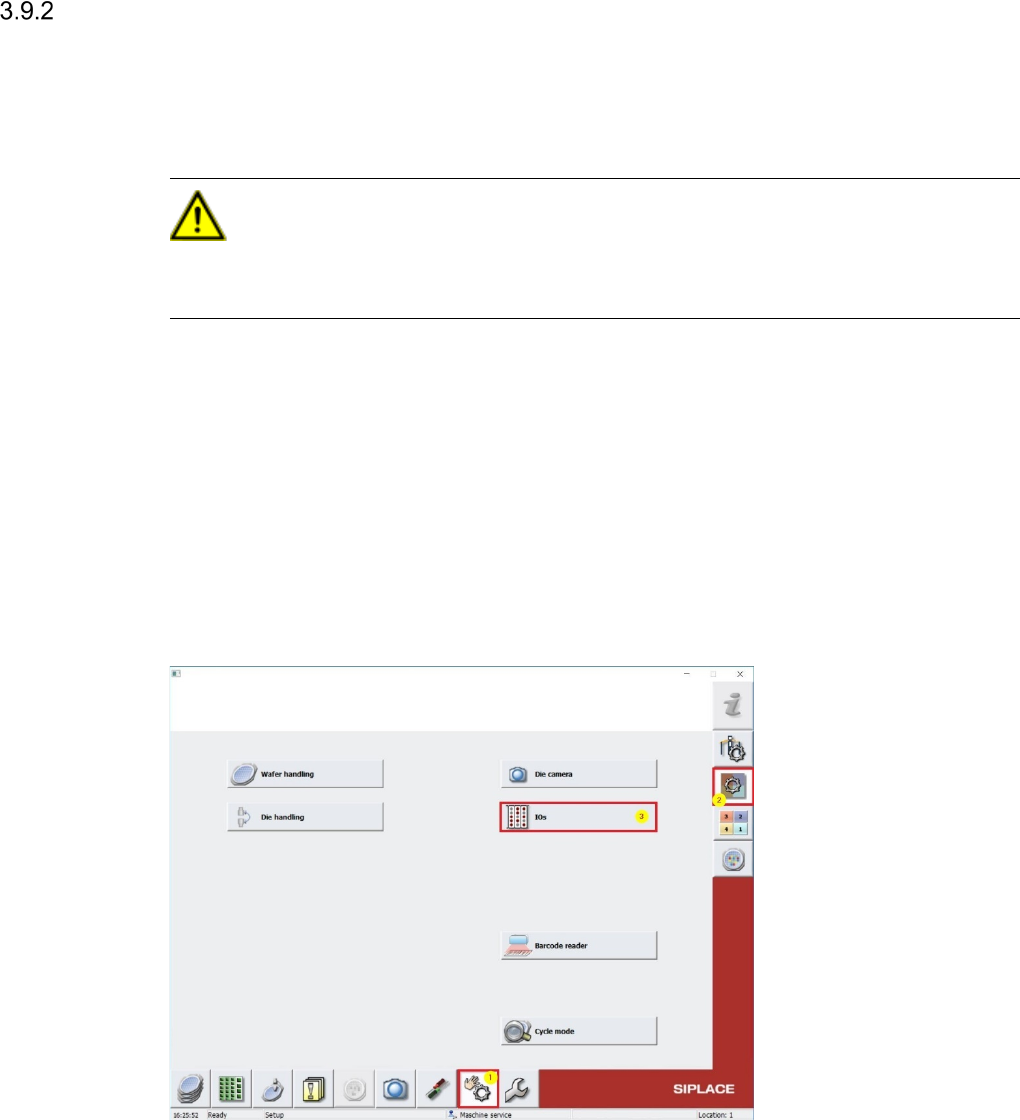
Change to Menu Manual operations [1] -> Manual operations subsystems [2] -> IOs [3] (see
Screenshot below)
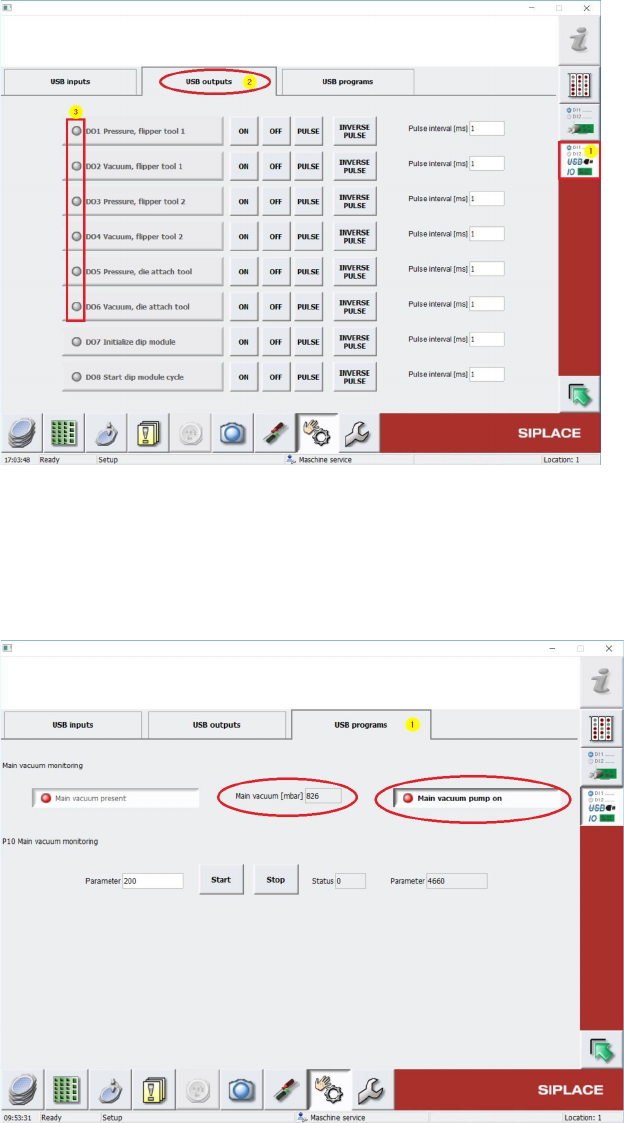
Change to Menu Manual operations USBIO [1] and select folder USB outputs [2] (see
Screenshot below) and switch off all Vacuum consumers (Dxx Vacuum …) by pressing OFF
buttons (see. 3), in case one of these outputs is active. This has to be done also for all air
supply consumer outputs (Dxx Pressure ...) (see 3).
49
Change back to previous Menu Manual operations -> Manual operations subsystems ->
IOs -> Manual operations USBIO -> USB programs [1] and read out the Main Vacuum
Value under Main Vacuum [mbar] (see Screenshot below).
Keep in mind, that the vaccumpump must be switched off like in the screenshot below..
The Main Vacuum Value should have at least min. 700 mbar. See Screenshot above. Write
down this value!
Change to Menu Manual operations [1] -> Manual operations subsystems [2] -> IOs [3]
(see Screenshot below)