00195963-03_MM SWS-EN.pdf - 第52页
Checking the Suctio n Plat es (Membran) at the Nozzle Take - Up for Leaks Interval: 3 months Equipment: New sucti on plates (0307984 - 03) , if necessary Legend [ [1] Suc tion plate Remove the nozz le. Check the blue…
51
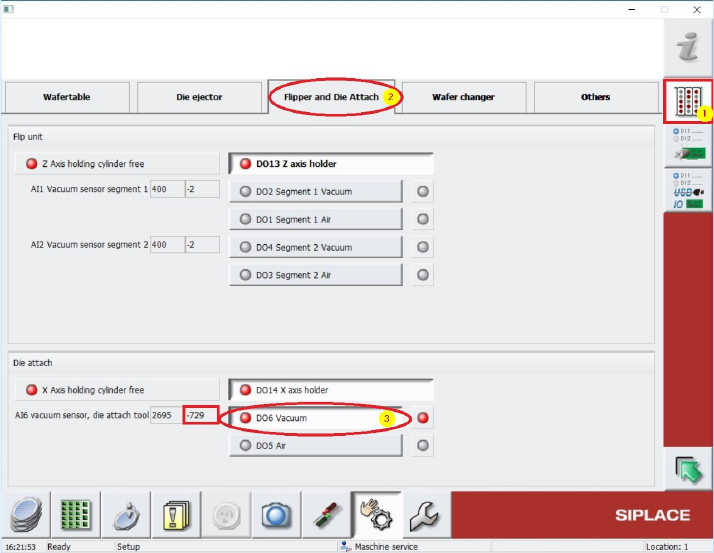
Change to Manu Manual operations IOs [1] and select folder Flipper and Die Attach [2]
(see Screenshot below).
In Menu „Die attach“ must the Vaccum be switched on by using the Button D06 Vacuum [3]
(see below.). A vacuum force must be noticed at the nozzle tip or the vaccumplate.
Beside this Button, under “AI6 Vaccum sensor die attach tool” the vacuum value can be read out.
This Value should be nearly the same like the previously noticed Main vacuum value. If this value is
lower, there is some vacuum leakage and all the tubings and seals (e.g. Vacuum plate) must be
controlled and exchanged in case.

Checking the Suction Plates (Membran) at the Nozzle Take-Up for Leaks
Interval: 3 months
Equipment: New suction plates (0307984-03), if necessary
Legend
[ [1] Suction plate
Remove the nozzle.
Check the blue suction plate for signs of
damage or wear.
If it shows signs of damage, it has to be
changed for a new one.
Loosen the screw thread of the suction plate and lift off the suction plate.
Make sure, that the spacer remains in its position. Otherwise the tightness is not ensured.
Picture is an example for mounting of the Suction plate
Position the suction plate straight, otherwise there is danger of damaging the screw thread.
Fasten the suction plate with a torque of 13 Ncm.
53
Lubricating the Retract Unit and Checking for Ease-of-Movement
Interval: 4 months
Equipment: Oil dispenser with Structovis GH
)
Legend
[1-3] Lubrication points at the retract mecha-
nism
Lubricate the retract mechanism at the
points shown (items 1 - 3). If necessary,
use a cleaning bud to apply the spray
grease precisely.
Manually, pull the retract mechanism back.
It must be easily movable.
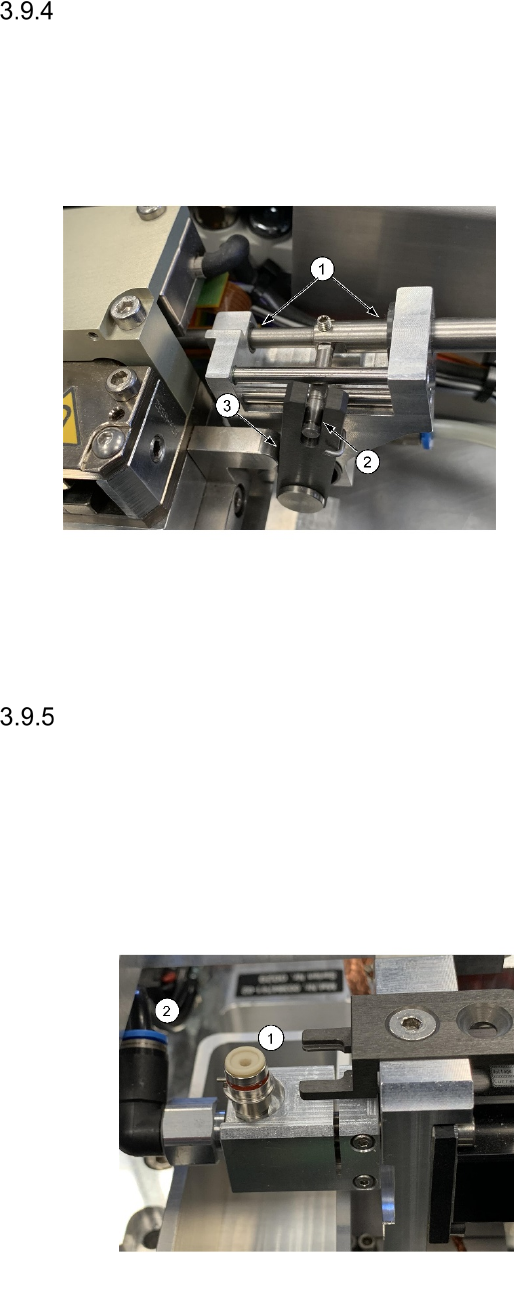
Checking the Vacuum Part for Leaks
Interval: Yearly
Equipment:
Vacuum
Legend
[1] Suction plate at the die attach head
[2] Vacuum connection
Switch on the vacuum and check the vac-
uum connection for leaks. Observe any
blowing noise.