Printer 710_810 v8 Preventive Maintenance.pdf - 第64页
PREVENTI VE MAINTE NANCE CLEA NING, LUBRICAT ION AND MA INTENA NCE DI AGRAMS 33.64 Technical Reference Manual Chapter Issue 6 Oct 06 8. Replace the carbon\pre-f ilter as re quired and ref it the pre-f ilter int o the car…
PREVENTIVE MAINTENANCE
CLEANING, LUBRICATION AND MAINTENANCE DIAGRAMS
Chapter Issue 6 Oct 06 Technical Reference Manual 33.63
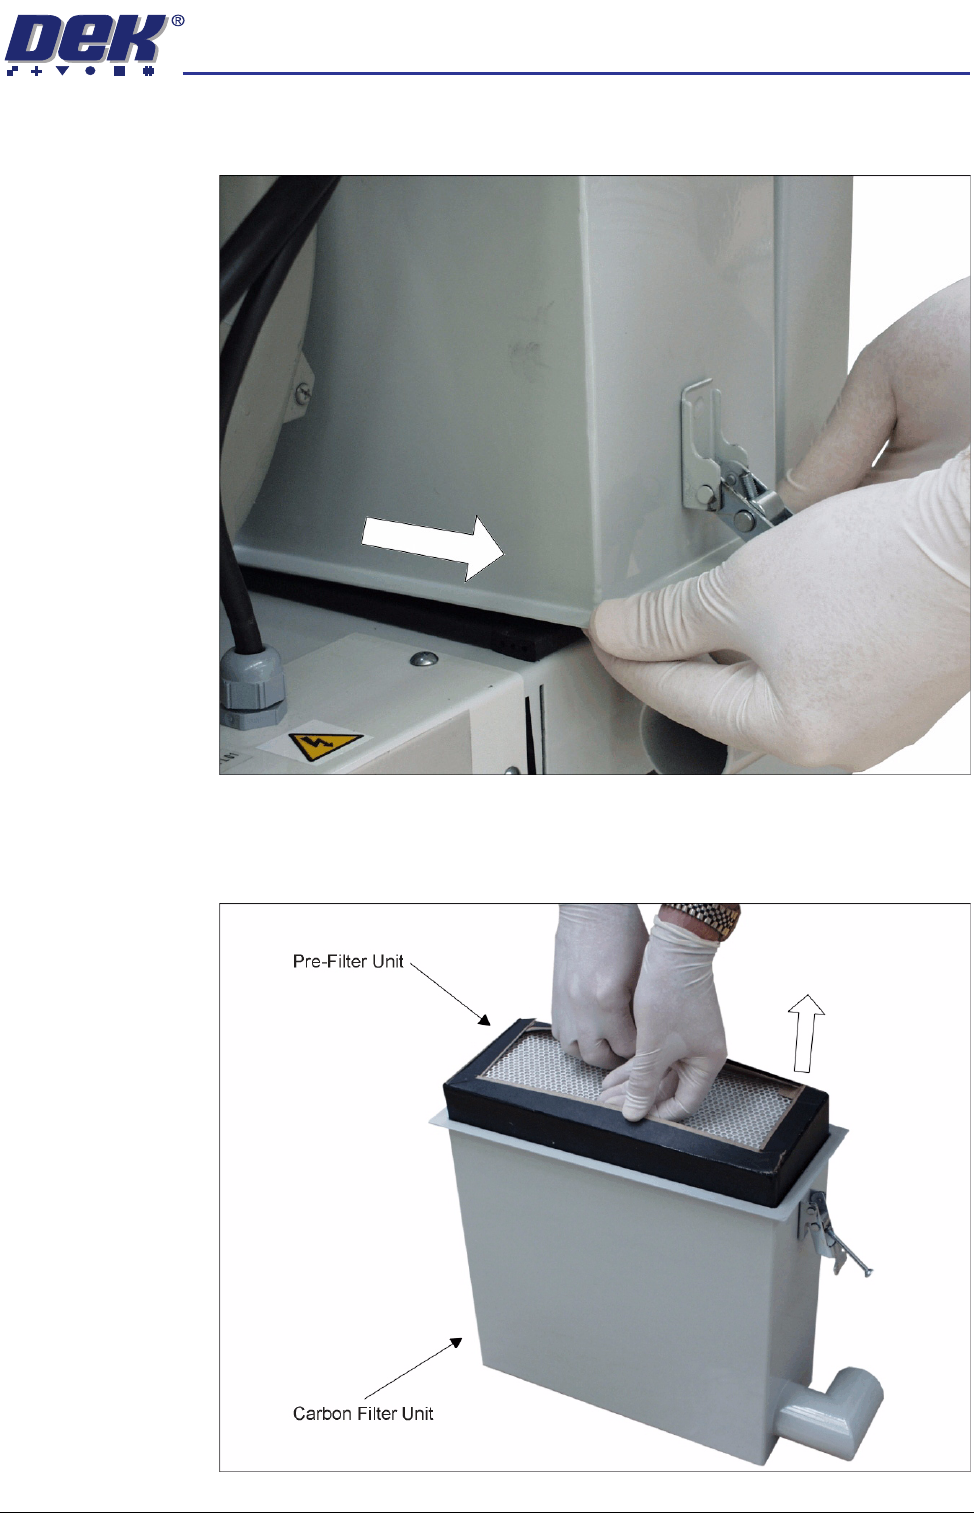
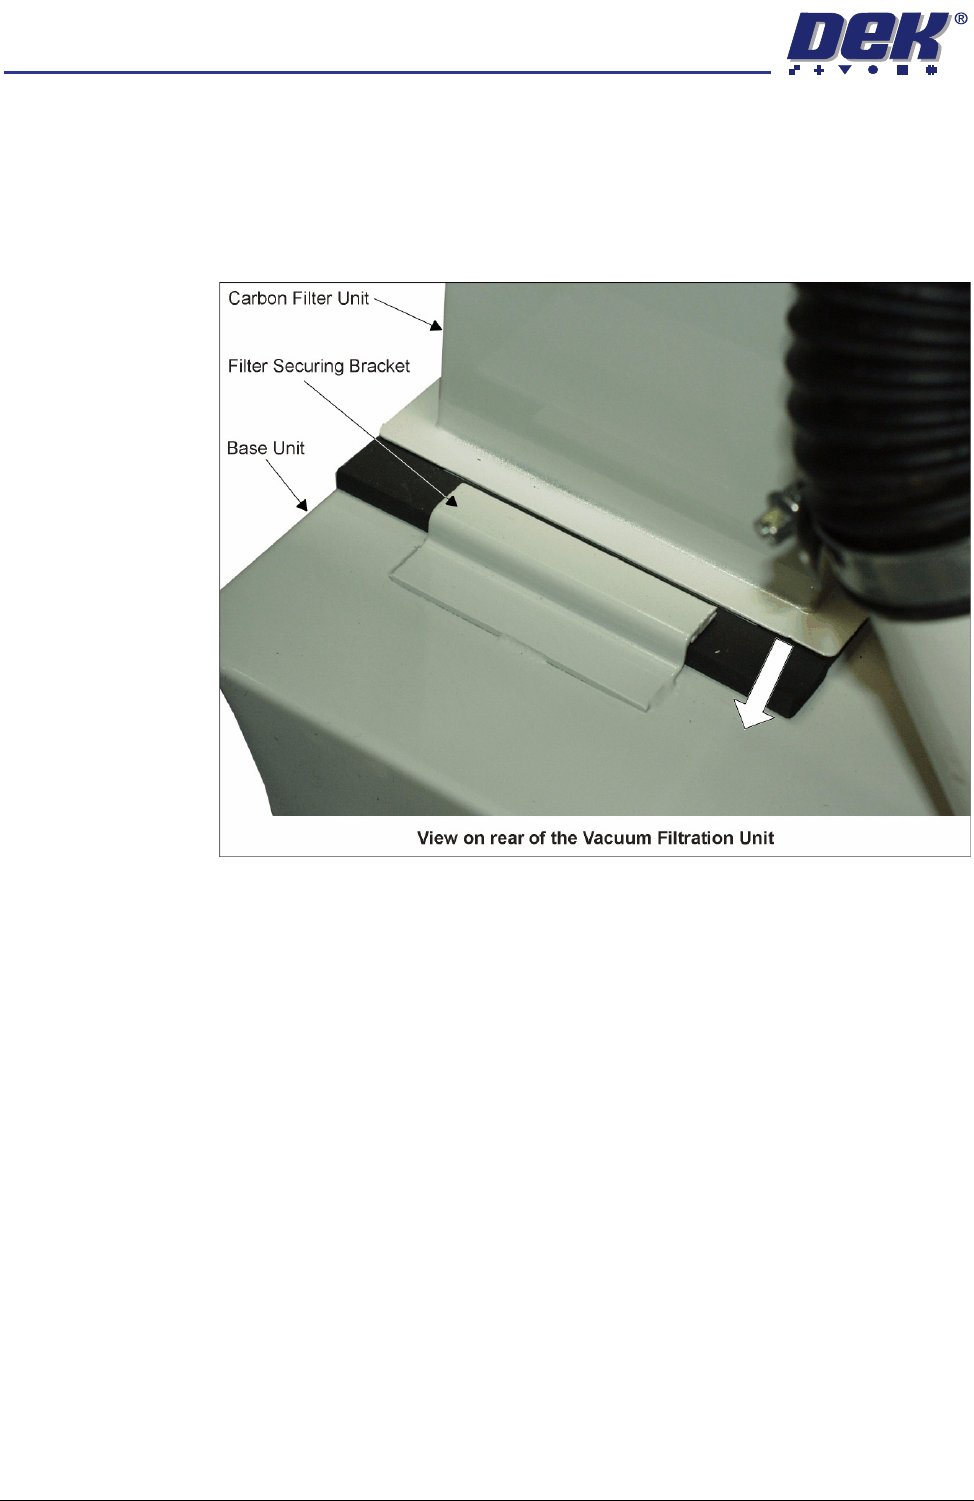
5. The back of the carbon filter unit is secured beneath a filter securing bracket.
To remove the filter, lift the front and pull the filter out of the machine.
6. Turn the filter unit upside down.
7. To separate the pre-filter unit from the carbon filter unit, pull the pre-filter
upwards using the pre-filter frame.
PREVENTIVE MAINTENANCE
CLEANING, LUBRICATION AND MAINTENANCE DIAGRAMS
33.64 Technical Reference Manual Chapter Issue 6 Oct 06
8. Replace the carbon\pre-filter as required and refit the pre-filter into the
carbon filter unit.
9. Refit the carbon filter unit to the vacuum filtration unit.
NOTE
When refitting the carbon filter unit to the base unit, ensure that the rear of
the carbon filter unit is located beneath the filter securing bracket.
10. Secure the carbon filter unit using the filter retaining clip.
11. Refit and secure the air duct to the carbon filter unit.
12. Refit the panel removed in Step 2.
VF25 Vacuum
Filtration Unit
To replace any of the filters in the Vacuum Filtration Unit, carry out the following:
1. Ensure the machine is switched OFF.
2. Remove the machine front panel.
PREVENTIVE MAINTENANCE
CLEANING, LUBRICATION AND MAINTENANCE DIAGRAMS
Chapter Issue 6 Oct 06 Technical Reference Manual 33.65
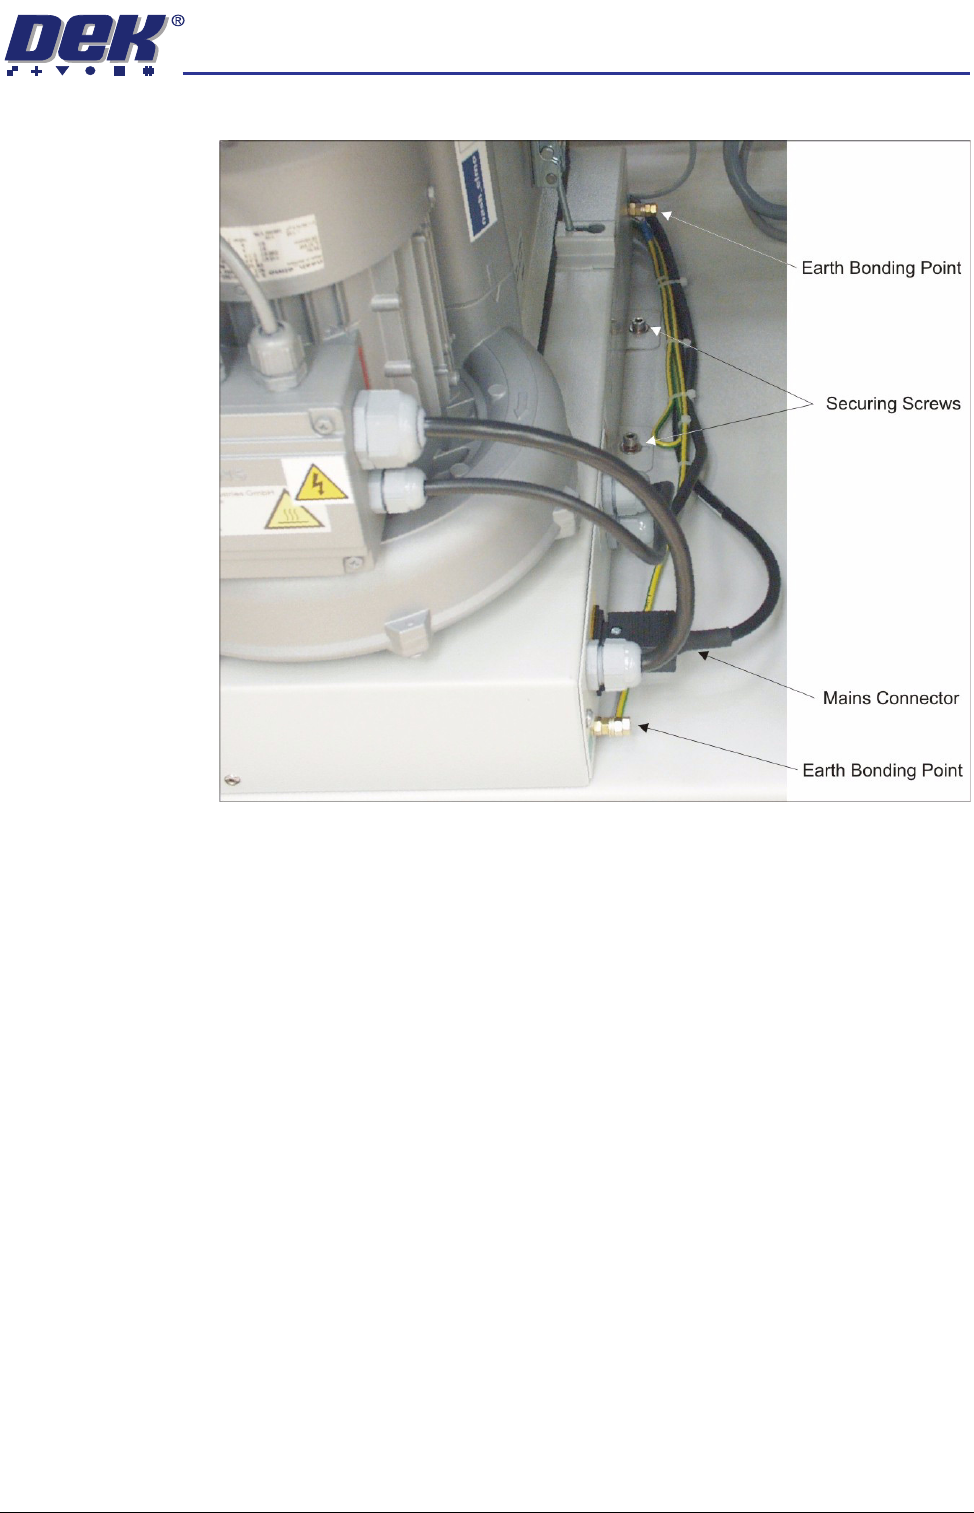
3. Disconnect the mains connector from the vacuum filtration unit.
4. Using an 8mm spanner, remove the two nuts on both earth bonding points
and disconnect the earth wires.
5. Using a 4mm Allen key, remove the four securing screws, two on the left
side and two on the right side of the vacuum filtration unit.
6. Slide the vacuum filtration unit part way out of the machine and undo the