KE2040Instruction Manual Ver2.01,REV04.2003.6.25.pdf - 第921页
14 − 37 14.5.3 Recycling t he Used Battery Contact your recycling or hazardous waste center for infor mation on proper disposal of t he used battery. W e accept your batt ery for r eturn at cost to you. WA RNING • Do not…
14 − 36
14.5.2 Replacing Batteries
The following steps explain how to replace the batteries. Consider all warnings,
cautions, and notes before replacing batteries.
WARNING
Batteries can present a risk of electrical shock or burn from high short
circuit current.
The following precautions should be observed :
1) Remove watches, rings or other metal objects.
2) Use tools with insulated handles.
3) Do not lay tools or metal parts on tip of batteries.
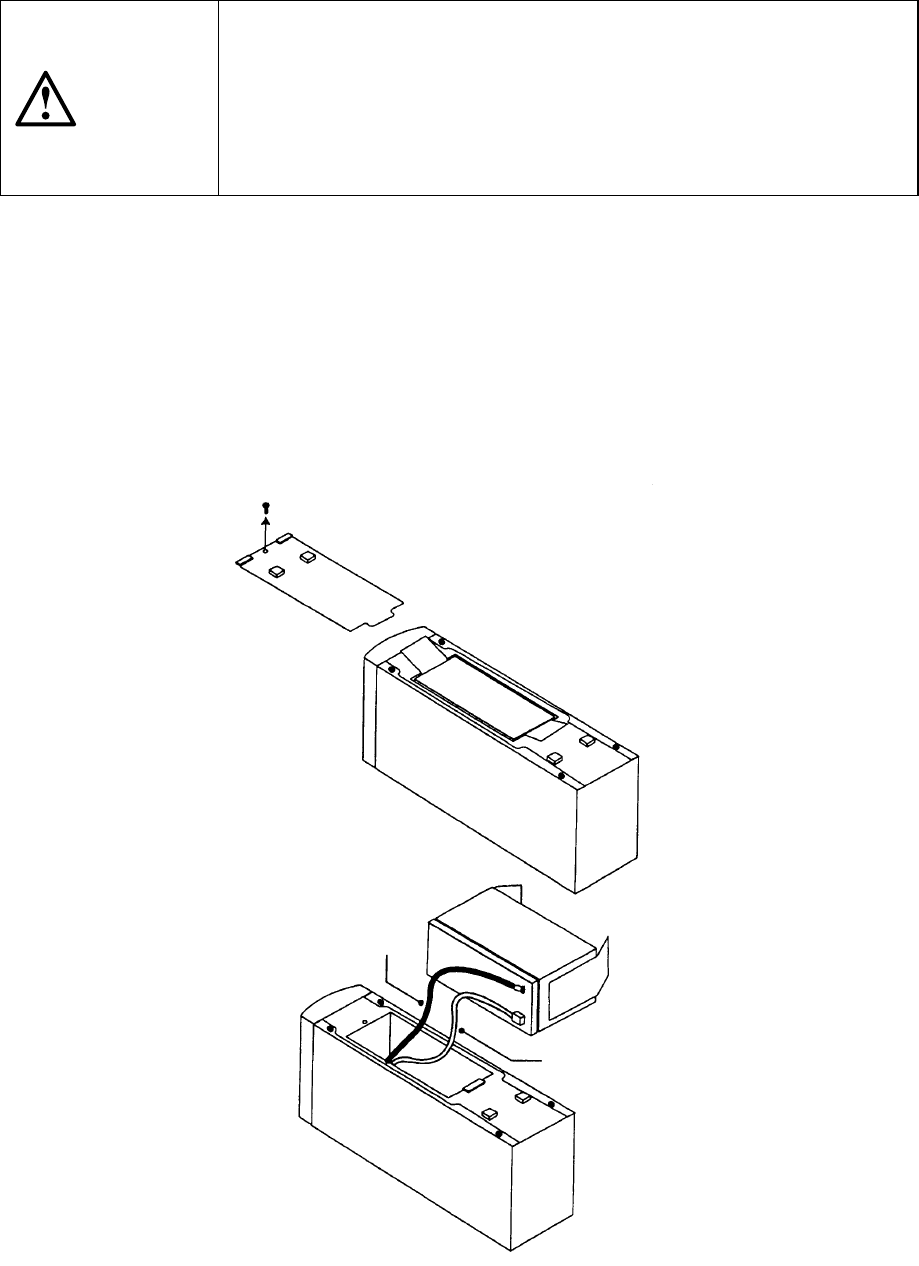
1. Place the UPS on its side, and remove the screw that fixes the lid of the battery
located on the bottom of the UPS. Slide the lid to remove it (see Figure 14.5.2.1).
2. Hold the disconnect tabs to pull down the battery slowly.
3. Disconnect two lead lines connecting the battery to the UPS.
4. Connect the lead lines to a new battery: connect the red line to the (+) side
and the black line to the (-) side. Put a new battery into the case gently.
5. Slide the battery lid to fit it to the case, and fix it with the screws that were
removed at Step 3.
Black (-)
Red (+)
Figure 14.5.2.1
14 − 37
14.5.3 Recycling the Used Battery
Contact your recycling or hazardous waste center for information on proper disposal
of the used battery. We accept your battery for return at cost to you.
WARNING
• Do not dispose of battery or batteries in a fire. Batteries may
explode. Proper disposal of batteries is required. Refer to your local
codes for disposal requirements.
• Do not open or mutilate the battery or batteries. Released electrolyte
is harmful to the skin and eyes. It may be toxic.
CAUTION
• Do not discard the UPS or the UPS batteries in the trash. This
product contains sealed, local recycling or hazardous waste center.

14 − 38
14.6 Coplanarity Sensor (Optional)
14.6.1 Name of each part
Figure 14.6.1 Explanation of the device
Setting the monitor screen switch
When you turn on the system or operate it normally, set this switch to A.
The menu screen does not appear on the monitor.
14.6.2 Daily maintenance
Check to see if the filter unit (photo-transmitting window/photoreceptive window) gets
soiled. (Check that everyday.)
− Clean the filter unit with dry cloth or gauze.
Figure 14.6.2 Coplanarity unit
CAUTION
Carefully check to see if the filter unit is not soiled. When necessary,
be sure to clean it. It may cause the system to malfunction.
Do not use any alcohol to clean the filter unit.
Coplanarity check
controller
Coplanarity check
sensor cable
Monitor screen switch
Coplanarity check controller
Coplanarity check sensor cable
Explanation of the monitor screen
switch
Side A: Main unit (standard) screen
Side B: Coplanarity check screen
(for maintenance)
Side A
Side B
Photoreceptive
window
Photo-transmitting
window
Where
to
clean