JUKI FX-3R MAINTENANCE GUIDE.pdf - 第130页
FX-3R Maintenance Guide 12-1 DANGER To prevent any trouble caused by accidental machine start, always shut-down the power before starting the maintenance and adjustment work. [12] OTHER UNITS 12-1. LCD Monitor 12-1-1. Re…

FX-3R Maintenance Guide
11-8
d Adjusting the feeder float sensor outside the machine
1) Turn the volume on the light emission side counterclockwise to the minimum position to put the
sensor in the shut-down state.
2) Gradually turn the volume clockwise toward the maximum position and stop turning when both
the red and green lamps on the light receiving side are lit.
3) Set the bulk feeder at the left, center, and right positions of the bank to check that the sensor is
not turned OFF.
∗ If the sensor is turned ON (green lamp does not light up correctly), turn the volume to make the
green lamp lit.
4) Set the NF32 feeder at the same positions as described in step 3) and open the top cover by
hand to check that the sensor is turned OFF when the top cover is raised 10 mm or less.
Raise the cover by hand.
NF32 feeder
Figure 11-10 Adjusting the Feeder Float Sensor
∗ If the volume is turned excessively in step 3), the sensor does not respond even though the
cover of the NF32 feeder is opened.
5) Set the NF16 feeder at the same positions as described in step 3) and open the top cover using
the lever to check that the sensor is turned OFF.
Top cover
Leve
r
N16 feeder
Figure 11-11 Adjusting the Feeder Float Sensor
∗ If the sensor is not turned OFF, move the sensor mounting position back and forth to adjust the
light-axis, and perform the adjustment again from step 1).
Rev. 1.00
FX-3R Maintenance Guide
12-1
DANGER
To prevent any trouble caused by accidental machine start, always
shut-down the power before starting the maintenance and
adjustment work.
[12] OTHER UNITS
12-1. LCD Monitor
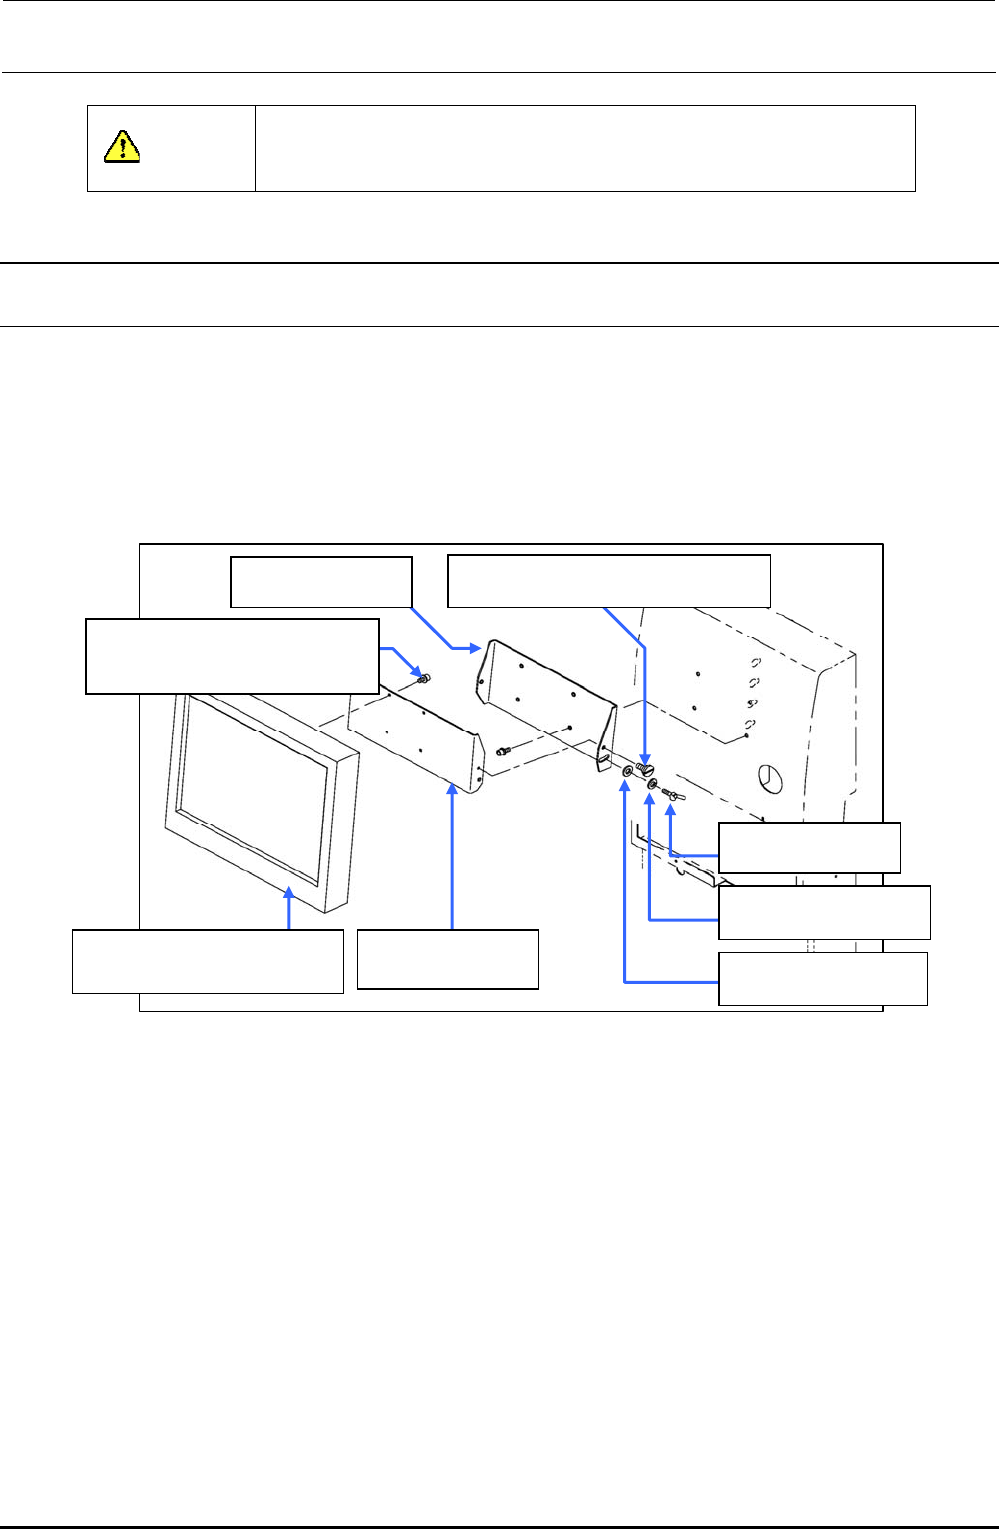
12-1-1. Replacing the LCD Monitor
1) Remove the shoulder screws and thumbscrews , and to detach the LCD bracket F
from the LCD bracket R .
2) Remove the SEMS cap bolts to detach the LCD bracket F from the LCD monitor .
3) Reassemble the components in the reverse order of disassembly.
40048083
TECNART’s LCD monitor
40047170
LCD bracket F
SD0640246SP
Shoulder screw D=6.35 H=2.4
SL6041092TN
SEMS cap bolt with washer
M4×10
WP0641601SC
Plain washer M6
WS0610002KN
Spring washer M6
16187007
Thumbscrew
40047171
LCD bracket R
Figure 12-1-1-1 LCD Monitor
Rev. 1.00
FX-3R Maintenance Guide
12-2
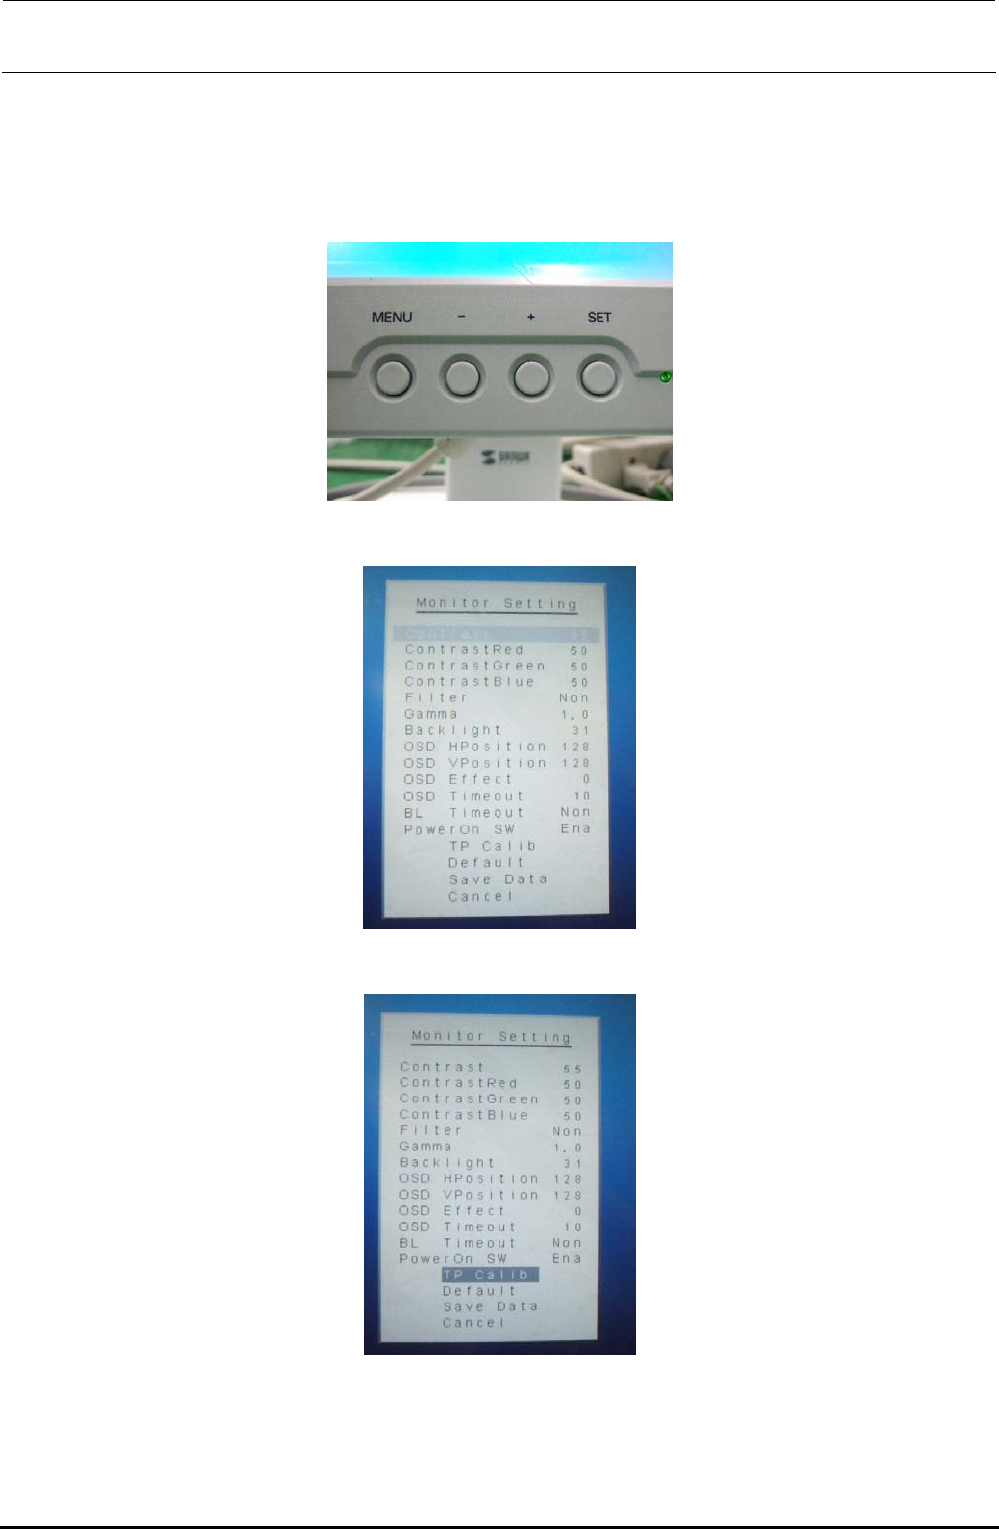
12-1-2. Setting Up the Touch Panel (TECNART, TM150-JDA03)
After the LCD monitor has been replaced, it is necessary to set up the touch panel.
1) Check the [MENU] and [-] buttons on the front of the LCD monitor.
2) Press the [MENU] button to display the “Monitor Setting” screen.
3) Press the [-] button to select [TP Calib] on the “Monitor Setting” screen.
Rev. 1.00