DT_ELMC-V3-EN_REV-B.1_L.pdf - 第48页
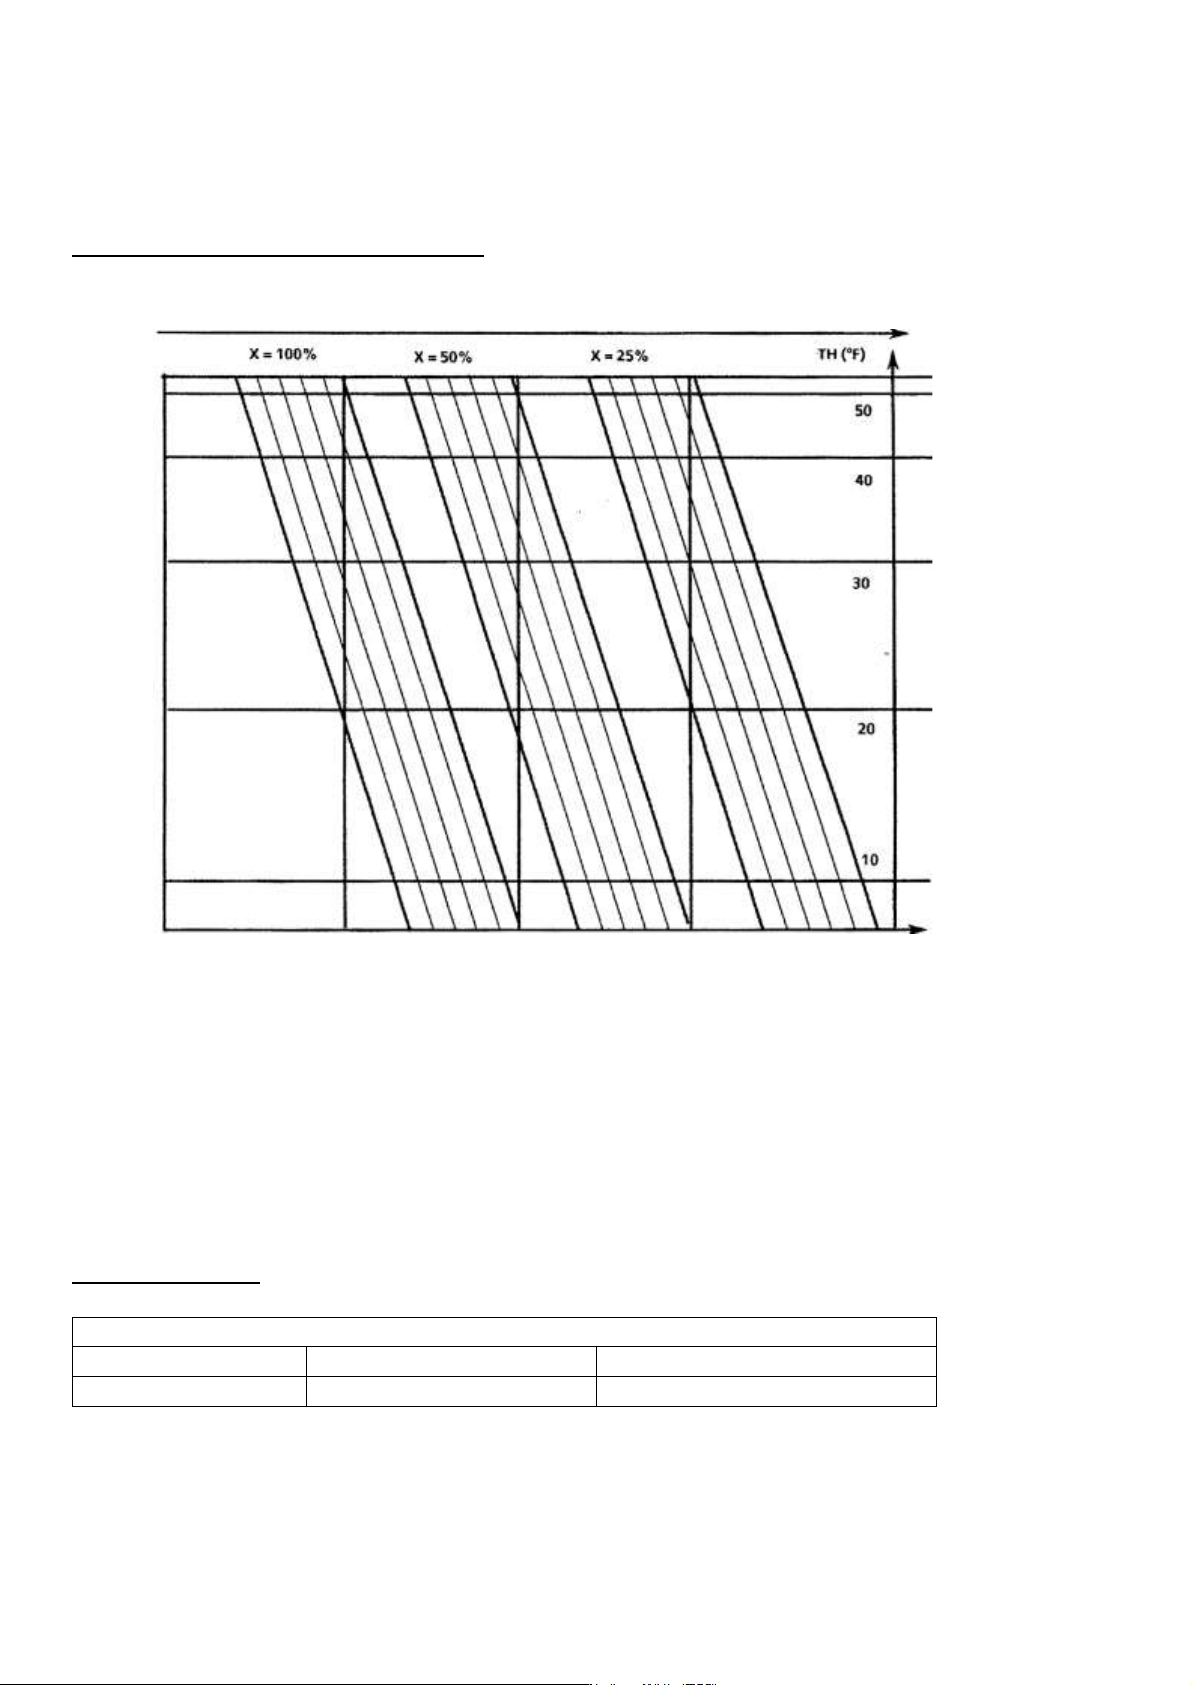
ELECTROVA P ® E LMC 48 6.2 STEAM CYLINDER CLEANING ESTIMATED CYLIN DER MAINTENANC E CURVE X – st eam demand Hours of operatio n Example: for a humi difier operating at 100 % capacity, using water with TH20, the cyl inder…
ELECTROVAP® ELMC
47
6 MAINTENANCE
6.1 GENERAL INFORMATION
Periodic checks
• After an hour of operation, check for no water leaks in the middle and foot of the cylinder.
• After 50 hours of operation, check the condition of the cylinder. Make sure no arcing or flicker occurs between
the electrodes during operation.
Check the filter inside the water inlet valve as well as the drain system.
Please re-examine all the power cable connection terminals, as well as the clamps of the various pipes (steam,
drain, inside the wet part).
WARNING! Tighten the clamps when the cylinder is cold.
• After a year of operation, please check the condition of your steam hose, water drain and the internal pipes of the
unit. If some pipes seem damaged, it is essential to change them. Please tighten all connection terminals.
Warnings
After a prolonged use or with the use of high TH water, may be solid deposits on the electrodes which can increase
the concentration of water.
If electrical arcs appear inside the cylinder, your humidifier works under abnormal conditions and these arcs can cause:
• A significant heat increase that could overheat the plastic and even melt it, causing a hole and then a leak into the
unit.
• A disjunction of the device due to a high intensity created by the electrical arcs.
• Premature deterioration of heating electrodes.
• Burning of electrodes power cables.
In case of electric arcs
Check any points in case electrical arcs appear inside the cylinder:
• If your water is running with softened water, make sure your softener does not release salt into the appliance's
water supply pipes.
• Make sure the drain valve is working properly and maintain it.
• Check F3 drain valve fuse on the main board.
The humidifier has powered electrical components and the cylinder has heated elements.
Therefore, all work must be carried out by qualified and competent personnel.
Before working on the cylinder, make sure that the humidifier is switched off.
ELECTROVAP® ELMC
48
6.2 STEAM CYLINDER CLEANING
ESTIMATED CYLINDER MAINTENANCE CURVE
X – steam demand
Hours of operation
Example: for a humidifier operating at 100% capacity, using water with TH20, the cylinder will need to be cleaned or
changed after 800-900 hours of operation.
• The water hardness is expressed in French degrees. The value thus expressed refers to the Total Hardness
of the water (TH).
• The water quality must be specified when choosing your unit in order to adapt the cylinder to your
type/quality of water.
ELECTRODE CHANGE
Original length
Type
ELMC 5 to 15
ELMC 20 to 90 and ELMC 10 MONO
Length [mm]
160
250
The electrodes must be changed when their length is less than 1/3 of the original length.
ElectroVap ELMC are equipped as standard with cleanable cylinders that can be disassembled using two 8 keys.
300 H
800 H
1000 H
2000 H
4000 H
ELECTROVAP® ELMC
49
CYLINDER REPLACEMENT METHOD
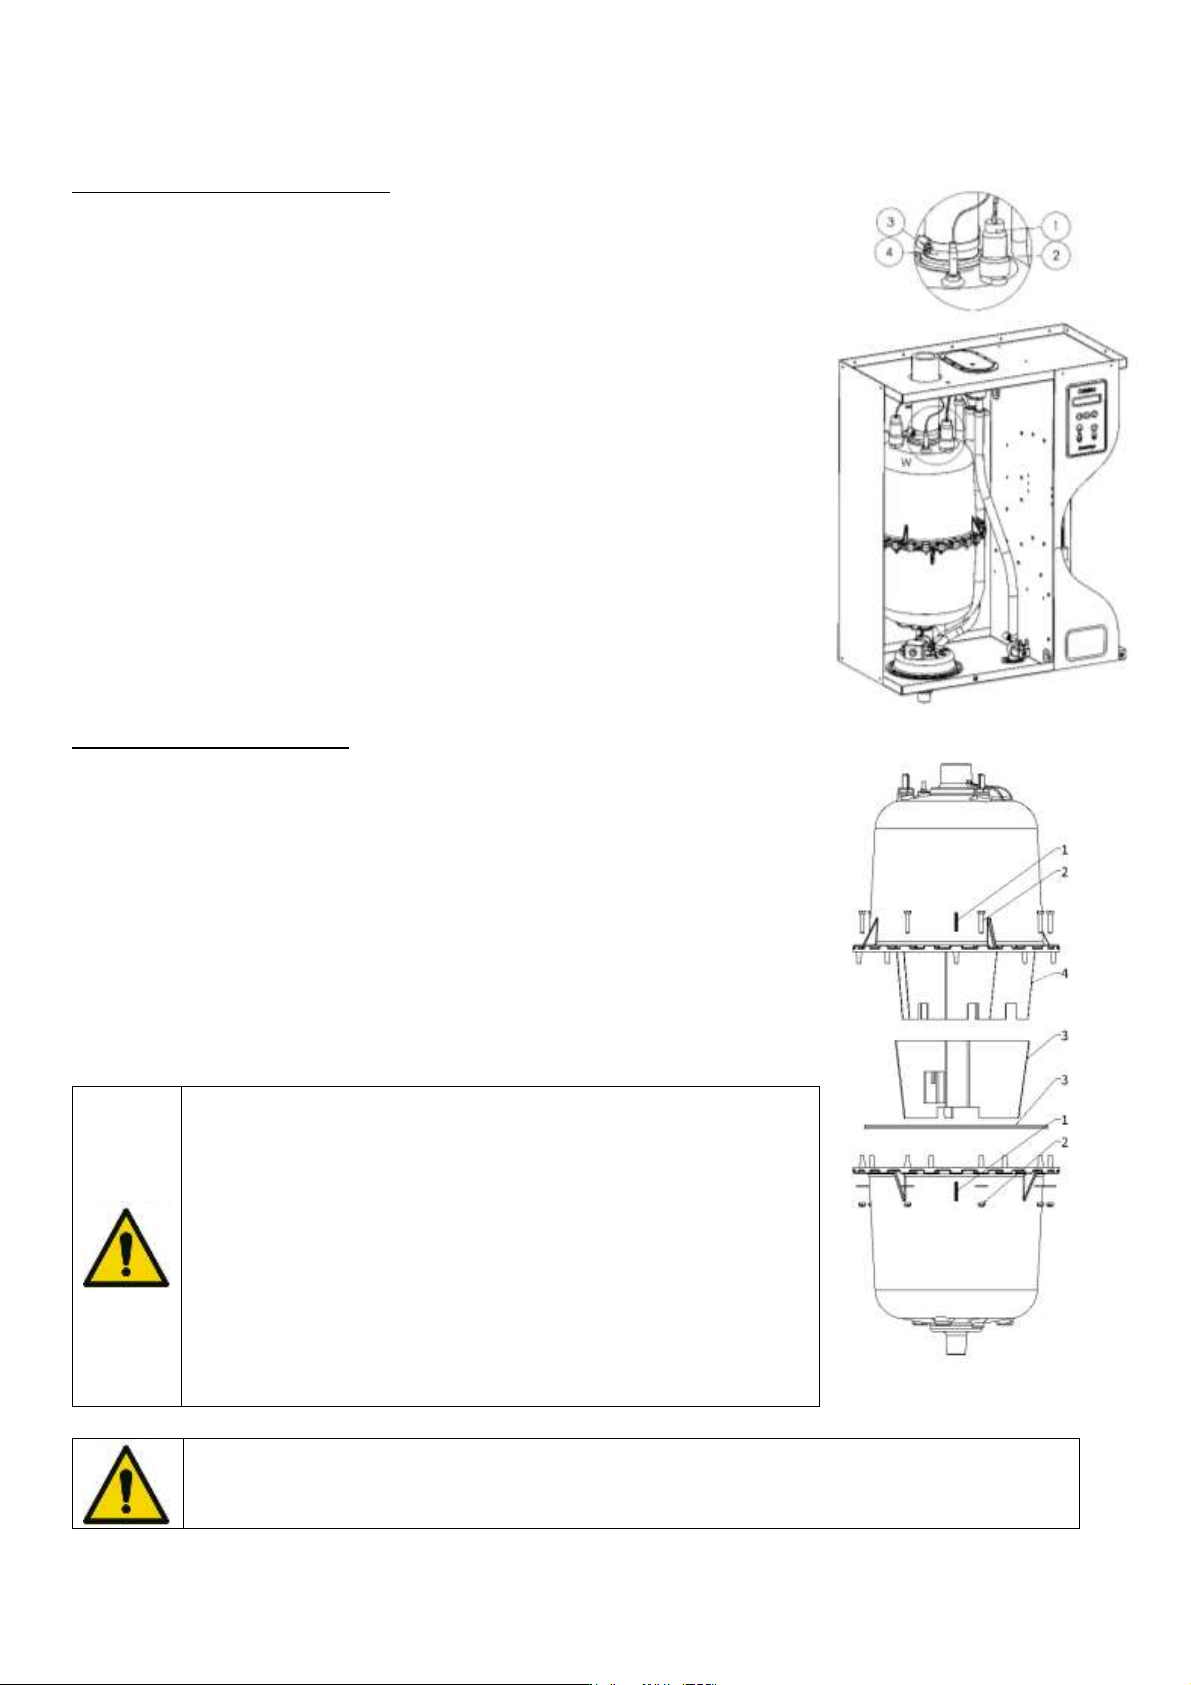
• Drain the cylinder by pressing the drain button and wait until the cylinder is
completely empty. The message "DRAINING CYCLE OVER" appears.
• Turn off power of the power circuits (in the general electrical cabinet) and
control system located on the front of the device.
• Remove the door from the hydraulic compartment, remove the power cable
connectors and water level sensor (1 and 2). Then loosen the clamp to
disconnect the steam outlet hose (3 and 4).
• WARNING! Risk of burns. If the drain is recent, the steam cylinder is still
burning. Therefore, wait for it to cool down.
• Lift the cylinder up by pressing down on its base to release it from the foot of
the drain valve.
• Remove the top of the cylinder from the retaining clip and remove it from the
hydraulic compartment.
• Please tighten the steam hose slightly on the cylinder, only when the cylinder
is cold, to avoid deformation.
CYLINDER CLEANING METHOD
• After removing the cylinder, mark the two half-cylinders (1) at once.
• Remove the nuts and screws holding with two keys of 8 (2), open the cylinder.
Remove the strainer and seal, then clean them (3).
• Clean the electrodes, the brace, and the inside of the cylinder's bodies by
scraping the limestone (it is possible to use passed acid for power electrodes) (4).
• Rinse the electrodes, the bodies of the cylinder, the brace. Do not forget to clean
the strainer in the cylinder foot.
WARNING! Never shake the edge of the cylinder shells to remove
limescale. It is imperative to systematically replace the cylinder seal
and reposition it in its housing. Always replace the sealing ring and
insert it into the profile of the lower barrel of the cylinder. Then insert
the upper part (electrodes).
Make sure to align the two shells, reposition the nuts and screws.
Tighten by screwing the screws opposite each other so that the seal
is not deformed.
If the power cables change, be sure to run them through the humidifier according to the wiring
diagram explained previously.