KE2010.Instruction Manual.Ver.2.01,Rev.08.pdf - 第163页
4 – 56 4.6.2 How to enter data Placement data initial screen Details ① (Component) ID Enter the com ponent ID using the f ormula bar . W hen this parameter is def ined, the def ault values are shown and an asterisk (*) a…
4 – 55
Scroll box
When you drag the scroll box, the screen starts scrolling from the position
indicated with the scroll box by comparing the scroll bar to all data display area.
Moving to an unentered line
When you click the down arrow key at the bottom line, a new record is created
and the cursor is moved to the “Comp ID” cell.
(If you do not enter any data for a new record, for example, by pressing just a
cursor key, the new record is deleted when you move to another line.)
Moving to the top or bottom of the screen
When you press the Home key, the left half screen which cannot be scrolled to
the left further appears, then the input focus moves to the “Comp ID” cell.
When you press the End key, the right half screen which cannot be scrolled to the
right further appears, then the input focus moves to the “Lyr” cell.
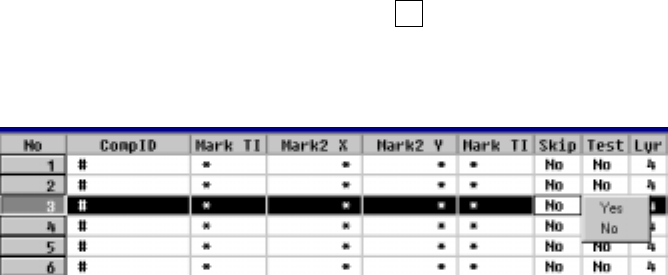
Entry of mutually exclusive items
When you enter data or change it, press the F2 key or click the input field with
the right button of a mouse. The pop-up menu appears on the screen. Select
the desired value.
4 – 56
4.6.2 How to enter data
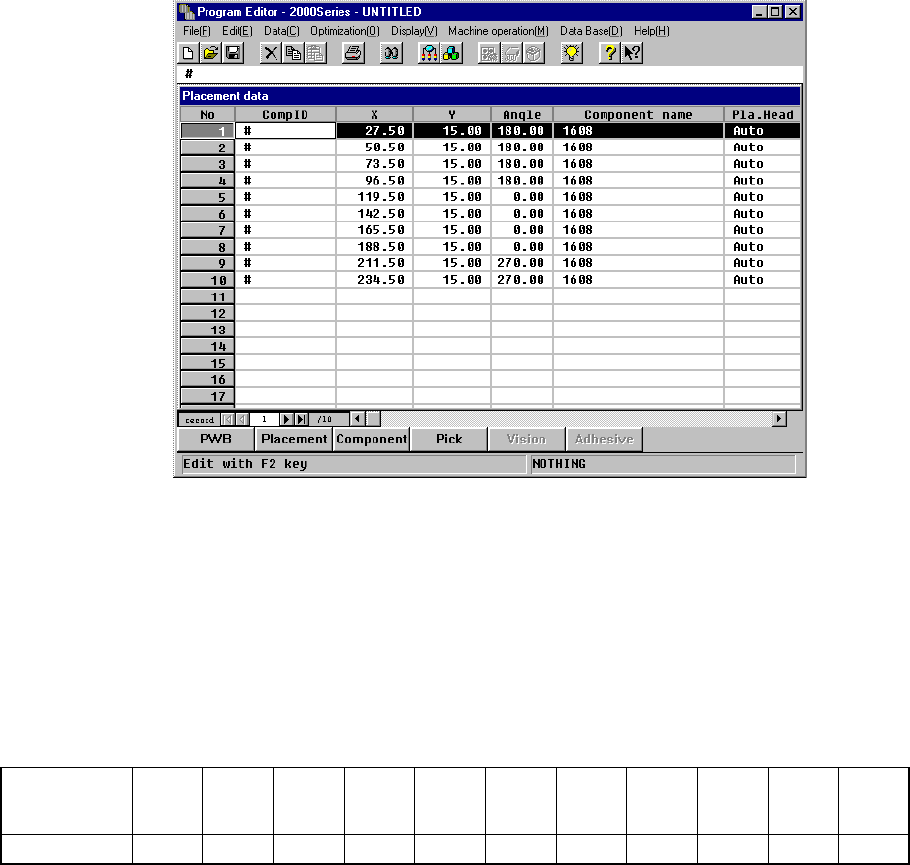
Placement data initial screen
Details
① (Component) ID
Enter the component ID using the formula bar.
When this parameter is defined, the default values are shown and an asterisk (*)
appears where data entry is not necessary.
Default values
Pla. H
(Placement
head)
Mark Mark ID
Mark
1 X
Mark
1 Y
Mark
1 TI
Mark
2 X
Mark
2 Y
Mark
2 TI
Skip Test
Lyr
(Layer)
Auto No * * * * * * * No No 4
If you enter eight characters or more, only the first eight characters are allowed
and entered actually. If you omit the ID, the ID becomes “#”. IDs other than “#”
are checked if they are unique, and if the same ID already exists, it is rejected.
② X, Y
Define the placement position with the X and Y formula bars.
− Absolute position entry
A numeric entry is directly set. Either a + or - sign may precede the number.
− Relative position entry
If ++ is appended before the number entered, that number is added to the
value of the field at the cursor.
If -- is appended before the number entered, that number is subtracted from
the value of the field at the cursor.
4 – 57
If += is appended before the number entered, that number is added to the
value of the field one line above the field at the cursor.
If -= is appended before the number entered, that number is subtracted from
the value of the field one line above the field at the cursor.
Note: Do not enter any space between “+” and “+”, “-“ and “-“, “+” and “=“, or “-“ and
“=“.
③ Angle
Enter the placement angle using the formula bar.
The setting range is from 0° to 359.95° in increments of 0.05°.
③ Component name
Enter the component name using the formula bar. Each time a component name
is entered, the component data space is allocated accordingly. If you enter a
wrong component name, the corresponding component data space is released
when you change the wrong name unless you enter any Component data.
When you enter a component name, the machine searches it through the
Component library. When the machine finds the same component name in the
Component library, it loads the corresponding component data into a production
program. Upper case characters and lower case characters are handled as the
same as each another, but are displayed separately. If a component name is
registered in the Component database in advance, the registered characters are
displayed instead of the characters you entered here.
The length of a component name is up to 20 characters.
The 21st and the following characters are ignored.
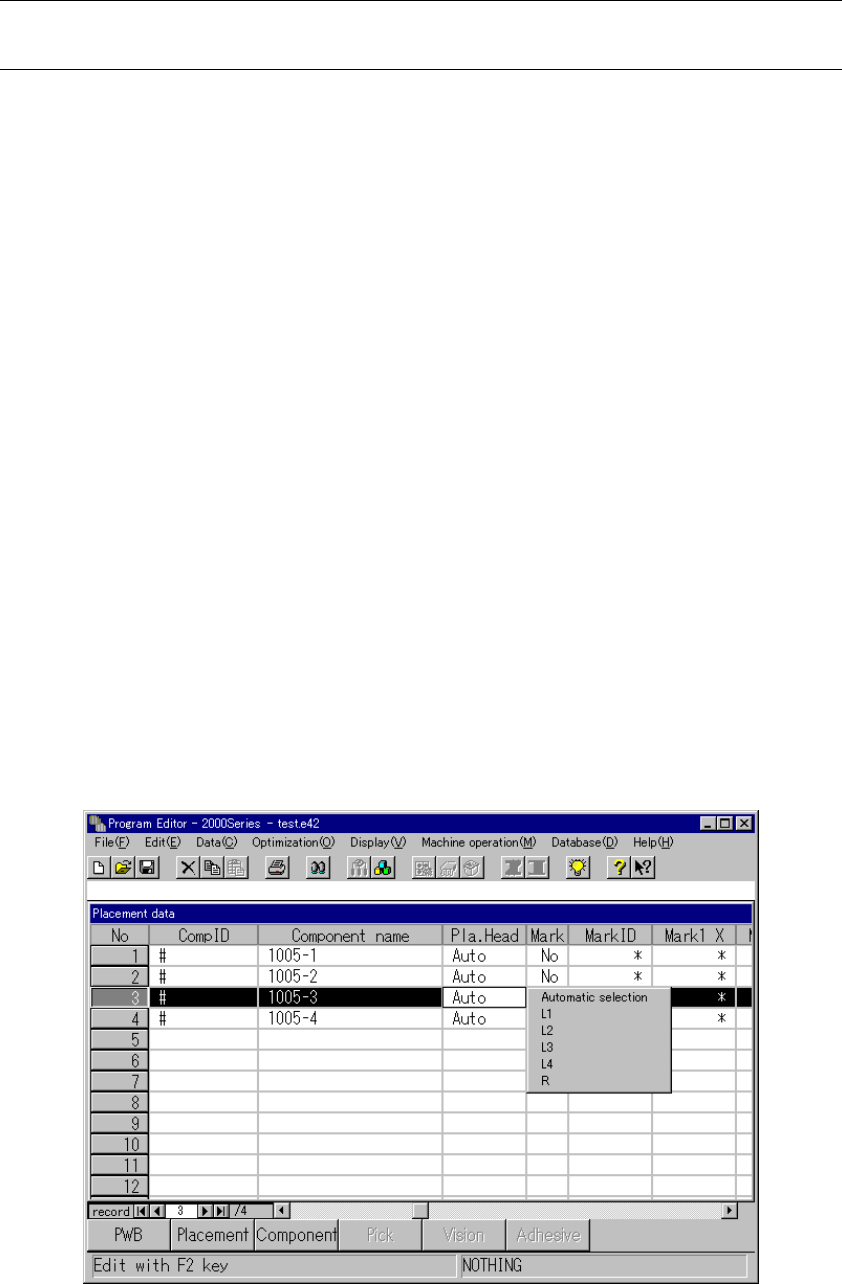
⑤ Pla. Head
Select the head to mount on the machine from the pop-up list box. If you do not
want to select a head, select “Auto” from the pop-up list box displayed as shown
below.