KE2010.Instruction Manual.Ver.2.01,Rev.08.pdf - 第305页
4 – 198 1) Component of meas. (Component of measur ement) T he descriptions of a component t o be measured are displayed here. 2) Pickup position T he component pick -up position is displayed here. Y ou can change the pi…
4 – 197
4.12.2.4.2 Single measurement
• Select the [Current component] command on the menu. The “Measurement”
dialog box appears on the screen.
• Set each measurement item on the “Measurement” dialog box.
• When you click the <MEAS.> button (F10 key), the system starts measuring a
component. When the system finishes measuring it, the “Result of measurement”
dialog box appears on the screen.
• When you click the <OK> button (F8 key) on the “Result of measurement” dialog
box, the measurement result is saved into Component data, then the
“Measurement” dialog box reappears.
• When you click the <CANCEL> button (ESC key) on the “Result of measurement”
dialog box, the system displays the “Measurement” dialog box again without saving
the result.
• On the “Measurement” dialog box, you can manually enter a component pick-up
position or teach it. When you check the check box “The taught result is reflected
in the pick data”, the system saves the taught result into Pick data.
• On the “Measurement” dialog box, you can use the NEXT or PREVIOUS key of the
HOD or F5 or F6 key to move to an alternative component.
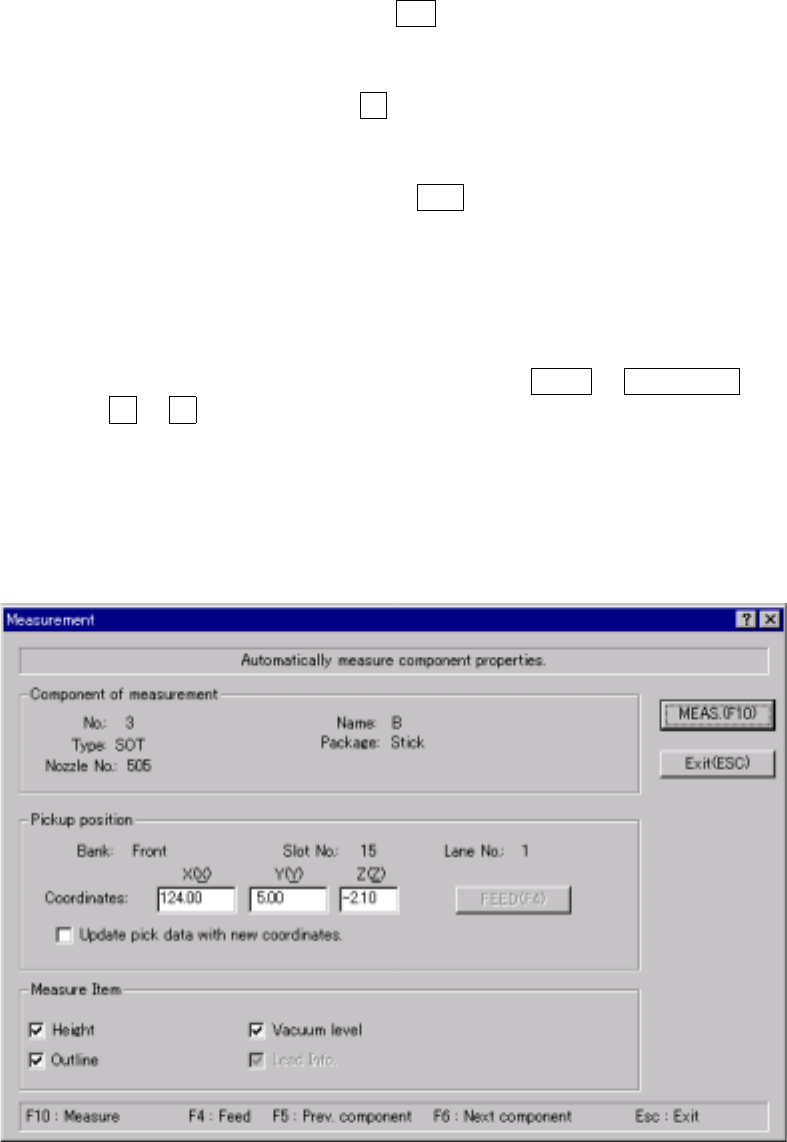
(1) Setting on the “Measurement” dialog box
When you select the “Current component” command on the menu, the
“Measurement” dialog box appears on the screen as shown in the figure below.
Figure 4.12.2.4.2.1 “Measurement” dialog box
4 – 198
1) Component of meas. (Component of measurement)
The descriptions of a component to be measured are displayed here.
2) Pickup position
The component pick-up position is displayed here. You can change the
pick-up position to the previous or next alternative component. If there is no
Pick data created, each menu item is not displayed, so you cannot change
the component pick-up position, knock a feeder, or perform a teaching
operation.
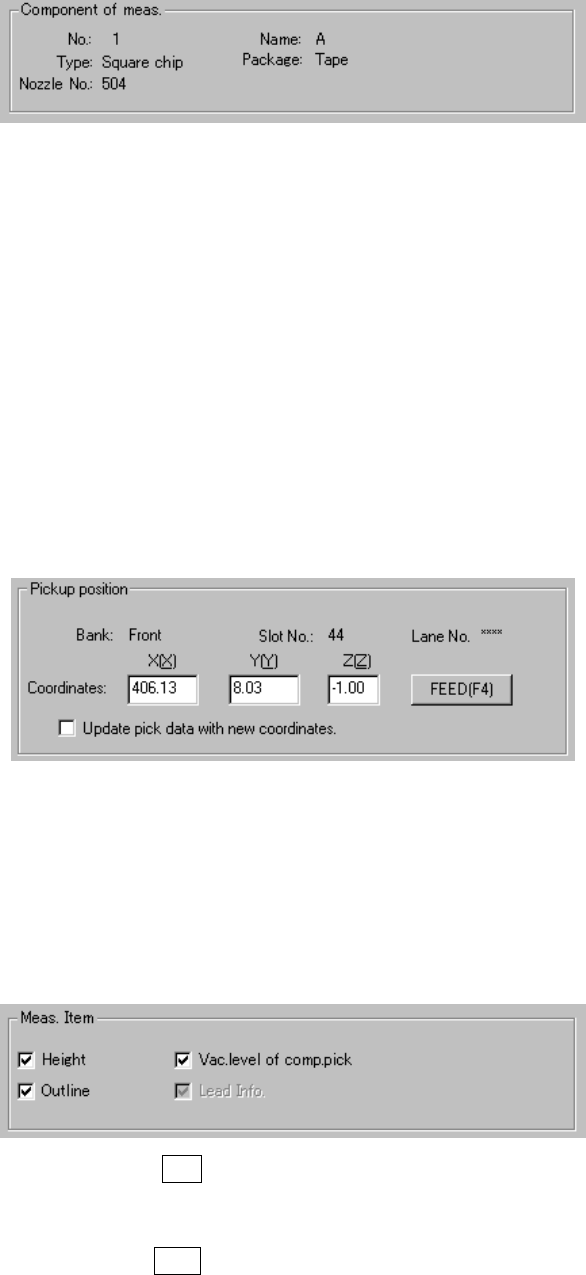
① <FEED> button
When clicked, this button knocks a feeder (excluding a 32-mm paper tape
feeder) once to feed a component.
② The taught results reflected in the pick data.
Check this box if you are to save the taught result into Pick data with the
HOD device. When unchecked, the coordinates displayed are used to
pick up the current component only.
3) Meas. Item (Measurement Item)
Select the item to be measured. As the default setting, all available items
are selected. Some of the measurement items are dimmed in gray
depending on the component type selected. You cannot select such a
dimmed item.
4) <MEAS.> button (F10 key)
This button measures the current component.
5) <BACK> button (ESC key)
This button finishes measuring the current component, then displays the
previous screen again.
4 – 199
6) Short-cut keys
In the “Measurement” dialog box, the following short-cut keys are provided.
Keyboard
key
Operation
panel key
HOD key Operation
F10 ENTER Measures the current component.
F4 Knocks a feeder.
F5 PREVIOUS Moves to the previous alternate component.
F6 NEXT Moves to the next alternate component.
ESC CANCEL Returns to the previous screen.
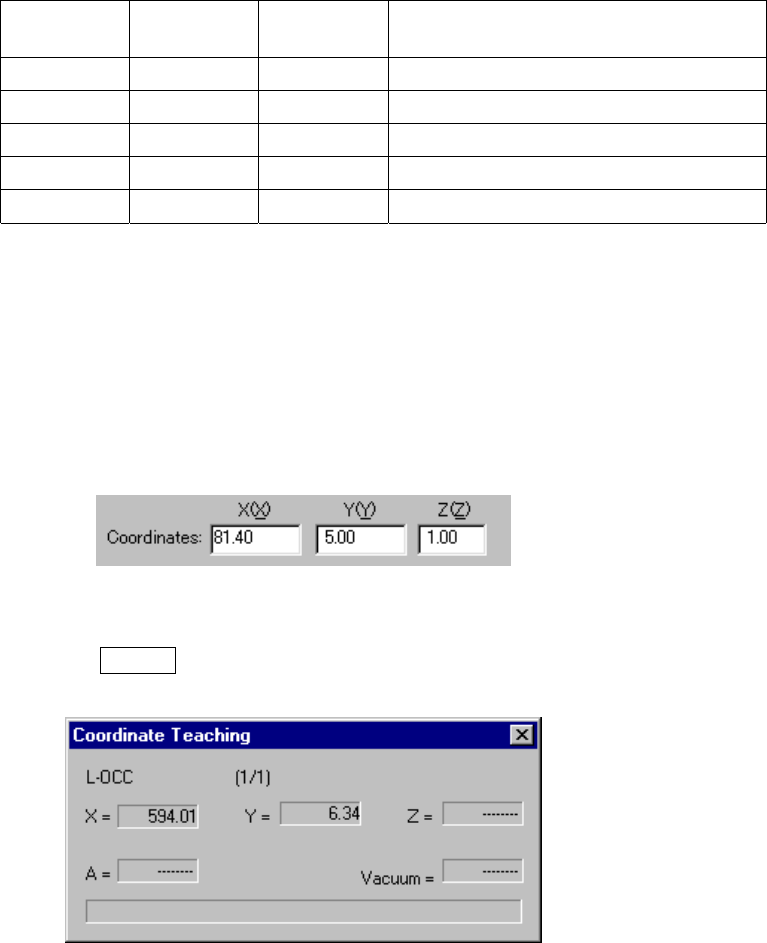
7) Changing the component pick-up coordinates
If the pick-up position of a component to be measured is different from the
current one, use the HOD to teach the coordinates of a component placed.
You can manually enter the coordinates to change the current ones also.
Step 1) Move the cursor to the X or Y coordinate.
Step 2) Press the HOD device button to teach the coordinates, then the
ENTER button to validate them.
Figure 4.12.2.4.2.2 “Coordinates Teaching” dialog box