KE2010.Instruction Manual.Ver.2.01,Rev.08.pdf - 第346页
4 – 239 4.12.5 Mark database This command m anages the m ark dat abase which was registered during t eaching of mark data described in Chapt er 5 "T EACHING" . Figure 4.12.5. 1 "M ark database management&q…
4 – 238
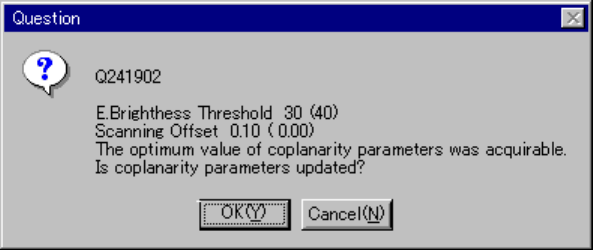
4.12.4.10 Dialog box for showing the parameters obtained
When the system obtains the optimal coplanarity parameter, the system displays the
obtained electrode brightness threshold and scanning position offset on the screen.
The parameters set before the system obtains new ones are displayed in
parentheses. When you click the <OK> button, the system updates these
parameters to the obtained ones. When you click the <Cancel> button, the system
maintains the parameters set before obtaining new ones.
Figure 4.12.4.7 Obtained parameters dialog box
4 – 239
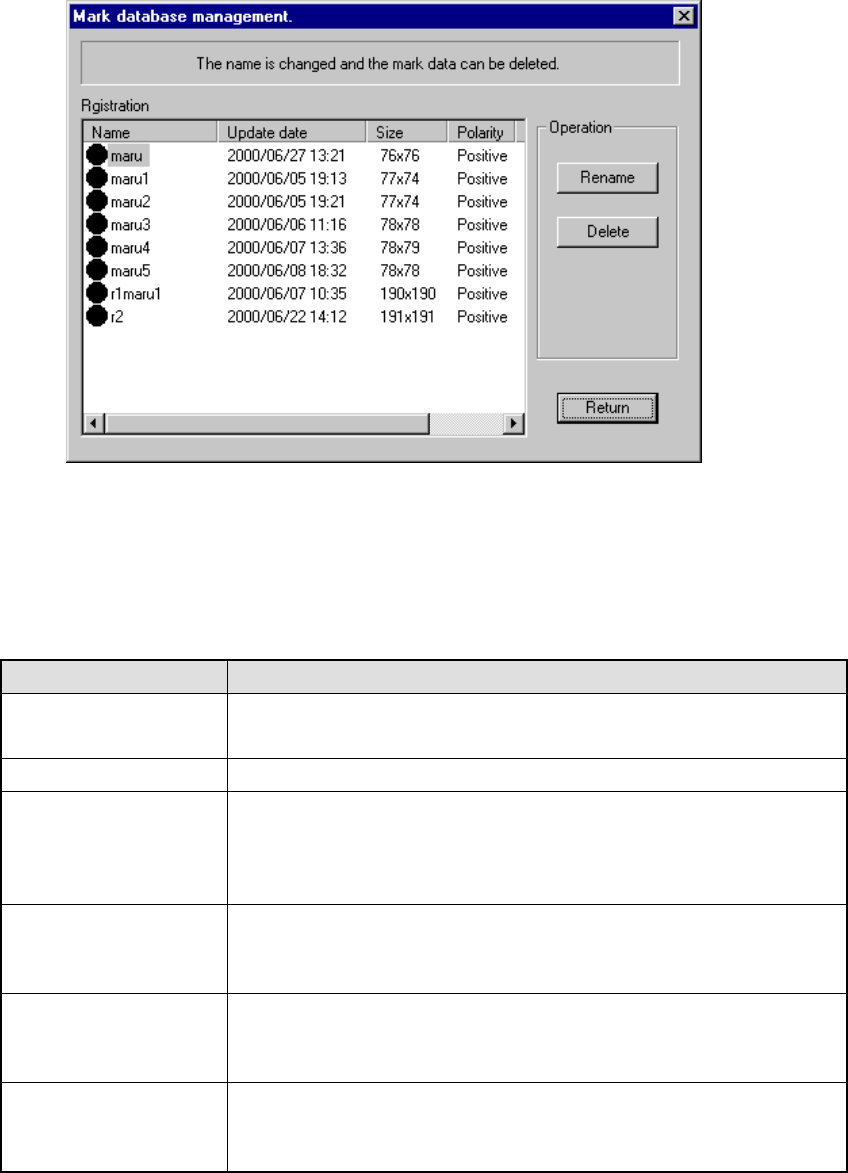
4.12.5 Mark database
This command manages the mark database which was registered during teaching of
mark data described in Chapter 5 "TEACHING".
Figure 4.12.5.1 "Mark database management" dialog box
(1) Registration
This list displays the mark data registered in the database. The meaning of
each item is described in Table below.
Item Meaning
Name Name of a mark
(The mark shape is displayed before the name itself.)
Update date Date when a mark was registered in the database.
Size Number of horizontal and vertical pixels consisting of a mark
aaa x bbb
aaa = number of horizontal pixels
bbb = number of vertical pixels
Polarity Negative/positive shot of a mark
Positive: white mark on black background
Negative: black mark on white background
Scale Image data scale of a mark
Grayscale: mark data is read as a multi-scale image.
Binaryscale: mark data is read as a binary-scale image.
Station (available to a
KE-2030 only)
Station which obtained a mark
Left = A mark was read with the OCC located on the left station.
Right = A mark was read with the OCC located on the right station.
4 – 240
(2) Operation
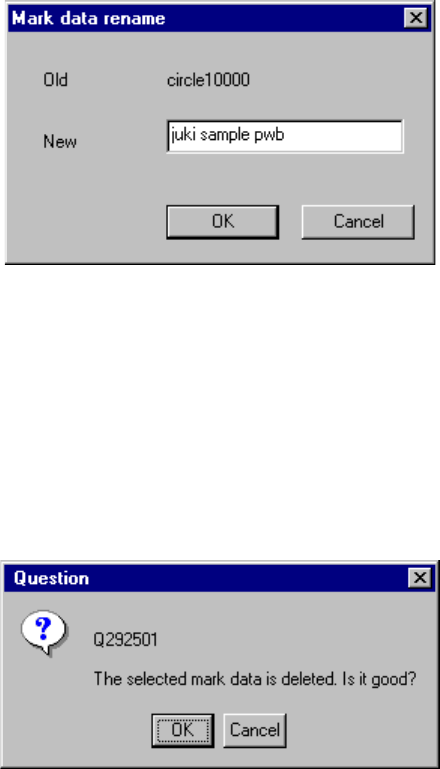
① <Rename> button
This button allows you to change the registered name. Move the cursor to
the data line you want to change, then click the <Rename> button. The
right dialog box appears on the screen. Enter a new name.
Figure 4.12.5.2 "Mark data rename" dialog box
② <Delete> button
This button allows you to delete the registered data. Move the cursor to the
data line you want to delete in the list, then click the <Delete> button.
The right dialog box appears on the screen. Click the <OK> button.
Figure 4.12.5.3 "Question - to delete mark data" dialog box