KE2010.Instruction Manual.Ver.2.01,Rev.08.pdf - 第360页
5 − 7 ④ W hen the device reaches the desired position, press the ENTER k ey on the HOD to store t he taught coordinates dat a into the machine m emory. In teaching during production, t he teaching par ameter s must be f …
5 − 6
If the head is selected and a different nozzle is installed other than that used in
teaching, the nozzle is replaced.
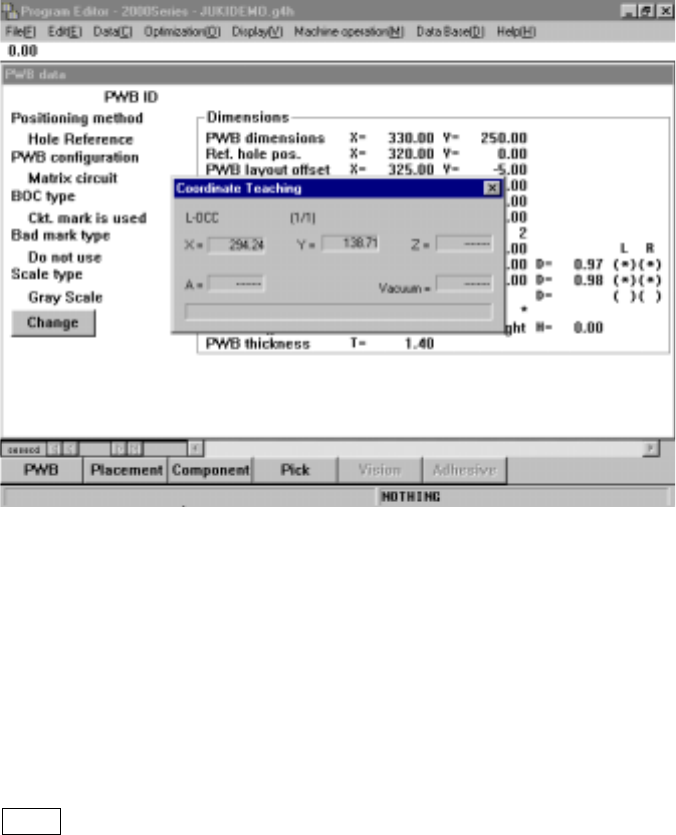
In this case, the following information is shown on the screen.
− Selected device name
− X/Y coordinates of the selected device
− Z coordinate of the selected device
− θ-axis value of the selected device
− Vacuum value of the selected device
The name of the device you selected appears on the LCD of the HOD so that you
can make sure of which device is to be taught.
Figure 5.3.2 Teaching coordinates (2)
③
Using the axis drive keys on the HOD (XY, Z and θ), move the selected device.
As the device is moved, the numerals (coordinate values, etc.) shown on the
screen change.
An alarm beeps when the device reaches its motion limit, warning that the device
cannot be moved further.
The FAST key on the HOD may be used to change the motion speed of the X-
and Y-axes.
5 − 7
④
When the device reaches the desired position, press the ENTER key on the HOD
to store the taught coordinates data into the machine memory.
In teaching during production, the teaching parameters must be first set by the
operator before pressing the ENTER key.
This completes the coordinates teaching procedure.
The down arrow key of the DEV. NAME keys or the NEXT key of the HOD may
be used to move to the next teaching parameter after you set one parameter. In
the same way, you can go back to the previous parameter by pressing the up
arrow key of the DEV. NAME keys or the PREVIOUS key of the HOD.
Teaching is terminated if the CANCEL key of the HOD is pressed during teaching.
If the CANCEL key is pressed during production, the device returns to the
coordinates at which the device was located before teaching. The device does
not move if production is not in progress when the key is pressed.
If the servo power supply is turned off during teaching (because you
pressed the Emergency Stop button or the area sensor was activated), the
buzzer sounds and a KE-2000 series station finishes teaching operation.
5 − 8
5.3.2 Teaching X/Y-axis
The X and Y axes (coordinates of the X- and Y- axes) can be taught by using each
nozzle of the head, the bad mark sensor, or the camera. The operator can select the
device according to his/her need.
Note, however, that some device may not be selected depending on the teaching
conditions.
The following explains the teaching procedure used for each of the three different
methods.
(1) Teaching by the nozzle of each head or bad marks
For teaching by the head, select the device which is to be taught with the HOD
first.
(2) Teaching by the camera
For teaching by the camera, select the camera as the device which is to be
taught with the HOD first.
It is also necessary for the teaching by the camera to select the number of the
input points (select with 1, 2, or 3 POINT key). Determine the position for the
number of times corresponding to the number of the teaching points, and enter
them. For teaching of 2 POINTS and 3 POINTS, move the device and press the
ENTER key on the HOD the same times as the number of input points to enter
the data (for 2 POINTs, move the device, press the ENTER key, move the device,
then press the ENTER key again)
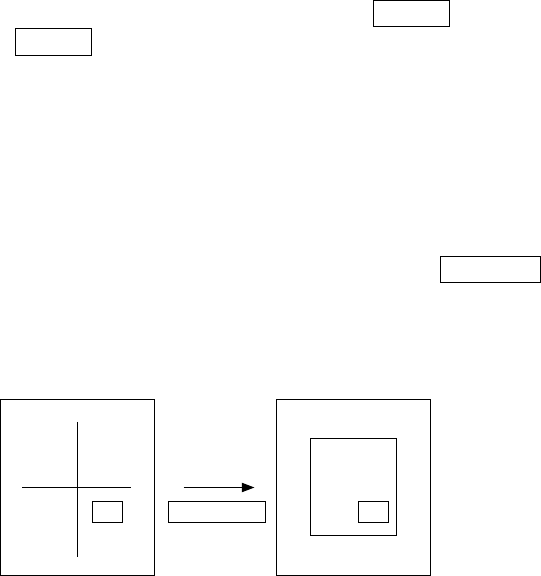
For teaching by the camera, obtain the coordinates at the center (cross point) of
the crosshair cursor for each point, or move along each edge of the box window
and obtain its center as the coordinates.
Normally, use the crosshair cursor for point-by-point teaching, and use the axis
drive key for X- and Y-axes to move the crosshair cursor.
To obtain the coordinates using the box window, press the WINDOW key on the
HOD. The cursor on the screen then changes from the crosshair to window.
WINDOW
key
Normally, the crosshair
cursor appears
Window cursor